"Chamfer Along Path" Tool/Plugin
-
Hi All!
I need some help with a plugin to extrude along a path (inside, outside, recessed/concaved, protrude/convex). Many of my models require the extrude method, and although the default tool in Sketchup works well on outside, protruding surfaces, the inside recessed paths are a problem for me. The tool mentioned in the "subject" line, was downloaded from the Ruby Library Depot; it was developed for Sketchup 4. I've attached a diagram of the issue I'm faced with, and hopefully someone can provide a solution.
Thanks for your help!
Jo Ann

-
So it's just a chamfer on the inside edges of a frame you're after? I wouldn't use a plugin for that at all. I would use Offset and the Move tool with Auto Fold. I'll make an example and post it.
-
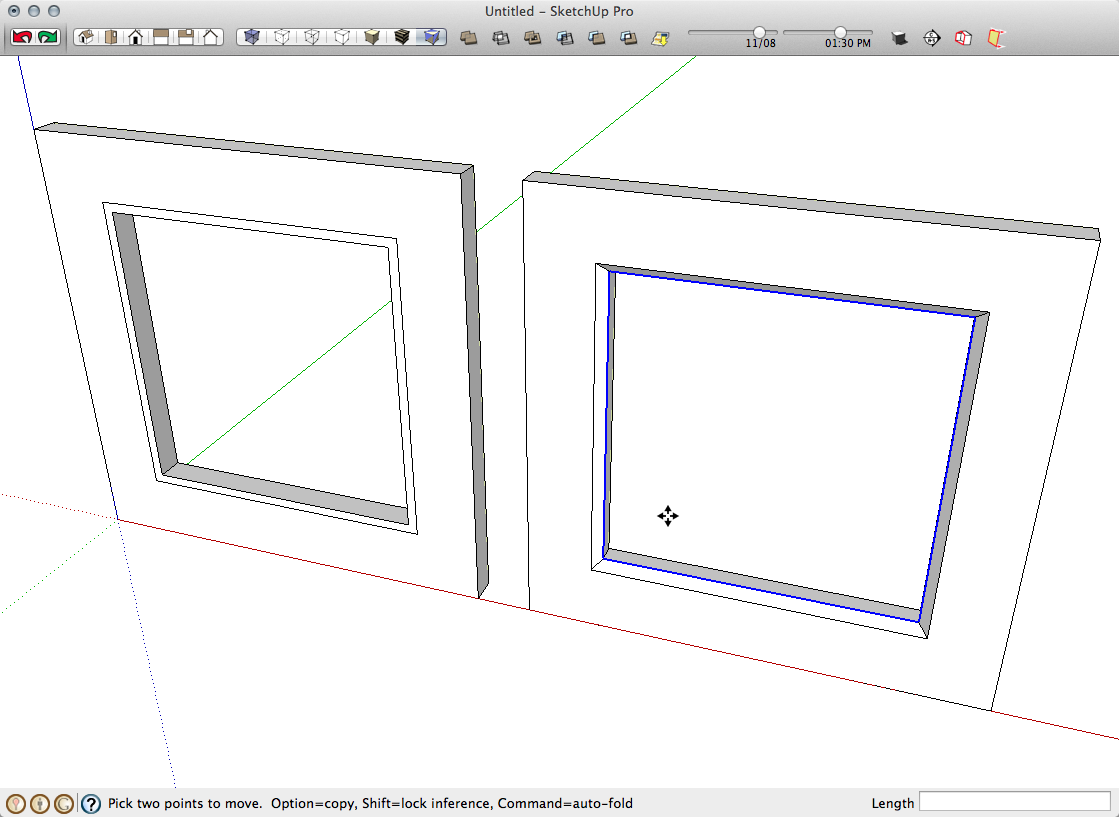
So on the left is a frame with an opening, I selected the inside edges of the frame and use Offset. Those offset lines will be the limits of the chamfer.
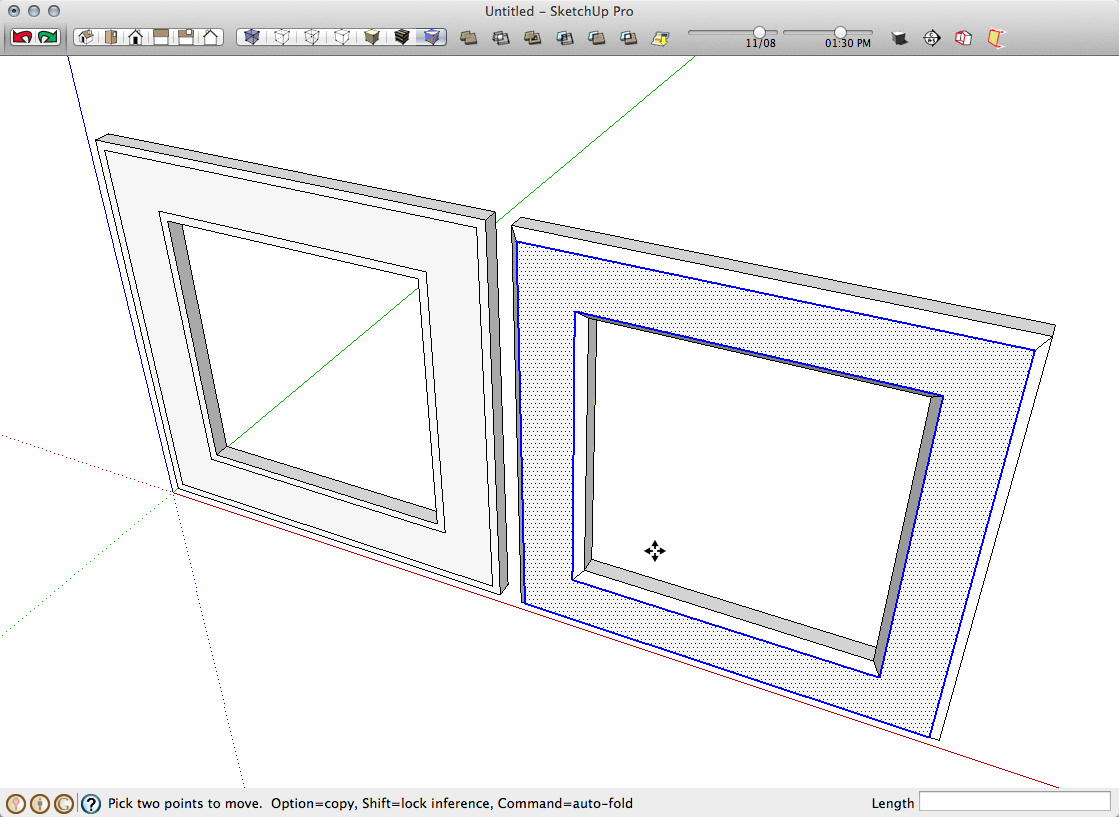
On the right, select the internal edges, get the Move tool and hold Alt to invoke Auto fold (Command on Mac) and Move the selected edges back into the opening. For a 45 degree chamfer move the edges in by the same distance you used for Offset.
For chamfers on the outside edges, do the same thing with the exterior edges.
If you wanted to do both inside and outside edges you could handle this a different way. Set the face back by the height of the chamfers, use Offset on the outside edges and then on the inside edges. Select the face in between the offset lines and use Move+Alt to pull that face out to the height of the chamfers.
-
Simple is beautiful!

-
Your awesome Dave! I wasn't aware of that simple method... guess I need to check out some more training videos!!! Thank you! Jo Ann

-
Dave has shown you how to use move and autofold beautifully, you could also use "scale" in this case too. I'll let you think about how. People sometimes miss the intricacies of scale. You don't just use it to modify whole pieces, you can use it on a single face to modify a shape. Scale one face of a cube and you can create various shapes with the variety of scale options.

It's well worth pointing out that it's easy to get a bit plugin blind.
Many of them are so good you often don't need the basic tools, but that can lead to problems. If you don't understand what the plugin is really doing you can tie yourself in knots unnecessarily.
Being able to make your models in "longhand" is crucial. Using plugins to speed up and perform repetitive tasks is what we all should aim to do.I guess it comes from my time as an apprentice and then having many apprentices of my own, the rules were always the same, once you prove you can do it manually I will let you use a "Tool". If you are old enough to remember letraset, we had to show that we could do the lettering by hand before we were allowed to touch one sheet.
Hello! It looks like you're interested in this conversation, but you don't have an account yet.
Getting fed up of having to scroll through the same posts each visit? When you register for an account, you'll always come back to exactly where you were before, and choose to be notified of new replies (either via email, or push notification). You'll also be able to save bookmarks and upvote posts to show your appreciation to other community members.
With your input, this post could be even better 💗
Register Login


Advertisement