Large circular lattice work
-
@ Dave, I think I did say no to softening edges and I might have hidden on. I remember turning it on for something and might need to turn it off again. Plus after posting I noticed the back is open. So I'll be trying to do it different ways till I figure out what it does.
On the door, so I forgot to save after recoloring,
 That was taken from a file I did a complete build up with over 50 different steps and color ideas. I started with the basic frame and grouped, add more parts and group. So on and so on. It kind of look like a tutorial in a way. An OLD habit for working out ideas. I normally do work in monochrome, and I'm not sure you mean by "work with a style that does not have endpoints turned on" but I will look into that. I had no idea that grouping like that make editing and correcting more difficult. It's just easier for me when I'm roughing out ideas. Guess I need to start using components more. Thanks again.
 -
@unknownuser said:
if you want a V6, let me know.
Of course yes, but what not save always in V6 ?
This make avoid some efforts and anybody can reload it even you!
-

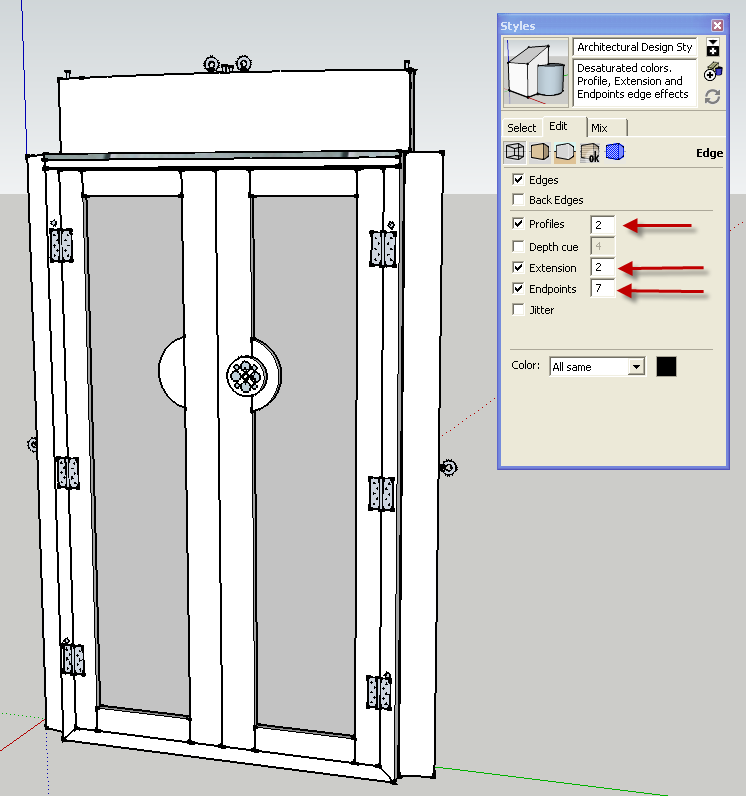
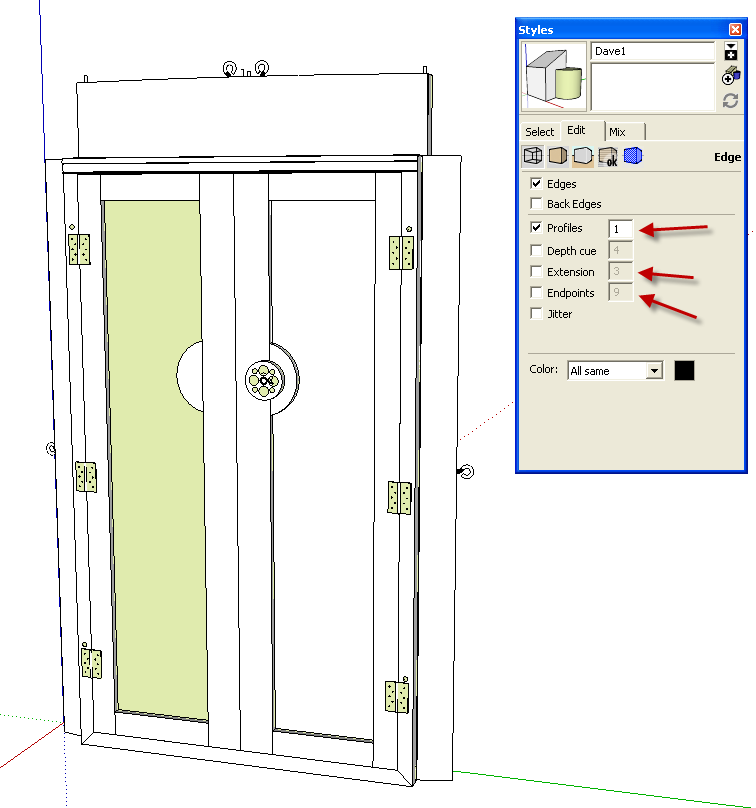
Here's what I mean by endpoints. You also have extensions turned on in the style you are using.
And without endpoints and extensions. This is my default style. I normally work with Profiles set to 1 and the back face color set to green which make it easier for me to detect exposed back faces and fix them as I go. -
@ Dave, I've been using the default style that the program set up when it was installed. Until now, SU was a screw around program, something to play with. I started using it to help boy scouts get their architecture merit badge. A free program that would do the basics to get them by. Most of them use it in school as well as other projects they have. Not that long ago, 1 of the boys wanted to draw up a yurts for his merit badge. I opened AutoCad (2010) and showed he the files I had on yurts and gave him a copy of the pdf (if anybody wants me to upload it, just ask). Then for kicks, I did a (primitive/ basic shape) yurts. Well I was shown a few trick on how to draw it from Bran. The next few nights, I started to redesign the door frame and got something that worked (all in AC). Then I went back and redid the primitive yurts that I started with. Which I'm up loading. I can safely say that in the last week, I've easily double my knowledge of SU, triple my aggravation, and practiced my french (slang for cussing like a sailor) as much as when I'm forging. I own most of that to you. So a major Thank You again. I have since decided to learn how to use SU as a real program and not just some screw around toy to play with and that's why I'm here at the forum.
-
@ Pilou, I don't know how to switch the default save to V6 and not sure I want to. When I get a project like the helix or Tig's design. I do a step by step save. That way I can go back and check where I might have screwed up and do the plug-ins that have multiple steps different ways to see how they work. Do I mind saving a file in V6. 'ell no. Besides it let's me get my post count up so I don't look like some noob.
-
-
Seems you have a lot of groups and no name for them!

Very difficult to manage
When you have some pieces who are copied, don't use group!!!

Use components!

I can't make a simple copy rotations in a reasonable time!
-
Sorry Pilou, those files where never meant to be shared, but now that I'm trying to learn SU. That has changed. I'm sure Dave is planing on schooling me about the use of groups and components in the near future. Please bare with me well I'm learning. My old files well be the same, but the newer files should improve with time. With your help, I can only get better.
-
No problem

-
In the meanwhile, I am following this topic with great anticipation (just cannot really contribute due to lack of time). My ancestors used to live in these yurts (and there are lots of historic re-enactment groups here building them and even using for dwelling). Here are some images.
-
Well Guieus that where I got the pdf from, a re-enactment group and I do that myself. My last yurt had stones painted on the side to make it look more like a hut (my ancestors are from Scotland). The next one I want to do, will have flat stone on the sides and a thatched roof paint job. I can't find pictures of the old yurts or I'd post 1 or 2.
Cliff
-
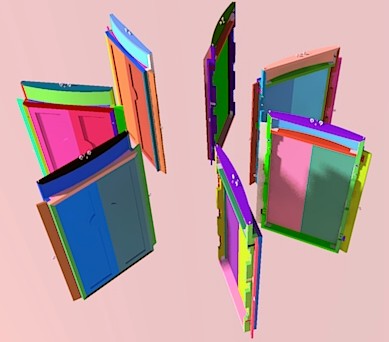
@ Pilou. last night I did a quick conversion to the door file. Now that I know how components work, I was thinking about how I would have done things differently well doing some wood working. So here's the file, look it over and tell me if that's better or if I just went overboard the other way. I still haven't figured it all out, but there are some parts I'd have grouped that I made a component in the drawing.
-
All copies of something must be a components!
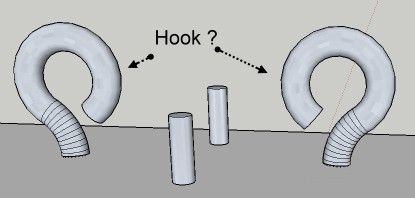
Your hooks are very heavy (2400 entities)and they are groups!

and you have 4 of that!
so making components is indispensable!

-
OK I thought I redid everything as components. So if you exploded a group and re component it, it's still a group? I did find a few parts I couldn't draw correctly just 2 weeks ago that I fixed. So I am learning something. Plus I'm not familiar with the term "hooks" can anyone explain?
-
This?


@unknownuser said:
if you exploded a group and re component it, it's still a group?
No it's a Component with all elements "grouped"!

[flash=420,315:lpdwih0l]http://www.youtube.com/v/r1QpoNO-1zM[/flash:lpdwih0l]
[flash=420,315:lpdwih0l]http://www.youtube.com/v/1Z_Br6AQZhI[/flash:lpdwih0l]And that are groups

[flash=420,315:lpdwih0l]http://www.youtube.com/v/mtH9Sm7YgHg[/flash:lpdwih0l]If you make a car with 4 wheels are one wheel's group copied * 3 and save
If you make a car with 4 wheels are one wheel's component copied * 3 and save
the file with the car withs "component" will be less heavy than the file with 4 wheels groups ! -
That is called an eye bolt. Since the hook rolls over to almost a closed position. I though you where using the term as some kind of vocabulary used for SU. Sorry about that. The one's over the door are that heavy, the lag screw (wood threads) portion is cut short so it doesn't go through the 2x4. There's a rope that goes through the outside ends of the rafters, that is tied off to those eye bolts. It works as the top tension band making the frame work stronger. That was the 1st attempt at making something like that with the follow me tool. It's not perfect by a long shot, but close enough for what I needed at the time. They are a little to large for the door wings, but when I tried to redraw new 1's it did work out the same, I could have used scale to re-size them, but I didn't. Those are both changes I made to the original plans.
So I was wrong about my guess about changing group to components.
 Not the 1st time I was wrong about something in SU. Since we are kind of on vocabulary, when you say "heavy" is the file size larger or just the entities count?
I've seen the top video before, it's one of the video series I watching to find out how things work better. I remember seeing the Dummy's series a while ago, but never went back and look at it.
-
Sorry Pilou, my mind has been going in 4 directions the last few days. You where talking about the hooks from a drawing point of view, not the actual use. I was working out the math to layout the slats for the walls and took a break to work on the follow me tool. I redid the eye bolts or hooks and figured out a better way to do them. I also played around with making them components. Found out that you can modify a singular component without effecting the rest of them. I thought anything you did to one, happened to the rest of them. I'm starting to see the difference between groups and components as far as the layout goes.
-
@unknownuser said:
when you say "heavy" is the file size larger or just the entities count?
the file size larger when components are not used in general
so at the screen all is more slow to move /rotate/...when you have big projects!
-
Thanks Pilou, now what you guys have been saying is starting to make more sense. I might have been screwing around with SU for 2 years, but I've put in more hours the last 2 weeks then I have before. I just realized something major today as well, stop thinking like AutoCad, this is SketchUp, learn how it works.
Thanks for all the help for everyone. It's starting to sink in.
-
I've got a rotate question. Will SU rotate to the .00 percentage of a degree? Say like 11.77 degree rotate. I remember doing the spoke wheel and manually placing parts. When I got to the end, the last pieces where out of place. After checking the angle, it read 11.8, I went back and changed a few to 11.7 to make everything fit. Would a rotate / paste array work better (I hope that's the right term) or would a rotate / paste by divide (12/ entered after rotate) work? Or is there a better way to solve this problem?
Cliff
Advertisement


