[WIP] '69 Dodge Charger
-
@panixia said:
:idea: but maybe the trick to scale it to 0 can work also for a selection wich is not a simple ring, now that i'm thinking of it, i should try how it work..
yes, i tried. it does.. so no need for additional tools/option. the gizmo does it all!

-
 I love it! I love it when users find good tricks like this which I hadn't even thought about.

-
 yeah man, the point is your tool is f#kin' amazing! can't stop to play with this in the sparetime.
yes sparetime.. i mean: i'm modelling those boring small houses for the boss.. boring bloky squared-out-at-all houses.
so i have to test your organic tool in the lunchbreak..i hope the days will come for a detailed fully organic-objects-loaded vray render..

-
not sure i fully understand what's exactly the matter with your door shape, but if the point is to avoid triangles from loops while having the crested shape to smoothly "vanish" into the main door shape, then this is my try at it with VT+QFT.
no reference image/size.. just thinking of the general loops arrangement for such a shape..
-
@panixia said:
not sure i fully understand what's exactly the matter with your door shape, but if the point is to avoid triangles from loops while having the crested shape to smoothly "vanish" into the main door shape, then this is my try at it with VT+QFT.
no reference image/size.. just thinking of the general loops arrangement for such a shape..It's not the crested shapes that's my main concern. It's the different detail lines that flow into each other merging multiple surfaces.
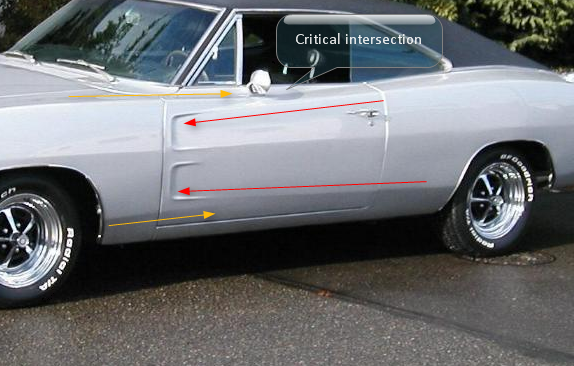
Haven't tried anything yet. Been ill and got distracted by subdivisions.
 Time to get back on track.
 -
now i see.. the "critical intersection" is quite hard

-
Ok - now I promise to get back to modelling.

-
Jeez, I would love to be able to use this on my cars. I could stop spending half my time trying to smooth everything and spend more time doing actual work. I see this is a menu item in your SU, so is this a plugin we can download yet? I'll pay
-
looks great!
i didn't understand from the vid if it is possible to crease in your beta! great job anyway!
here is my super-crappy effort to the door topology.. never tried to model cars before.. looks very difficoult indeed..
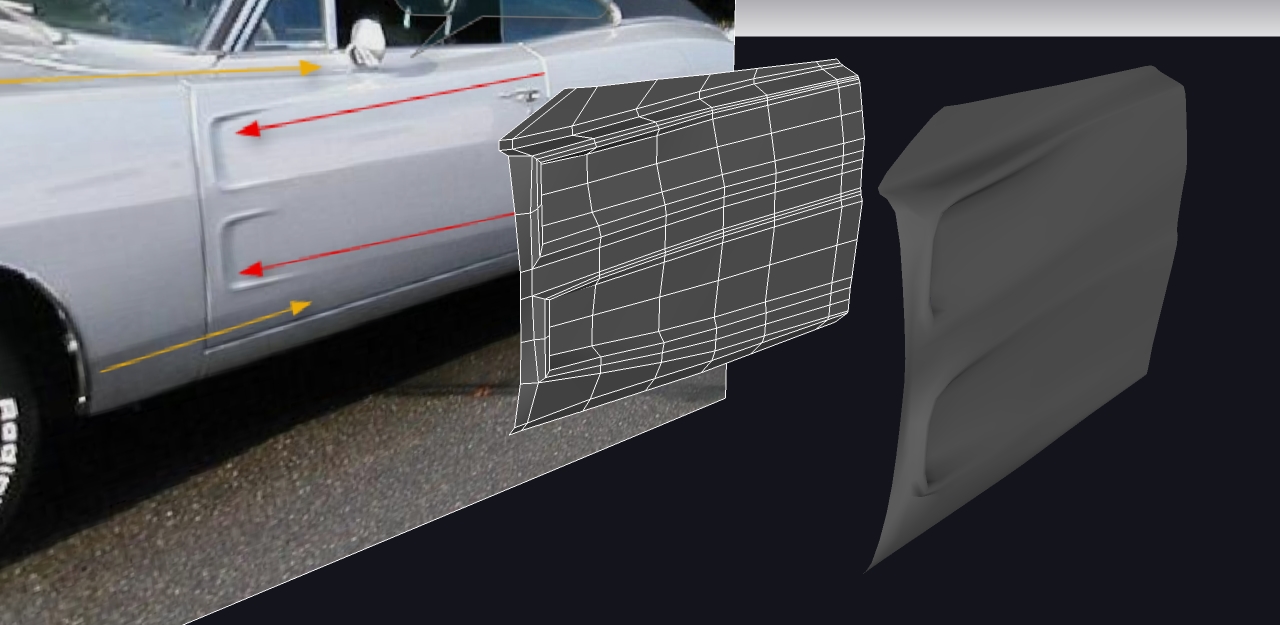
-
@panixia said:
@panixia said:
:idea: but maybe the trick to scale it to 0 can work also for a selection wich is not a simple ring, now that i'm thinking of it, i should try how it work..
yes, i tried. it does.. so no need for additional tools/option. the gizmo does it all!

So it looks like you can bring the center edges in line again, by selecting all and scaling to 0 with the scale tool. but there doesn't seem to be control of where this new plane is. You still have to bring it back to the mirror line periodically, changing the work you've done in that area. Or am I missing the technique?
being able to lock edge vertices and nearby unconnected geometry

 --maybe this is a discussion for the plugin thread.
 -
@hellnbak said:
I see this is a menu item in your SU, so is this a plugin we can download yet? I'll pay
It's just an experiment I've played around with the last couple of days. Nothing that should leave the confinement of the guinea pig testing area. There's lots to do to make this safe to the public.
@panixia said:
i didn't understand from the vid if it is possible to crease in your beta! great job anyway!

No - so such thing as of yet. I'd have to learn that the Catmull-Clark thing do first. Implementing it is easy - understanding it is a different matter.
@panixia said:
here is my super-crappy effort to the door topology.. never tried to model cars before.. looks very difficoult indeed..

You have the crest shapes pretty much there. But you're missing the design lines that flows with the yellow edges. Notice how they intersect and blend - especially at the top. I'm thinking I need a loop to run across the door from the top where the front and back fender meets along the crests.
-
@pbacot said:
So it looks like you can bring the center edges in line again, by selecting all and scaling to 0 with the scale tool. but there doesn't seem to be control of where this new plane is. You still have to bring it back to the mirror line periodically
yes you have to bring it back.
@pbacot said:
changing the work you've done in that area. Or am I missing the technique?
not 100% sure about this.
in the original comment i said "outer ring" i wanted to say outer loop. in that case not so much would change in the geometry after scaling 0.
i mean place back the component on the other mirrored one require 2 click: pick endpoint -> snap endpoint
i suppose a lock plane tools would need at least 4 click: show menu, enable mirror plane lock, pick first point for the plane, pick second point for the plane.
so.. -
@thomthom said:
you're missing the design lines that flows with the yellow edges. Notice how they intersect and blend - especially at the top. I'm thinking I need a loop to run across the door from the top where the front and back fender meets along the crests.
it is absolutely not proportional cause i have no dimension, but i think the job of the upper yellow line may be done by the red faceloop.
by twisting it from near vertical to near flat, should be possible to remove the triangulation on top of your first picture (the one with the orange door)
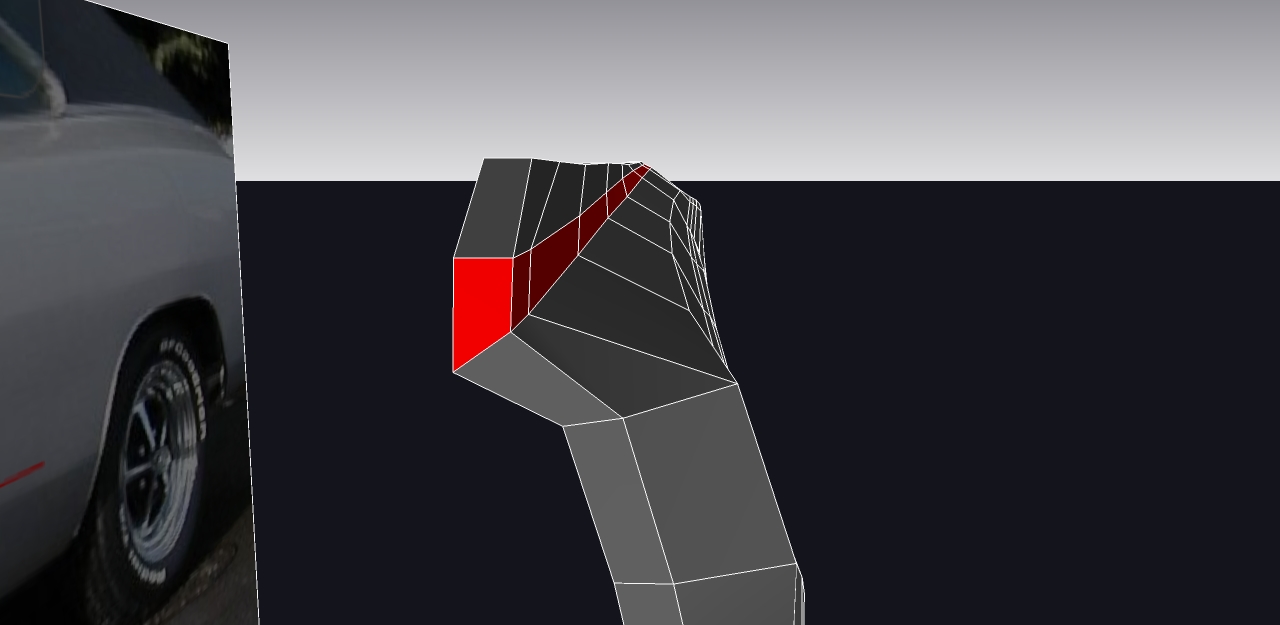
-
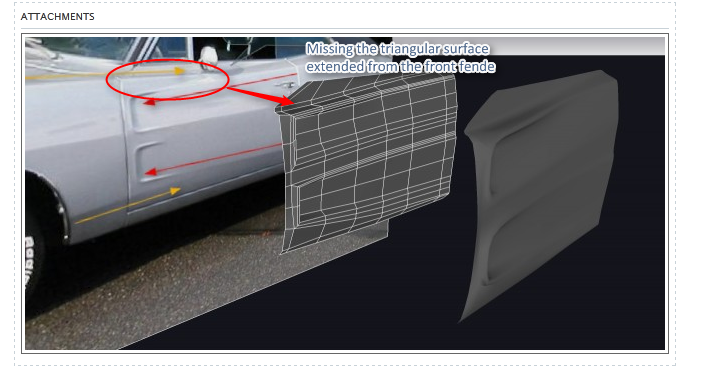
I'll bring home some tracing paper today and sketch out where I think the control loops will go.
-
@thomthom said:
The cold caught up with the and I'm home sick today. No working today either. Though I had to play around for a couple of minutes with the sub-divisions:
[attachment=0:2cm0gofe]<!-- ia0 -->ColouredCube-Results01.png<!-- ia0 -->[/attachment:2cm0gofe]When you subdivide it should also be possible to transfer UV mapping. Which would be another cool thing.
But I digress - need to get back to modelling this car.

TT I can't help noticing the sphere obeys quad based rules, how can I get my hands on that?
-
@iichiversii said:
TT I can't help noticing the sphere obeys quad based rules, how can I get my hands on that?
Break into my house, crack the password of my computer, search the HD for the source-code, copy, install. Easy peasy!

-
Alternative reply: http://forums.sketchucation.com/viewtopic.php?f=333&t=47691&p=428150#p428097
-
@thomthom said:
@iichiversii said:
TT I can't help noticing the sphere obeys quad based rules, how can I get my hands on that?
Break into my house, crack the password of my computer, search the HD for the source-code, copy, install. Easy peasy!

Ha ha, I'm on it, I'll remotely access your desktop from here.

-
@thomthom said:
[attachment=1:bn4paodp]<!-- ia1 -->FrontDoor.png<!-- ia1 -->[/attachment:bn4paodp]
I'll bring home some tracing paper today and sketch out where I think the control loops will go.
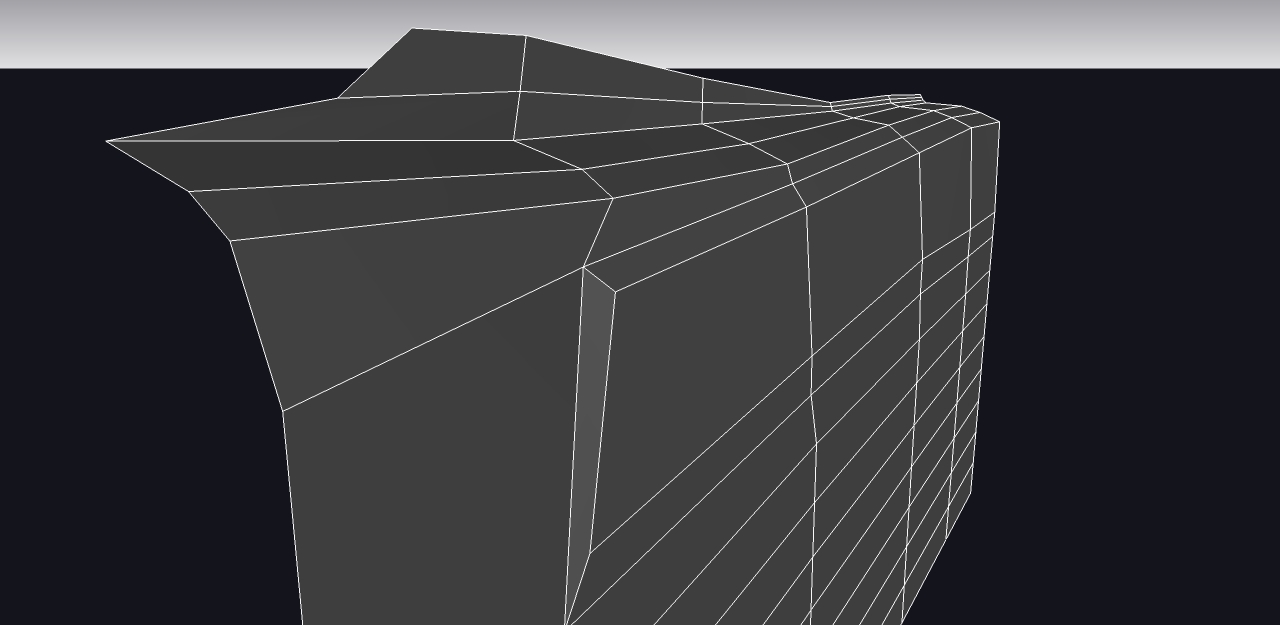
something on this scheme/idea maybe??? this headscrach is driving me completely crazy. not easy at all

-
I know - at first eyesight the shape of that car looks very straight forward. But as you dive into the details you notice it's actually very complex.
It's the front fender shape that intertwines and merge with the back fender shape while at the same time you get these two indented shapes (fake air-scoops?) bordering the intersection.
Advertisement


