Curved grip on flintlock pistol stock?
-
Totally lost..I can make a square or round object but I'm totally lost in trying to make the curved handle stock for a flintlock pistol...How do I make the curved grip??
Thank You
-
could you provide a picture of what you are trying to model?
-

-
The easy way: pony up for Artisan. I have not.
The not as easy way: think reductively about the shape. What simple forms that are easily modeled can it be reduced to? Perhaps these can be combined. Or perhaps outlines can be drawn that can be skinned. I think I'd try that. Trace or draw the profile from the view you show and then from a view perpendicular to that (and any others you can, the more the merrier). Then use CurviLoft or one of the other amazing free plugins to 'skin it'. If you generate the profiles, you'll have a good start, I think.
Of course you will want to have the profile at the top match the profile which it will join.
-
Didn't follow my own advice.
It's too flat, needs some inflating. Soap bubble plugin?
My times up. Added faces with sandbox from scratch but kind of got nowhere... The checkerboard look is not a special grip texture.
Must learn to listen to myself more closely, or not. I think so in this case --> loft, skin etc.
-
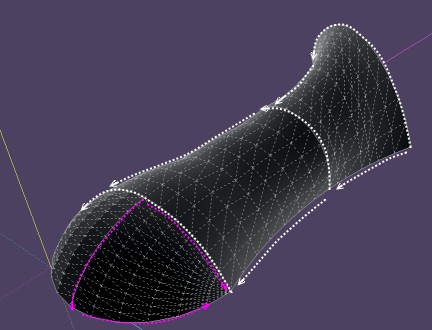
You can also use the Extrude edges by rails by Tig with 3 or 4 curves
Don't erase curves between each call of it
-
That's nice, if mysteriously precise. Which half is it?
OP can see the elegance of your moves.
This subcontract work times out pretty fast, for some.
-
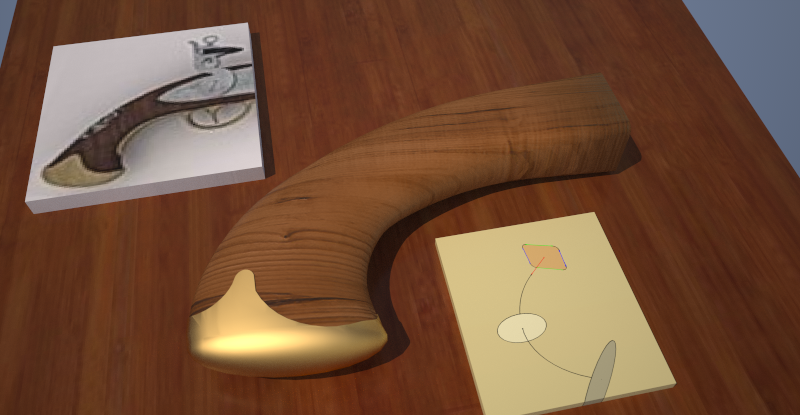
I got the bug to try this. I thought I knew a way but it took me further down the alley of organic modeling than I meant to go. I did try a couple of subdivision and smoothing rubies, not Artisan, but figuring out the proxy seemed harder than what I finally did.
Sorry I only took one picture of the process. I used Curviloft along a path (second icon) since I thought this shape is moving through simple cross sections. Then at the butt I guessed that this is the same elliptical shape lathed, so that's what I did with follow-me (perhaps not the best method). It needed a little stitching, and it isn't all neat geometry. I think curviloft is a good choice for this if you are less adept at organic modeling like me. The closest I got otherwise is scaling rings in a tube-- but this was much faster.
-
@unknownuser said:
Which half is it?
It's nothing special, just conceptual

You must have to find some generator's curves in the object that you want to sculpt
Extrude Edges by rails and Curviloft are brothers twins friends!
-
I´m sure you´ve sorted this out by now.
If it helps, here is a drawing with some cross sections that may come in handy. -
@pbacot said:
I used Curviloft along a path (second icon) since I thought this shape is moving through simple cross sections. Then at the butt I guessed that this is the same elliptical shape lathed, so that's what I did with follow-me (perhaps not the best method)... I think curviloft is a good choice for this if you are less adept at organic modeling like me.
Very fantastic. Really nice. ShowOff
But the beautiful walnut is kinda rubbing it in, don't you think? And the brass butt bolster should be finished with 00000 steel wool for that final 'Prell' UltraConditioner look popular in the antique gun re-modellers trade.
@unknownuser said:
it isn't all neat geometry.
Prove it.
.
Thanks, numbthumb, but Peter has made me very tired. Maybe the OP breathes still.
. -
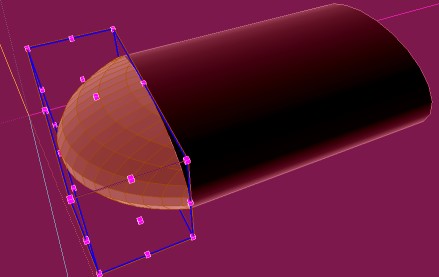
Soap works also in this case

Division 20 , Pressure -100 and then you can Scale it if you want
-
Thanks to all of you...
-
Generally as per Peter, curviloft along path, but with lousy proportions and no artistry.
Note the inflated butt, however.
Follow me there would have been better: more precise and no tedious cleanup.
New proportion and butt, but... still.
-
@brookefox said:
Very fantastic. Really nice. ShowOff
But the beautiful walnut is kinda rubbing it in, don't you think? And the brass butt bolster should be finished with 00000 steel wool for that final 'Prell' UltraConditioner look popular in the antique gun re-modellers trade.
@unknownuser said:
it isn't all neat geometry.
Prove it.
.
Thanks, numbthumb, but Peter has made me very tired. Maybe the OP breathes still.
.Thanks,
 The rubbed lacquer finish is to COVER UP the geometry... For the bolster I just took a color and gave it a metal description and guess what? It came out looking like metal paint. I haven't much background in such texturing.
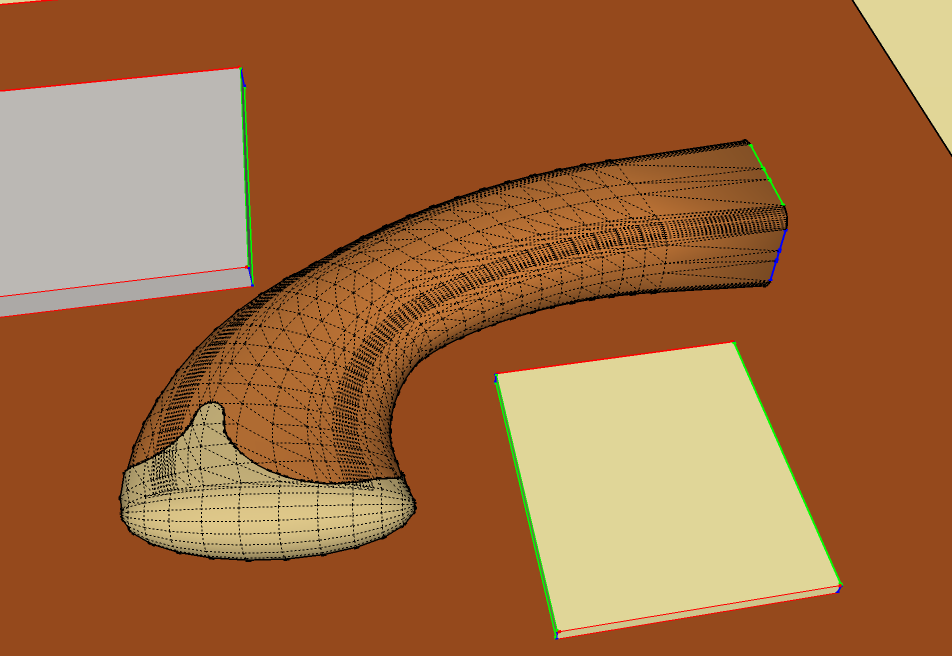
OK so feast your eyes. First mistake: too many segments in rounded corners added unneeded complexity at the other end.
Also it was hard to get a nice curve on both top and bottom of the handle and find the right shape. I had to scale and even rotate the main rings after the fact (ouch) to get it in line (or in curve). Brooke yours has a nice even looking mesh. (How does Pilou make his look like it's f'g glowing?)I never thought much of modeling guns but I have to say it gave me an appreciation of the craftsmen who developed these classic shapes. And I gained additional respect for the work of organic modelers we see here and awe for the ruby masters.
-
Yeah, yeah.
I gotta nominate to the "'Help Me Model' Hall of Fame" to be opened in a Gallery near you.
-
@unknownuser said:
(How does Pilou make his look like it's f'g glowing?)
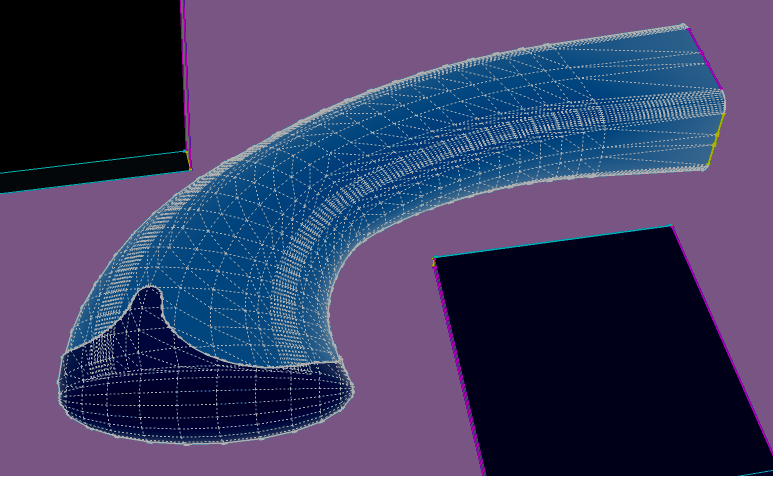
Very easy

Key Print Screen of the normal SU Canvas and past it in any 2D prog
Inverse colors
Some colors variations
That's all! (5 seconds made)
-
@unknownuser said:
@unknownuser said:
(How does Pilou make his look like it's f'g glowing?)
Very easy

Key Print Screen of the normal SU Canvas and past it in any 2D prog
Inverse colors
Some colors variations
That's all! (5 seconds made)
Merci beaucoup, Speedy.
Le P Bacot
Advertisement


