Model in several textures-How
-
Hi,
I work occasionally in the SketchUp drawings, eg, the kitchen cabinets.
I often need to render the same model kitchen, but with a different color.
Currently, after the first render, I manually change the color and texture every time I need to correct.
Example: Shelf for hanging partThe first time I put walnut texture, then the correct, rotate, pulls out ... until it is the way I want.
Then render the model.
When you want in the render the texture of ash, I have everything over again!
Is there a different method for changing textures on the model, when you want to have a model in the several texturesThanks in advance
-
[off:makn6ylb]Hm. I thought I have already answered this post...
Anyway, again:[/off:makn6ylb]
Hi Ljubisa, try this plugin: http://forums.sketchucation.com/viewtopic.php?t=13192
It can change the material from one to another that is already in the model (so you need to get the other material into the model: go to your material library > right click on a material y add to model).
It will keep all UV-coordinates (rotated, projected etc.) as well as adjust the size according to the new material so you need not worry if a material would cover bigger or smaller area.
-
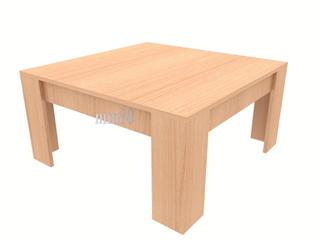
If it is just something fairly simple, like the table you posted, you can also change the material by going to the In Model section of the material browser, choosing that material, then click on the Edit tabe and search for a different wood image. Obviously, the grain will need to be running in the same direction as the original. You will need to change the name of the material also. This will map the new material in all the same directions as the original.
I have never used TIG's plugin that Gaius has linked to, so I don't know if the same thing applies there also, but I have found that merely changing the textures in this way...although it seems to work, doesn't fully work if you then want to have the original component and the adapted component in the same model. You will find that even though the two components are mapped with different textures if you open them separately...if you import them both into a model, they will both take on the texture of whatever model is imported first.
It might be that TIG's script addressses this problem, but when doing it manually, the only solution I have found (after changing the specified material) is to then burrow down into each sub-group/component until the raw geometry is selected then use Cut/Paste in Place to 'bake' the material change and avoid the problem above.
-
That method would work perfectly Alan if
- the size/aspect ratio of the two image materials are the same
- both images represent the same "real life" size of (in this case) wood bord/plank whatever
Otherwise one may end up with out-of-scale or distorted materials. This plugin takes all these things (like the material size set in the skm file) into consideration.
-
Yes, I realise that Gai...however it's no big deal to change the resolution in the Edit tab. Most wood textures are eyeballed anyway, rather than a precise size.
I hadn't come across TIG's script before, thanks for pointing it out. Changing the texture itself takes as long either way (given that using the script requires that the replacement texture be in the model to begin with) However, of far more importance is that the script does seem to solve the problem of fully updating all the group and component definitions to avoid the problem I outlined above. I'll be using it from now on.
Cheers TIG.
-
-
Thx for help...Global material changer...That`s all I need

Hello! It looks like you're interested in this conversation, but you don't have an account yet.
Getting fed up of having to scroll through the same posts each visit? When you register for an account, you'll always come back to exactly where you were before, and choose to be notified of new replies (either via email, or push notification). You'll also be able to save bookmarks and upvote posts to show your appreciation to other community members.
With your input, this post could be even better 💗
Register Login


Advertisement