[Plugin] TextureSwapper v1.1 20111112
-
(c) TIG 2011
All Rights Reserved.
THIS SOFTWARE IS PROVIDED "AS IS" AND WITHOUT ANY EXPRESS OR IMPLIED
WARRANTIES,INCLUDING,WITHOUT LIMITATION,THE IMPLIED WARRANTIES OF
MERCHANTABILITY AND FITNESS FOR A PARTICULAR PURPOSE.Script:
TextureSwapper.rbSwaps Textures between two standard folders.
Usage:
Type in the Ruby Console...
TextureSwapper.out
OR use CADfather's toolbar 'TextureSwapper' item... still use Console to
see what's happened...
All of the model's materials' textures image-files are exported into a
folder with the model called 'ModelName_TexturesOUT', it's made if it
doesn't exist. It returns a message in the Console, including an array
of the exported textures' image-files' names.
You can then copy that folder as 'ModelName_TexturesIN' and edit the
texture image-files as desired - e.g. reducing their resolution or other
adjustments to them... Remove or do not alter textures that are to be
left alone...
Next type in the Ruby Console...
TextureSwapper.in
OR use CADfather's toolbar 'TextureSwapper' item... still use Console to
see what's happened...
All of the model's materials' textures are updated using the image-files
found in 'ModelName_TexturesIN'. It returns a message in the Console,
including an array of the imported textures' image-files' names.
The replacement textures use the previous texture size, so for example
if you half the resolution of an image that is then imported it will
still appears the same size in the model, because the original w/h are
preserved.
The 'TextureSwapper.in' action is one step undoable - useful if you find
that you don't like the results !Donations: by PayPal.com to info @ revitrev.org
 ###
###
Version:
1.0 20111112 First issue.
1.1 20111112 Toolbar version created by CADfather, TIG tweaked.
###This is v1.1 with the Toolbar v1.1 - Extract the TextureSwapper.rb file and the TIGtools folder with its contents intact from the zip file. Put the script and the folder in the Plugins folder [merge with TIGtools if you already have other tools using that folder too] and then restart Sketchup. Read the instructions - the tools are either run from typed commands in the Ruby Console, OR from the 'TextureSwapper' Toolbar.
You can still use the original v1.0 version without the Toolbar, if you want to...v1.0 - Put the script in the Plugins folder and restart Sketchup. Read the instructions - the tools are run from typed commands in the Ruby Console [Use this version IF you don't want a Toolbar...] -
incredible... and it took you less than me doing the icons..

here's the file with the toolbar if you want to integrate it - (then i can delete the attachment)

(i really think we should have this icon in the list).
-
Here's v1.1 http://forums.sketchucation.com/viewtopic.php?p=365582#p365582
It now includes a 'TextureSwapper' Toolbar with snazzy icons [by CADfather, with TIG tweaks].
So you can now run the two tools from the Ruby Console OR from the new Toolbar...I've left v1.0 on the page in case you want a toolbar-free version

-
Forgive me for asking a stupid question...
Its the purpose/function of this plugin to: Export all the textures(and JUST the textures) of a model to a separate folder, allowing you to then swap out those textures for other other, either higher rez or different color etc... and then import them back into the model "swapping" them for the originals... thus creating an alternate texture version of the original model... in effect doing a mass "re-paint" ?
-
you mean, "forgive me for giving you the right answer".

EDIT: darn it... can't even get the toolbar right, that TIG has to tweak it...

-
Yes.

It came out of CADfather's idea in another recent thread.
You export all of your model's texture image-files into a 'ModelName_TexturesOUT' folder using the first tool.
You then copy that folder with its files intact, as 'ModelName_TexturesIN'... and then edit the images as you will with Photoshop/Gimp/etc, perhaps making them higher/lower resolutions, more/less grainy/sharp/noisy, or with adjusted colors etc etc.
The second tool then imports all of those images from that 'IN' folder... and swaps them for each of the model's materials' textures as appropriate. The original image size is always kept, so changing an image's resolution will not change the size of the textured material that uses it, when it's viewed in the model - although it might actually look [slightly] different depending on what you've done to that image while editing it...

-
Thank you both for the reply and for this wonderful plugin! One last question if I may... I suppose the altered textures would have to retain their original names for this to work... Correct?
-
Yes, the names must be the same - but if you rename a completely different image-file in the IN folder with the original name it'll replace OK on 'IN'. The only caveat is that the 'aspect-ratio' of the image's w/h should be equivalent - unless of course you want distorted results...
-
Thank you! This should come in hand with some older models that I wanted to retexture! Thanks again TIG and CadFather for this plugin!
-
Hi TIG,
Love this plugin - fantastic! Ive had a play with it on a couple of files and mostly have had perfect results. However there is a file that Ive run this on where not all of the textures are exported? After Ive run the plugin it says its exported 51 textures but there are only 33 in the folder? Do you have any idea why this would happen?
Thanks
Sam -
If some of your Materials use the exact same name for their texture-file you will get fewer .jpg/.png files exported than Materials processed.
For example, you might have 3 'glass-brick' materials that all happen to use 'glass_brick123.png', so there will be more materials processed than texture files made.
It should affect the result as when each Material's texture file is added back the same file can get reused by several materials.
It's quite possible that the one texture-file is used in several Materials - for example you might have the texture set to use different sizes in different Materials, or apply a 'color' over it or even have different transparency settings...
However, if the 3 glass-brick materials are exactly the same in all respects, then tools lie=ke MaterialConsolidator will reduce the Materials list back to have used just one - so if so then use that before using this tool...
The worst result is if you have three materials using a texture with the same name that's actually completely different! But that's housekeeping and commonsense. So never use non-specific texture names like 'texture1.png' as somewhere along the line they'll be another material using a texture with that name that's not remotely similar
-
Hi TIG,
Thanks for coming back. Totally understand about not using the same names and that materials that use the same map wont export different maps. Ive opened several of the materials whose maps don't export using the plugin. If I go to open them in photoshop through the material palet it opens the temp folder and the files have the following names:C/\Users\CHRIS~1.GWY\AppData\Local\Temp\txjv9jiw.jpg
C/\Users\chris.gwyther\Desktop\Breakthrough book cover.jpg
S/\Level 3\Design Team\Design Reference\3D\Models\Furniture\Espresso Machine LaCimbali\1B Model Library\Library Built by Ryan\Equipment\lcd-display-screen.jpgNot sure why it has that name but its appears to be the address that the original material is stored or first used? We work on a network and work on both Mac and PC (which seems to add some issues). Could the file name be too long to save? Ive tried saving it to my (mac) desktop but still no joy. Do you think this is resolvable or is this just another PC / Mac issue.
Any ideas? Thanks again.Sam
-
Just tried re-saving a couple of files on the mac from photoshop and get an error message telling me that the file name isn't valid so I know why they wont save now using TextureSwapper but do you know if there's any way around this in terms of how the materials are created? Im guessing the answer is probably no, as Im sure its something thats written into SU. It seems that any materials that have been created on mac dont have this massive long name, but the PC ones do. Hope you can help . . .
-
If you edit a texture it gets saved to a temp folder, depending on your OS...
However, if you export textures using this tool the file name is kept and the file goes into the common folder ??
-

 hello Tig
First off all thank you for all the great tools
i try to make my textures smaller with the software Jpgmini and texture swapper
but my snapshots have after this all the same texture ?
Texture names are unik the model is 90 mb
The jpegmini software works well but the import see only the first snapshot ?Thanks for helb
See below wath swapper make with my Map

-
I am not exactly clear what your problem is...
Have you tried Fixing issues under Model Info > Statistics ?
Have you tried Purging under the same option?Do the various materials have 'simple names' ?
Are these names 'related' etc...
What is the connection between the failing ones ?
etc -
Hello Tig
Fast service here
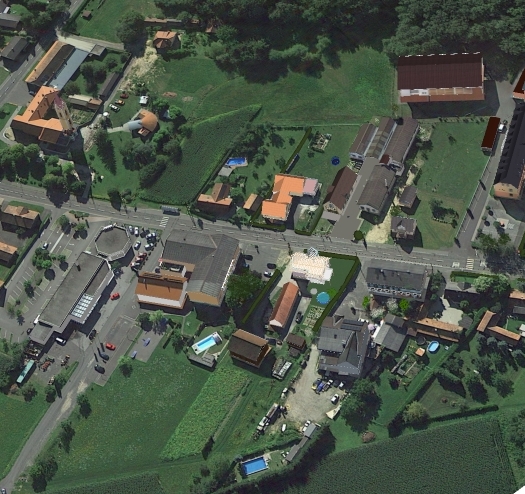
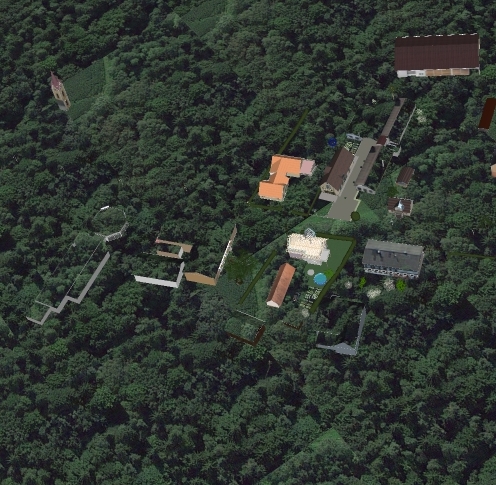
You see the 1 picture with a lot of grass the 2 picture shows only one forest texture over all
The material are google earth snapshots they are groups
the names are Google Earth Snapshot#66
some materials have a hidden line betweenThanks for help
-
Were some of the 'gray' roofs etc in the original, using the default-material ?
Which is now taking a textured material ?I am still unclear about what you are swapping with what...
Does giving these default-material faces a real color help ?
-
Hello Tig
I try to have the same textures like in picture 1
I use the Swapper only to make the picture folder smaller
The Software Jpegmini compress the 90 MB to an 29 Mb i save 70 Mb in the model.
The Material size and resolution are the same like bevor.
I Think the proplem is the name i have to rename all.
I Will report you the result in some days Thanks for all at the moment
esense3d -
Hi,
Is there a chance This Plugin doesn´t work any more in sketchup 2018?
I can´t start it any more. Thank you for your help, Best,
Advertisement


