Unwrapping / texturing a big cylinder
-
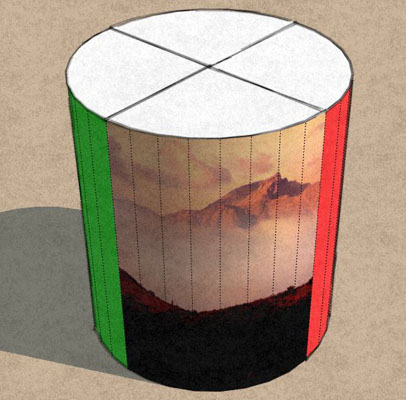
It is simple and not too tedious. You set the cylinder to "show hidden geometry". You import an image and in the process click "use as texture". The image will come in and you attach it to one of the segments and size it vertically. When you let go, the texture will only paint one narrow segment. Then you take the eye dropper tool and sample the texture on the 1st segment and then paint the second segment, then you sample the second segment and paint the third segment and just keep repeating the process all the way around the cylinder. The texture will smoothley wrap all the way around as shown in my sample. When done unhide hidden geometry and lock the cylinder.
Unless I am missing something, that should be it.
-
I also have two systems for unwrapping a real world cylinder photographically if anyone needs a long strip photo of a column or vase so you can see all sides at once.
-
@roger said:
... Then you take the eye dropper tool and sample the texture on the 1st segment and then paint the second segment, then you sample the second segment and paint the third segment and just keep repeating the process all the way around the cylinder. The texture will smoothley wrap all the way around as shown in my sample. When done unhide hidden geometry and lock the cylinder.
Unless I am missing something, that should be it.
It would be nice if it was that simple but it is not. Each 1024-byte wide texture has to be painted on 8 segments. You take the first texture and paint it on the first segment, then sample and paint the next etc. When you get to the 8th segment there is no way that the texture will finish with pixel 1024 exactly at the final edge of the last segment. Not even vaguely close. You can repeat and repeat the process as much as you like, shrinking and enlarging the texture horizontally, and it will never match up exactly. Therein lies the problem.
It is even worse than that. Let's say the texture ends up too short. So you go back to the first segment and stretch the segment horizontally a bit. You then re-paint it on segment 2. It does not retain the same stretch. It reverts to the original horizontal width, so you can in fact never achieve the desired result by trial and error.
-
Take your texture and lay it out flat. Divide it into 8 segments. Sample each one with the paint tool and paint it onto the one panel of the column. Sample the next and the next and the next and paint each column individually. Post the column and the texture. I want to see for myself if failure is inevitable.
-
Unfortunately that that won't work either. When you sample each of the 8 segments you get the exact same texture each time.
-
Rather than guessing can I ask you to draw a 32-sided cylinder and try to manually paint 8 sides of it with any texture so the ends match up exactly with the ends of the 8 segments.
-
If you can adjust your texture resolution to match the cylinders face then it'll map. As long as both have the same height/width ratio. Otherwise your trying to fit a square map to cover a rectangular map.
-
Version 8 has a command called make texture unique. I just used it and it works.
-
Make texture unique reduces the quality of the texture badly and also shifts the texture several pixels left. It does not give a seamless result.
As for the suggestion of making the texture the same shape, that is impossible. Let's say the texture is 1024 pixels wide by 673 pixels high. Each segment of the cylinder is 1.3762m wide by 2.7643m high. What shape should I make the texture so it fits exactly?
-
Impossible....not really.
As your earlier request highlighted your requirement. Unfold the cylinders face, map it and fold up. So in essence your applying the texture to the flattened face so both match exactly.
If you look at my earlier .skp you'll see that I mapped a 4096x4096 texture to a cylinder without stretching or overlapping.
I can see your problem but your hampered by both SU'S mapping and your image canvas size.
-

-
Actually totally impossible. There is no combination of pixels that will exactly match the shape of the 8 segments hence the process of applying the texture to the first segment, sampling then applying to the next can never work. Unless there is some black magic in there that I am unaware of.
-
I finally figured out what you are trying to do. Here is what you need to do. Do it all in one piece to begin with. Make the height slightly bigger than you need once you get the width about right. What falls of will be lost and who cares. Now wrap the texture all the way around. Stretch it a bit for a tiny overlap. Yes that will create a really minor seam between panel 1 and panel 32, but we are going to fix that. Make panel 1 and panel 32 unique and then take them into an image editor where you will join them together. In the image editor use clone, soften, and smudge tools to retouch the joint between panels. Then re split the two joined panels and reinsert them at positions 1 and 32. Now you will have a visually perfect and seamless column from all sides. And this better be for an animation, because if it is for a simple render, you could have hidden the joint on the side of the column away from the viewer.
-
@unknownuser said:
Actually totally impossible.
Within SU using your particular texture and technique I agree but....
I beg to differ, in fact my earlier .skp proves it's possible. I think it's how your approaching the task that's making it not possible. If mapping a simple cylinder wasn't possible in 3D then we'd all be wasting our time. My advice is to either learn an external mapping app or adjust your image so it can better fit the UV space (1024px x 500px doesn't fit a 8.011m x 3.5m area without some distortion and you're trying to manually guess the distortion).
TIG has a set of Texture Tools that allow you to adjust a texture's UV scale independently so you can figure the necessary adjustment to the texture's height or length to allow a seamless mapping on each quadrant. There will be slight distortion overall but it's minor. Actually Dale's UV Tools Cylindrical mapping will show you instantly the distortion in this case.
Or if you want you can share the file.
-
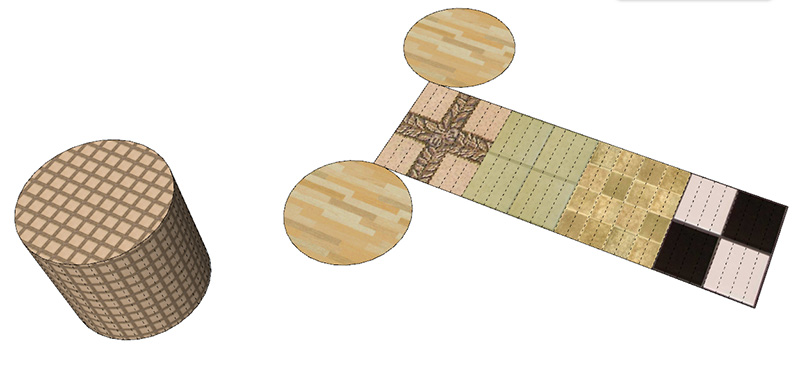
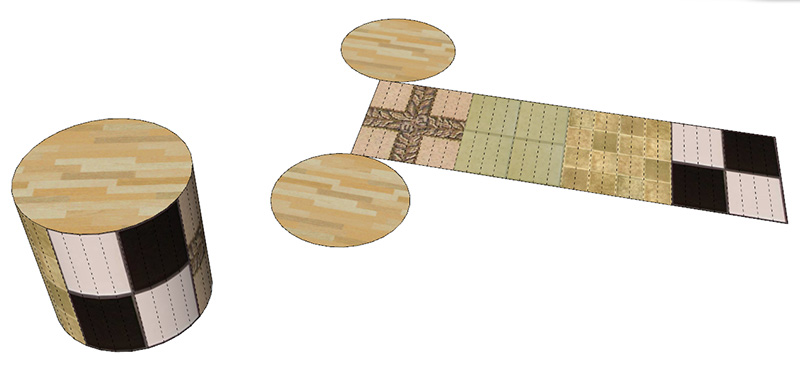
I tried the Flattery plugin. It works fine to unwrap the cylinder out to a flat plane. It is then a trivial matter to texture each group of 8 segments so the entire cylinder is textured perfectly with the 4 individual textures.
Problem is there is no option to put the model back together again, so that becomes a manual process. Not too difficult however. I have suggested on the Flattery topic that such an option would be nice.
-
Have you tried my UVunwrap plugin? It can remap the UVs to the original object.
It might need some manual editing of the unwrapped object but here is a quick test I did.
I then use my UVprojections-Planar to project the UVs on the flattened faces with the option "fit" so that each square texture fits exactly to the selected faces.
Finally I use the update UVs feature to apply the new UVs to the original object.

-
How did you then reconstruct the cylinder? Did you have to fold each segment manually, or do I misunderstand? Is it perhaps only the textures that get unwrapped?
Guess I will have to give it a try.
-
Watch the video that's associated to Pixero's plugin
-
In an earlier post Pixero said....
http://forums.sketchucation.com/viewtopic.php?p=354245#p354245
-
Do you have a link for the video please? I cannot find it in the UVProjection topic or in the videos page at http://forums.sketchucation.com/viewtopic.php?f=323&t=40041&p=356804#p356804
Advertisement


