Outdoor Kitchen Project - Help..
-
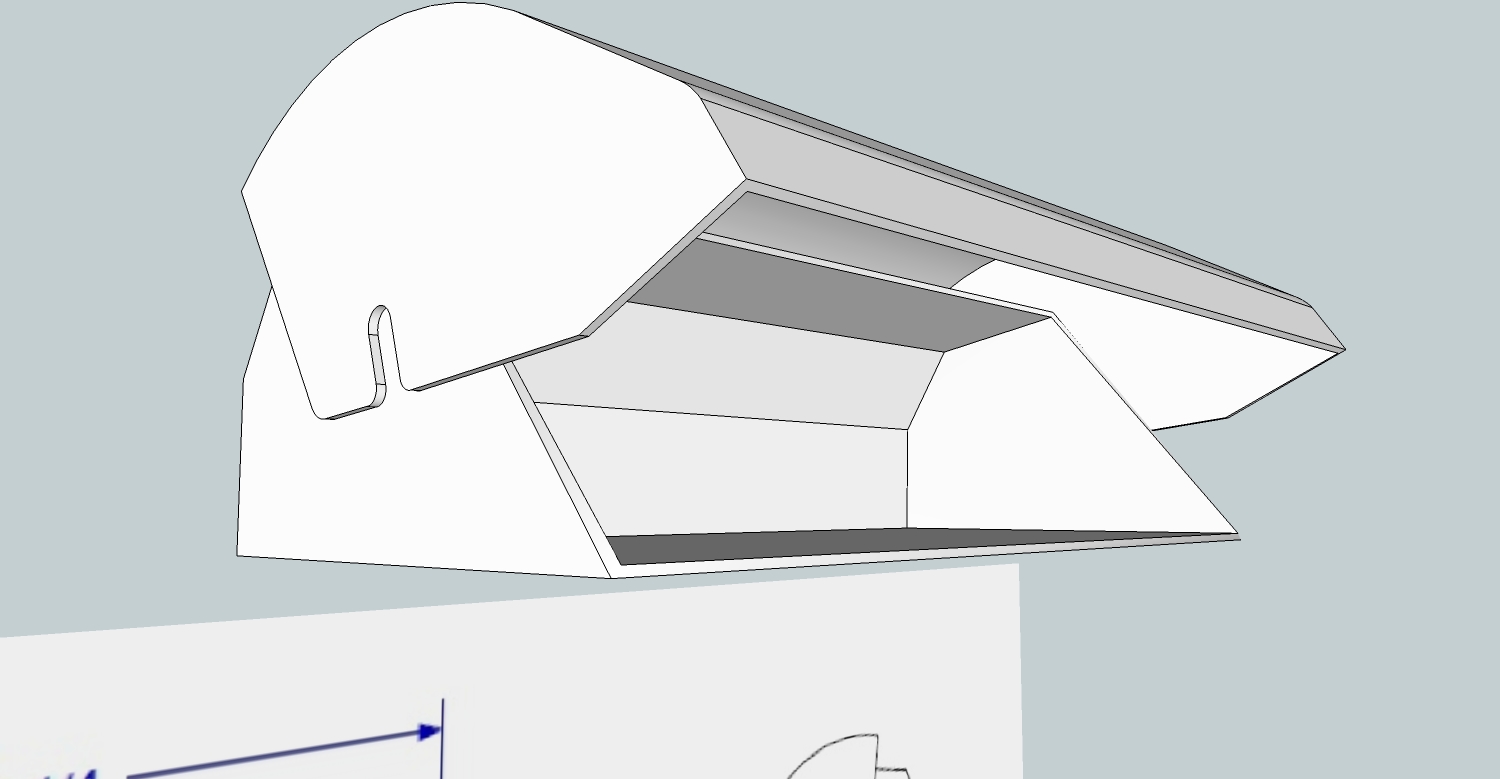
As stated previously jsut started this and seeing how im new to Su im having trouble figuring stuff out..in the attached SU file you see a image of the grill im modeling along with that top of it modeled (quickly) what im havent trouble with (and probably just overthinking it) is hollowing out the inside of the top..basically just giving it like an 1/8" thickness and hollow the rest..you know like a real grill...lol..any help would be grealy appreciated..
Thanks
-
Also, since you are working on an outdoor kitchen, you may find these useful. I downloaded them from the Viking website a while back and converted them to .skp.
Viking Outdoor Kitchen Components - http://www.box.net/shared/j8q5y0tccmqeg69d8xta
-
I would just delete the inner edges until you get the shell of each piece. Then use the plugin Joint Push Pull and set it to thickening (tab key) and extrude all the faces (simultaneously) a quarter inch. Then group the piece.... doing the same for each.

-
@earthmover said:
I would just delete the inner edges until you get the shell of each piece. Then use the plugin Joint Push Pull and set it to thickening (tab key) and extrude all the faces (simultaneously) a quarter inch. Then group the piece.... doing the same for each.
THank you, definetly need to get plug ins it seems..also thanks for the other files i will take a look at them when i get a chance..
-
I don't want to detract from Adam's excellent method and I think the Joint Push/Pull plugin is definitely worth having. Still, here's an easy method done entirely with native tools.
From left to right.
The original shape of the end.
I made a copy of it with Ctrl+Move (Option+Move on the Mac) Select the top and front edges of the original shape. Get Offset and create an offset line the desired to the thickness of the metal. I used your 1/8 in. for that.
Delete the waste leaving the end of the bent portion of the hood.
Push/Pull to get the length. This is the length without the ends. Push/Pull The copied profile to thickness. Copy it with Move to the other end.
Move them into place at the ends of the extrusion. Delete the unneeded seam line edges on the top, front and back. Make it a component. Done.One thing I often find useful is to think of how something might be made in real materials. Break it down into its component parts and draw them. Sometimes those shapes are easier to develop than trying to handle it all in one chunk. So for this grill lid I figured it isn't like that it would be milled out of a big billet of stainless steel but instead made of sheet metal. The ends are probably weld onto the formed top/front.
-
Nice Dave. Indeed it can all be achieved very efficiently with the Sketchup native tools. Sometimes we get spoiled with the ease of use the plugins provide and forget that there are native methods that get us the results just as fast. As with most thing in SU there is no one way to do anything, but many different methods and tricks. I like Dave's advice though. It's better to learn all the nuts and bolts of SU first, then start diving into the plugins down the road.
Best of luck with your project.
-
Thanks Dave..I too also like to try to accomplish things with native tools first before using plugins and such..though having plug ins is always useful...and since im new to SU i will be trying both methods
 as soon as i get a chance..
Quick question for either of you...should i keep asking questions within this post or create mew topic per question??
-
You could continue in this thread if it's still related to your kitchen project.
Knowing several ways to do something is good because you may find cases where one way works and another doesn't or is much harder. Having a variety of options is always helpful.
Advertisement


