From SU to papermodel - Thickness of paper issues.
-
A little free thinking. Very little.
First, would a paper model be made of more than one thickness of paper?
Second, would there be a way to generalize the parts that need to be reduced to compensate for the thickness of the joining parts? For example, could you say that all vertical faces need to be shortened by the thickness of the top? And then all faces parallel to the green axis need to be reduced in width by the thickness of the parts parallel to the red axis. That's very simplistic and obviously doesn't account for walls that aren't parallel to an axis.I think before you can ask for a plugin you have to determine rules for how the adjustments are done. Maybe it can't be simplified like that, though.
-
On a related note, I used to have this problem all the time. One big time saver that I found was to shorten the unfolding process. There are a number of very good plugins on this site for unfolding, but what I liked to use is called Pepakura, http://www.tamasoft.co.jp/pepakura-en/. It unfolds your model and tries to keep as many edges together. You can add labels to the edges, too. Then I would edit it in Autocad and make adjustments for thickness. Also, if these are primarily exterior models, you can use single-ply museum board (essentially a thick paper), score it (with a laser cutter) and fold it. Pepakura can add tabs to loose edges so you'd have something to glue.
Just a thought.
EDIT: I just found the Waybe plugin for SketchUp. The full version is $80USD for the educational license. More expensive than Pepakura, but right in SketchUp. Then there is the Flattery plugin, which is free. Still won't help you with the thickness issue, but may save time before so you have more to adjust for thickness.
-
Dave:
I have attached a file that shows the adjustments necessary, the next step in my test file would be to unfold the 'adjusted' model with Flattery or similar script.
I don't know how is possible via ruby, but if that's possible via a plugin it would be great The model is adjusted for 2mm material.
ledisnomad: thank you for the input
 I'll check the plugins you mention!!
"Then I would edit it in Autocad and make adjustments for thickness" I don't understand how that's possible, I found it a bit hard to adjust the model within sketchup but if i only had the 2d shapes in AC I would be totally lost :S you must be very good
The models are not only exterior models, they need to look perfect both in and out. My goal is to have a working method that would be 99% precise then I could start making models in other materials even metal because I wouldn't have to tweak it with a knife anymore

Thanks again to all of you!
-
@unknownuser said:
I don't understand how that's possible, I found it a bit hard to adjust the model within sketchup but if i only had the 2d shapes in AC I would be totally lost
Essentially all you are doing is "cutting off" the thickness from one piece, right? So if you know which edges attach to each other (a simple intersection, two walls for example, will be a pair), then you need to cut off 2mm (or whatever) from one side of the pair. If you use a plugin that labels matching edges, then you just offset/stretch/whatever the edge in each pair.
Of course nothing is that simple with a real project, so there will be roofs, floors, complex intersections, etc. But with the labels, things go pretty quickly with just a little practice.
-
-
bjornkn,
wow! thank you for taking the time to make such a detailed explanation!!
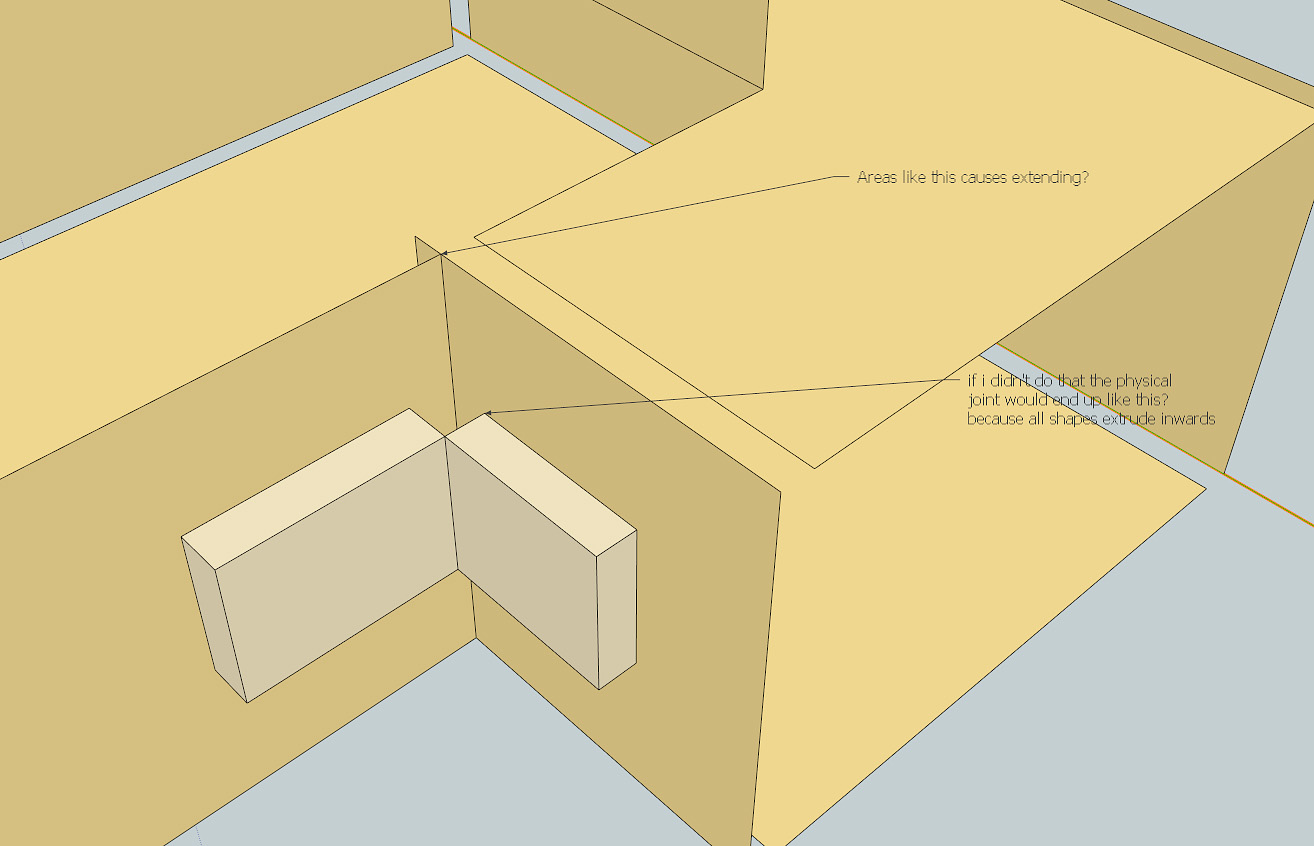
In my example I trim the top and bottom due to some other design issues but I get the point, but because I can't add any volume on the outside (all external measurements needs to stay 100% the same, then there's shapes that needs to be extended instead of trimmed, isn't that true? I have attached a picture. These small unforseen adjustments seems to be quite confusing :S
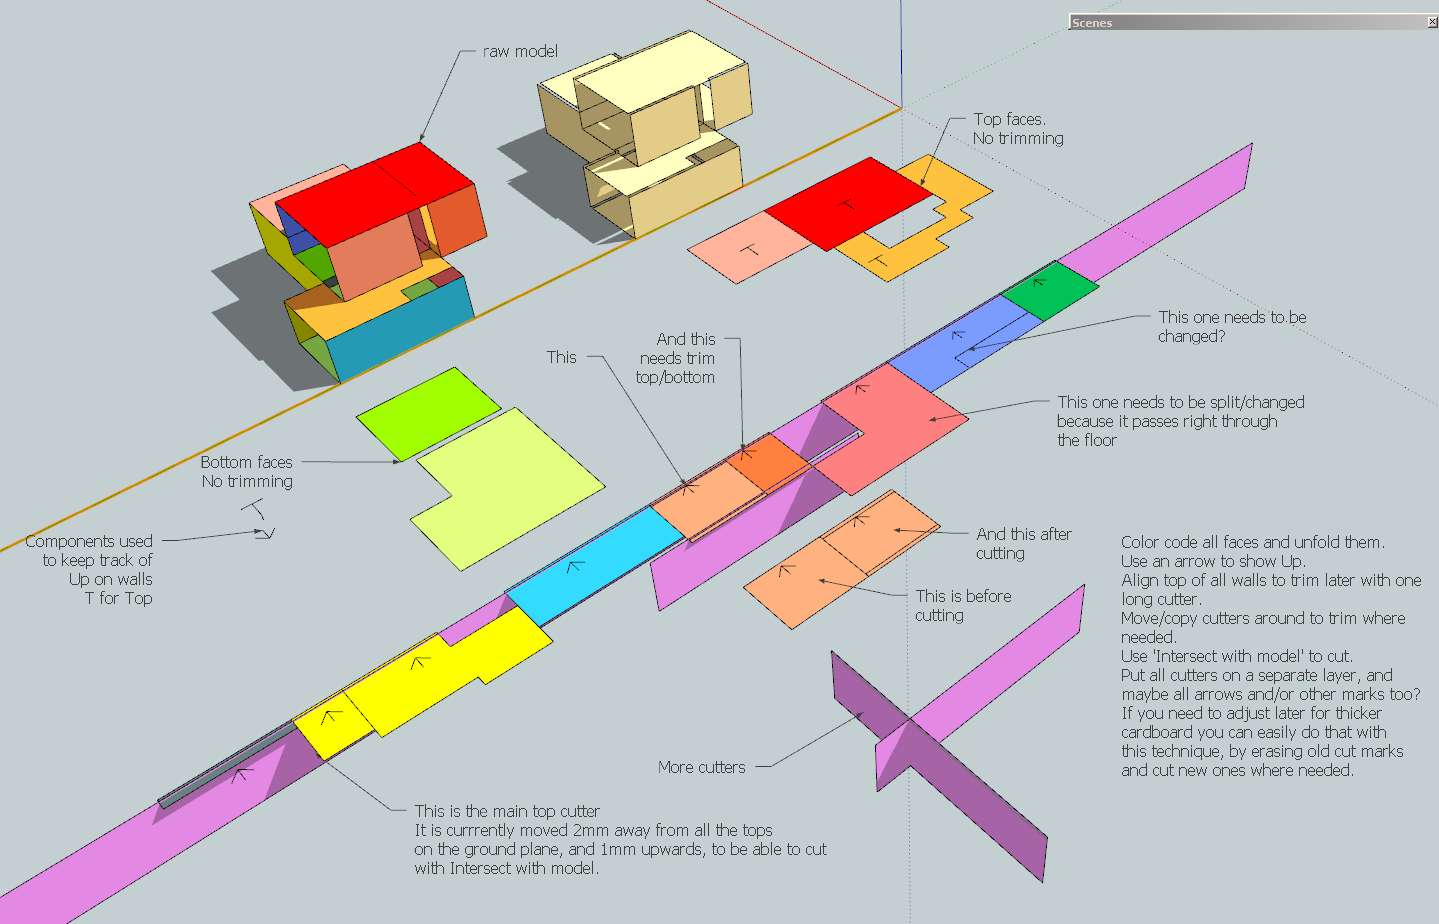
Do you use the flattery script to move all faces to the horizontal position, or do you do it manually?
Thanks again!


-
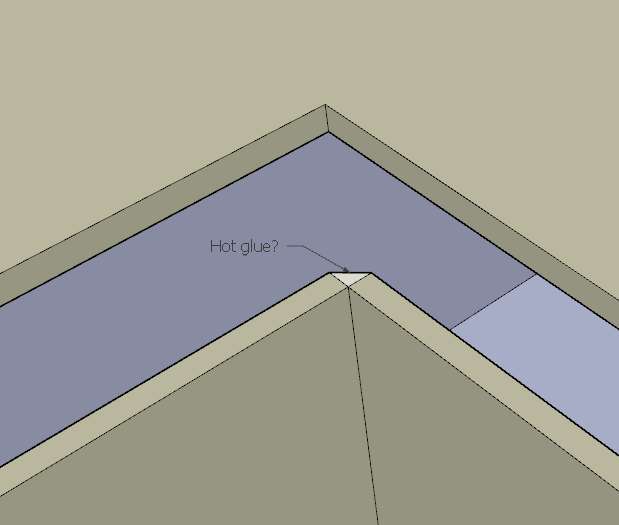
Yes, I suppose you should extend some faces with such inside corners, if you want to keep it as nice as possible on the inside too. But if you're using a hot glue gun, and the inside isn't that important (or visible) I would've just used it non-extended.

Or if the laser can make "bends" (or you use a knife/tool), ie not cut all the way through the cardboard, you could just bend the corner?You will probably encounter some problem areas, but to avoid confusion and messing up it would help a lot to keep some rules. Like: "do all trims on faces on the red axis" and "do all extensions on faces on the green axis"?
And "never let a wall span more than one floor" and "group each floor"?As you had already grouped each single element I just moved and rotated them manually. But using Flattery or Unfold would probably work well too.
Once you get some routine, and follow your rules, it isn't that big a deal to get this right I think.Lykke til!
-
Thank you very much for your help Bjørn!
I'm not able to use the glue trick for this project but it's a good idea!
I'm sure you're right - it's a matter of practice and then I'll get the hang of it! and then maybe one day there's a plugin developed!
Thank you and mange tak!
-
Totally off topic,
I wrote a reply earlier to you earlier today but I Just figured out that it hasn't been posted, it has happened a few times before, I'm sure it's something I did but hmm strange!
Advertisement


