How to apply a texture to a curved face (projected) ?
-
Hi
I have a problem I have been trying to solve for several days now, but I've had no luck so far
 . So maybe you guys and girls can give me a hand.
I modelled a soother recently and I wanted to 'pimp' it by applying a texture (a logo) to the back and front side of it. The problem is that geometry is curved (facetted) and I can't seem to get the texture projected on the curved face. (It needs to be projected otherwise I get bits and pieces of my logo on every single facet of my curved face)
I followed all the steps in the tutorial of Aidan Chopra - http://www.youtube.com/watch?v=HHsRRLCAOm8 (he never disappointed me in the past, fantastic tuts - so big tnx !) but somehow I must of have done something wrong. Or maybe it's a bug in version 8 I stumbled upon (but i doubt that).
Anyway, how would you go about texturing the soother with a logo ?
A few pics to illustrate ...
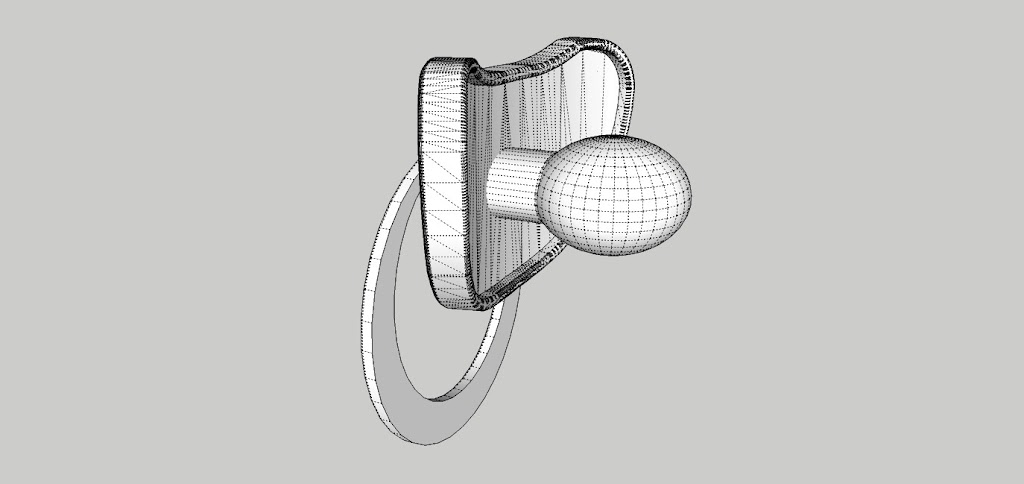
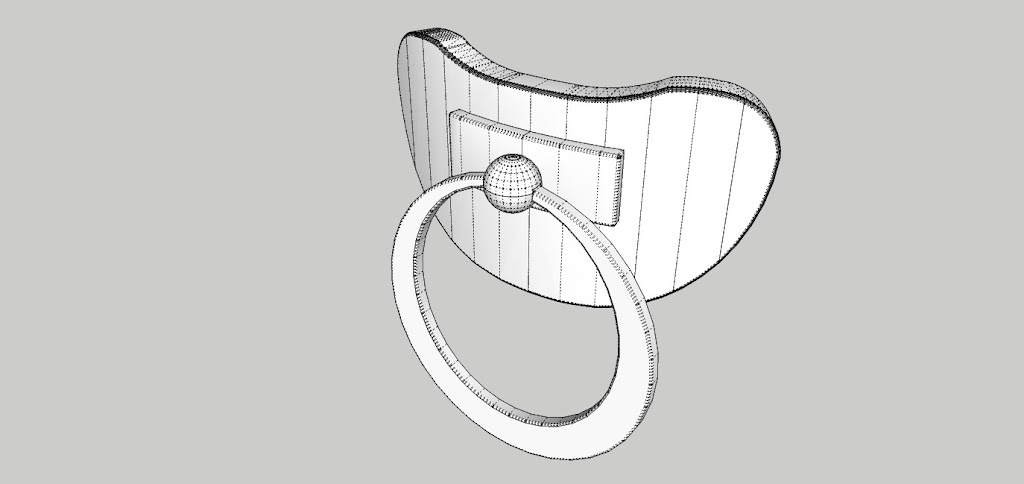
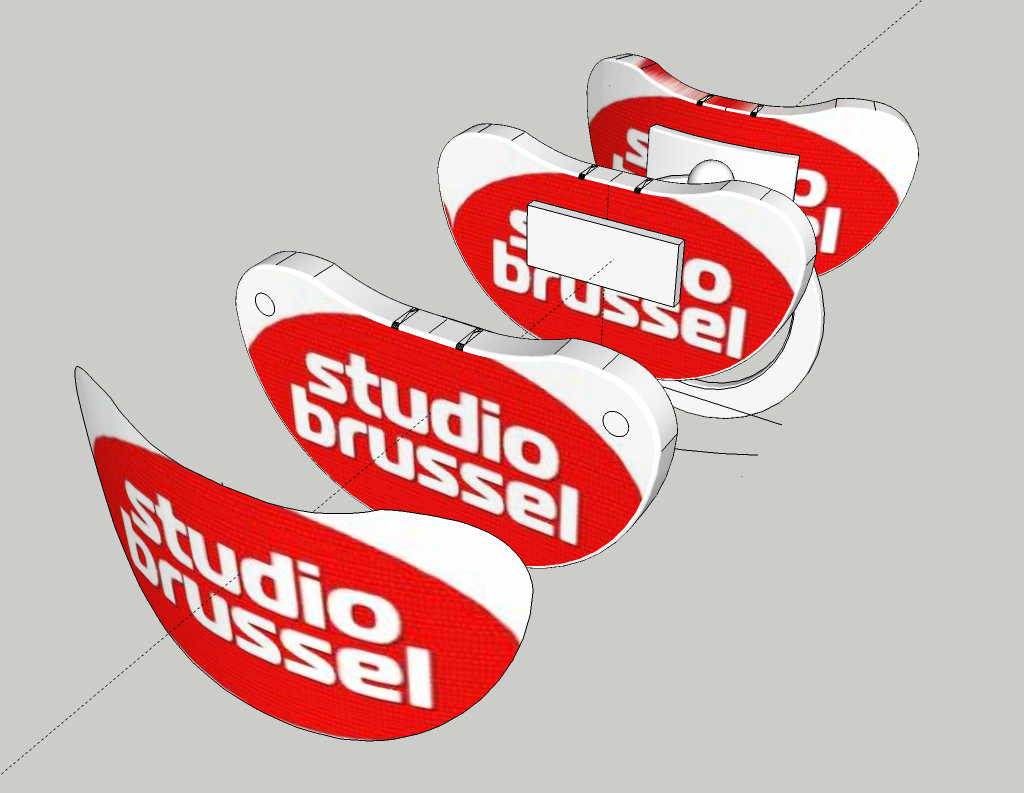
The logo:

Thanks !
Flapsy
-
Hi Flapsy,
The way Aidan explains it in that video is the correct way to go;
- you position the texture on a flat face first
- then make it projected,
- sample it and apply the (positioned and projected) texture on the curved surface.
One thing comes to my mind (without the model itself): is your curved surface inside a group/component? Note you cannot project a texture on a group/component, only on raw geometry so if it is grouped, you need to edit the group first to apply the projected texture on the raw surface.
If this is not the case, please, attach the file, too.
-
Hi Gaeius
Thanks for responding. I tried it already by exploding the group, but no luck. I had some difficulties making the curved surface projected. The more I think about it, the more i think that's where the problem is. Any idea's on how to make a good projected surface ? (I tried with vector pushpull and then take a slice out of it but something went wrong I think when I bended the original flat surface (with Chris Fulmers amazing plugin)
Anyway, I'll try and upload the model.If you could get it to work, I'll be very grateful.... but if you could explain me what you did to make it work i'll be in your debt for ever

Flapsy
-
I am not sure how exactly you'd like to position/project the image but here it is after a quick play. It went without any issues; first position it on a flat facethen make it projected and sample > apply on the curved surfaces.
Again; no positioning and projecting on groups/components.
You need not explode anything.
Sample the projected texture then right click on the side > close component then right click on the other component > edit component...
-
Fantastic !
Thanks a lot Gai !
Djee, feel a bit embarassed now ...

Flapsy
-
@flapsyd said:
Djee, feel a bit embarassed now ...
So does it mean you can replicate the thing? (Thatwould be the point - not that someone does it for you!
 )
) -
Sigh ...
I keep on doing something wrong. Somehow either the "projected" thing doesn't work or either it's the sampling I'm doing wrong.
My workflow:
I import the texture, position it, then mark as 'projected'. Next I open the material box, press the sampling icon and click on the texture I positioned. I close the component, open the component with the curved surface and apply the texture and then ... I get once again a fragmented texture...Don't know if it's important but I noticed that in my material box the shape of the texture doesn't change when I sample it. In Aidan's tutorial you can see that the shape of his texture is a bit stretched. (Note: I tried it on simple model and the normal (flat face to a flat face) sampling worked like a charm so i'm guessing it's probably some kind of a projection issue.)
I'm having a lot of (real) work right now, but I 'll try to make a short video of my workflow later on, so you could see what i'm doing wrong
Meanwhile it's really driving me crazy


Anyhow, thanks for hanging on ...
Flapsy
-
Sample the texture on the face you applied (and projected) on. Press the Alt key (while the Paint bucket tool is active); it will turn into an eyedropper tool and click on the face you applied the positioned/projected texture.
In the material browser, it is in its "raw" form only (no UV mapping info is carried by that thumbnail).
You can even sample a texture that is inside a group or even after you entered into the other group (to access the surface), you can just click "out of the box" with the sampler (Alt + tool)
-
Ok
I made a quick screencast of my workflow. It's probably something very obvious ...
Here's the link: http://www.screencast.com/users/David.Bouwen/folders/Jing/media/a0492629-6af1-443c-818f-60d37d874872
Tnx for your patience
Flapsy
-
At the end, before applying the (already sampled) texture, you click into the material browser thus clearing the sampled texture. Do not click in there just paint with what you already sampled from the positioned/projected face before.
The sampler is to sample textures from other faces, not from the material browser (and re-read what I wrote above, too).
Hello! It looks like you're interested in this conversation, but you don't have an account yet.
Getting fed up of having to scroll through the same posts each visit? When you register for an account, you'll always come back to exactly where you were before, and choose to be notified of new replies (either via email, or push notification). You'll also be able to save bookmarks and upvote posts to show your appreciation to other community members.
With your input, this post could be even better 💗
Register Login


Advertisement