Introduction + question
-
Hi there My name is Guy. 57 years old. Wanted to say hello.
 I'm looking to use Sketchup in my woodturning/woodworking hobbie. I'd like to draw a milk stool. I can make the seat and the legs but I'd like to splay them 15*. Any suggestions will help. Thanks
 -
Hi Guy and welcome!
We have a special Woodworking forum down the road although it is a bit disguised so I added you to the Woodworking usergroup in order that you can access it.
-
Hi Guy, welcome!
There are a couple ways to do that, but I'd use the rotate tool
Here is an excellent video (part of a series) that shows how to use the tool. I'd suggest watching the series...its worth the time investment!
YouTube - Google SketchUp Toolbar Series: Rotate
[flash=480,385:nnogcb9o]http://www.youtube.com/v/09Vd2jj3BGE&hl=en_US&fs=1[/flash:nnogcb9o] -
@guy bratt said:
I'd like to draw a milk stool. I can make the seat and the legs but I'd like to splay them 15*.
Welcome. SketchUp is easiest when everything is orthogonal (parallel to the red, green or blue axes). Your legs, I assume, will be 120 degrees apart. Not orthogonal. I'm not so sure about the Rotate tool, either, though I second the advice re watching those excellent videos.
Draw a circle a bit larger than the seat you want, centered on the origin. Draw another circle where the centers of the legs will attach to the seat. Draw a leg-sized circle on an axis.
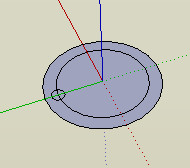
SketchUp aces will use the Rotate tool to make an outer array and get this all done in one go, but that's kind of advanced. Here's the more straightforward approach. Grab the Protractor. Click the origin to center it; click the center of the first leg's circle to define the 0 line. Type 120 and Enter and you'll have a guide for the second leg.
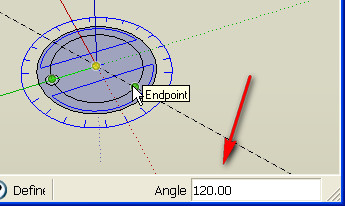
Draw another leg circle. Repeat for the third leg.
Now triple-click to select everything. Type M for the Move tool, click the origin and start sliding up the blue axis. You'll get a tooltip that says "On blue axis". Type the height of the bottom of the seat and Enter. You'll get a stool bottom floating in the air.
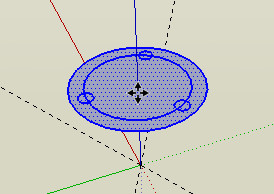
Now clean up. You've no use for that inner circle. Delete it. Sad to say it's in six segments. By the way, the eraser is not your friend, here. With the Select tool (Spacebar) click a segment. If you miss, you just click again. Then press Delete. Once your first model is "done" look up the Eraser tool. It's got magic. But don't use it for erasing.
Now fun times. Orbit under your seat. PushPull the legs down to the ground. (Start the PushPull, then type the distance you want and press Enter.) Double-clicking with PushPull repeats the previous PushPull. (Very handy, but not totally reliable.) Starting to look stoolish.
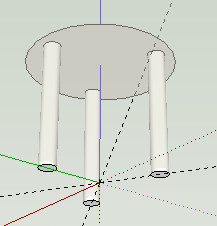
Now here comes the trick. When you use the scale tool, attached geometry moves along with the geometry you are scaling. Tap S for the scale tool, grab one of the corner handles, hold the Ctrl key down (to scale about the center) and move it in. Magic slants your legs while leaving tops and bottoms parallel to the floor.
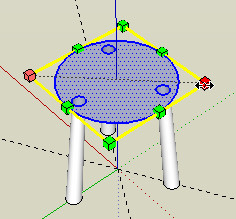
Now you PushPull your seat up to seat depth and all that's left is a little cleanup so the legs don't poke through to the seat top. I've not come up with a slick way to handle that. Maybe someone else can help out.
Here's a little woodworker's tip you may want to use before you make your stool. I'm thinking something like hard maple.
-
Martin,
That is a clever approach -- great if you just need a rough representation of the model, but inaccurate if Guy needs to actually build from the model. Here is a picture (exaggerated scale) that shows what happens when you scale the top of the stool. The tops of the legs are scaled down as well, making them thinner at the top.
Here's how I'd do it, sorry I've no time to make pics:
Make the seat, turn into a group/component, move it up to the desired height.
Use guidelines to mark where a leg will be on the bottom of the seat, draw the leg and push/pull to length. Make leg into a component as it will have more than one instance in the model and any changes will be updated in all copies. Select the leg and rotate out 15* using the top edge as the hinge. Ensure the leg is positioned correctly, then use 'intersect with model' to miter the top of the leg to fit the seat if necessary. Select the leg and rotate/copy by 120* the component around the center of the seat as Martin suggests in his description above.
Guy, does any of this help...Martin's instructions or mine? If you need better descriptions, just ask...someone will help

Advertisement


