Adding texture to a spaceship model
-
Hi All,
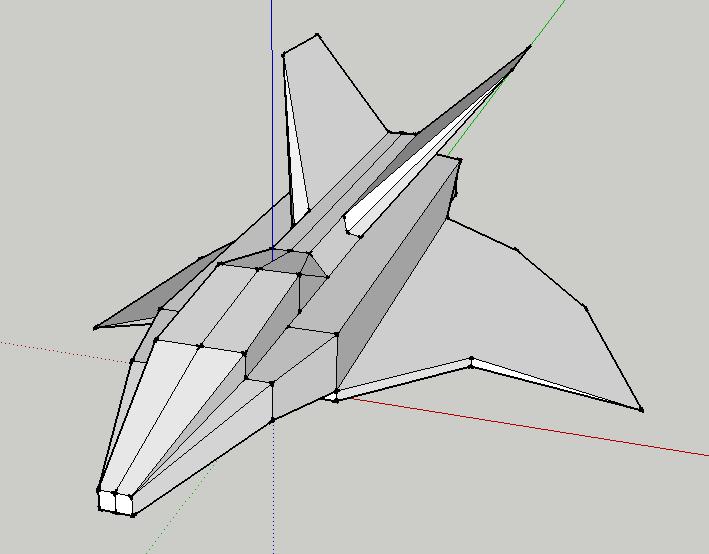
Anyone got any texture tips for the very simple spaceship/plave thingy I have made?
I want to add decals, burn marks and other things to this model but I am unable to find any tutorials that would help me achieve this.
This would be the first time I have attempted this so please be gentle
 What is the best proceedure?
Could someone help me with this?
Thanks,
GO

-
[flash=480,385:ccf8fg6l]http://www.youtube.com/v/KEg6tHWNXb4&hl[/flash:ccf8fg6l]
-
Hi,
Thanks for the reply.
So using this method I can apply a texture to each plane of the model? I take it that I only have to texture half the model then copy and flip it so that it would create the other half?
Thanks again,
GO.
-
@ginger_overlord said:
I take it that I only have to texture half the model then copy and flip it so that it would create the other half?
You should have started like that in the first place. In fact, it is still not late; delete half (where there is that center-line), select all the rest, right click and make it a component.
Now you can flip/mirror a copy of this component and see when you are editing (now already just painting) one half, the other will instantly update, too.
-
When you have a face texturized
Use the Sample Paint - Click the face for choose it
Paint the other face
Right Click /Texture
Right Click / Position / Flip etc
Right Click / Done
-
Hi,
Thanks for your replies!
Editing my new component right now! what a time saver! (didn't even know this existed)
I want to apply some decals to my ship, do I have to apply the decals to the hull texture then re-texture the parts of the ship I want these to appear on or can I somehow apply these decals straight on top of the hull texture I have already applied to the ship?
Thanks again for all your help - apologies for my noob questions

Regards,
GO
-
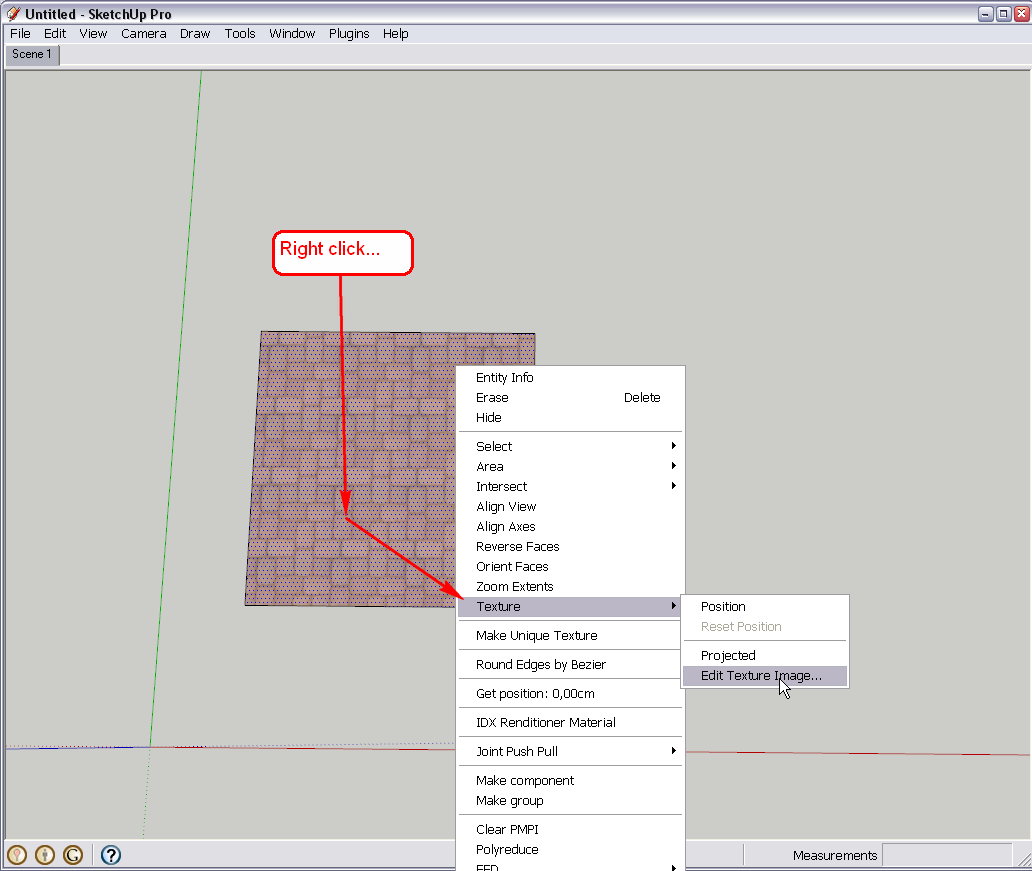
Once you applied (and hopefully carefully positioned) the textures onto the faces, make sure to set your favourite image editor to be the default editor with SU under Window > Preferences > Applications. Now you can work yourself through these steps:
- enter the component's editing context (double click to edit)
- right click on the face whose texture you want to modify and "Make unique texture"
- Now right click again > Texture > Edit texture image...
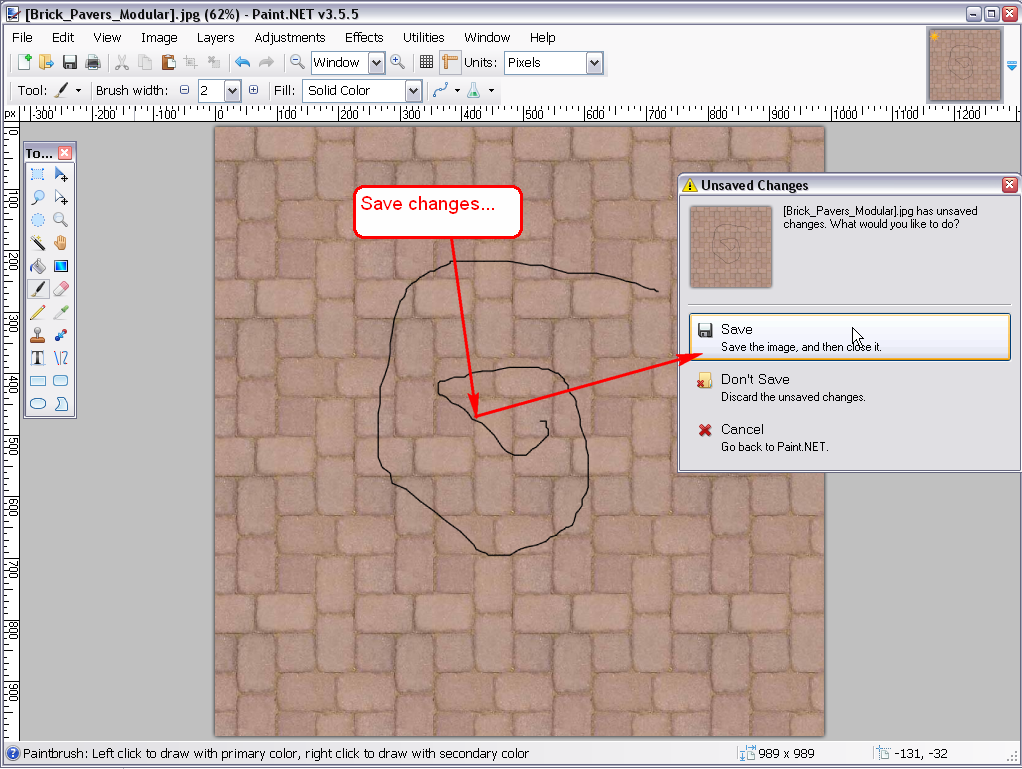
- This will open the newly created ("unique") texture in your image editor where you can appply not only decals but even some "dirt maps", worn patches, burnt edges near the fuselages whatnot (up to your level at image editing).
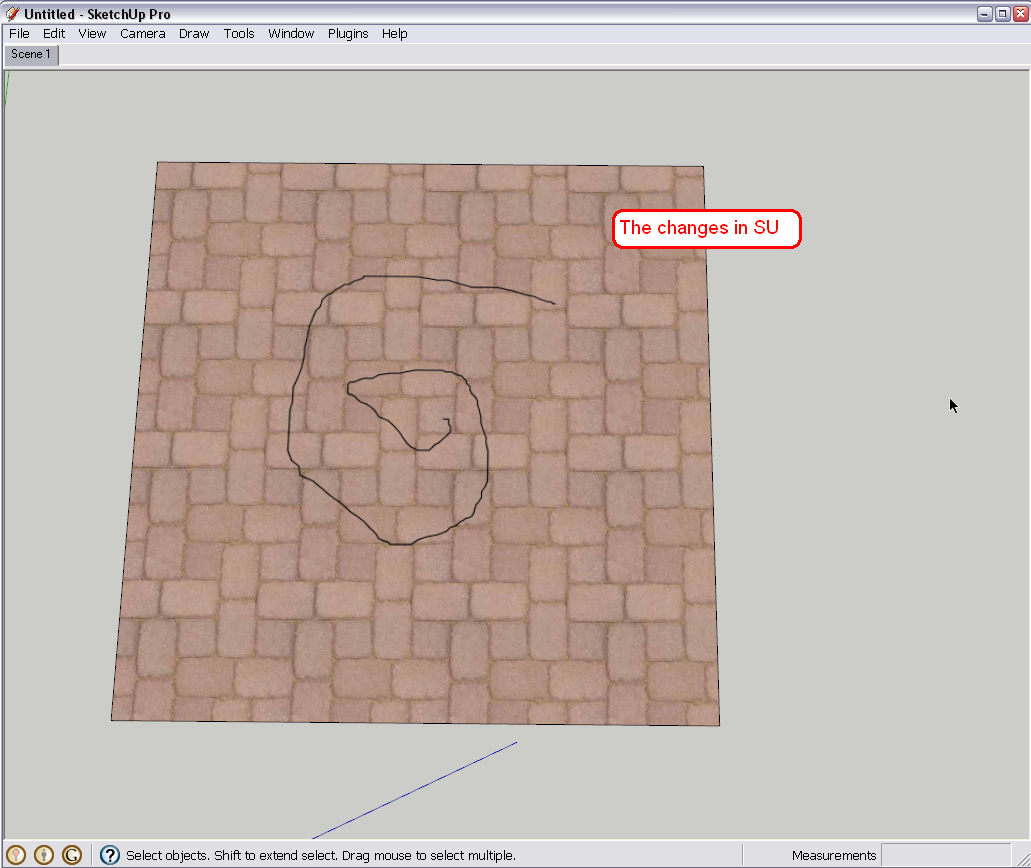
- When you save the image, it will instantly reload/update in SU.
Note that with mirrored components, this will also be mirrored so if there are text parts and such, they will be mirrored, too. You can overcome this by editing everything "together" in the two components until you get to this point and only then "break" the connection between the two halves by right clicking on one component and making it unique.
-
Hi Gaieus,
Just what I needed!
Slight problem though, I manage to get my unique texture into Photoshop, edit it and save it. When I go back to my model in SU the texture hasn't changed - what should I do?
Thanks for your continued help.
Regards,
GO
-
Did you go through the right click > edit texture image from SU? To make sure what texture you are editing, right click on the face it is applied to > texture > edit... from there. It HAS to reload the image in SU (if not, this is a bug or something).
Also, have you set PS to be your default editor in your SU preferences as I suggested above?
-
Hi again,
Yup, it was me - sorry

I've managed to get things working now and have had little play with one of the textures. I think I may be OK to carry on with this project for the time being (thanks to you guys!).
I'm sure I'll be on again soon with something else which isn't working for me but for now - thanks.
Here's a little render I done showing my handy work(!) up to now.
Regards,
GO.
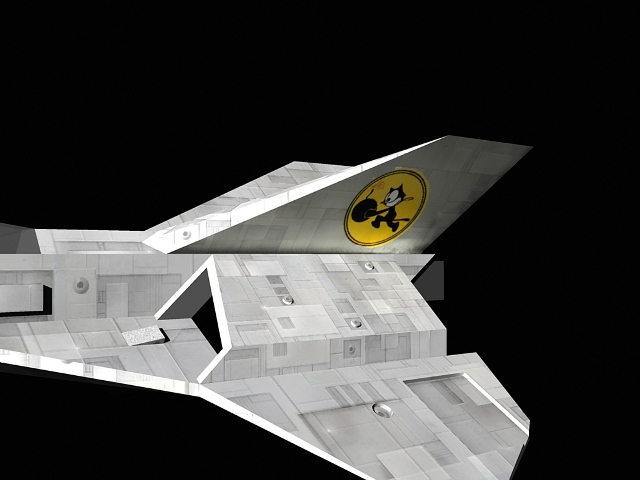
-
So far looking good!

What renderer do you use? -
Hi Gaieus,
Thanks for your comments.
Looking OK-ish but very angular at present (how would I get around this?)
I'm using Podium which seems to do the job but it has a habbit of crashing.
Do you have any tips on adding backgrounds to scenes?
Regards,
GO.
-
In SU, background images can be added as watermark under Window > Styles > In model > Edit. I don't know however how this would render in Podium (I doubt it would but who knows?). If a rendering plugin is capable of rendering background images, it is generally set in the plugin itself.
As for the angular look, you can experiment with Fredo's Round Corner plugin.
-
This would be something with rounded corners (hidden geometry on) and with a space background in SU:
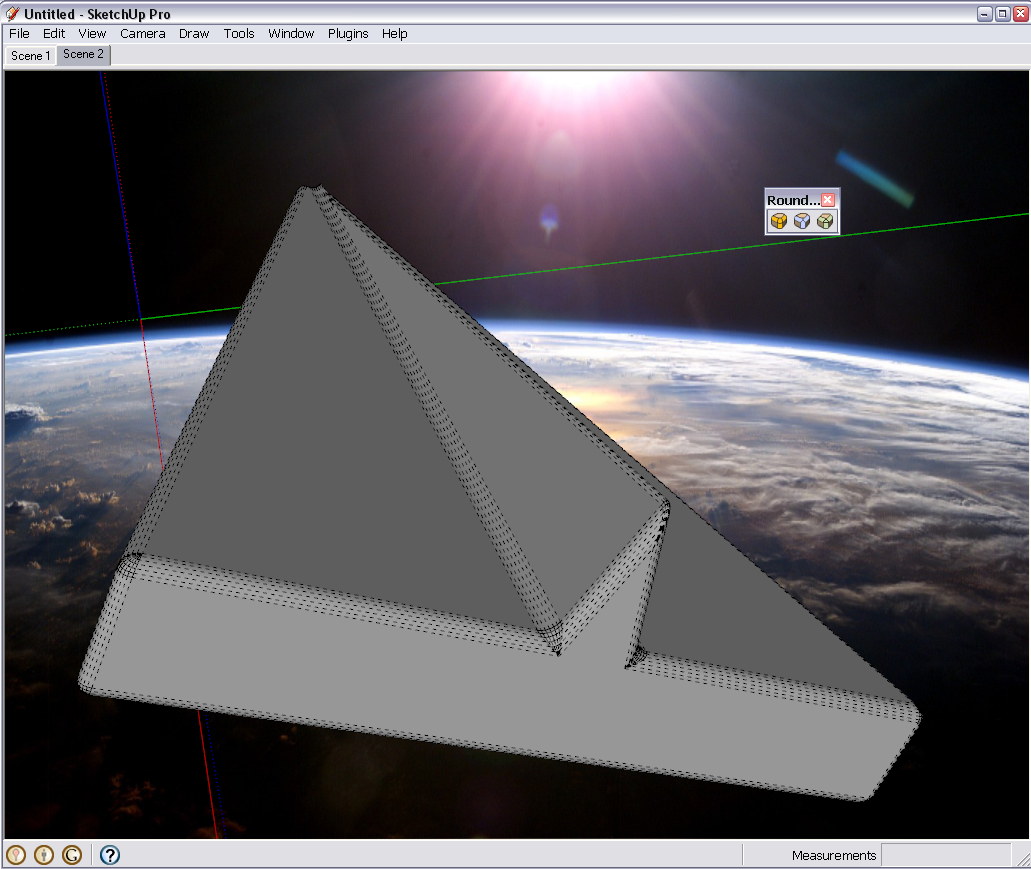
Of course, for a rendering program, the best is if it is a spherical background as in that case the light comes from the whole image and the stars or such give reflections on the surface of a space ship. -
Hi,
Unfortunately Podium doesn't display the water mark in rendering

Thanks for the tips and I'll give the round corner plugin a bash!
Regards,
GO.
-
Not necessarily SU watermark. Cannot Podium insert a background image itself?
If not, you can still put them together in Photoshop.
-
Or use Fastone Photo Reziser 3 (free) it is less price than toshop

-
Hi,
Just an update.
After messing about with Podium and adding textures to my ship here's what I have so far...
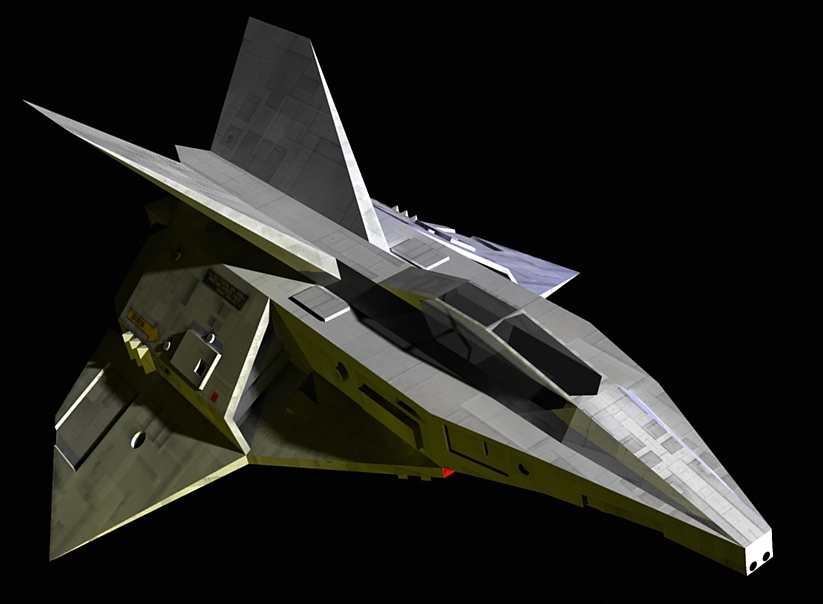
Any help, advice, offers or tips are greatly welcome.
I just want to try and animate it now
Thanks again for all your help.

Regards,
GO.
-
And with some background image...

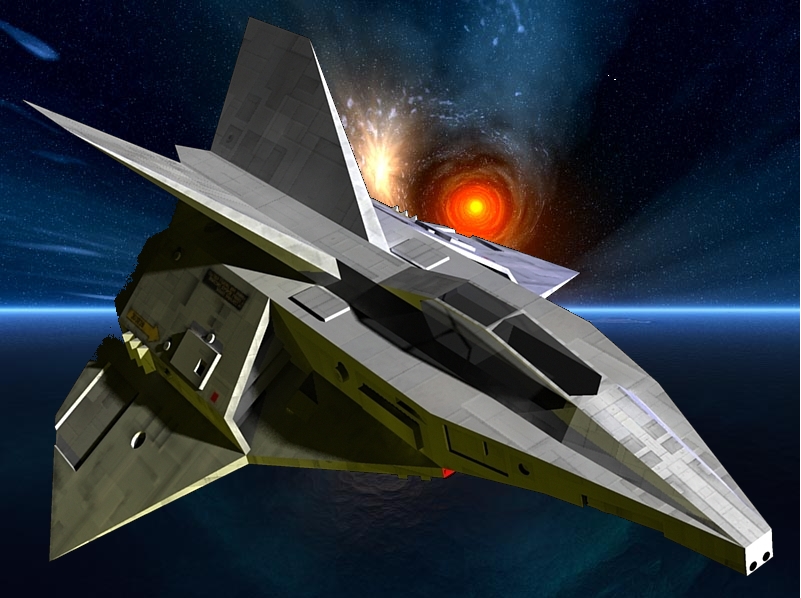
-
Hi Gaieus,
Good work!
All i need now are some enemy ships, some explosions and a sprinkling of asteroids.
Regards,
GO.
Advertisement


