Quick & Easy "Dennis Method" renderings [TUTORIAL]
-
Thank you everyone for stopping here to read about my little graphic trick.
My name is Dennis Nikolaev, I am a licensed architect, AIA member and a big fan of SketchUP.
Here is a quick and effective method of creating an artistic image from your SketchUP model. It was posted way back in 2005 on the original SU forum. The thread became so popular, it was active for over a year and a half and still could be found here
http://groups.google.com/group/pro-gallery/browse_frm/thread/ac10461fa662ede0/2181e36017e1604fq=dennis+method+review&lnk=ol& .
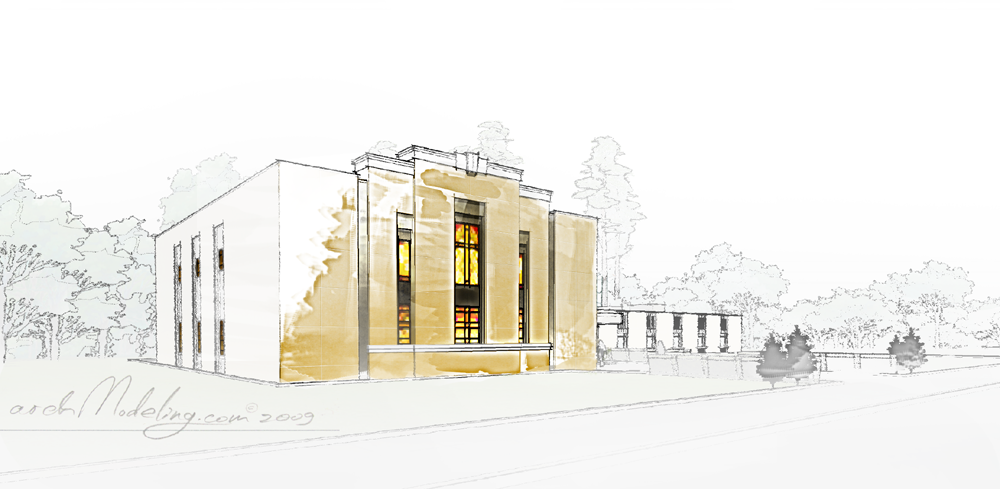
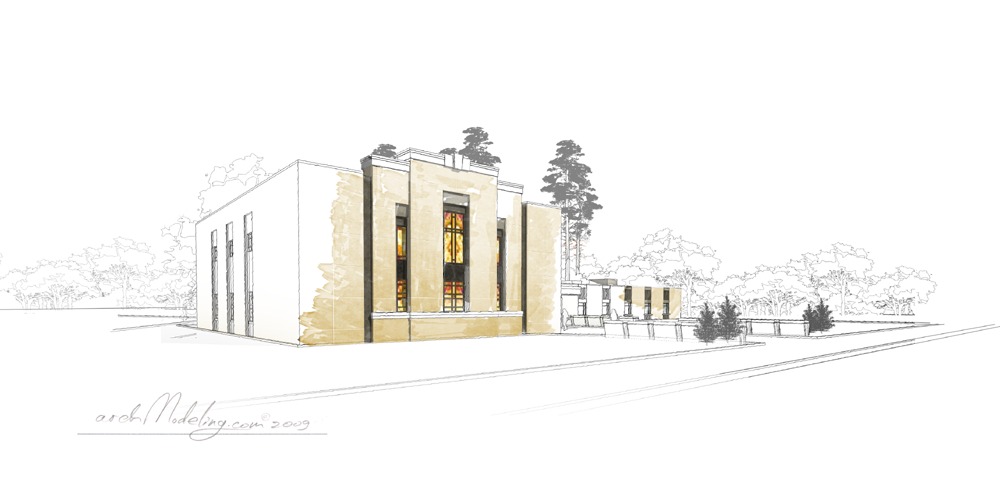
Here are a few examples:
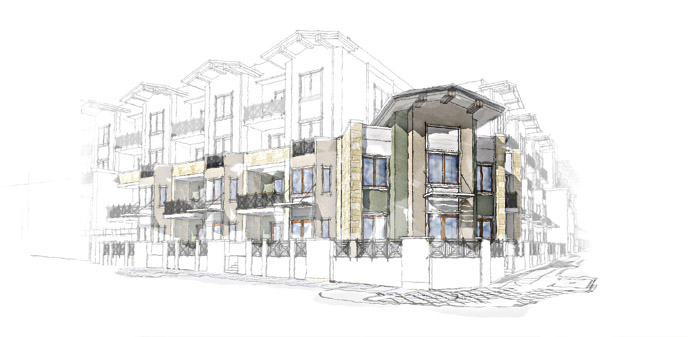
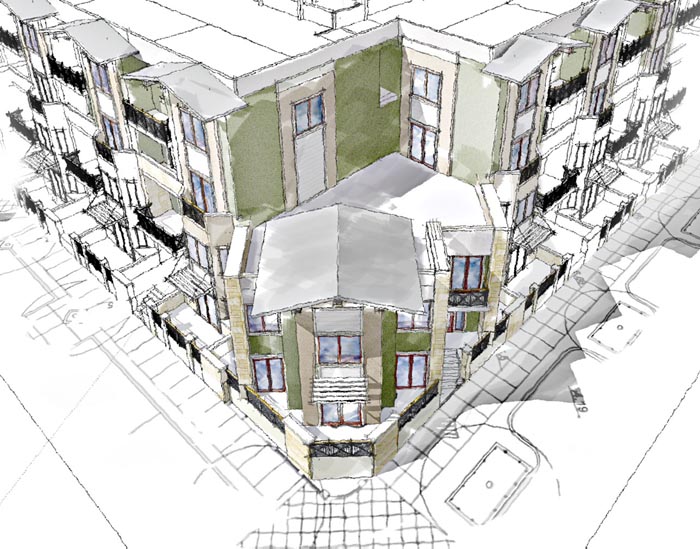
-
In short, you will export 2 images from your SketchUP Scene: a) Hidden Line Black & White image and b) textured one with shadows. Bring them together in Photoshop and then erase a hole in the Hidden Line layer with the colored textures showing through.
The whole procedure can take as little as 5 minutes. However, there is no limit to perfection as there is no limit to the time you may spend perfecting the image.
A few more examples to give you a better grasp of the final product:
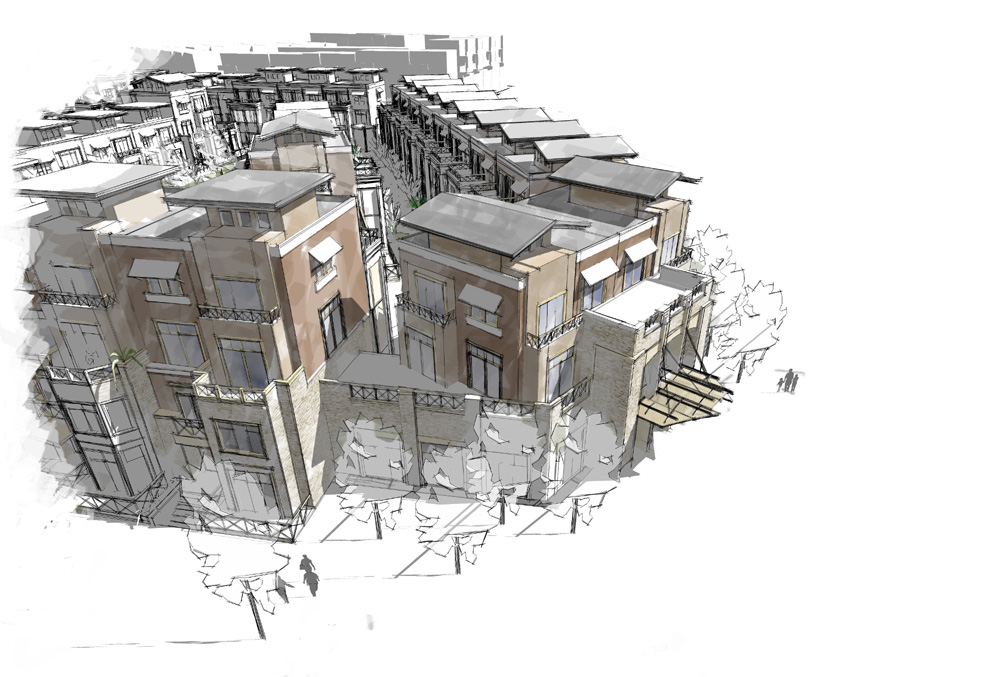
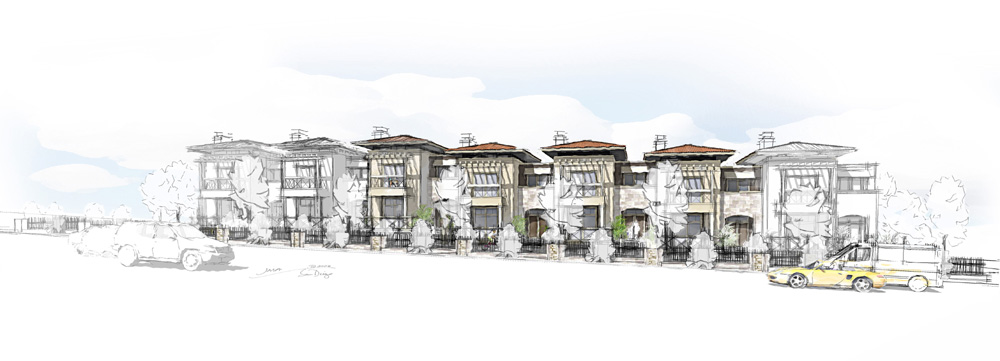
-
So, here are the step by step instructions for what became known as the “Dennis Method”
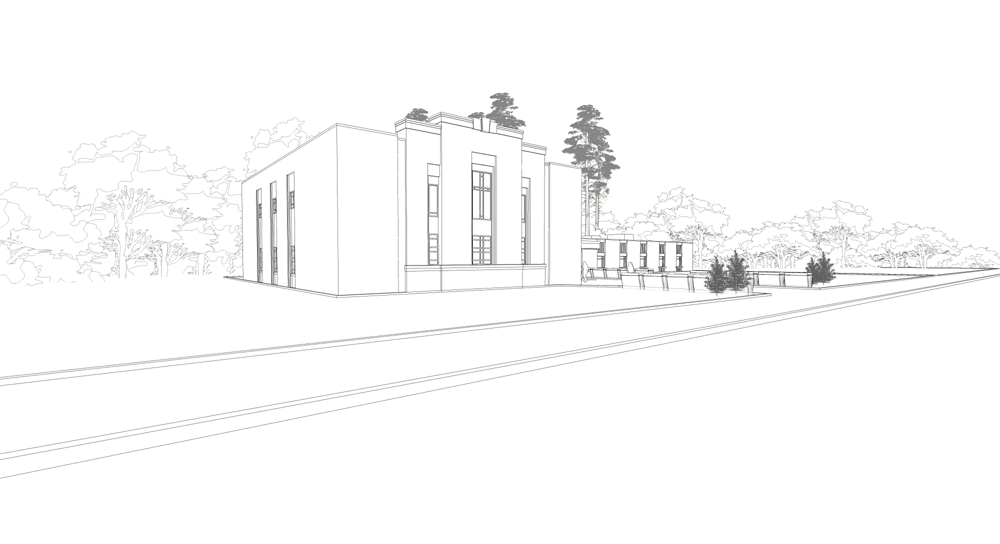
- We start by switching to the Hidden line mode and turning off your shadows. Make sure that your background is white.
- Line up a view that looks the best with these particular settings.
- Save the scene.
- Export the scene as .PNG file 4000 pixels wide. (.PNG files compress the SU graphics without loses).
-
- In the same scene, turn on your shadows and textures. Export an image with the same resolution.
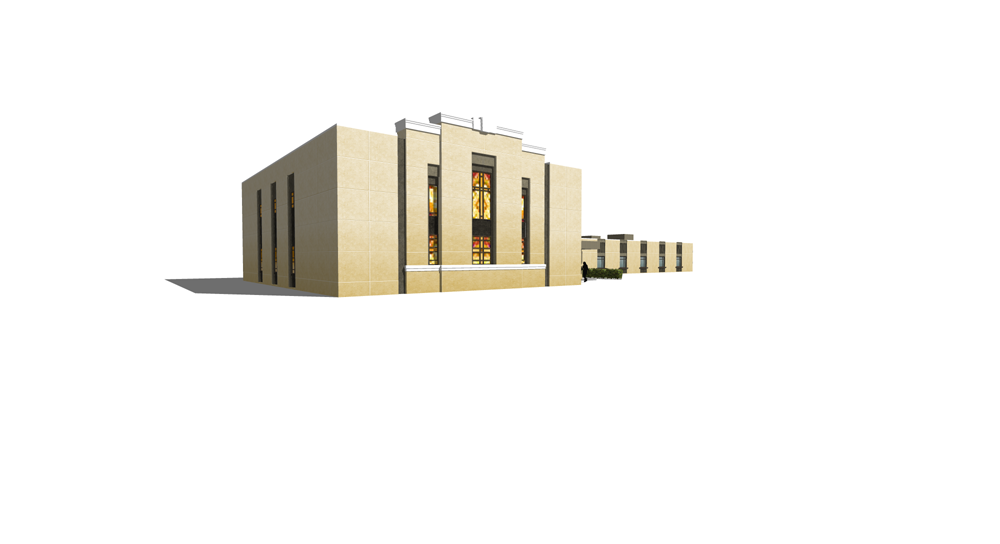
-
That is all you needed to do in SketchUP.
Now, open the images you created with PhotoShop.-
Adjust your Hidden Line image to show grey lines instead of black. This will help to make it look like a pencil.
-
Use Copy/ Paste to place the Hidden line image on top of the textured one.
-
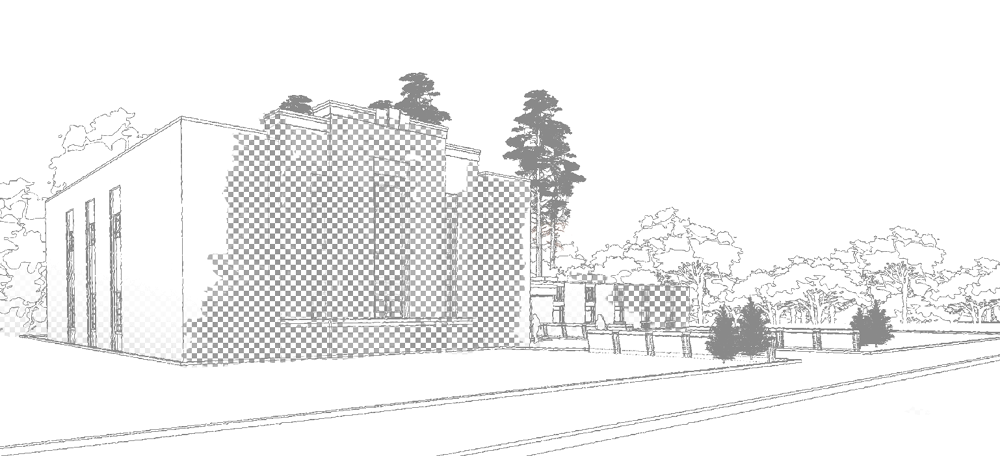
Pick up a large brush looking eraser and STOP!!!
-
Think. Think, what is the most expressive wall or part of your building? Only a part of this wall can show the color. Otherwise the image is not going to work. So THINK carefully what you want to see before you go on.
You will be erasing the Hidden Line layer two times with different opacity erasers. This helps to simulate colored strokes of a brush.
-
-
- Back on the screen you have the B&W Hidden Line layer completely covering your colored image. Set your eraser to 50% opacity and erase about 80% of the part of the building you intend to color. Make sure that you don’t erase any of the white layer over trees or entourage – it must remain white.
When erasing, pretend that you are painting the color fields onto your picture. This will help the image look more natural vs. artificial.
11. Turn your eraser to 75% opacity and go over the same area. This time cover only 70% of the part of the building that you are coloring.
12. Save the image, because you are done!
-
I hope this was helpful. Feel free to post your questions here and to visit my site http://www.archmodeling.com for more examples.
-
Hi Dennis and thanks for this tutorial!

I joined the SU community lot later than you first posted your method in the old forums so when I started SU, it was already called "The Dennis "Technique" (also telling this to currently new users if they ever come across the expression).
It is really great to see it "first hand" so thanks again!
-
Well hi Dennis, and a real thanks. I can't tell you how many times I have used the "Dennis Technique" over the years.
Thanks, glad to see you around. -
Dennis, the whole sketchup community, myself included, are greatly in your debt. Way back you effectively showed us how to achieve great NPR images very quickly. ..."never in the field of rendering have so many owed so much to Dennis"....
-
Hi Dennis, WOW; have wondered where you have been!!!!
I have used your technique many time in the past few years so please accept my gratitude for your expertise and generosity...
I hope you see you here a little more regularly....
-
Very good stuff thx for sharing

-
i've probably heard about the "Dennis technique" before knowing the "follow me" tool, it is to tell how it is part of the skp "tools set"
thanks & respect Dennis
-
Hm, interesting. I can't think of a good way to use the "follow me" tool with D.M.
-
Fletch, my bad. You are right. I meant to say "hole". I'll go back and fix it in the text. A part of my brain that is responsible for spelling is missing all together. English in not my mother tongue even thou I'm a US citizen. However, my native Russian is even worse.
-
Wow, I never expected that this little idea will have such a lasting effect.
So, I'm going to share one dirty trick:Add a watermark vignette right into your SU model!!!
In Photoshop erase a painterly "hole" on a white page and save it right in the .PSD format (SU) understands it. Add your signature to it and the stick it up as a watermark. Now you get an real time painterly effect even without doing any post processing. The down side is that this vignette doesn't "hug" your building. However, if you need 10 views rendered in 10 minutes, sometimes even this will do.Thank you for your warm comments.
Since the posted tutorial is "bare bones", I hope that people will post here their own tricks and samples on "D.M.".Dennis
-
Dennis, I, too, have used this method innumerable times, but don't think I will ever make them as lovely as you do!

@dennis_n said:
Add a watermark vignette right into your SU model!!!
In Photoshop Erase a painterly "whole" on a white page and save it right in the .PSD format (SU) understands it. Add your signature to it and the stick it up as a watermark.this is interesting... but by "whole" do you mean "hole"? ... sorry, but I was a bit confused by the tip... I know it's a gem, hope you can explain. pictures are worth a thousand words.
-
Cool stuff, Dennis. Can this be done in SketchUp, without PhotoShop?
-
of course - you just got to color a small part of your building and leave the rest to be white. that is it. It might take a bit longer to simulate "the painterly strokes" but I believe it is possible.
-
@dennis_n said:
of course - you just got to color a small part of your building and leave the rest to be white. that is it. It might take a bit longer to simulate "the painterly strokes" but I believe it is possible.
Although i dont use your method, i plan to! But i have an idea about doing the painterly strokes. Use bezier curves on a face, then using the push pull tool, move it onto the wall. Then select all and instersect selected. Delete useless geometry and you've got the exact pattern you created with bezier curves on your wall.
Hello! It looks like you're interested in this conversation, but you don't have an account yet.
Getting fed up of having to scroll through the same posts each visit? When you register for an account, you'll always come back to exactly where you were before, and choose to be notified of new replies (either via email, or push notification). You'll also be able to save bookmarks and upvote posts to show your appreciation to other community members.
With your input, this post could be even better 💗
Register Login


Advertisement