Help Me Draw A Dome [TUTORIAL]
-
V quick.
Looking at it makes me dizzy!
-
On the topic of Volume...
There are two volume tools - v1.8 is a slow but reliable method, using 'integration' of slices - this has 'accuracy' settings; and v2 which uses a whizzy topographical method that's quick but requires a 'perfect' set of 'manifold' faces enclosing the volumes...
You are trying the 'sensitive' one !
Your shapes must have internal 'partitions' which it won't like...
Make a copy of what you need to get the volume from, off to one side.
Explode the parts and re-group them into one thing, to get its volume...
Try using Xray mode, section-cuts etc to find, access and remove internal 'partitions'.
Also ensure there are no 'holes in the faces as the volume will 'leak out' [just like water would] and fail...
If you can publish your skp I'll look at it... -
I need the SKP not a PDF ?

-
@d0me said:
Hi Gaieus
Ok lets break my request down.
Can we firstly slice my entrance in equal halves where the seams of the 2 dome slice and entrance meet?
Then, if we look at the dome from the front view, I need the 1 slice of the entrance and the 1 back slice of the behind that same entrance printed with their hidden geometry on.
I have attached a Jpeg of the 2 slices I require including the entrance. Once the entrance is split, it will make a little more sense.Sorry dome I still do not get it. Are you talking about section cuts? Why don't you place one (just roughly) and orient your model in a view I can understand and can do the printout?
-
Hi Gaieus
Ok lets break my request down.
Can we firstly slice my entrance in equal halves where the seams of the 2 dome slice and entrance meet?
Then, if we look at the dome from the front view, I need the 1 slice of the entrance and 1 back slice of behind that same entrance printed with their hidden geometry on.
I have attached a Jpeg of the 2 slices I require including the entrance. Once the entrance is split, it will make a little more sense.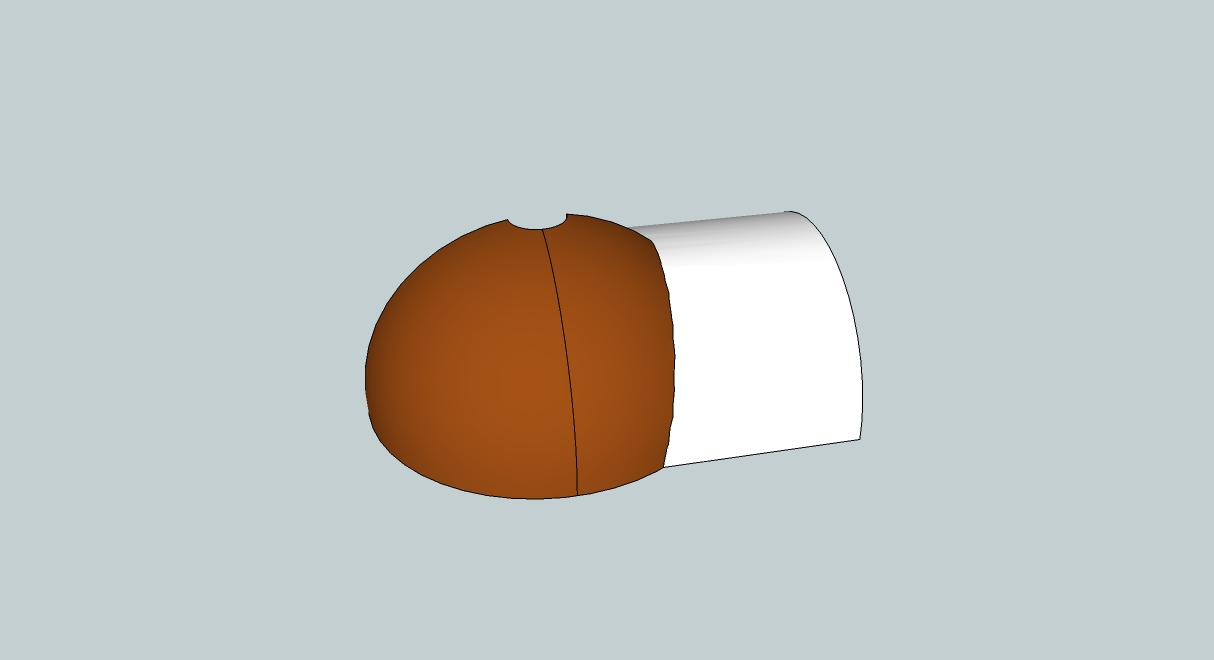
TIG, I have attached my latest version of the model which Gaieus has helped me build.
Thanks guys
Regards
D0me
-
Hi Guys
TIG: Sorry about that. I got so many files for this model that i get confused.
SKP is now attached.Gaieus: It's not the Section Cut, its the dome model itself. I have printed what I require to PDF. Currently its on a 1:5 scale. I require it to be on a 1:1 scale.
Thanks
Regards
D0me
-
And in this perspective format or orthogonal? (Perspective cannot be printed to scale). Also, no grey dome then? (Above you said brown and grey). And in colour or B&W?
-
Hi Gaieus
Orthogonal is fine. The Grey dome will need to be printed on a separate page. Black and White is perfect.
Edit: Sorry Gaieus, can I ask for 1 more favor? Can you give me 3 views of each of the domes. I need the Right , Back and Top view if possible.
Thanks
Regards
D0me -
Here's a SKP with the Volumes done by Integration.
I separated the colored parts. I thought you might want them like that ?
There's also a total...
I had to combine the pieces and then remove some internal partitions etc...![Dome V2 Final redone [Volume].png](/uploads/imported_attachments/EvRP_DomeV2FinalredoneVolume.png) Dome V2 Final redone [Volume].skp
Dome V2 Final redone [Volume].skp -
So TIG it seems you made Stinkie's head gear as well ...

-
Okay, here is one of the Brown dome on 3 pages. It actually fit on an A1 paper but the bigger ones will not fit for sure. Shall I rather export this on an A3 instead?
-
Hi Gaieus
Thanks for printing me the Requested views. Sorry, forgot to tell to turn off the Grids. Please can you reprint it and you mentioned that you can print it to A3. That should be fine as long as it fits 1:1 scale on this page size.
I'm sorry to trouble you again but I need some other prints as well as some adjustments to the model if possible.
Print outs are as follows.
-
As mentioned above, the brown dome you just printed but with the Grids Turned off.
-
The Grey dome to be printed the same as the brown dome.
-
The entrance of the dome (front view) in the same manner that the domes in (1) and (2) have been printed. Difference here is there is only one view unlike the domes which have 3 views.
-
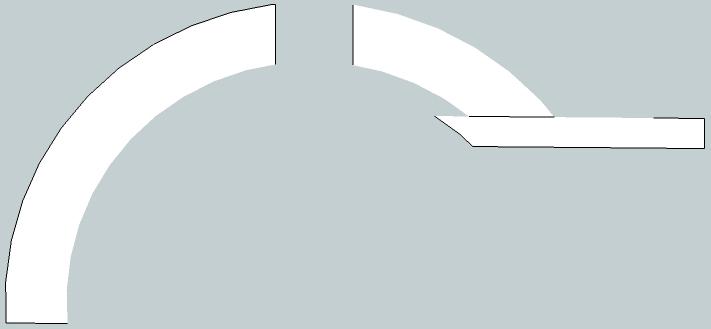
Lastly, this next request refers to the section cut. Is it possible to print out on separate pages, each dome separately on a 1:1 scale. I have attached an image of what I mean.
Below is the Brown Dome Only
Below is the gray Dome only.
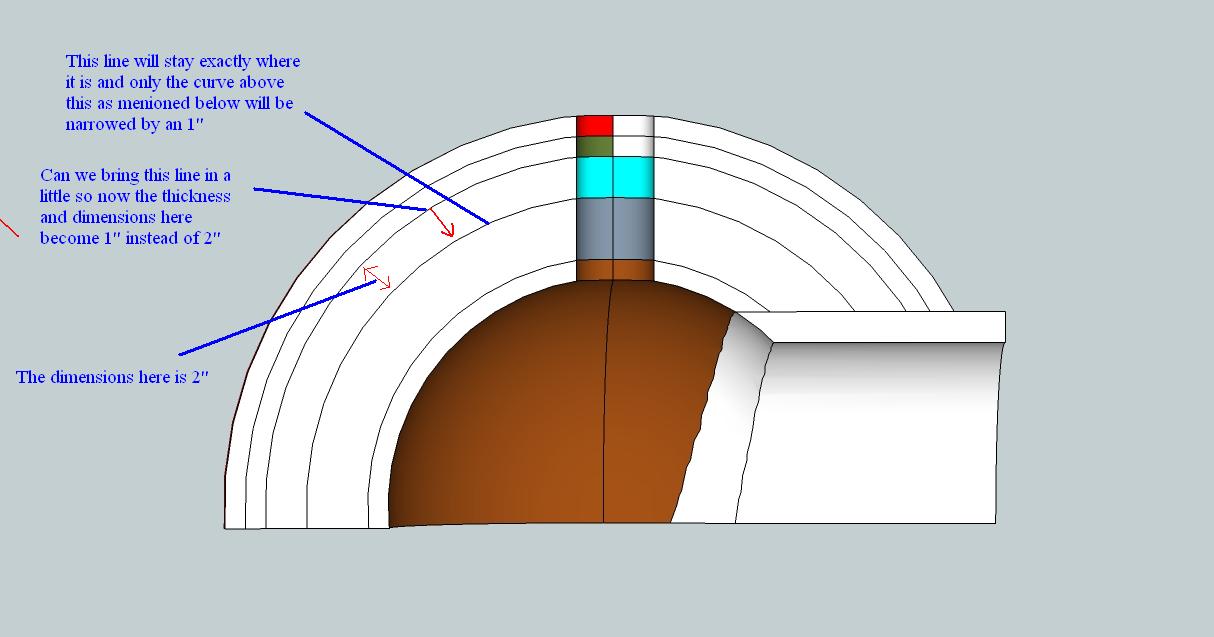
With regards to the adjustments, if its too complicated and may affect the dimensions by large amounts, then we can skip it and I will work around it.
I have attached an image of what adjustments I would like to make.
Thanks
Regards
D0me -
-
No, sorry, I really meant A0 no A3. That's a typo. So this smallest dome can fit on an A1 but the rest won't. So the question is - shall I print this one on an A1 and the others on A0'a or should all be the same (A0) instead?
-
Hi Gaieus
All can be on A0.
Thanks
Regards
D0me -
OK, I will do then.

-
Hi Gaieus
How are you?
Just thought I'd pop in and see how those print outs are coming along.
Thanks
Regards
D0me -
Hi d0ome,
Sorry but indeed I totally abandoned you.

I promise I will do those exports but I had a whole sh***tload of things to deal with during the week-end (and still have things to do).
-
@gaieus said:
Hi d0ome,
Sorry but indeed I totally abandoned you.
I promise I will do those exports but I had a whole sh***tload of things to deal with during the week-end (and still have things to do).
No Problem Gaieus.
Whenever you have the time.I just realized a huge error of mine. The 48mm radius pipe in the centre of my dome was supposed to be 24mm radius. I should have paid more attention to math class because I just confused radius and diameter.
I tried all morning to resolve it but couldn't entirely. I managed to fill the 48mm bunghole but now I need to fuse it back with my dome pieces and then intersect my 24mm pipe.
The other solution is, as my usual self. I can redo the domes, intersect with 24mm pipe and then copy the entrance from my current model though I don't really know how to put this into practice on SU. Personally, the entrace is most time consuming, so redoing the dome will be easiest.
Well these are the only 2 solutions I can think of but I guess you have something in mind that's less complicated and time consuming.
Look forward to hearing from you
Thanks
Regards
D0me -

Good I didn't start exporting!Well, if that top is missing, it would be more to fiddle around filling it (and then reopening a smaller) than redoing it IMO. That entrance is not that hard - last time you skipped it anyway so now you can make it.
-
Hi Gaieus
I have started redoing my model with the correct pipe size.
I have already completed my domes. Now starting to slice up my melon and then proceed from there.Yep, I did skip the entrance the last time so this is my chance to it properly.
Thanks and will keep you informed
Regards
D0me
Hello! It looks like you're interested in this conversation, but you don't have an account yet.
Getting fed up of having to scroll through the same posts each visit? When you register for an account, you'll always come back to exactly where you were before, and choose to be notified of new replies (either via email, or push notification). You'll also be able to save bookmarks and upvote posts to show your appreciation to other community members.
With your input, this post could be even better 💗
Register Login


Advertisement