Google Earth 3-D Layer Rejection
-
Hi everyone,
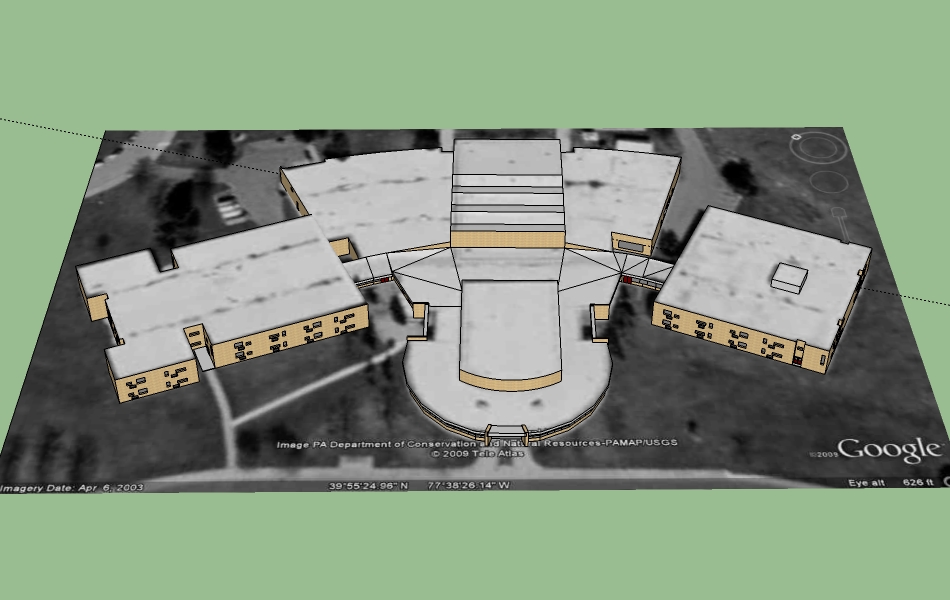
I teach 6 & 7 grade gifted students, and I want to use SketchUp with them. I decided to teach myself the program first by modeling our school before trying to teach them. My students encouraged me to submit the model for inclusion in the 3D layer of Google Earth. It was rejected due to 'incomplete texturing' and 'model incomplete' It is in the 3D Warehouse here:
http://sketchup.google.com/3dwarehouse/details?mid=6a7e347eac0a51f2e2c1e195aff8988eDoes anyone have any advice for me?
Thanks in advance!
Jason
-
Hi Jason,
In the Warehose I can only see the kmz/collada file for download (you must have uploaded it in the web browser, not from SketchUp) so I cannot really tell (examine deeper) what the problem may be. However even by the very basic/first look, it seems that you have a bunch of faces (the roofs for instance) that you haven't textured.
Google's expectations are NOT to leave any untextured faces and the roofs should (preferably) be textured with the same image you can import from GE - so that when seen directly from above, the 3D buildings simply "blend" into the GE imagery nicely.
Could you share the skp file as well so that we can have a better look?
I'll move your topic to the SketchUp Discussions > Google Earth subforum if you don't mind...
-
Check out this very insightful post about modelling for Google Earth: http://forums.sketchucation.com/viewtopic.php?f=271&t=18180
-
Thanks for your input!
I've attached the SketchUp file and the image from Google Earth (the image got deleted from the SketchUp file at some point). I tried to use photo match to add some photo textures to the model, but I was unsuccessful. I don't think my poor laptop could handle the operation -- it really worked hard!
I appreciate any advice you may have.
Thanks again,
Jason


-
Well, the model itslef definitely has textured applied everywhere outside. You can check it by first making a big group of all the geometry and then applying some crazy colour to the group. If any visible face receives this colour, it has not been textured.
Now here the problem (and the explanation for the reason they gave) is probably that you didn't texture the model with real world photos (that could on one hand "replace" some of the details you made by modelling but also give the model a kind of "realistic" look more than it has now).
Since the building seems to be fairly simple for taking photos of, I'd really suggest going in that direction however accurate the model is at this time of its state.
-
Thanks for your help. I doubt I'll go through the trouble of taking all of the pics required to do the photo texturing. I would require a good many, and my computer is too much of an antique! Maybe I have my students do the work on one our desktops!
 I also might try to photo match the roof and then resubmit.
Thanks again!
Jason
-
In fact, involving the students into such a project is the best idea (not only because you don't want to be bothered with it
 ) But seriously, the kids could be easily motivated and awarded by a common effort and result if they finish it.
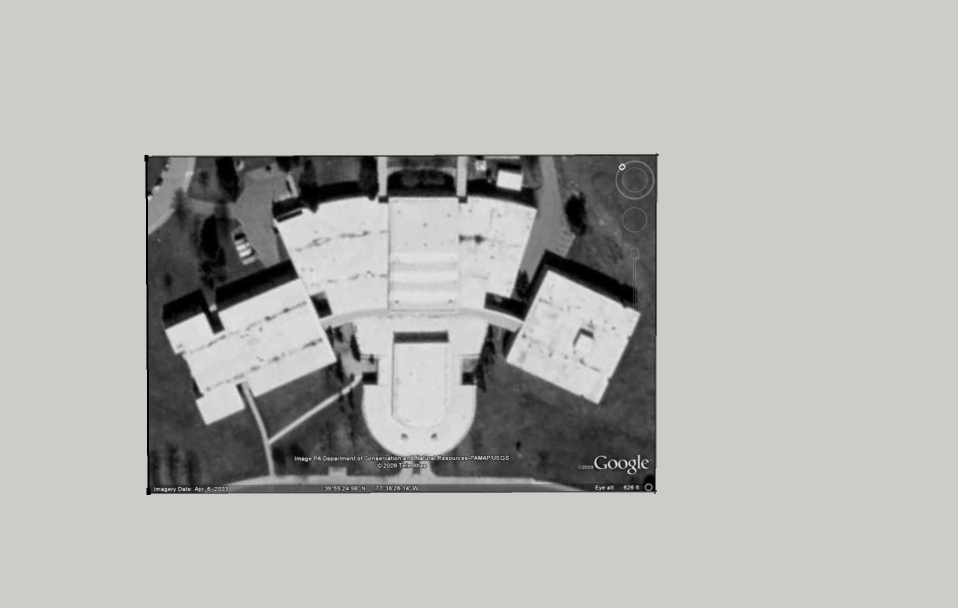
As for the roof texture, it's fairly easy however. If you import the GE snapshot into SU, there is a B&W image projected on the snapshot and the terrain that are created in SU.
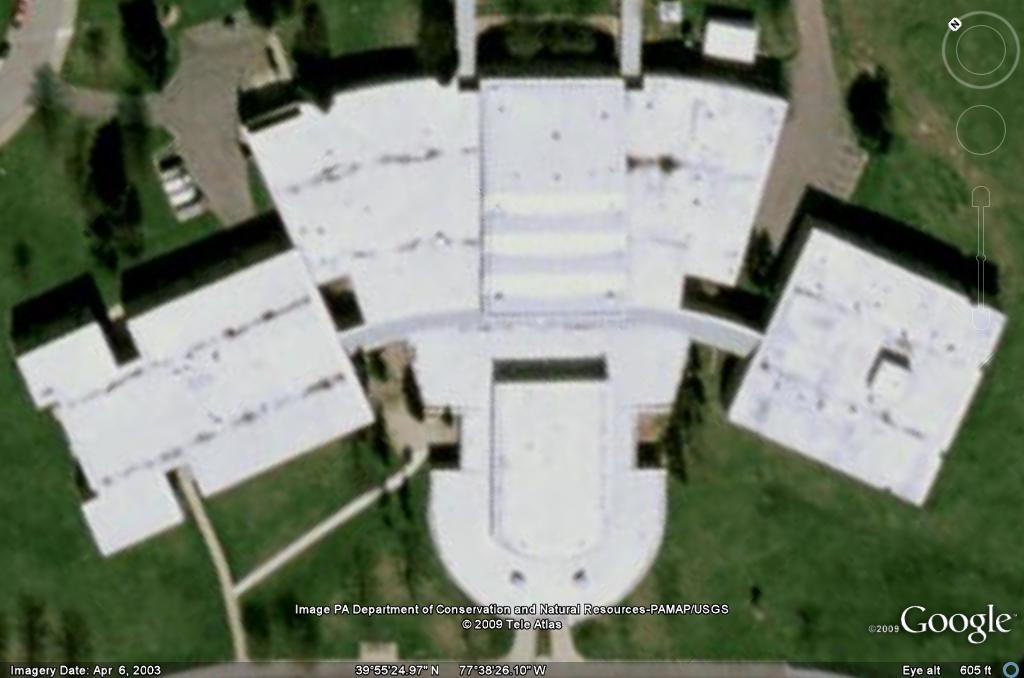
Now before you do anything (especially moving/navigating away in GE), export a colour image from there and save it somewhere. This image will be the colour identical of what's been imported into SU.
Now in SU,
- open your material browser, navigate to "In model" (the small house icon)
- click on the imported (B&W) image and go to the Edit tab
- there, next to the image file name you can see a small folder icon > click on it and navigate to the saved, colour image
- now right click the snapshot > unlock
- then double click to edit the group right click the face
- go to > Texture and select "projected"
- now with the Alt+Paint bucket tool sample this image
- and paint the roof of your building with it. It will nicely apply the roof texture from GE and where it is exactly needed no matter how angled that roof is or anything.
Of course, this is only a good method if that GE imagery is at least somewhat usable as far as quality goes.
Here's my house whose roof is now textured this way. Note that the GE imagery s far not the best (so if I really modelled it, I wouldn't have used this technique but Google loves it).
Also, since the southern side of the house has terraces, the whole thing looks ridiculous now but the concept is the same. I saved it in parallel projection (not perspective) and in exact top view so that you can see how it looks in SU. Open the layers dialog and turn Layer 1 on and off (that contains the model itself).Try to export it into GE to see if it looks "realistically" from above (obviously not from the sides as it's not textured just quickly "shovelled together")
-
-
Little did I know I had saved a color copy of the GE snapshot. I'm trying to follow your instructions to apply it to the roof, but I'm stuck on step #5&6. What am I right-clicking on? I don't see a texture > projected...
-
I can totally see what you mean by Google liking when SU users use GE images to texture roofs. When I opened your house file I couldn't even tell that the building was there until I orbited away from the birds eye view -- it blends in that well!
-
I'm impressed by the amount of your city that has 3D buildings (I can see you had at least a part in that!). Sounds like a nice place to visit ("2010 culture capital of Europe"). I'll be in Romania next month for a English/Adventure Learning (missions) trip, but I guess that's not quite close enough!

Jason
-
-
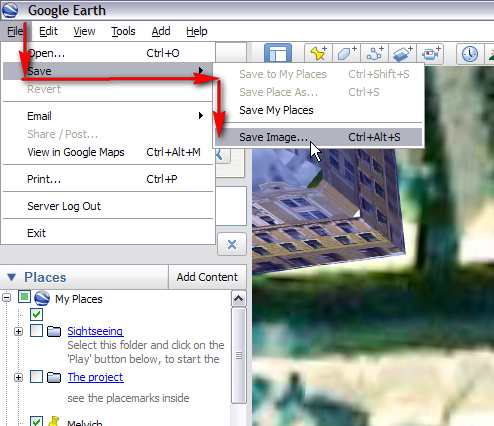
Now I wasn't clear I think. First of all (even before my numbered list), you should save a colour copy in GE. Go to file > Save > Save image...

Only if you did this, will you have a coloured version on your HD. This is why you need to replace the B&W version with this in step 3.Make sure however NOT to move/navigate away in GE so as to grab exactly the same image you exported to SU (just colour). Also turn off any GE layers (like roads, any placemarks etc.) so that you'll have a "clean" image to export. Though there are rarely roads on top of buildings...
 (but in case you need to "edit" the terrain, this is already a valid suggestion)
As for steps 5 & 6, the GE snapshot in SU is locked, This is marked with a red bounding box when you select it (and means that you cannot edit it either). Now when you've unlocked it, you will end up with a grouped face. You need to edit this group (double click) so that you can access the face inside and the image applied to this face. Only now you should right click to access the "Texture" context menu where you can turn the image into projected.
-
Hey Jason
The stuff you have been told to do to 'fix' your model is right on the money. Google likes to accept models that look like the models they build for the 3D layer. They do this of course so that everything looks about the same. A SketchUp texture stands out like a sore thumb compared to a nice photo texture.They did, however, make it so that you can tell the judges that they are wrong. I haven't done this myself so I have no idea how it works or even if it does work. But give it a try if you wish.
http://sketchupdate.blogspot.com/2009/05/launched-tell-us-why-were-wrong.html#links -
@denbost said:
Hey Jason
The stuff you have been told to do to 'fix' your model is right on the money. Google likes to accept models that look like the models they build for the 3D layer. They do this of course so that everything looks about the same. A SketchUp texture stands out like a sore thumb compared to a nice photo texture.They did, however, make it so that you can tell the judges that they are wrong. I haven't done this myself so I have no idea how it works or even if it does work. But give it a try if you wish.
http://sketchupdate.blogspot.com/2009/05/launched-tell-us-why-were-wrong.html#linksI had considered using photo textures for my model, but as you can see above my school is a large building with lots of faces. I estimate that it will take about 36 pictures or so to get the job done. I might have to get my students involved in that part of the project!

I also considered telling the judges that they are wrong but figured that they know what they are talking about!
 Do you think it matters that my model has no bottom? Since Google said my model was incomplete I was wondering if that is what they were looking at...
Jason
-
They actually like if a model has no bottom. The less faces the better (although that one face shouldn't count and I like to keep it in case some adjustments like PushPulling needs to be done).
-
@gaieus said:
As for steps 5 & 6, the GE snapshot in SU is locked, This is marked with a red bounding box when you select it (and means that you cannot edit it either). Now when you've unlocked it, you will end up with a grouped face. You need to edit this group (double click) so that you can access the face inside and the image applied to this face. Only now you should right click to access the "Texture" context menu where you can turn the image into projected.
I must be doing something wrong.
I have the colored GE snapshot (or at least close to it). I used it to replace the B&W background, but after unlocking and double-clicking on it, I don't seem to have a 'texture' menu when I right-click.
My file is attached, should you have a chance to look at it...
Thanks again for all of your help!
Jason
As a total side note, I can't upload directly to the 3D Warehouse or access the Warehouse from within SU. I'm thinking it is because of my school's proxy server configuration. They filter out inappropriate content and block email, Facebook, and the like, probably blocking the ports I need in the process!
-
@jkibbe said:
I have the colored GE snapshot (or at least close to it). I used it to replace the B&W background, but after unlocking and double-clicking on it, I don't seem to have a 'texture' menu when I right-click.
The reason is that you are right clicking on the GE Terrain, not the GE snapshot. The nature of the two is different;
- while the "snapshot" is a single, flat face and allows you to access the texture item in the context menu,
- the "terrain" is a triangulated, softened "mesh" and as such (a "curved surface") it won't allow you to access the texture menu (nor do groups or components when clicked on them "from outsie" - before double clicking to edit)
Problem is that you seem to have deleted the snapshot somehow and only have the terrain in your model now (this may result in not too accurate texture positioning). Yet you can do the projection but by "inserting" and extra step:
- double click to edit (like before)
- go to Virew menu > Hidden geometry; this will unhide all the hidden/softened edges on your triangulated mesh.
- NOW you can right click on any of the facets and access the texture menu item
- check the "Projected" as described above
- sample the material on that tiny facet (Alt+Paint bucket)
- turn off hidden geometry and apply the material (now "projected") on the whole surface.
- Exit the group and start painting your roof.
@jkibbe said:
As a total side note, I can't upload directly to the 3D Warehouse or access the Warehouse from within SU. I'm thinking it is because of my school's proxy server configuration. They filter out inappropriate content and block email, Facebook, and the like, probably blocking the ports I need in the process!
It's almost certainly the case. Before starting to use SU seriously with your students, these things should be solved and your network admin add the 3D warehouse to the allowed sites and fix the connection anyway.
I'd even suggest adding (the often also "blocked") YouTube to the white list as many of the video tutorials are hosted there even by Google. 7th graders should be considered "adults" enough to be able to make the difference what they are watching in class.I could also suggest you to use proxy servers to access these sites but I doubt your school would be happy with a teacher hacking the system.

Mind you though that the students are most probably aware of these "tricks" so such a censorship only makes your job harder but won't block them to see Facebook for instance.
-
Okay, I finally got it to work. On one file it projected some of the roof in the wrong place (not sure why). I reverted back to an earlier version, and I love how it loves with the photo textured! I think I'll resubmit for 3D layer approval.
Thanks again for your help!
Jason

-
Glad it works now. Mind you however that the walls should also be photo-textured (at least that the "expectation"). Nevertheless if it gets acceptred this way, you can always edit and improve the model and submit it for revision.
-
Yeah, the walls are going to have to wait for now. The school year is almost over, and I have a busy summer! Maybe in the fall... Photo matching the walls looks a little more involved than just projecting the image onto the roof, too.
I tried resubmitting to the GE 3D layer, but I'm not sure if it worked. Supposedly if I have the Google Earth Ready checkbox checked they'll reconsider, but on the main page for the model the status still says that it was "not accepted at this time." Maybe the status will change eventually to 'under consideration'!
Thanks for all of your help!

Jason
-
For the correct records, I have to mention that I learnt this image reload trick (as far as I remember) from our "Frenchy" Pilou here, on this board. Until then I kept suffering with importing the colour image and trying to meticulously scale and position it which is obviously never as precise as this (fairly simple but brilliant idea of the) reloading method.
(If it wasn't Pilou but someone else, forgive my short memory)

-
For those that are visual learners, this video shows a similar technique. At least to get one started...!

-
Thanks again for your help! I used the GE satellite image for the roof of my building, resubmitted for 3-D layer inclusion, and was accepted. Strangely, the roof in GE does not look like the model I submitted...
Thanks again!

Jason
View building in GE with 3D layer active
Advertisement


