How to make this into a log cabin
-
Yes, you could call it that. At this moment we are doing the operations in another storageplace but this one would be great. Especially because we have the timbers and it is just lying there. People are already calling me 'fred the cabin' because i have been working on it for so long (try imagine what it would take to count all the logs which of course are lying on top of each other and determining all of them.
I've been working for this foundation for about 2 years now, my wife contacted someone, went to Bosnia once and was addicted. I joined the next trip and same story. We love it.
She is helping with all the medical stuff and cuddling dogs, i am helping in the team which is building stuff. -
Fred,
I had a try at you cabin puzzle, I don't think it is quite right..........yet!

& I have a few parts left over
Charlie
-
Wow!
That really is a nice solution!
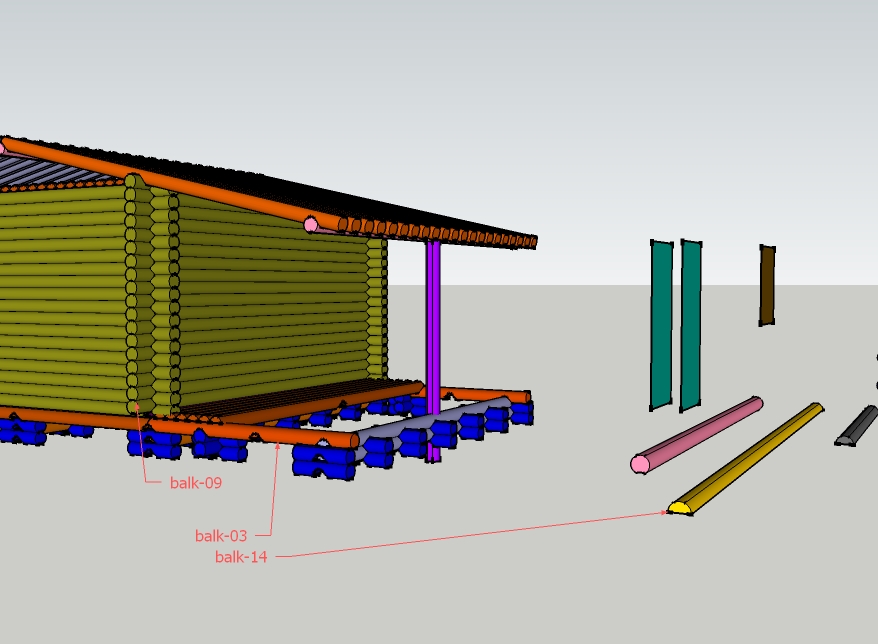
Actually i thought the roof was not available so i always calculated all the wood for the floor and walls but this would also be a possibility! And you don't even have so many parts left.Now I see (i'm sorry) that i forgot to mention some things that may help you some more:
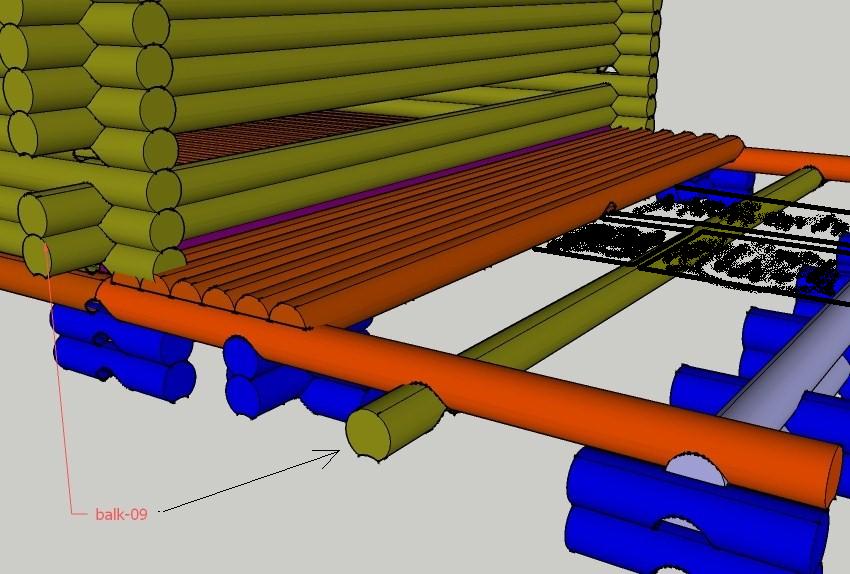
- the strange 'half' parts like 'balk-14', they would be used first (we think). So they would lie on the ground and than balk-03 would go on top of that. In that case you would get some holes which could be filled with balk-09.
- we think that the floor will not be made with all the wood, (it wouldn't be nice to walk on it). It could be that the floor was created with the timbers at say every 70 centimeters (every hole you get from balk-03 on top of balk-14) and then you would have to get some board (not available now) to hammer on top of these timbers. (see second picture with the example in black).
(in that way you also would have a lot of parts extra that you could use somewhere else?) - the 'snij-balk' are not really there, i only used these to make my drawing (to cut the holes in the timer) ('snij' is Dutch for 'cut').
- the green parts ('deur') is a simplification of the doors we have (correct size used) and the ('raam') is the shape of the window
- the blue ones, i don't know where they really belong, but we believe that every hole has a purpose, so they could be used if (for example) the front wall of the cabin was not there. Then the side walls would have a lot of holes where the blue ones could be used. (the wall would become more rigid?
Anyhow, i am already very happy with this first attempt, it triggers me of thinking a little different, for instance the way you created the roof and i hope that 'attempt-1' implies an attempt-2 also?

(btw, i inserted 2 pictures, in the second one i just moved 1 timber (balk-09) to the place where we thought it should go (but then again, all our thought were wrong up til now

I really appreciate your help!
-
Hi Fred
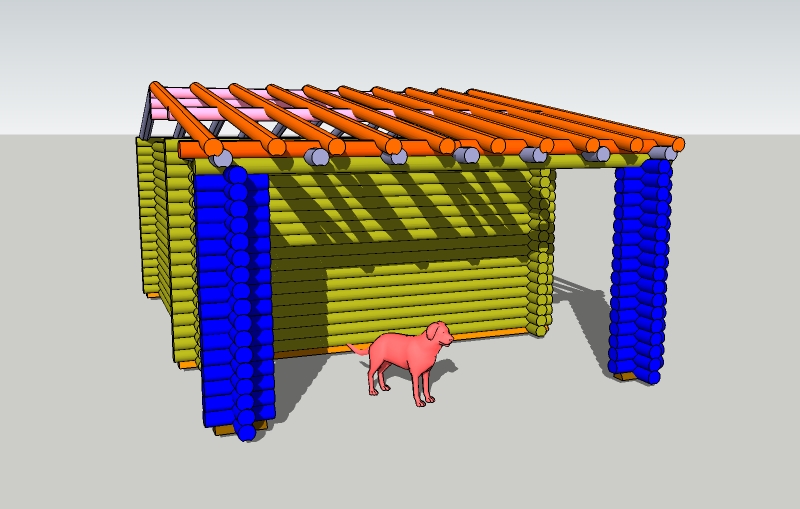
I took the model and tried to make a cabin from the components. I avoided trying to use every component and focused instead on fashioning a reasonably easy cabin to build. First thing I decided was to forget about a wood floor structure. Solid wood cabins like this are fairly heavy and it seems to me a concrete foundation & slab is more appropriate than any wood system you could build from the components. Building up from a appropriate frostwall can be quite straightforward. You'll notice the way I did the porch columns. I believe it is likely that is the way the original fabricator intended. For the roof structure I think you should avoid putting too much timber overhead. Use the pieces as rafters and plan on buying some boards to sheath them over. You would of course need to support the ridge 'beam' and the purlin. That could be done with infill framing at the gable ends - then sheath over that framing. I'd suggest for your doorway(s) and your window that you'd frame up the walls and then cut out the openings with a good chainsaw. Make the openings wide enough to allow subframes to be added. Use those subframes to stabilize the logs at the edges of the openings and then install your doors and windows into the subframe. Note that to install the horizontal ties I show at the ceiling of the porch, there would have to be some site fitting where those pieces meet the main cabin wall.Anyways, I hope this modest approach gives you something to think about. (With all left over wood you can build some fences).
Regards, Ross
-
I love the dog in front of it!!!
hahaha,
No really Ross (and everybody else who is thinking about this problem), i am really glad you all give it a try and these really are good ways of building the cabin which i will take a good look at.
I will download the skp and study it a little more. (see what parts are not used and see if i can find a way of using them).
More ideas are welcome ofcourse but i think that we now know that the size of the cabin will be 4x4 instead of 4x8 what we were thinking. I think this is the maximum size that we can achieve. (and this will give us a different view of where the cabin should go also so already i am happy with the solutions!)Thanks Ross
-
Do you have any pictures of local cabins? or could you get some? Building practices vary from local to local, so seeing what is "around" would be very helpful.
Charlie's design is very good, but i think the second poster was right about spacing. The roof structure only needs timbers spaced approx 4' O/C. same for the floor. If you could give some pics, i'll bet we can put this thing together.
-
Hi JJ,
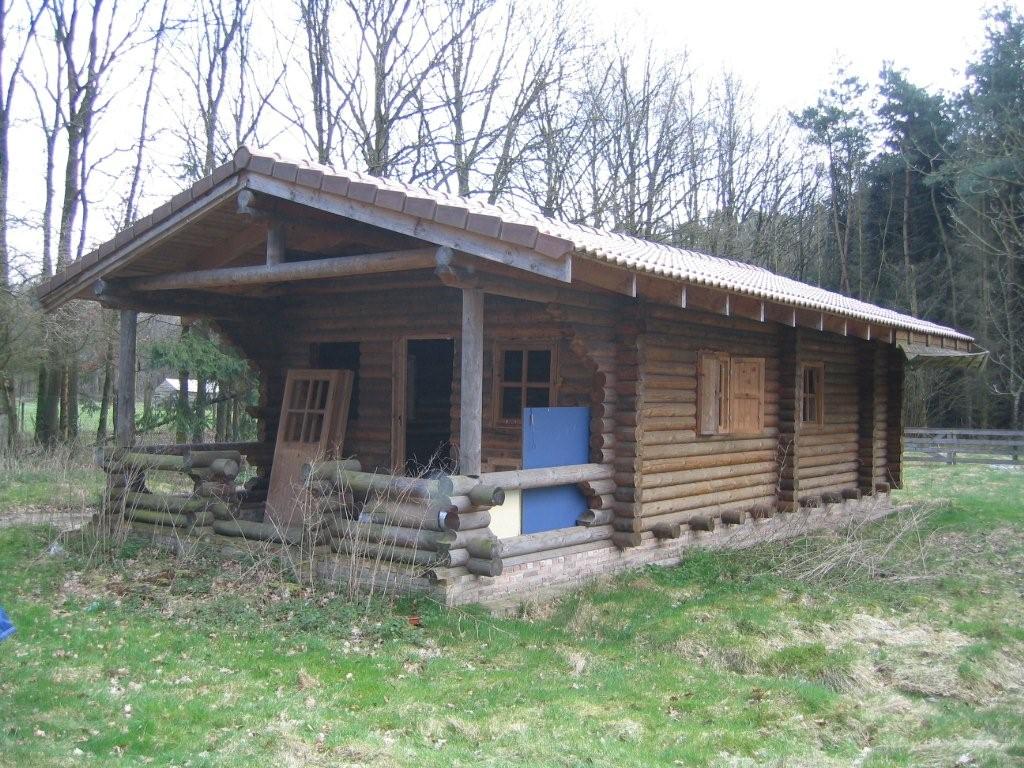
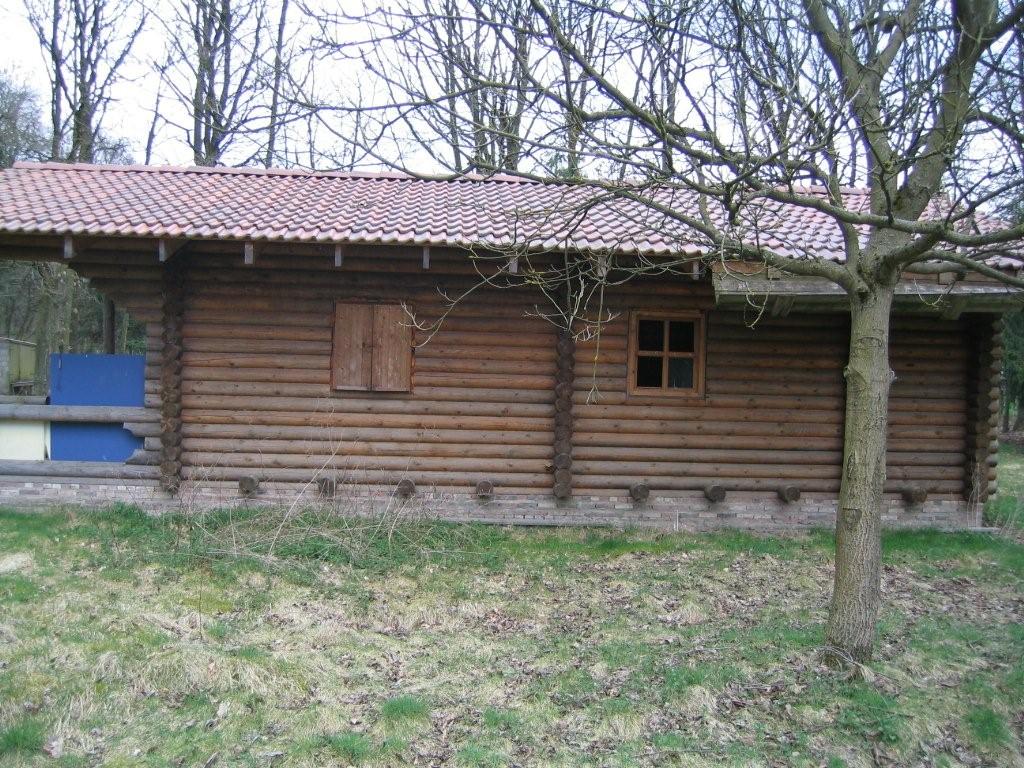
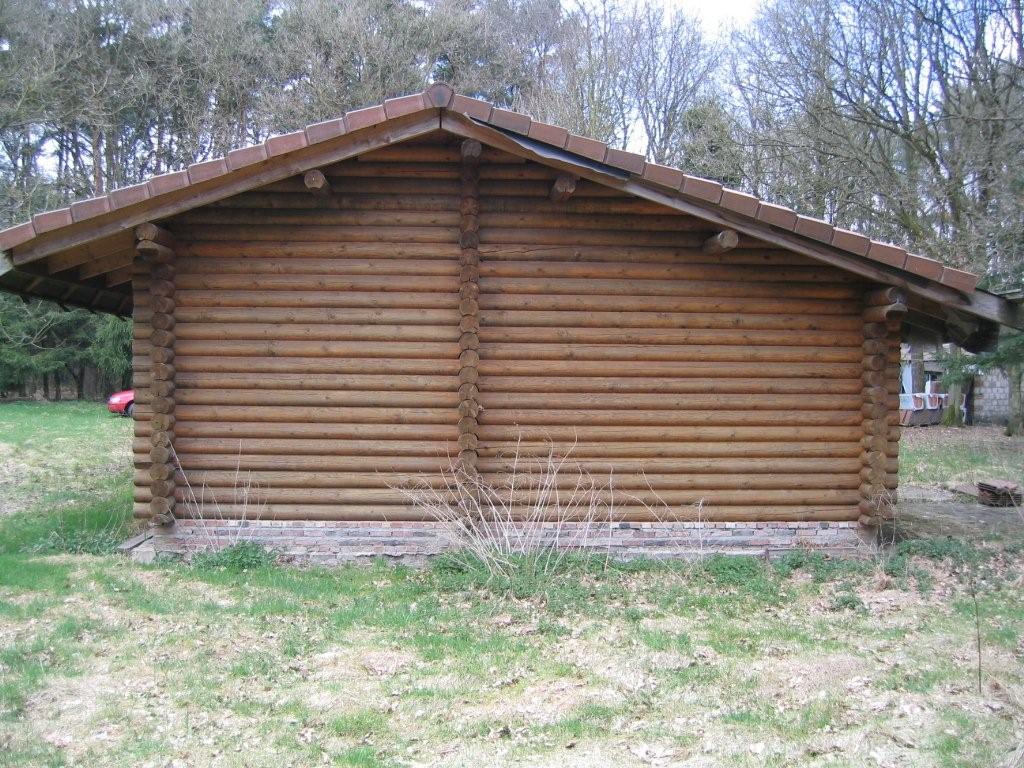
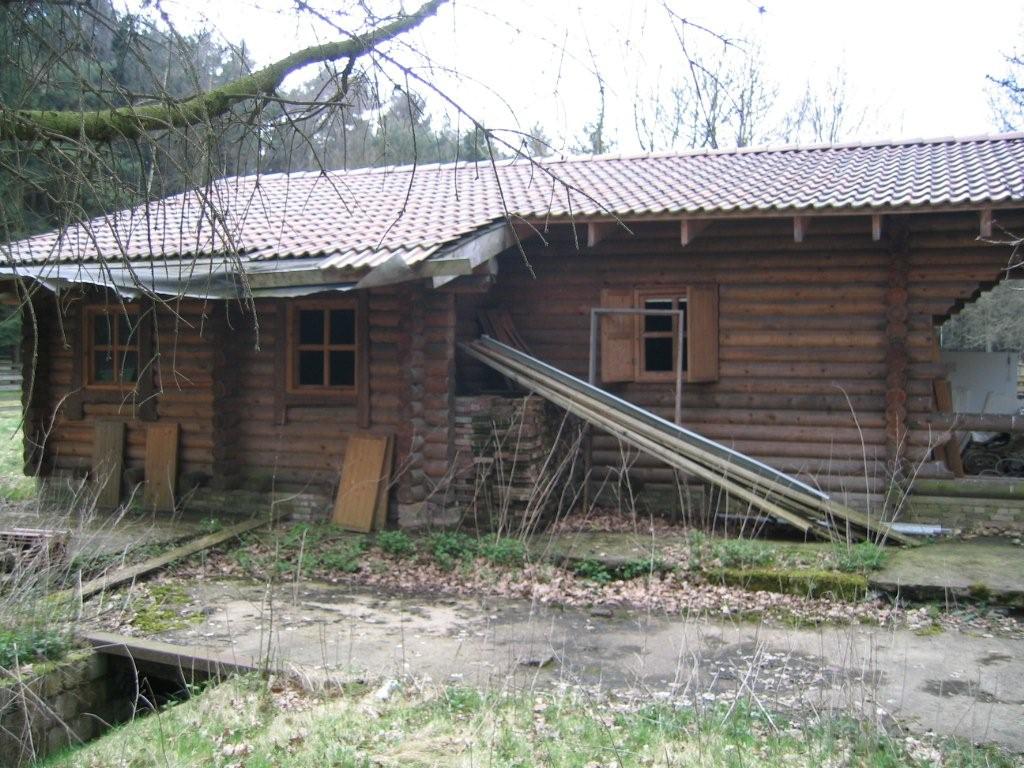
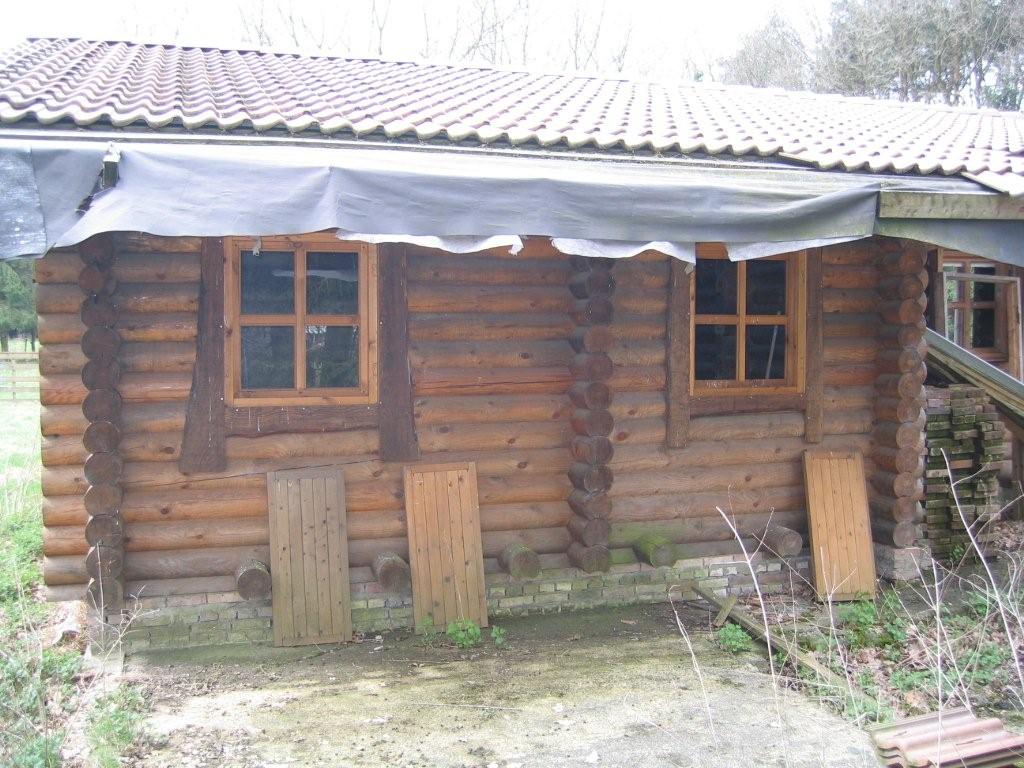
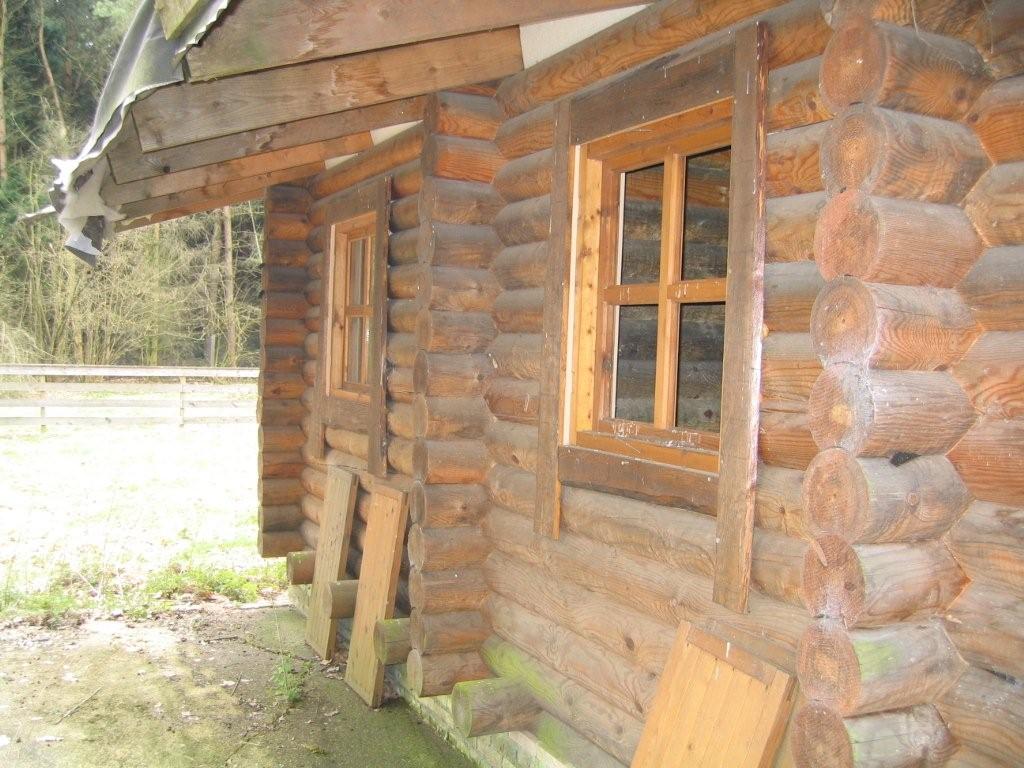
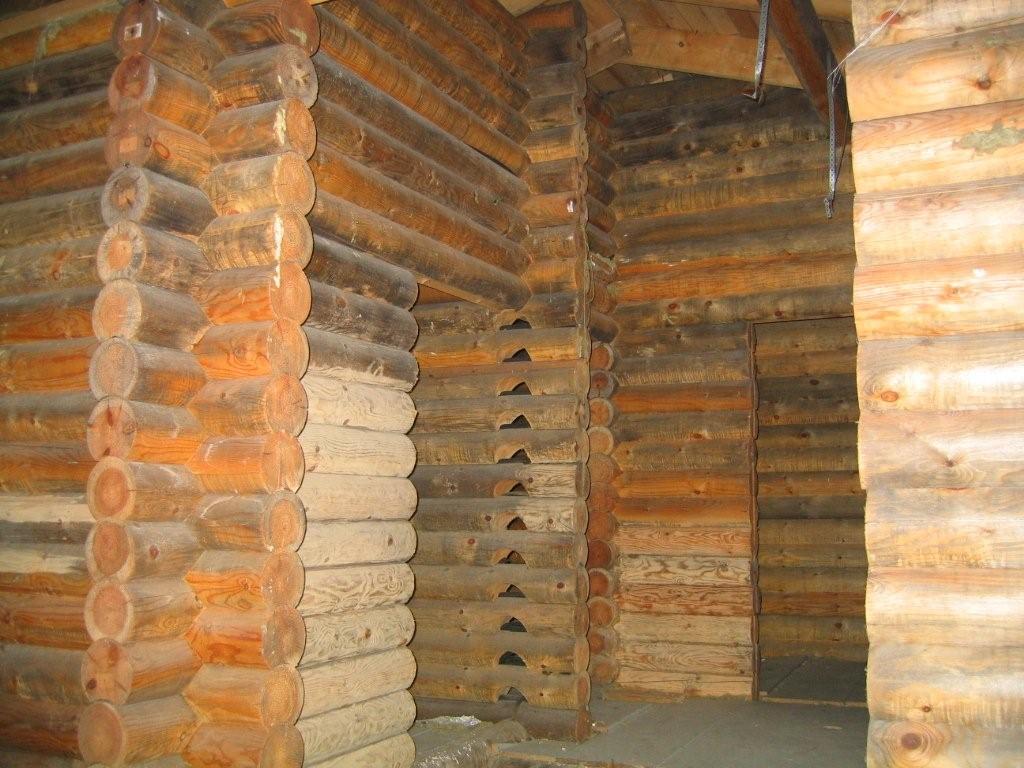
I do have some pictures i got from a cabin in Belgium. I looked at those many times because some of the timbers resembles so much the wood that we have. However, at some points they differ (holes at different locations).
Anyway, you are right, they can be helpful so i'll post them anyway.
(btw, i also wrote to some 'cabin-shops' in Holland en Belgium and sent them some foto's of the timbers we are having but they did not recognize them so were not able to tell us what the cabin should look like).
Appreciate all your help!
-
There needs to be some questions answered to properly put this together
1.) does this cabin use a concrete floor or raised wooden deck?(i think its a deck design using <balk 10> as footings/piers that actually rest against the ground)
2.) is the floor completely covered by posts, OR is it a beam construction, and the "actual" floor base material is not included here?( that would be my initial impression, but there are so many <balk 4> with work nicely as a sub floor, but of course would be a complete waste of material to do it this way)
3.) does this cabin have a porch? (it seems <balk 9> makes up the walls, leaving noting that would properly make more walls, but i can see a porch here. Do you want a porch?)
4.) you mentioned rooms, how many rooms do you want? one open room? more?
One complication is that some pieces are probably meant to be cut on site for the installation. Even so-called ready to assemble kits require some cutting on site. What are your thoughts on the above questions?
-
Hi JJ,
good questions. I do have some ideas of course, but i did not want to put you in some direction because i have been doing that myself and by doing so, i could not solve the puzzle so maybe you have other ideas which makes it possible to solve it.
However:-
i also think it would be a raised wooden deck, placed upon the footings (all new English words to me, but i think i know what you mean)
-
i think the floor base material is missing. If you would use all the material for the floor, it would be very hard to walk on (all these half circles), so you would still have to put some board over it to have a flat floor. That's why i also was thinking about a beam every 70 centimeters and then some board of say 1.40 meter on top of that
-
I am not sure. The porch itself is not that important, it would be nice to look at ofcourse but not necessary. I was trying to create the cabin itself and if i would have leftovers, than i would probably use them for a porch.
-
We thought about that one, i think the priority is to create something 'as big as possible'. I mean, if creating an extra wall to create an extra room means that the cabin itself will become smaller, than we rather have one big room. But then again, if we have a lot of leftovers that can be used to create an interior wall and the room itself is big, than maybe we can make that one.
For the size, we are not sure, if you calculate the (how do you call that: Width X hight) of all the wood and calculate some more, that in theory it would be possible to make a cabin of 4.20X8.40, but i don't know how. Should this be possible, than an extra room would be nice maybe, but if it is going to be a cabin of 4.20x4.20, than an extra room is not really necessary.
I think you are right, some pieces will have to be cut on the spot. There seems to be no specific beams for the window or the door, so i think that have to be cut afterwards. However, the beams all have holes, so if there is a hole, i expect that one to be there for a reason and hope that we do not have to make new gaps (but if necessary, well, so be it)
-
-
OK i have taken a long hard look at this cabin and here is my synopsis.
<balk 1> wall
<balk 2> king-post
<balk 3> floor-beam/joist
<balk 4> ?wall?
<balk 5> floor-beam/joist
<balk 6> wall
<balk 7> floor-beam/joist
<balk 8> ridge-beam
<balk 9> wall
<balk 10> ?footing?/block
<balk 11,12,13,14> spacerA typical cabin roof is constructed of a main ridge beam with either a king post at each end supporting it or the cabin walls supporting it. I think that is what you have here. Then standard nominal lumber is used to build a roof(2x joist) and usually it is covered with a metal(modern) of shingle roof. Of course there are many ways to build a roof, but i would think you would want to keep the weight overhead to a minimum.

I have tried every way(i can think of) under the sun to make this work with no success. This leads me do 2 common sense conclusions
1.) you miss counted/measured some lumber pieces and/or their notches.
2.) This is not a complete kit and/or is a hodgepodge of two or more kits.I am leaning more towards #2. Many times when an organization donates something to a non-for-profit or what-not, it may not be complete/new, or whatever. There could be many reasons including a tax write-off, customer cancellation, parts not to spec, etc... These are the only conclusions i can draw from this puzzle.
I will continue to ponder this problem, but at this point i have no new ideas left.
-
Hi FenS,
i'm a log home designer. All the logs should have a number on it. Normaly you have a Cut-Sheat where all logs are shown with the number on it. I know you have no drawings, but you should look at all the logs for the numbers, than you could figur out in witch possition they should be placed. It will take you some time to do it, but it would be the easiest to build the log cabin.
-
Hi DesignerGay,
you are absolutely right, but by the time i first saw the log cabin, almost all of the numbers were already gone. Either they were not readable anymore, of there was only a nail left in the log. I have written down some of these numbers back then, but by now they do not make any sense to me (i should be able to find the picture of the drawing i made back then.
Would you be able to give some hints if i would only have a few numbers? (i am not even sure that i now on which log the number was because the first time i wrote down some of the numbers, all the logs were lying on top of each other and i could not figure out what kind of log it was)
I will try to find the picture i made and will post it anyway (i keep feeling sorry that i did not do that right away because even things that might not help me by now, might be interesting information to one of you...)Thanks again for your help, appreciate it
-
The only thing you can do, try to put the logs together like a huge puzzle. Build it right next to the place it should be build.
Than put each layer on a own pile. If you start cutting the logs you are lost, because for the last few layers of logs you will run out of material.Do you remember who donated the log cabin? Could you ask for the compay witch cut the logs? May they will have an old cut-shead.
-
We do know the people who donated the cabin, but although they are willing to help, they also can not give more information. They have given all they had but do not know from which company it came, that's why i have written some of the complanies that i could find (no luck). I agree that we should only cut if we are sure that the rest can fit but actually cutting is something i hope not to do unless there really is no other way.
-
What hight has one log? A standarthight are between 7 and 9 layer. Do you speak german?
-
Ein bisschen
(with the help of google translate maybe...
One log itself is 15cm high (round), minus a little gap so it fits exactly on top of the previous one. So actually 13,5 cm.
I think that a normal height would be around 2 meter and a little so about 15-20 logs?(google translate:
Ein Stam selbst ist 15cm hoch, minus ein wenig, damit sie passt genau auf der vorherigen auf. Also eigentlich 13,5 cm.
Ich denke, dass eine normale Höhe würden sich auf etwa 2 Meter und ein wenig so ca. 15-20 anmeldet? -
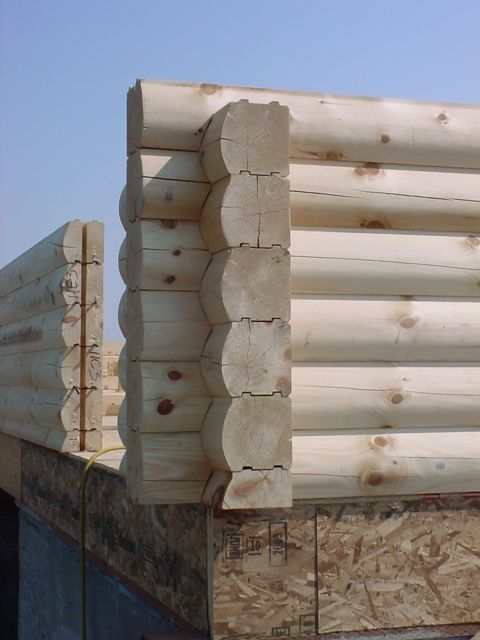
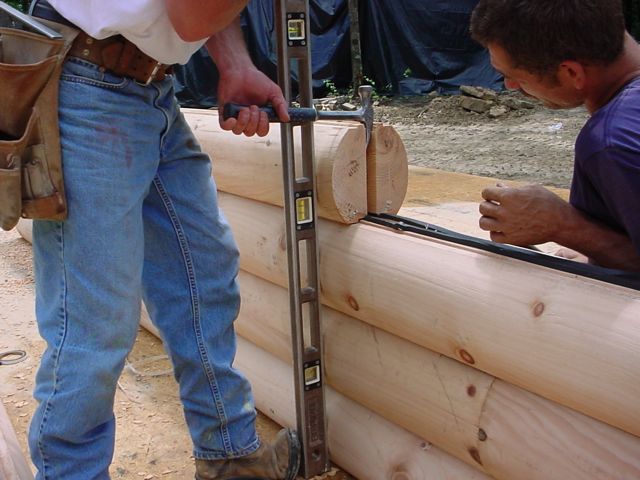
It schould be at least 2,40m. For example, you need 2,00m for a finished door opening to walk thru without hidding your head. i would say it will have 17-18 layers of logs.
As i menshend earlier, the best thing to do is to build the cabin once before next to the building place. Than take it apart and put each layer of logs on a own pile.
-
I don't now about you DesignerGay, but i prefer to do my designing in the virtual world. "I can move 1000 logs with a single mouse click", and at the end of the day will still have enough energy for my wife

Have you looked at the model to see if you can make sense of it?
-
i got my SketchUp last week, i am at the beginnig to find out the first steps. If he hab the parts also for ArchiCad, than i would have it done in a short time.
I know the blue peaces are used at the corners from the building, not for supporting the porchroof. -
DesignerGay
I agree about the short pieces.
1.) For this model, all you really need to use is the move tool, select tool, and rotation tool(Just FYI, you will probably find it easier to rotate a group with the move tool. The rotate tool can be a little confusing at first)
2.) You may need to group(Right Click->Make Group) un-group(Right Click->Explode) there is no need to make a component, FenS has already done that.
*One Warning though when using the move tool, do not push Control or you will make a copy, if you do by accident, just push Control again and the little "+" sign will disappear.
Hopefully with your experience, you can help us put this puzzle together.
Advertisement


