How do you make an grey object with a black outline???
-
@gaieus said:
No. I meant to go back to the Styles dialog > In model > Edit tab > Edge settings.
You can either have ALL edges coloured by the same colour (in this case black - but you can change that) OR by material (or by axis but you don't wnt that now).
So if you need different colours, you have to paint your edges so and at the same time use that setting.
ive just done that .....i have selected the seams which needed to be grey and then "Color by material" was selected. However as i did this the seams did turn grey but other parts in my model turned grey also when the should have stayed black!!!!!
-
This method indeed has the drawback that you need to paint every edge with a colour/material (it will also display as a colour) individually - or at least select a bunch of them and apply the colour.
-
Thanks for the help but This program is shit.
-
Quite rash opinion based on your unexperiences with it...
-
well simple things such as changing the colour of a line should be blindingly obviuos but it isnt. you have to go to here, then there, then click on another option just to do basic commands. And even then the problem isnt solved completely. I have been told that this program was the easiest of all 3d programns to pick up yet i disagree. Ive used 4 other 3d programs and they are by FAR easier! My judgement comes from the picking up the program and using it for a month......so i dont think my statement was rash.
-
Look, there are altogether two things here:
-
setting it up to display edges by material/colour
-
applying a colour to the edges.
What is so difficult in this? How would you expect SU to automatically know what colour you wish the edges to diplay?
-
-
-
All of the lines in the whole model change colour, (which i have stated before)
-
the colour does not change if i select the lines and change the colour. they are components and if i change the colour of one line they should all change BUT they do not.
I do not expect SU to mind read. Im telling you your methods do not work.
-
-
Okay, if they are components, even better.
So you are set now to display the edges by material, right?- Now double click on your component the colour of whose lines you want to change
- go to wireframe mode (this will hide faces so they won't be affected)
- select all the lines with a simple selection box - make sure they are all seleted
- use the Paint bucket tool to colour them as you want.
- Now you can go back to shaded (with colours or with textures) mode to check out the result.
- Apply this technique to all your components or whatever you want to paint.
Note that if you paint a component from outside its editing context, everything (front and back faces as well as edges) will be painted that colour.
Once you have applied any colour/material to a face/edge inside the editing context of a component however, it will retain that colur/material whenever you change it from outside.
This is the basis of a simple trick also described in the SU Guide (scroll the very bottom of this page) where you paint the windshields/windows and the tyres of a car from inside the editing context of a component like this:
And later on you paint the cars with different colours from outside like this - notice that the windows and the tyres don't change colour:
Now apparently first you painted your component from outside - thus you are unable to paint the edges with a different colour from the faces. You will need to edit that component (double click on it).
I hope this helps.
-
I have been trying that for some time. The problem is that when i switch from "color all same" to "color by material" the edges also change!
image 1 color all same
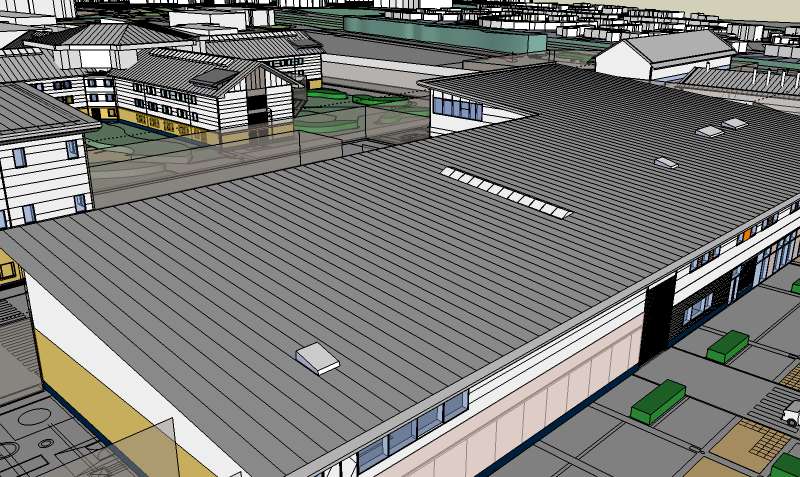
image 2 color by material
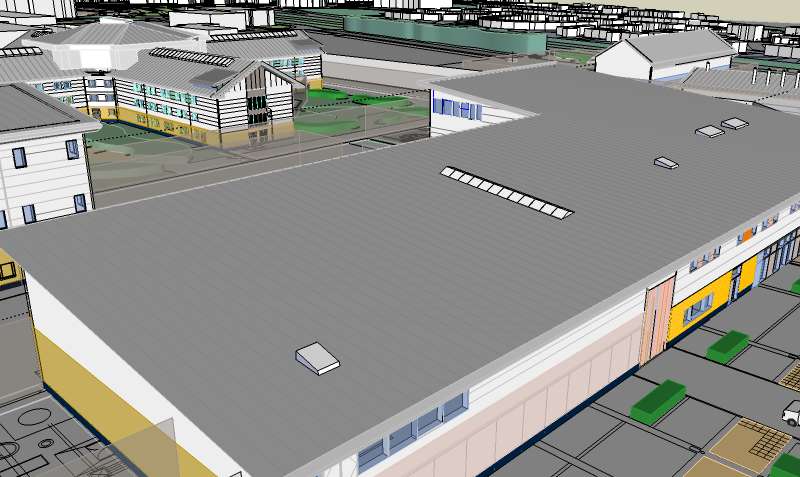
the edges change to the same colour rather than staying black. All i want to change is the lines on the roof. That is all.
Do you understand now?
-
Yes, they change because they are painted grey as well as the roof itself. If you use this kind of setting (colour by material), it will be applied globally in your model and you will have to adjust the colour of every edge you have painted differently before.
If that roof is a group/component, do the same to its edges as I described above.
No wonder people do not use this setting too much - it is easy to screw things up if you are not careful enough - and keeping to repaint everything is quite cumbersome.
BTW why are you not happy with all edges the same colour?
-
In my experience, it's extremely difficult in many other 3D programs...Max, Lightwave, Rhino, C4D etc...to get edges to display at all...much less individually, in the colour of your choice.
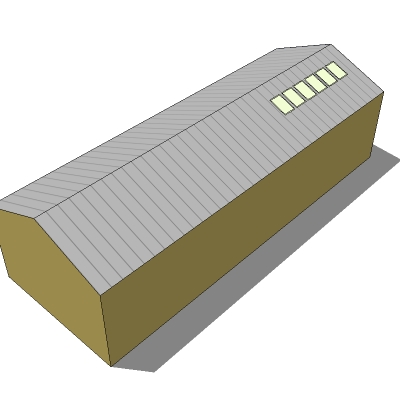
It seems to me that by far the easiest solution to this would be to simply make a png file in light grey...say 16 pixels square...then draw a single column of darker pixels along one edge, save it and paint the roofs with it. It took me less time to make the model than write this description.
-
Ah yes, texturing is another - and even easier - solution.
-
Making a png file would mean i would have to redraw the roof and several others to fit my scheme.
"you will have to adjust the colour of every edge you have painted differently before" - Gaieus
"If that roof is a group/component, do the same to its edges as I described above." - Gaeius
this is not possible for me to do so, as u explained above, i have said this before. This is THE PROBLEM!!!
This does not seem to be getting anywhere.
-
OK guys, do you know how to make the edges thinner on my drawing. On edge style all i have selected is display edges....can i thin down the edges any further???
-
@joejoejoe said:
OK guys, do you know how to make the edges thinner on my drawing. On edge style all i have selected is display edges....can i thin down the edges any further???
The thickness of edges on screen can not be adjusted, they are always 1 pixel wide. Only profile edge and section cut widths can be adjusted. Edges can, however, be easily made thinner in exported images. Just export a larger image, the edges will always be 1 pixel wide and thus proportionally thinner. You can then downsize the image in your photo editor.
Anssi
-
The approach Anssi explained is how most of us deal with the linework. Its nice to have very thin black lines, but not the the massively thick ones. So exporting extra large and then downsizing in Photoshop is a great tip. It makes for a much crisper export image. Hope your're getting somewhere on this, the model looks good.
Chris
Advertisement