PhotoMatch in SU7.0Pro
-
Modelhead
Well I admire your skill with the eyeballing!
Before photomatch I used to eyeball the perspective too, but it often used to drive me bonkers. You know the thing, "is it the angle" or "is it the degree of zoom" that needs adjusting, so when photomatch came along it was a gift for me. I must say, I don't have to fiddle with it - just sort it out once and its done.David
-
Hi Guys, my apologies for the absence; have been away for work...
David - You are right about the shadows, I should have taken more care in getting this right considering I have know the time of day and date it was taken...
As for yoru second comment regarding cropping the boring road; two reasons for the view selection.- create depth and focal back to the intersection [important point for local authority to understand proximity]
- a closer viewpoint would force a closer shot and in turn increase perceived conflict between existing streetscape and the proposed development. [ah, the beauty of view selection!!!]
Jeff - No, cannot render from PM. the earlier suggestions regarding Illustrator would be best pursued...
Modelhead - nice pony!!! And great job of integrating both. I only really use PM when exploring context as seen here. Eye balling it was not an option for this particular process as it needed to be as close to actual as possible. [BTW, the way I was able to achieve this was as follows:
The adjoining properties both sides share a front boundary that is in the same line as this project. i know their boundary lengths so in the model I added this info to the SU model. When selecting the view, I ensured I could see the extent of both boundary corners, hence lining up the boundary line in SU with the photo..... -
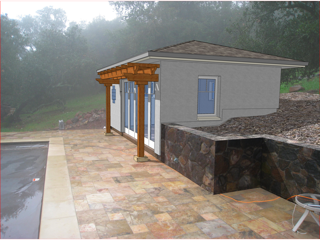
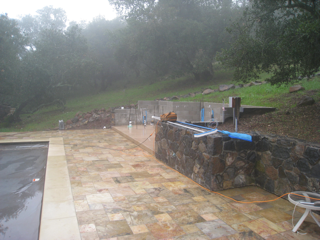
I would like to add here that, while I can see the shortcomings of photomatch I had good luck with it on the job pictured below. I photographed the existing pool deck, stone wall, and an existing foundation with retaining walls. I modeled the deck and the walls and added some ground plane (just as there is existing) to hide the retaining walls in some views.

I also photomatched a second view and put them both in a movie, with parts which do not have the photo background but the replacement ground that I modeled, but it returns to the background photos a couple of times. Doors open, fold back, close. I projected texture on rectangles on the deck by the posts here so there'd be shadow. The stone wall is projected texture from the existing--the deck is the photo background.
Any way I have tried eyeballing in other programs and found it frustratingly nearly impossible in exterior shots. This worked as advertised and got my clients excited, to say the least. (OK the design isn't exciting, really just conceptual here, based on the main house, and I could use some plants.)
You cannot use the textures you project from the photos in rendering.

-
Yeah, that's nice. And just what the client needs; an idea of what is happening....

-
I just got a program from here
http://www.kissmyimage.com/en/download/
It will keep the pixel size of an image the same but reduce the file size to one you input. I am using it for panoramas on virtual tours and it is amazing. I am dropping files from 3mb to 900kb without any noticable difference. There is a free version with a very small water mark. Full version is cheap.
I highly recommend this, the people on the panorama forums say it is way better than what PS can do.
Advertisement


