[Tutorial > Modeling] Tutorial for creating TIN objects
-
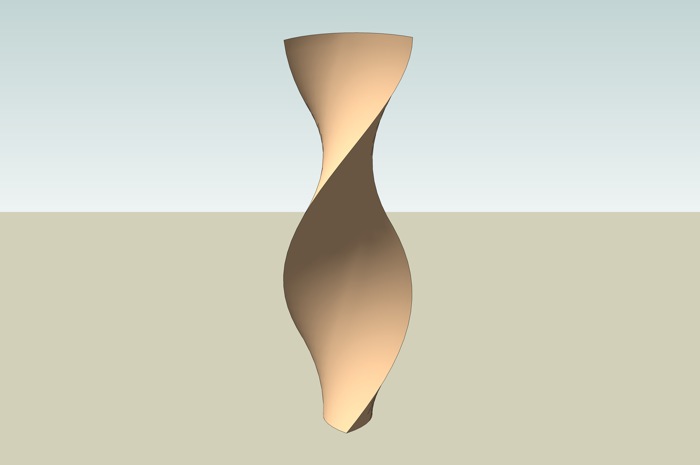
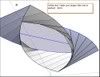
Attached find a tutorial for creating objects that have surfaces made of TINs. The image is of the object created in the tutorial but the process would work for a wide variety of shapes.
-
You say
@unknownuser said:
Build a 1 unit high wall of 1x1 TINs over the outline, making sure everything
lines up perfectly. When done, ungroup the 1x1 TINs and regroup the entire shape.That's mean draw a little vertical line at each extremity of one curved line
Copy past the curved at the end of this little vertical
then draw a little vertical line between this 2 curved line at each vertex of the curved line
Then use the "From contour" tool on each facett?
All that = the first half wall of Tin of the first level?
-
Pilou,
It is much easier to start with a 1x1 TIN created with the Sandbox "From Scratch" tool and then make duplicates of that and move them where needed on your layout. Takes a couple of minutes.
Fred
-
So you can retake my little speedy method adapted for 1x1
Just find the good center and you have your first Tin level in a secondI will find another one for the other levels
-
@unknownuser said:
So you can retake my little speedy method adapted for 1x1
Exactly! It is just a different orientation.
-
And for the Rotation / Elevation / + Scaling (if you want decreasing form) seems you can use the Ruby "Grow"
by Tig

-
Welldone fbartels,
It's not the first time i put an admiring eye on your work, and i was asking me what sort of complexe ruby script you where using for. And not at all. It's a pure use of basics Sketchup tools. Cool tip: i keep it in mind and in my tutos folder.
-
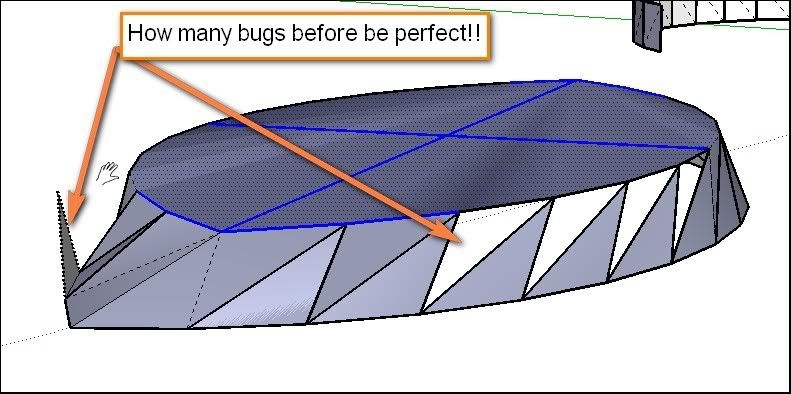
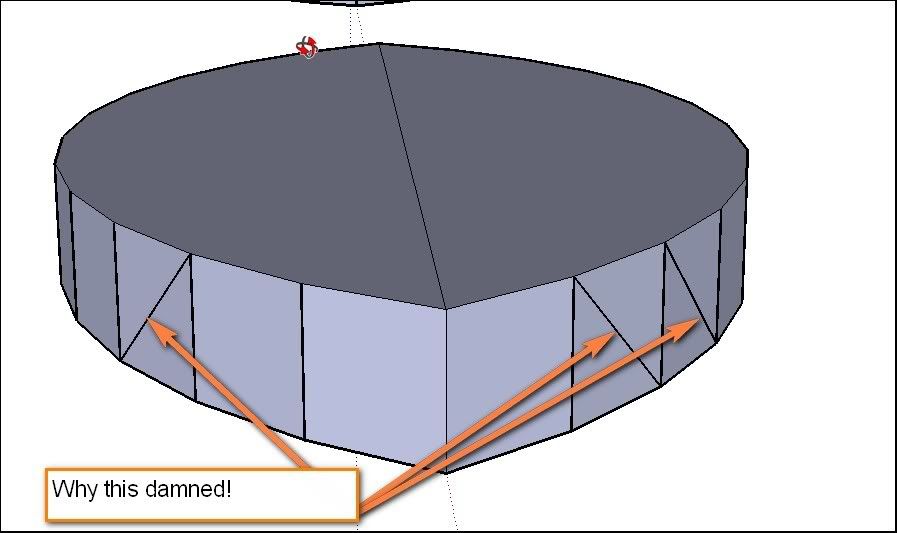
Dear Fred, I'm afraid i need more explanation!
I have tried several ways to draw the first step shape, but i have miss to do only one perfect. So at the end i desperatly let it down and have taken your own shape to play with.
Questions:
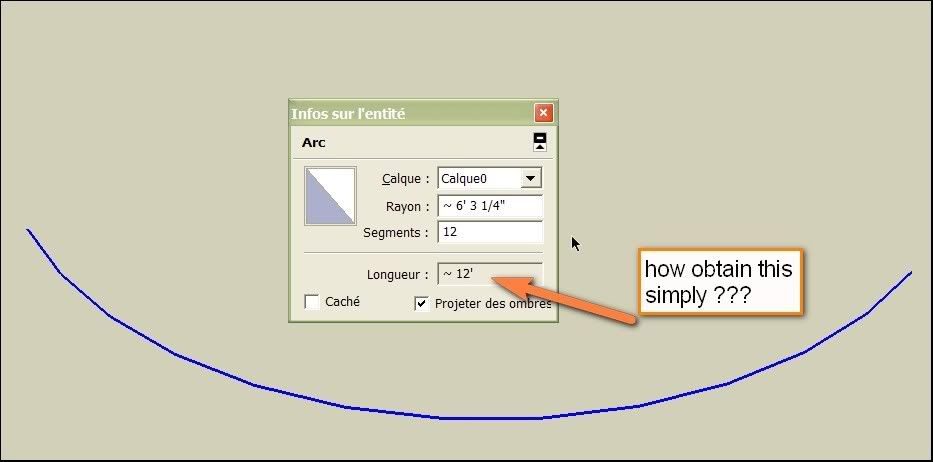
-Is there a direct way to draw an arc with the circumference we want. Because i haven't found other way than step by step to reach the 12'.?
-Why is it important to draw a one by one Tin?
-How do we know a shape is perfect, and How damned we can close a shape witch appears perfect!!???
Remarks:
-Am i wrong if i draw an arc, take is circumference in the info dialog box, divide this value by the number of arc's segments and make a square TIN with the result?
-The best way i've tried was to draw the first raw in an arc and mirror it withFrank Wiesner/Tig_Ruby Library Depot/Editing Section_Mirror 3.0>>Good tool..4My attempts:


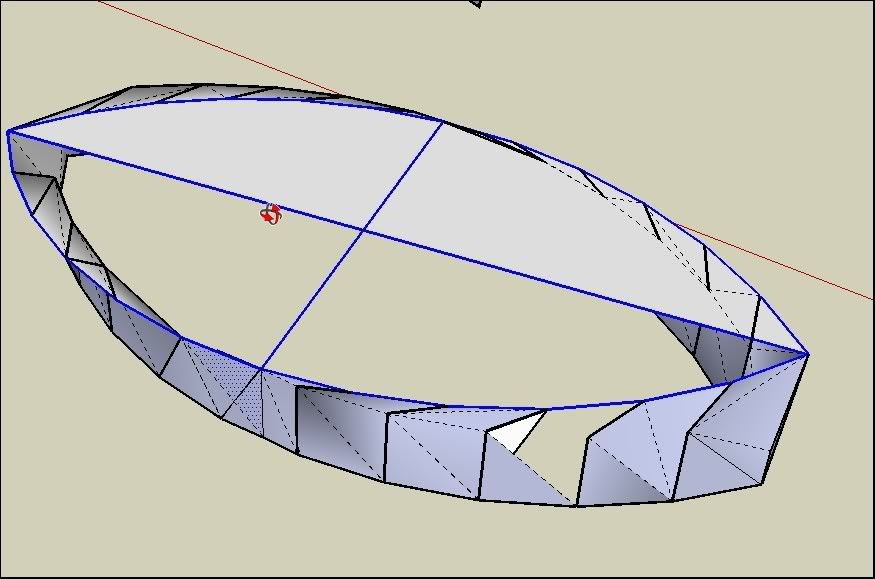
Playtime with fun:
Pic1,Pic2, Pic3, Pic4simon
-
Simon,
Ignore my previous tutorial. There is a much easier way.
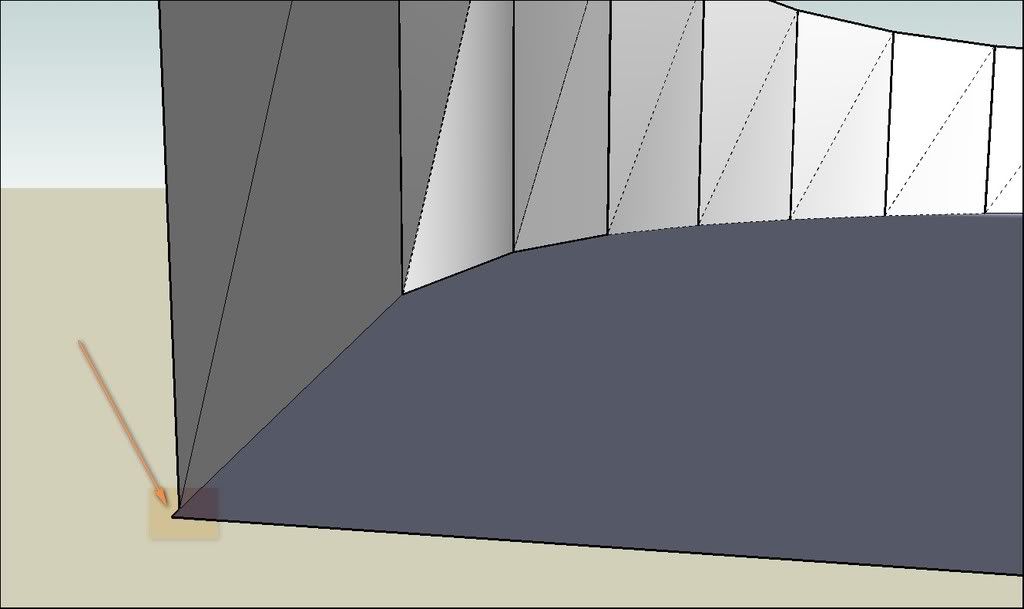
- Make the shape that you want to rotate. Make sure it is a closed shape.
- Extrude the surface using Push/Pull up a little.
- Choose the rotate tool, click on the top surface where you want the rotation point, and rotate however much you want. (This creates TINs on all the sides of the shape.)
- Remove the top and bottom surfaces, then copy the existing shape up on top of itself and rotate until aligned. Then do the same thing with the first two shapes, etc..
Fred
-
Thanks a lot Fred, i'm going to try this way..
@unknownuser said:
(This creates TINs on all the sides of the shape.)
Ahhhh!!Yes, Ok! ..... simon.
-
I am not getting it (feeling dumb
 ).
).
Could that second simplified method be made in a tutorial as well?
Sorry to ask...you guys are already sharing so much as it is.Thanks,
kwistenbiebel -
Chris,
There really is nothing to this. I think it is too simple for you given the complexity of the stuff you are normally doing.
Anyway, there is a quick tutorial here:
http://dws.editme.com/files/MarApr2008/making%20tin%20object%20tut.mov
Fred
-
Elegant method!
But seems a rotation on the good axis + elevation gives the same result with the "Grow" script by Tig with just one click

Just built the first piece with an integer angle for have any problem of junctionsJust a question : How many segments or coordinates can manage SU before slowdown?
Zbrush can manage some millions of polys, I am no sure than SU can make the same
Tin method is very consuming but tricky
Waiting next Tin episode with delight


Hello! It looks like you're interested in this conversation, but you don't have an account yet.
Getting fed up of having to scroll through the same posts each visit? When you register for an account, you'll always come back to exactly where you were before, and choose to be notified of new replies (either via email, or push notification). You'll also be able to save bookmarks and upvote posts to show your appreciation to other community members.
With your input, this post could be even better 💗
Register Login


Advertisement