Woodworking for kids
-
At my youngest son's school, Fridays first lesson is dedicated to "Special Interests" where the kids can choose to participate in a variety of activities like Origami or bird watching etc.
The special interest groups are led by contributing parents and I lead the woodworking group.
We don't have a workshop for this and that we meet and work with hand tools using the playground benches as work-tables. Still, the kids have a lot of fun and are extremely proud of their completed projects.
So far they have built a little bird house and a simple stool and we are now working on a carrier box.I would love to hear your ideas for projects.
These are the projects we've done:
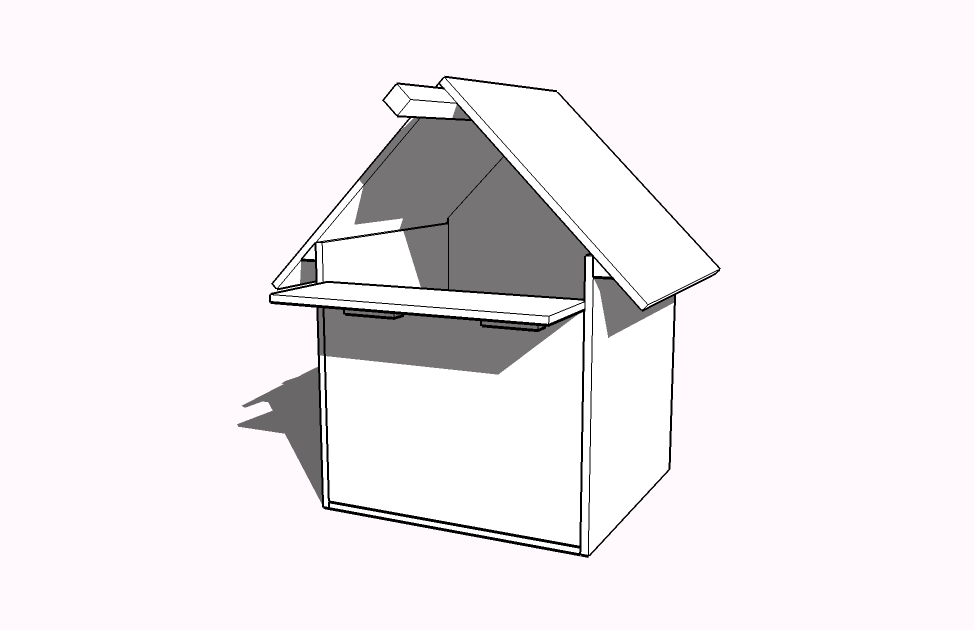
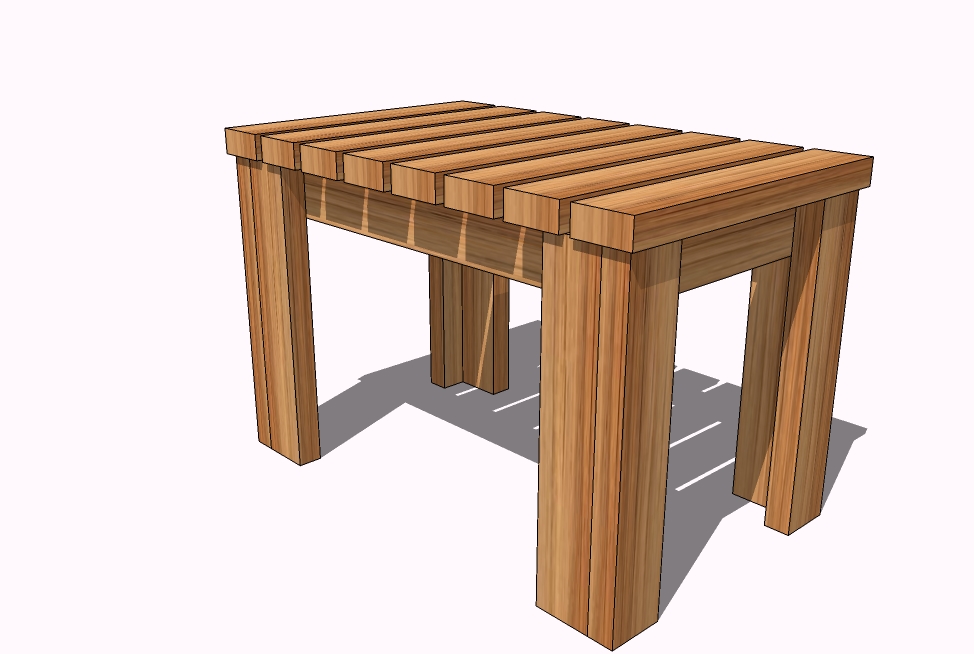
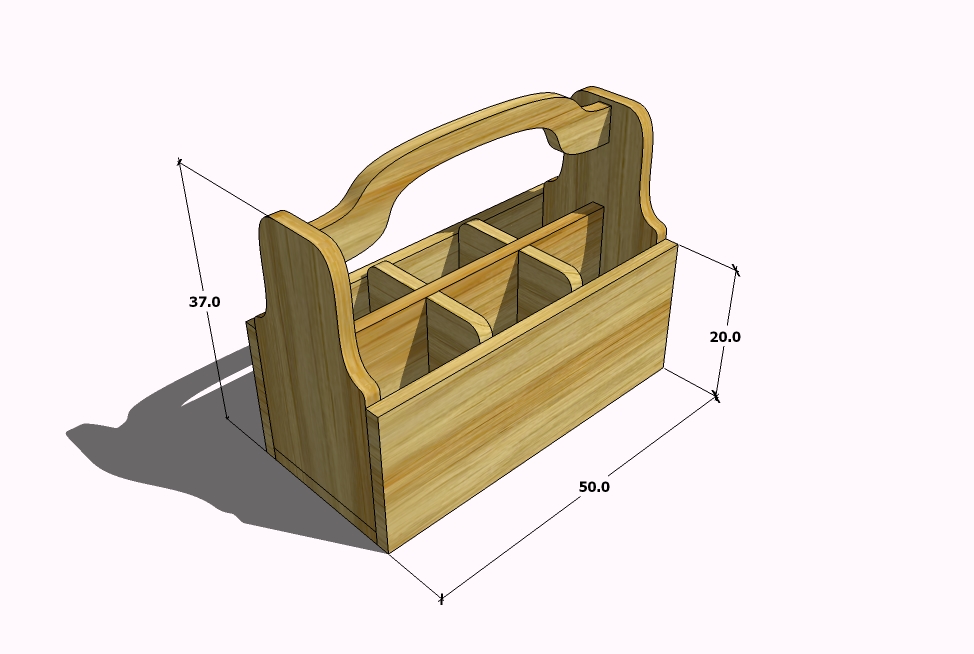
The children are between 9 and 12 years old.
-
Gidon
Here in the states we have a company called Home Depot which is a huge chain of hardware stores (massive complexes with almost everything from small repair jobs to full home construction sections), anyway the first Saturday of every month they have 'kids workshop' in their lumber section where they set up makeshift work areas and supply kids from 5 to 15 years of age with a kit of wooden bits, nails, glue, plans, hammers etc to build a theme item.
My boys have been participating for the last year now and have accumulated many items like stools, spice racks, boats, cars, key holders etc. They also get badges and certificates for quality and completion.
I am a less than weekend wood worker (got a lot of great tools but not fluent with them) however programs like these are fantastic for sparking interest in kids.As for ideas, I would suggest letting them make items that can be used in their home, or given as a gift (like spice racks, key holders, etc) that would give them a sense of achievement and encourage them to continue and even enjoy the giving or using of their creations.
-
We used to have these kind of lessons every week when I went to primary school. What's more, we even had a couple of workshops in the shool equipped with every kind of tools (we couldn't use some - like big electric drills and such - but then the teacher did it for us).
Kids still have the same here and they learn sewing (that I didn't like), woodworking, some cooking, iron working, basic electric fixing etc. I think it's quite useful and fun between "academic" lessons.
-
Gidon,
I admire you for being involved with your kids education that way. I wish more parents in the States were involved, especially in the inner cities. I'm 63, but when I went to school we had shop programs. In fact I graduated high school with honors in Industrial Arts. That meant I spent all my time in the various shops and liked it. We made tool boxes, bowls, night stands, trays etc. Small simple tables are great for kids to do homework or color on. Good luck. It sounds like a great project.
-
The way I see it is that more and more our chidren experience the world virtualy. They don't learn how to use tools and therefore are denied the development of basic hand-eye co-ordination. Just learning how to hammer a nail developes that co-ordination and helps the kids develope a sense of movement-to-power ratios. The 'feel' of how hard to hit the nail. The 'feel' of using tools as an extension of their limbs. The 'feel' of where to grip the handle, how to use the wrist, etc.
If we continue to let our children experience the world from TV and computer screens we will be doing them a great disservice.BTW, Solo I like your idea of a spice rack.
How about this one?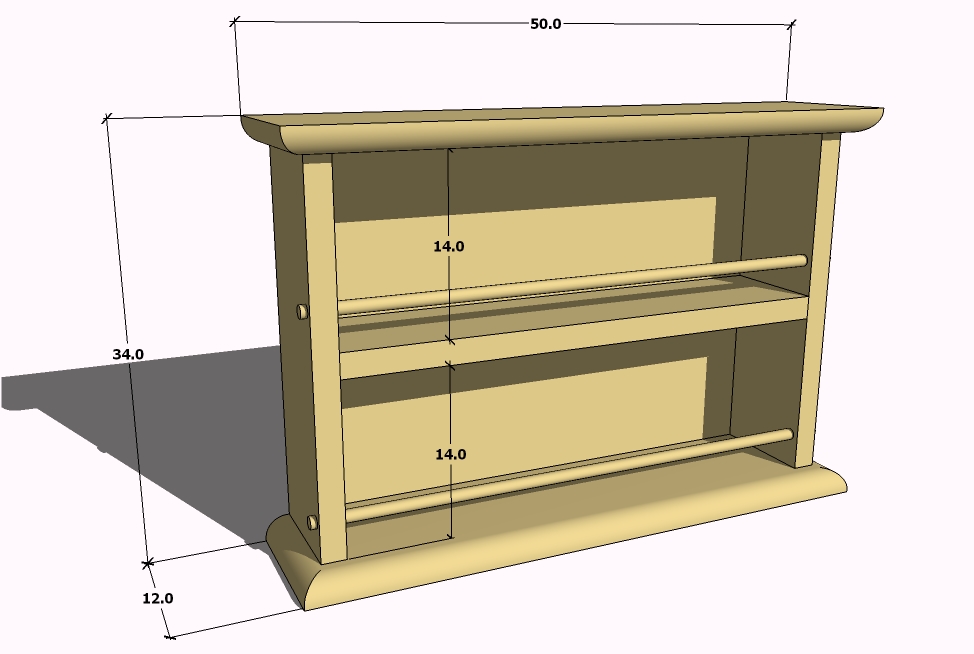
-
Very nice Gidon. I like the idea of getting kids involved with woodworking. My three year old son loves to spend time in my shop. Once in awhile he asks when we're going to build a boat. It'll be a little while yet but I've got his second boat picked out. His first boat is too small for him now.
After I get the cedar chest finished for his mother, we'll have to get the moulds out for the boat.
-
@dave r said:
After I get the cedar chest finished for his mother, we'll have to get the moulds out for the boat.
Moulds?
-
Sorry, that's the term for the things that give shape to a boat. For example, in the following sketch the three lighter colored vertical pieces are the moulds. The moulds don't stay in the boat when the boat is removed from the building jig.

This is drawn based upon the cradle boat I designed and built for Ian before he was born. It is a pram and so the end pieces (darker brown in the sketch) are both called transoms. Of course they stay with the boat.
FWIW, here's a picture of the cradle taken when Ian was about 2 1/2 years old. He's definitely outgrown it. Now the boat is an ark for all the stuffed animals. Once in awhile he'll pull the animals out of it and climb in. The planks are only 1/8" thick pine and I'm always amazed when he climbs in it and it doesn't break.

-
Dave,
Great looking cradle. Though, of the two efforts shown, I think you did a better job on the kid.
-
Thanks Joe. I think I would agree. I think he's a pretty cool kid but of course I'm biased. At least I'll get another chance on the boat.

-
@dave r said:
FWIW, here's a picture of the cradle taken when Ian was about 2 1/2 years old. He's definitely outgrown it. Now the boat is an ark for all the stuffed animals. Once in awhile he'll pull the animals out of it and climb in. The planks are only 1/8" thick pine and I'm always amazed when he climbs in it and it doesn't break.
Great and happy looking kid. He must not have an older brother. If he did, those cleats would come untied often while he is sleeping.
-
John, thanks. He is a pretty happy kid most of the time. He's been giving me grief lately about building another boat. He isn't even 4 yet and he wants to build a boat.


I wondered about those cleats. I figure when he's about 6 he's going to get the idea of cutting the boat down and dragging it off to the local creek to see if it floats. I designed it to be waterproof from the inside out. Not the other way around.

-
-
My wife wouldn't let me build a crib for our youngest before he was born. The thinking was that if, G-d forbid, something should happen, we wouldn't have the crib around to remind us. It's not exactly superstition, it's more like emotional insurance.
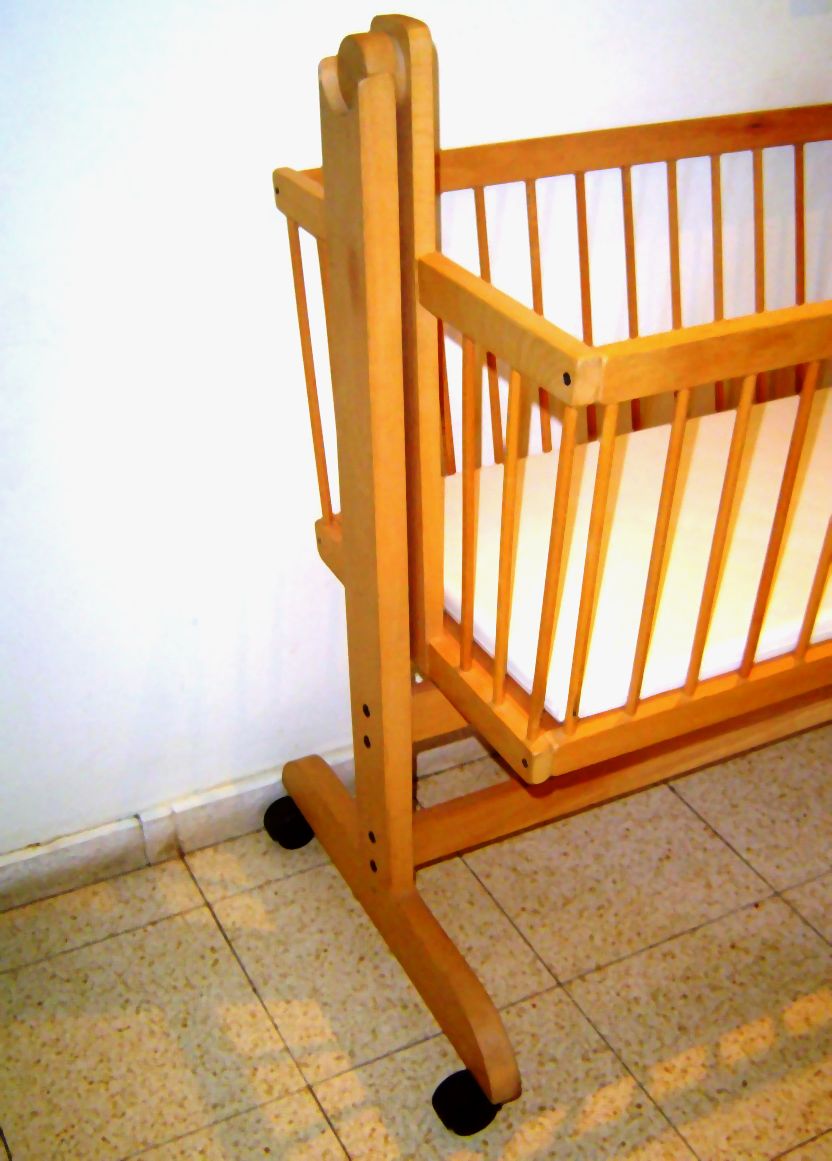
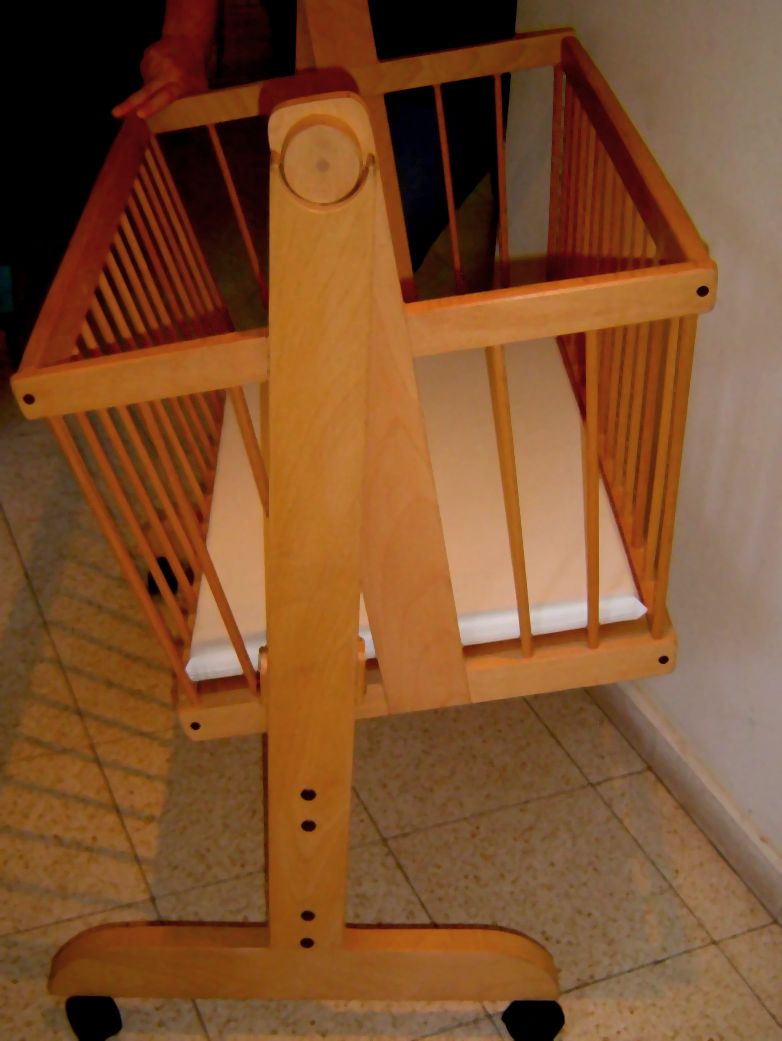
Anyway, once he was born I had something like 4 hours to build him a crib for his first 3-4 months when he'd be with us at night. I built the crib at a friends workshop from some Beech he had left over from some previous work he'd done for me. The finnish is a water-based non-toxic varnish. The whole thing knocks down to a nice flat pack. The little one is ten years old now. Every relative and friend who has had a baby since has used the crib and if I remember correctly the number stands at 6. I'm not much of a photographer but I thought I'd post this anyway.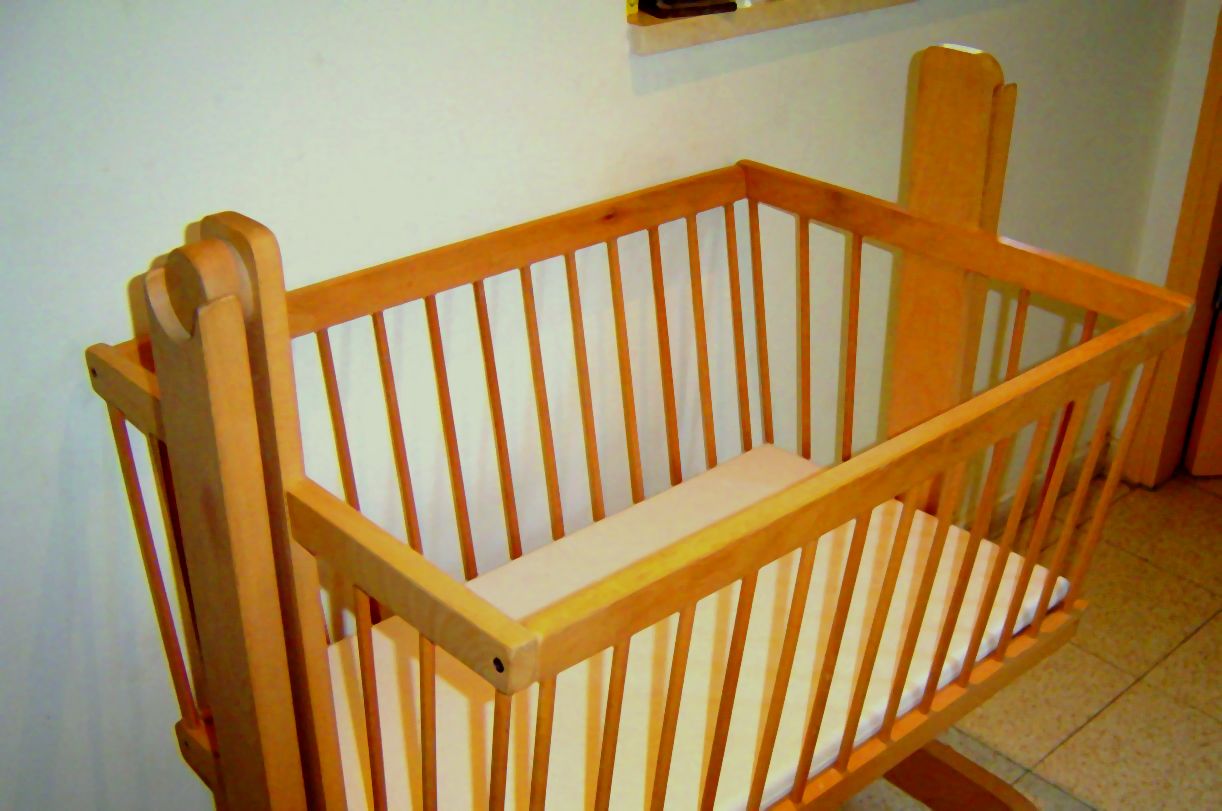
-
Gidon,
That was 4 hours well spent!!! Nice job. I have an antique high chair. I don't know who built it or exactly how old it is, but my grand kids all used it. Though they are to old to use it now I still keep it in my dining room. I love it. That is what is going to happen to this crib years down the road. Make sure you sign and date it before you lose control of it.
-
Gidon
lovely job. I wish I could make that in 4hours. Must have some good machines.
cheers
Alan -
@alan wood said:
I wish I could make that in 4hours. Must have some good machines.
AlanActually, Allan, the machines in that work-shop are pretty basic. What made it possible to complete the crib in so little time is the fact that I'm basicaly lazy, so I designed it in such a way that I'd have to do as little work as possible.
There are only two thicknesses: 2cm and 3cm.
There are only two widths so the rip cutting was a snap.
The legs and the two pieces that connect them are all the same width and thickness.
The joint connecting the upright to the base in the legs is a mortise and tennon joint where I'd drilled the mortise into both the upright and the base (one machine, one setting) and the tennon is another piece that connects the two, so I don't have to go through the whole procedure of fabricating a tennon. I make one strip of wood for the tennon, cut a notch down the whole length of it and simply cut into pieces of the required length. The notch is just to allow air and glue to escape when gluing up and clamping. A couple of swipes with a router round off the edges of the tennon strip.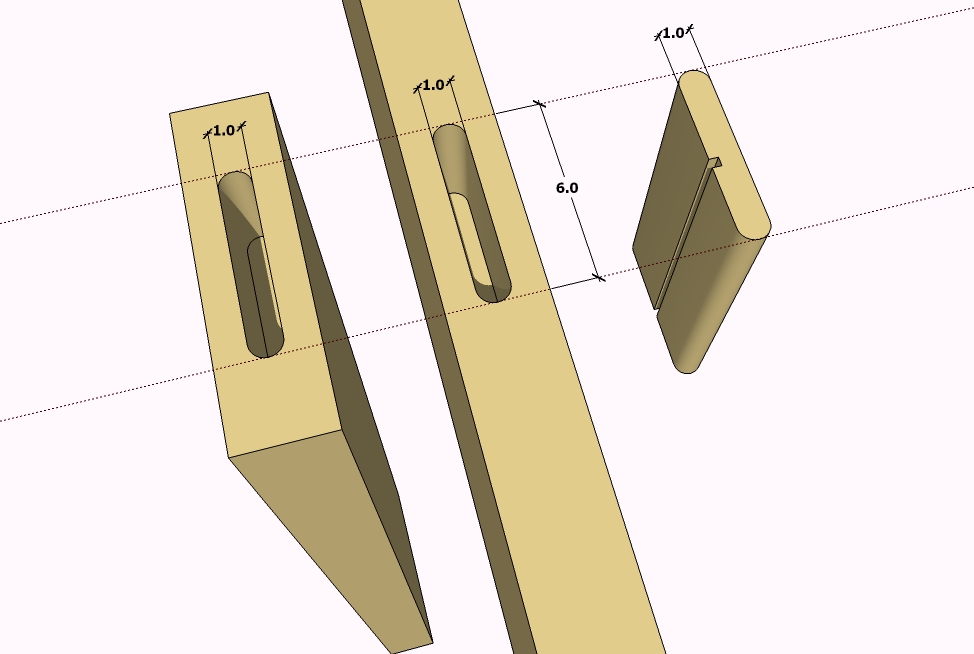
The rest of the 'joinery' is the wooden dowels for the 'cage' (for want of a better word) and Directa screws.
The swinging action was also a bit of a cheat. I used a circle saw on the ends of the uprights and glued the round 'waste' onto the cage uprights. A perfect fit!

OK, so we've got 15 minutes of thickness planing, around an hour for all the sawing, another hour or so for gluing up, and while the glue is setting on the uprights I drill the dowel holes, hold all the dowels together with lots of masking tape and cut them all to length in two cuts, drill the holes for the Directa screws and thats it. Spray with a quick drying waterbased varnish and I'm back home for lunch.Like I said, a lazy mans design

-
Some great tips there Gidon. Now I just have to have another baby so I can make one of those cribs.

-
Hi Gidon,
Very very efficient and a lovely job plus the obvious delight of making
something for your son.As Eric said great tips
cheers
Alan
Advertisement


