Volume Calculator v2...
-
@unknownuser said:
TIG,
See attached.
I've tried out your new VolumeCalculator Script.
Really good, very quick.
...
A few Observations / Requests:- Would it be possible to have the script mine down into Groups / Components similar to your Component Reporter - ie the Volume Script would work out the Volumes for the Deepest nested Groups / Components ??? Currently models have to be Exploded down before the script can be run. (This would be my Number 1 request).
- Currently when you make a selection and run the script, you are prompted with 2 dialog boxes:
a. Volume parameters dialog - where you define Layer etc
b. A dialog which asks "Do you want to leave the original selection hidden for now ?".
These prompts come up for EACH Group / Component selected.
It would be much better to have these 2 dialog boxes come up just ONCE for each Selection Set - much slicker. Currently you can get around this by keeping your finger on the Return Key on the keyboard - but I'm sure there is a better way !!! - I've noticed that some Volume faces are reversed - it could be just the file that I'm using to test the script - but it appears OK.
All Volume geometry does actually have the users chosen colour - it's just that some faces are reversed.
...
If I find anything else I'll post the info here in this thread.
Other than the items noted above, the script is great, you've done a really good job with it.
...
Regards
Howard L'
Thanks for the feedback.
- Group/Compo Mining would be quite possible...
- A combined dialog for all options once for each selection is quite possible.
- The problem with AdamB's great/swift volume-calculator method is that it can give wrong answers if some of the faces aren't consistently oriented. That's why I invented orient_faces.rb at the weekend. I currently make the group and orient faces consistently and make a copy with all faces reversed take the larger volume by comparing them - one's outside-in and the other is outside-out - sometimes a negative volume is reported and this is trapped. Unfortunately, depending on the form of the tested objects tested, it can report the same volume for BOTH options and it then sometimes guesses the wrong one and gives you a reversed-face final volume-group. I have some ideas on how to trap for this so we always get the volume-group's faces the right way round...
Watch this space...
-
TIG,
Just an idea ...
With regard to the Volume faces that are reversed, what about applying the users chosen colour / material to BOTH the front AND back faces ???
It's a bit of a workaround, but it might be the simplest solution ???
...
Howard L' -
@unknownuser said:
TIG,
Just an idea ...
With regard to the Volume faces that are reversed, what about applying the users chosen colour / material to BOTH the front AND back faces ???
It's a bit of a workaround, but it might be the simplest solution ???
...
Howard L'Had that and removed it BUT it is a solution...
-
Here's v2.1
...
Nested Groups/Components within Groups now 'mined' and each calculated.
Dialogs combined into one and only one dialog per selection set.
Reversed faces in some volume-groups now properly colored.
[Note that 'Red' faces show a problem too]
Warning at end if any ambiguous forms....
-
One technique I use to mark problem geometry for my stuff is to use something like this:
def show_problem(wpos)
msg = Sketchup.active_model.entities.add_text "malformed material; missing albedo", wpos
msg.vector= Geom::Vector3d.new(20,20,20)
msg.display_leader=true
endYou might want to also check the volumes form a manifold surface before you start.. Just a thought.
-
TIG,
See attached Zip File.
I've tried the new version of the VolumeCalculator Script V2.1.A few bugs noted:
-
See VolumeCalculator_V2-1 Test1 SU Upgrade Reqd.skp.
An upgrade to latest version of SU is reqd otherwise strange results with colours - everything is Red although Text is as intended. Users will need to upgrade I think. -
See VolumeCalculator_V2-1 Test2 - Scattered Volumes.skp.
A much cut down version of a large complex Component (too large to post) - Volumes are scattered and Volume Geometry remains on Layer 0.
(Original geometry is a component).
...
I've tried running the Script on quite a few shapes / models
Some Comments / Requests:
-
- the Red text is good, its sometimes a little tricky to spot if the model is complex but its generally very useful - a really good idea.
-
With the shapes that the script fails on - sometimes the red innards (reverse face) are tricky to spot if the gap through to the inside of the shape revealing the red colour is only a narrowish sliver - but generally it works OK.
If the script made both the inside and outside of failed volumes red it would be more obvious - it would really stand out.
See the polo mint shape that fails in Test 1 - this could be lost and overlooked in a complex model, especially if the shape was small. -
A quick way to seperate out all failed volumes is required (This would be my No. 1 request).
I think it would be a really good idea to put all failed volumes on a seperate layer eg "Volume_Errors" Layer.
Currently its not possible to seperate them out - unless you select them by eye - and as explained above, I think some could be easily missed.
Another possible way would be to colour up all failed volumes, by colouring up the grouped volume (which contains both the failed volume and its text). Currently this group is coloured up inside the combined group - and therefore failed volumes cannot be selected by their colour as the outer most group of volumes is currently the default su colour. -
A way to differentiate failed volumes in the csv output eg a column stating "OK" or "Fail" ???
If failed volumes can be seperated out by colour or layer this could possibly be omitted as failed volumes could be deleted before running the csv export.. -
What about the possibility of running the VolumeSlices Method on failed Volumes ???
Your original (integration) method would certainly work on some of the failed volumes.
How about having 2 check boxes on the initial dialog box to:
a. Delete all failed Volumes
b. Run Volume Slices Method on failed volumes - this would also need to be able to Mine down into Groups / Components.
In this case, when CSV Volumes is Run it would then pick up Volume Tags for all Volumes - Regardless of how they were initially produced (ie no matter which VolumeCalculator Method was chosen).
- Alternatively, make both the Volume Slices Method available to users as well as The Newer Volume Method on the Right Click Menu.
Currently you can only run one at a time.
...
I hope these tests / comments are useful.
If I find anything else I'll post the info here in this thread.
...
Regards
Howard L'
-
-
TIG,
It's really good news that you've managed to crack the doughnut problem.
This means it will be possible to use the script on for example, walls with door and window openings, Structures with cut-outs etc
...
It will also hopefully mean that no (or very few) volume errors will be generated.
...
I can't believe nobody else has tried this script out / commented, apart from Adam and myself.
I think a script like this will be so useful to many people.
...
One of the advantages with 3d modelling in Autocad using Solids is that it gives you Volumes (as an attribute of each solid).
Now we are getting close to having this ability in SU.
...
If I notice anything else with the latest version of the script (V 2-1) or have any other comments I'll post it here.
...
Thanks once again for all your hard workHoward L'
-
Howard
I am working on solutions for the issue of v2.2...
-
It's a mystery why the Sup upgrade might have caused somethings to work differently.
-
The misplacement of some volumes did occur in testing BUT I thought I'd ironed that out. I'll try a more robust methods. Basically the complication is that when we get the faces in a group inside a group inside a component instance etc we need to work out the transformation(s) and * them together so that the new volume's faces we make are in the place they should be. Sometimes if a group is edited in place then made part of something else it can recall its earlier transformation...
-
Forms with holes in (donuts) are now fixed - volumes are faced and calculated correctly - It was an easy fix... I forgot that some face edge loops could be internal and not needed to make the main face initially... now after the main face is made these inner loops are faced and immediately erased to make the holes.
-
I'll try using AdamB's ideas about 'manifold' checking before volume making, and your ideas about reporting etc...
It might not get sorted this side of Christmas though...
-
-
Hi,
I tried using this plugin. But it dint initialise.
Here's what I did. I saved the plugin in the 'plugins' folder. Then started sketchup. But was unable to find the calculator menu anywhere.
Is anyone facing such a problem? any solutions?regards
Pritam -
@3dmodellers said:
Hi,
I tried using this plugin. But it dint initialise.
Here's what I did. I saved the plugin in the 'plugins' folder. Then started sketchup. But was unable to find the calculator menu anywhere.
Is anyone facing such a problem? any solutions?regards
PritamWith most scripts if you open them in a text editor there are instructions written at the beginning...
'Volume' is a right-click context-menu item - there is NO top-bar menu item. You just select a group/component (or more) and you will get 'Volume' on the context-menu... -
Well, I tried it. I have never had a need for knowing volumes, but you wouldn't know it an engineer approached me yesterday about determining the volume for a piping project in which I used the TIG's pipealongpath script to produce a "snake shaped" pipe. The calc took a while but it worked. :}
So a big thank you, TIG!
(TIG: That might be a good option for pipealongpath, have it give the volume for either the interior or exterior diameter extrusion in form of a text label. Maybe it could simply call the part of the volume calculator script that does the computation).
-
Erm, can't activate the volume calculator.
I can't really understand the instructions when I opened volumecalculator2.rb in notepad.Here is what the author said:
@unknownuser said:
First select a Group or Component that has faces that form a
volume, then use the right-click Context-Menu and choose 'Volume'.
If there is the Plugins Menu Item 'Volume' you can aso pick that.
(see the end menu section on how to activate that option...)
You can make multiple selections and they are processed in turn.None of that really worked.
I have a Plugins menu, saying Cost instead of Volume (probably from other plugins that came with the package).
The right click context menu also has no Volume to speak of. -
did you move the file marked 'volume calc (some more filename stuff here).rb' into the plugins directory? if not, you need to move everything you downloaded to program files->google->sketchup->plugins otherwise the tool will not appear in sketchup.
-
@sephodwyrm said:
Erm, can't activate the volume calculator.
I can't really understand the instructions when I opened volumecalculator2.rb in notepad.Here is what the author said:
@unknownuser said:
First select a Group or Component that has faces that form a
volume, then use the right-click Context-Menu and choose 'Volume'.
If there is the Plugins Menu Item 'Volume' you can aso pick that.
(see the end menu section on how to activate that option...)
You can make multiple selections and they are processed in turn.None of that really worked.
I have a Plugins menu, saying Cost instead of Volume (probably from other plugins that came with the package).
The right click context menu also has no Volume to speak of.Scripts (xxx.rb) go in your SUp.../Plugins/ folder. Is it in there ? Is it still pure text with a.rb suffix - you didn't word-process it or save it as xxx.rb.txt ???
Volume Calculator's help says:
"First select a Group or Component that has faces that form a
volume, then use the right-click Context-Menu and choose 'Volume'."
You do NOT get a Plugins menu item unless you change the last part of the script as instructed (it involves removing ###'s so that that menu instruction becomes active. MOST people use the context-menu)...
To calculate a volume test... make a faced cube and then make a group of all of its geometry. Select just that cube-group and then right-click to get a context-menu... near the bottom you get an option 'Volume', choose it and you should then get a dialog asking for units etc... the volume is made and text added showing it ? -
Thanks for the quick reply.
I didn't know that you have to make the <<object>> into a <<component>> first before calculating the volume.
That is a very important step that I overlooked.
You may want to highlight that in the instructions that you have to <<componentalize>> before calculating the volume. -
@sephodwyrm said:
Thanks for the quick reply.
I didn't know that you have to make the <<object>> into a <<component>> first before calculating the volume.
That is a very important step that I overlooked.
You may want to highlight that in the instructions that you have to <<componentalize>> before calculating the volume.It doesn't have to be a 'component'. It can also be a plain 'group'...
-
I had some hassle getting Sketchup to recognize the .rb scripts, but after five restarts it did.
So I made a 36“ by 12” square, used Offset to cut out the center with 2“ walls, and then used the Volume calculator.
I got an answer, 1.73 cu ft. But I also got a warning that I had ”Ambiguous Form“.
So apparently this calculator doesn't like hollow objects. Are there any other scripts that might tolerate hollow objects?
BTW, the official instructions on installing scripts are wrong for OS X: it says to use the plugins folder inside the Sketchup package when it should say to use the plugins folder in /Application Support/Google Sketchup6
-
Dear JKirk,
Try the attached with TIG's V1.8 volume calculator. The large group is a 1000 mm cube with a 600 mm cube removed. The small group is a 600 mm cube. Set the accuracy to 1%. You should get 0.784 cu m and 0.216 cu m. You will find V1.8 in the Ruby section.
Regards,
Bob
-
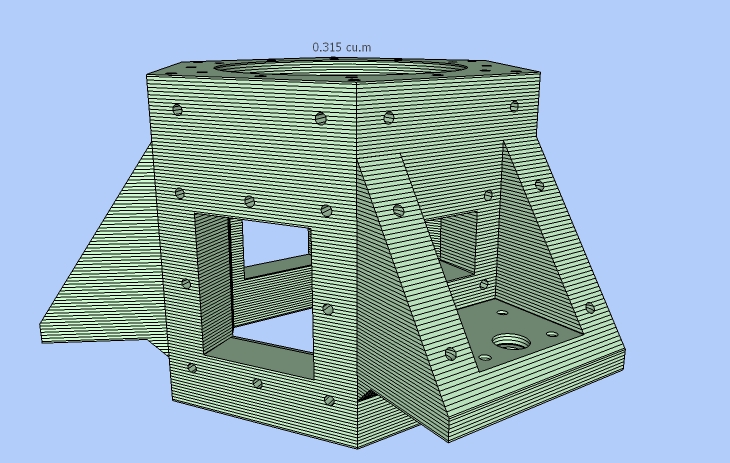
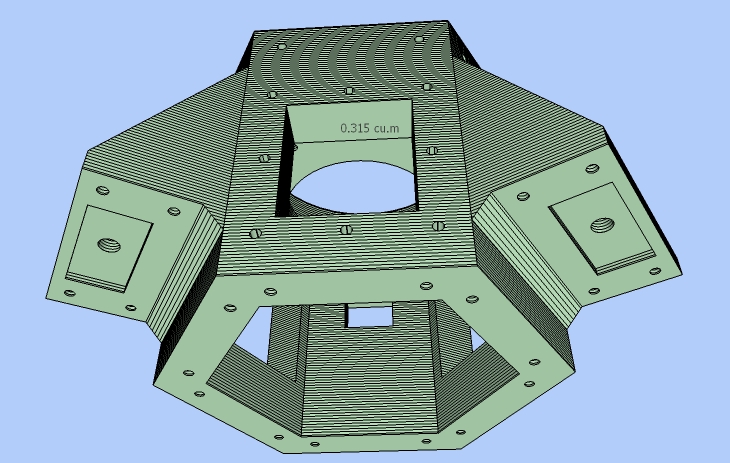
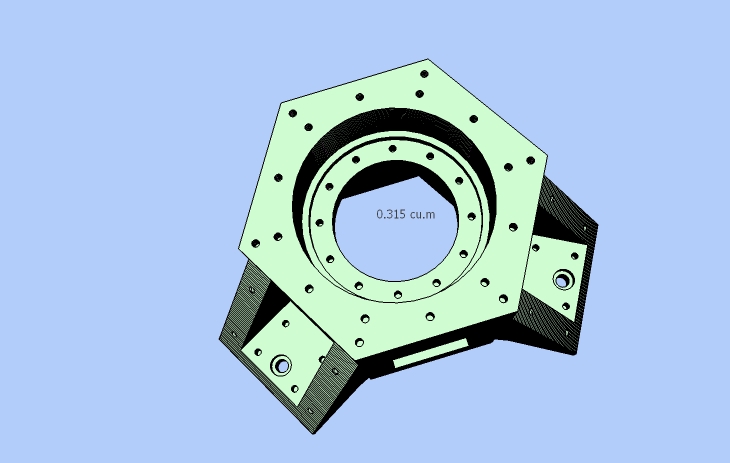
This is just to show that TIG's V1.8 works well with quite complex shapes (I have posted this before, but what the heck!).
The below images show the volume slices for a 1% accuracy volume calculation, which took many minutes to complete.
Regards,
Bob


Advertisement


