Modeling Simple Belt Around Pulleys
-
Good morning,
I am trying to figure out a way to model a simple (square cross section) belt around 2 pulleys that do not have easy 90 degree references to each other. They way I typically do this would be by drawing the route, then using the follow me tool to extrude the cross section around, completing the task. My problem is creating that route. In this screenshot, I created example wheels of 6" & 12" diameters, set some arbitrary distance away from each other. I chose a 2" wide belt for this example to simplify the numbers, meaning that they distance from the center of each wheel to the centerline of the belt would need to be 1" greater than the wheel radius, and at 90 degrees from the wheel axis. I have tried drawing lines of the correct length out from each wheel axis, connecting them, and then rotating the line coming out from each wheel axis around said wheel axis, thus preserving the line length, but I cannot find a way to rotate this line so that it is perpendicular to the belt path centerline. I do hope that I am overthinking this, and that there is some easy way to accomplish this task, but it has evaded me thus far. Any help would be greatly appreciated! Thank you!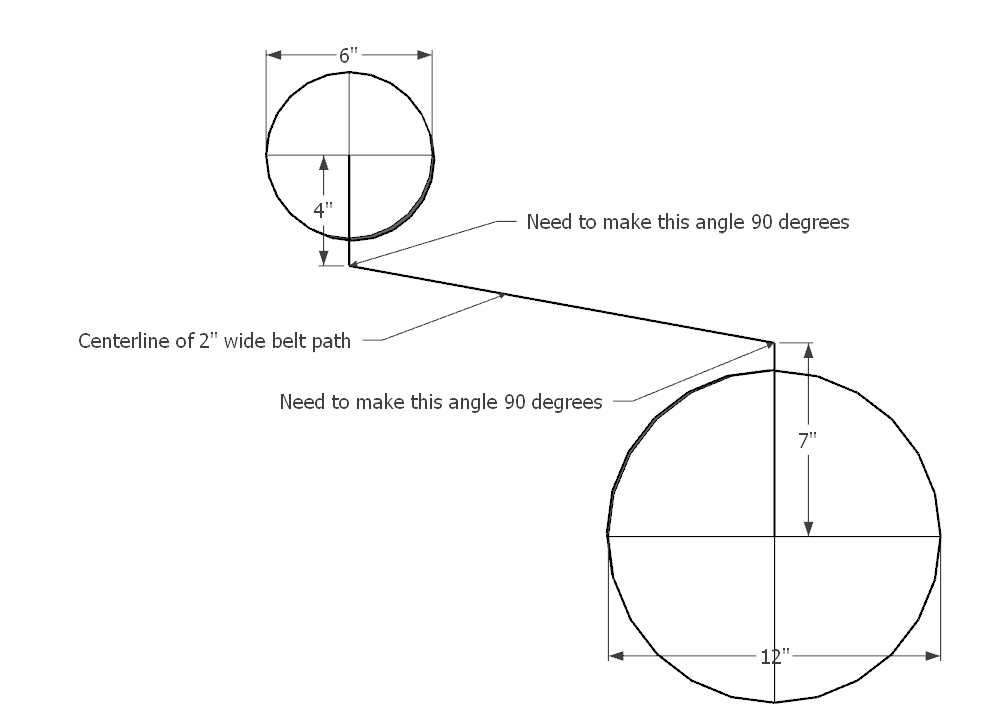

-
I do a lot of this kind of thing. I use TIG's True Tangents extension to aid in working out the tangents and instead of using circles for the bends in the belt I use the Arc tool between the tangent points.
Although this one is a round belt the idea is the same to create the Follow Me path.
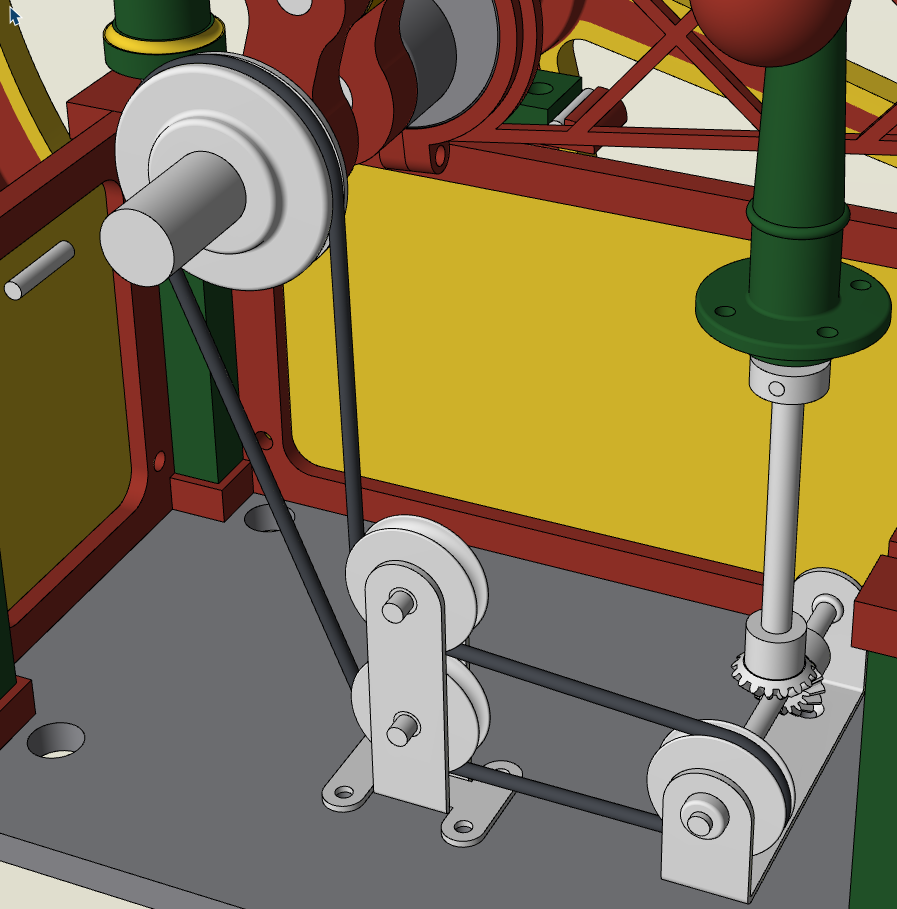
A quick example.
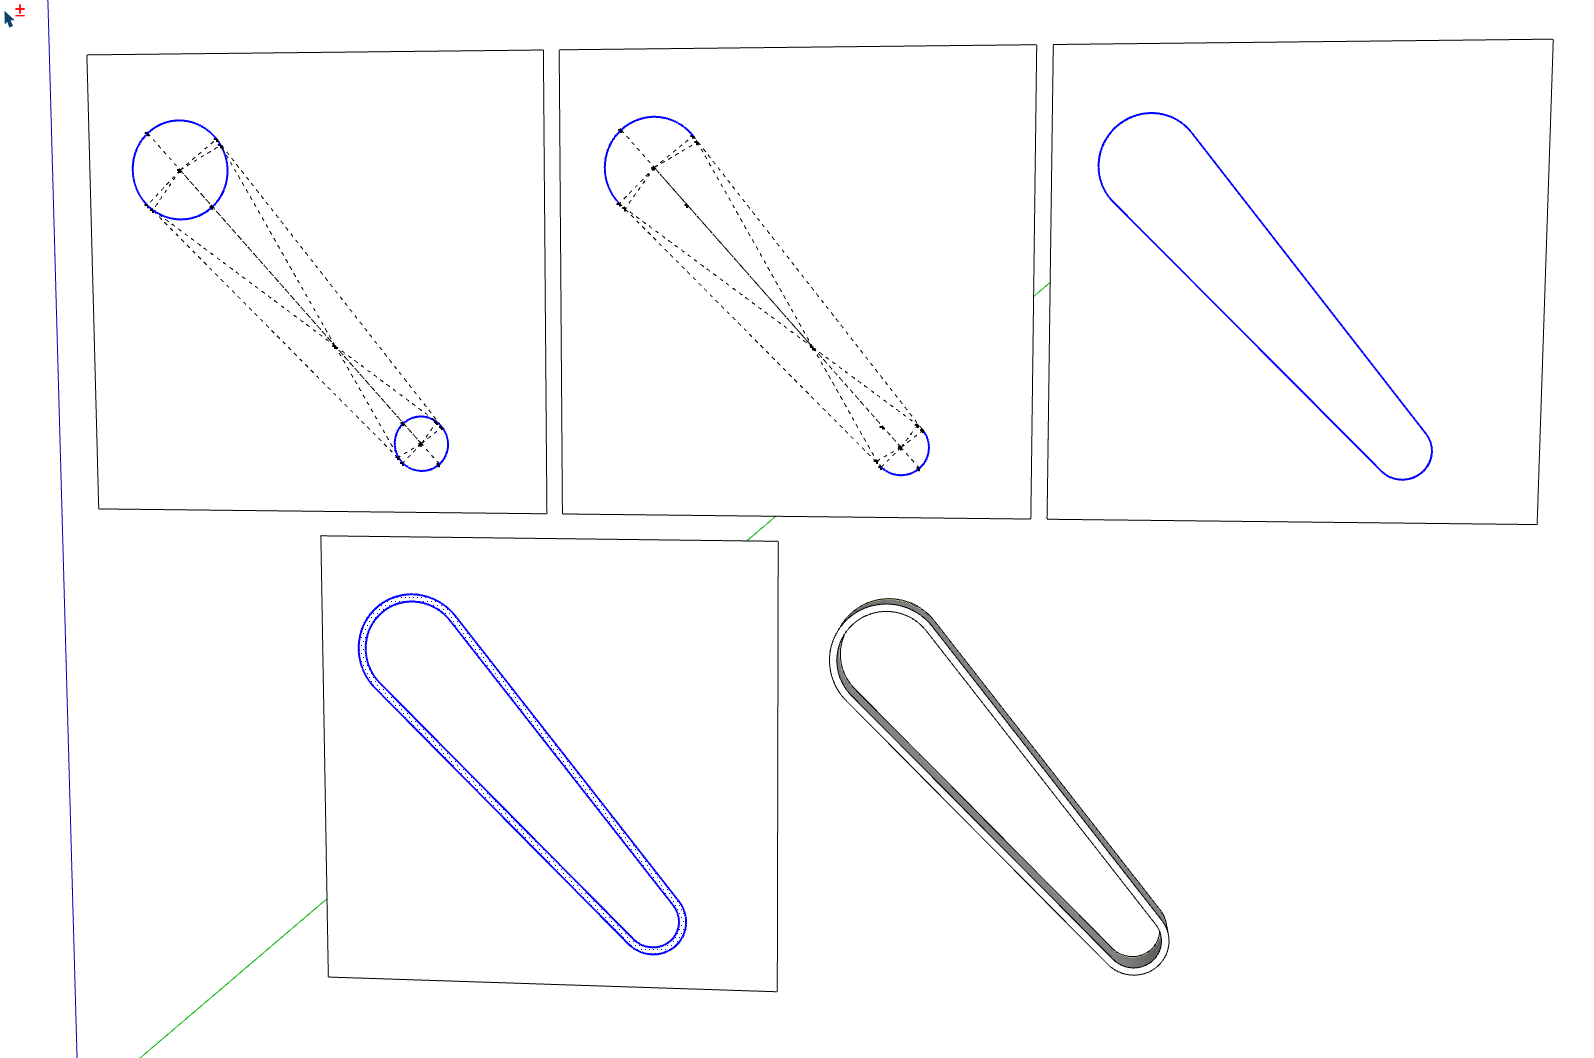
-Circles represent the surface of the pulleys. Guide lines and points after using Common Tangents in Tangent Tools.
-Circles replaced with arcs between the guidepoints at the tangents.
-Edges drawing in to complete the loop.
-Offset to define the thickness of the belt.
-Belt extruded to final width. -
@FrostyMug
Hello FrostyMug,
maybe helpful is this free german e-book from Thomas Pleiner:Look for Image (Abb) A-029, A-030, A-031 Page 32-34
Greetings from Germany
Martin Rüggeberg -
Thank you very much, I will look at that.
-
I do a lot of this kind of thing. I use TIG's True Tangents extension to aid in working out the tangents and instead of using circles for the bends in the belt I use the Arc tool between the tangent points.
Although this one is a round belt the idea is the same to create the Follow Me path.
A quick example.
-Circles represent the surface of the pulleys. Guide lines and points after using Common Tangents in Tangent Tools.
-Circles replaced with arcs between the guidepoints at the tangents.
-Edges drawing in to complete the loop.
-Offset to define the thickness of the belt.
-Belt extruded to final width. -
@Dave-R
That's exactly what I need, thank you! Is that the True Tangents plugin that you referenced? I agree with using arcs instead of circles for anything that is not perpendicular to one of the vertices that would be created by using a circle (I know I am not saying that correctly, but I am sure you understand). Basically arcs for anything that is not at 90 degree increments.
I struggled a good bit this morning to find a way to do it with Sketchup's native tools. It takes a few more steps, but I don't regret the struggle because of what I learned. My biggest struggle to overcome was trying to figure out how to rotate a line around a point to exactly meet another line. The Rotate tool doesn't do it. The protractor tool doesn't help. Finally I stumbled upon drawing an arc from the pivot point to the end of the line, over to intersect with the other line. Bingo! I should've known, but silly me.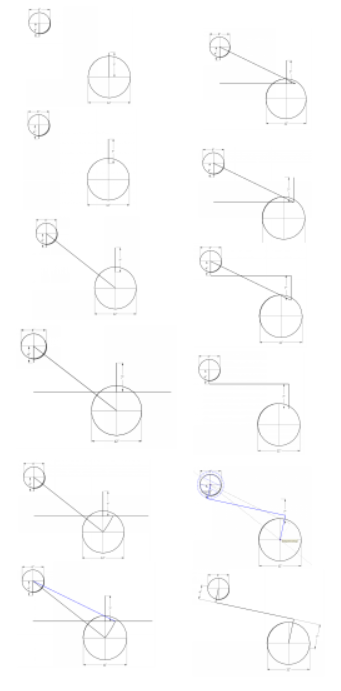
-
I just downloaded and ran the True Tangents plugin. I guess it is called "Tangent-Tools" in the extension toolbar. Oh so much faster and easier! Thank you again!
-
Makes it so simple!
-
Very good.
-
 R Rich O Brien marked this topic as a question on
-
R Rich O Brien has marked this topic as solved on
Hello! It looks like you're interested in this conversation, but you don't have an account yet.
Getting fed up of having to scroll through the same posts each visit? When you register for an account, you'll always come back to exactly where you were before, and choose to be notified of new replies (either via email, or push notification). You'll also be able to save bookmarks and upvote posts to show your appreciation to other community members.
With your input, this post could be even better 💗
Register Login


Advertisement