Print x-ray face view
-
I have a scene in sketchup with x-ray on. I have this scene in Layout and x-ray is working. When I export the sheet to jpg or pdf the x-ray disappears. Is there a work around?
-
How are you rendering the viewport?
On Windows with the viewport rendered as either Raster or Hybrid, exporting from LayOut to PDF or PNG displays X-ray just fine. In the attached PDF the left viewport is Raster and the right is Hybrid.
Which OS version? Which graphics card? Exactly which SketchUp version? 2023 what?
-
The Mac OS Ventura 13.5.2 Apple M1 Max Layout 23.1.341
I have all of the viewports set to raster see screenshot. The attached PDF is from a PDF export.
Unfortunately, I cannot upload more than one file..
Export to pdf from the file drop down -
here is the screenshot..
-
once again..
-
oh, well the system will not allow me to upload a PNG or a jpg
-
Share the LO file.
-
Hi Dave, the file is too big. 150 mb
-
Upload it to DropBox or We Transfer and share the link.
-
-
I'm waiting for your LO file to update. I'm afraid the SketchUp model isn't very efficiently made so updating the LO reference is very slow. In the meantime here's a few things I found.
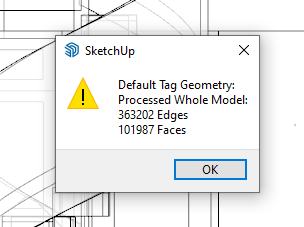
There's quite a bit of ungrouped geometry in the SketchUp model. On the stairs for example:

Unfortunately there's a lot of incorrect tag usage. You should be keeping Untagged active at all times and leave all geometry (edges and faces) should be created and remain untagged. Only groups and components should be given tags.
You are also hoarding a whole lot of unused content.
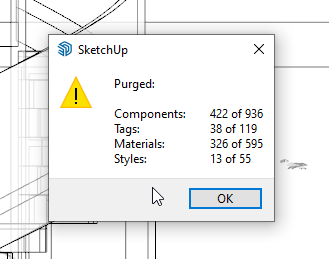
After purging the unused stuff from the file, the file size was reduced by more than 55%.
I only looked at the scenes showing the spiral staircases in Xray but for those elevations you have the camera placed at a huge distance from the model. If you go to the ADU Spiral Stair Elev scene and change the camera to Perspective you'lll see the model disappears. This is due to the huge distancefrom Camera to Model.
I'm puzzled as to why you have some many of what amount to the same style but dedicated to a single scene.
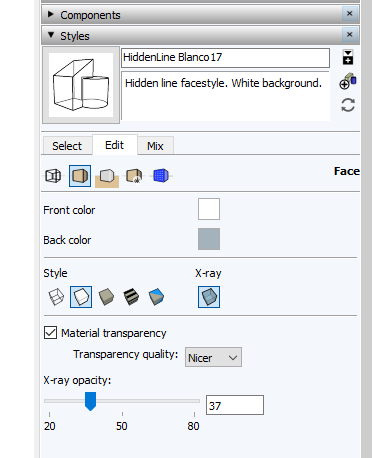
I edited the style for the aforementioned scene and set Transparency to better quality and reduced the opacity.
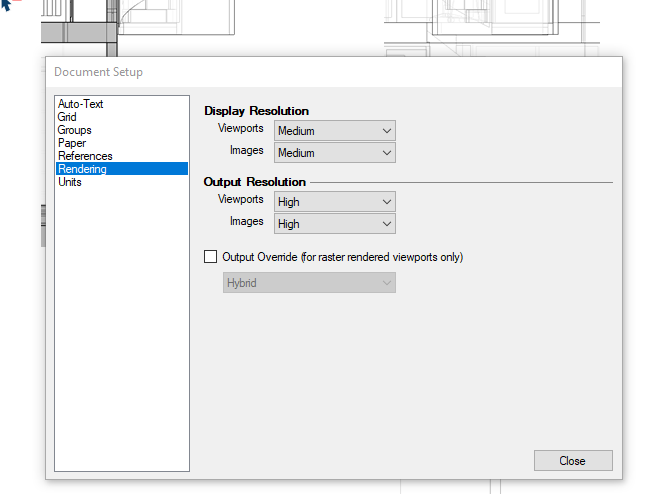
After updating the LO reference I went into Document Setup>Rendering and unticked the box for Output Override so the viewports retain the Raster rendering.
After that I exported the page to PDF and got a nice result. This screenshot is from Adobe Reader.
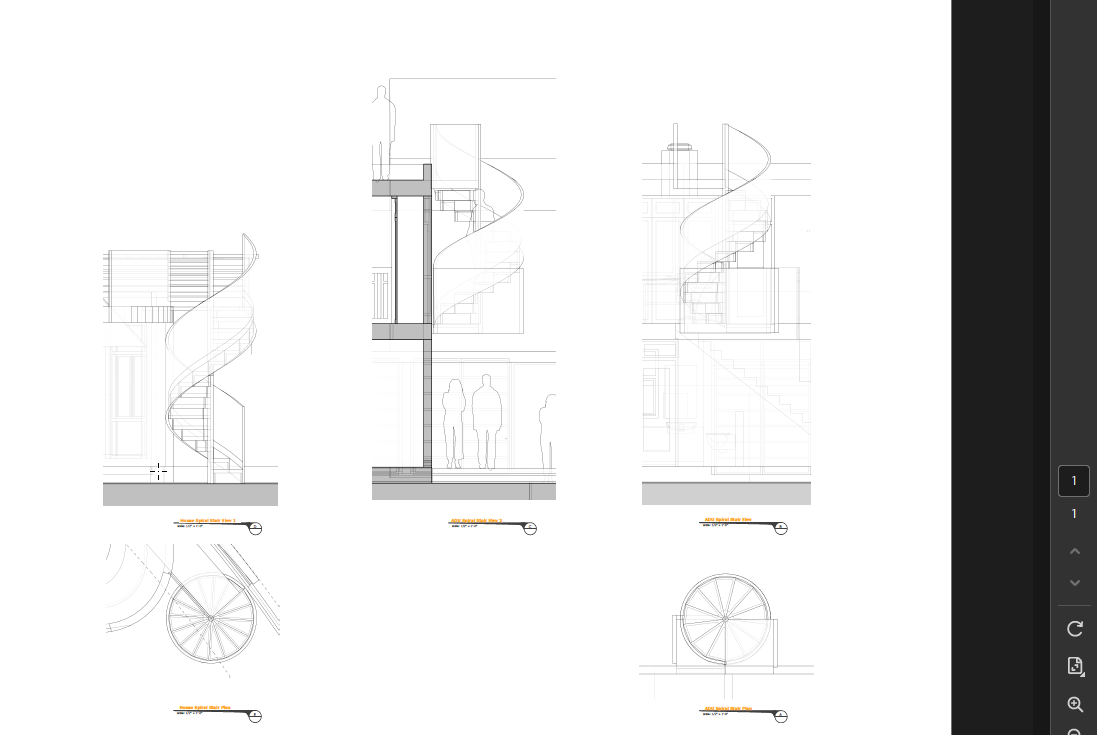
(I hid all but the Viewports layer for the export.)I think you should be able to do these fixes. Try that and see what you get.
-
Thanks Dave! I think I need to go through a tutorial that explains the basics of tags and groups. I have never understood the sketchup tag - layer system. I do understand how to create groups, but components are still a bit of a mystery. If you have any tutorials that you can suggest that would be very appreciated.
I switched from 3D Max many years ago to sketchup so, some of that process + autocad process sticks with me.
Best,
Ron Schafer
-
Maybe go through the SketchUp Funadamentals at learn.sketchup.com
Basically groups and components are sort of containers that collect stuff together. At their lowest level they contain edges and faces. If you need an analogy think of jars and bottles. The glass allows you to see the mustard, mayonnaise, and maple syrup without allowing them to combine with each other in your refrigerator. Make groups and components to prevent geometery from merging in your models.
Tags (formerly called Layers) don't provide separation in SketchUp. Tags are put onto objects (groups, components, images) primarily for visibility control in scenes. Tags will not prevent mergers of geometry in the model space. The normal workflow is to leave Untagged active at all times. Create all geometry untagged and leave it untagged. Make groups or components as you go and give tags to those groups and components as needed. This is the same workflow as when tags were called layers.
Using the correct workflow will make your work easier and faster. It'll also reduce the chance of errors because there's no need to chase the tags as you work. Here's an example from your model.
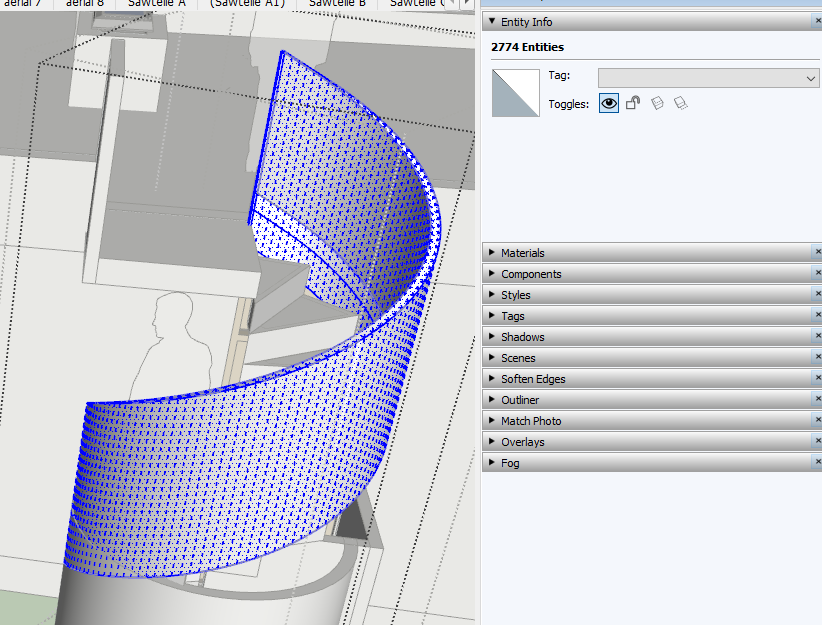
With all of the attached geometry selected for this stair rail, you can see that the Tags field in Entity Info is blank. Tht means that there's more than on tag involved. That results in some parts of the model disappearing while other parts don't when you turn off the Stair tag's visibility, for example.Also, because of your process of tagging geometry you have to always remember to change the active tag as you edit groups and components. If you leave all geometry untagged and leave Untagged active, you don't even need to know what tag an object has before you edit it. When the group or component is open for editing the tag is immaterial.
Another thing I noticed in your model is excessive nesting when you did use groups and components. This spiral stair is a case in point.

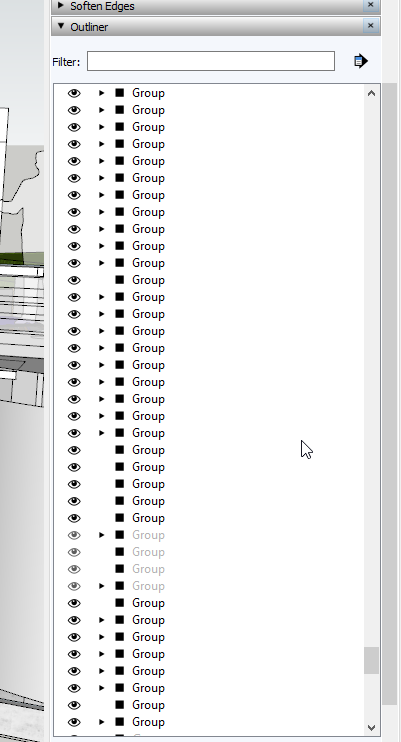
Look at Ouliner. All of the objects in blue are part of this spiral stair. The top Group is the top level object. Then there are several unneeded levels of nesting before you get into the objects that make up the spiral stair case. And you have each stair tread component in an unneccesary group. If you dig into this stair case you'll find the railing is ungrouped geometry combined with all those groups that contain a single stair tread component. This kind or thing bloats your model file and makes it more difficult to work with as you make updates. If you think of my anaology, above, you have 16 jars of mustard in larger jars (double wrapped) and they are in a bag (the group above the groups with the stair tread components) with maple syrup (the stair rail geometry) poured in. And then that bag is inside another bag which is inside another bag, which is inside yet another bag.Here I've simplified that stair case. I've eliminated the unneeded nesting and named the top level group so it can be identified in Outliner and automatically labelled in LayOut if needed. I made a component to contain the geometry for the rail and converted the landing and the landing rail to components with names to identify them.

Built this way, if you want to get in to the model to, say, edit the stair tread component, it's much faster and simpler because you don't have to burrow in through have a dozen or more group containers. And since the group has a useful name, you can work even more quickly via Outliner.Outliner is effectively useless when everything has the same name.
Keeping your models clean and streamlined may seem like more work but I assure you it will pay off in the long run with less time invested in working on the model, especially when changes are quired later. It'll also make working in LayOut easier and faster. This got longer than I intended but there's more you can do to improve your workflow. If your time has any value, I think it's worth figuring that out.
Advertisement


