Foundation Plugin
-
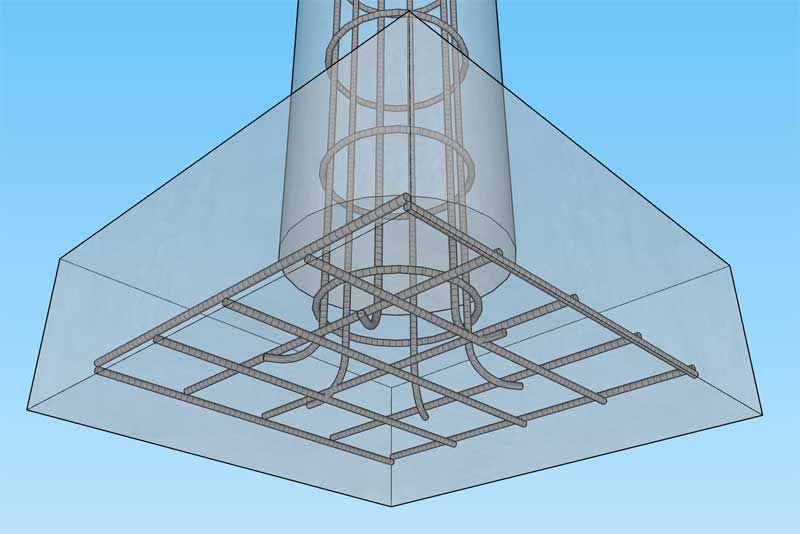
Probably something more along these lines:
View model here:
3D Warehouse
3D Warehouse is a website of searchable, pre-made 3D models that works seamlessly with SketchUp.
(3dwarehouse.sketchup.com)
If you look closely at the model you will notice that the texture/material on the vertical bars is a bit of a mess where they flare out to meet the spreading footing. Special attention will be required to make sure the initial follow me operation is done on the X-Y plane and then the bars are rotated up into the vertical position.
Does this type of rebar detailing look useful? Sometimes I need to use a bit of restraint so I don't take things to far, but if this is something that would find some utility I can add the additional rebar options in.
-
Version 1.4.4b - 09.10.2019
- Added vertical and hoop rebar for column footings with round or square piers.
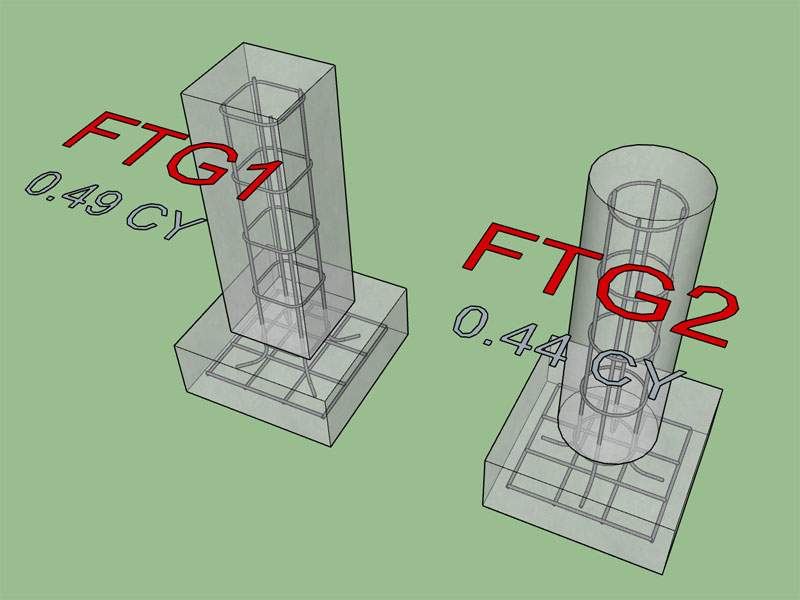
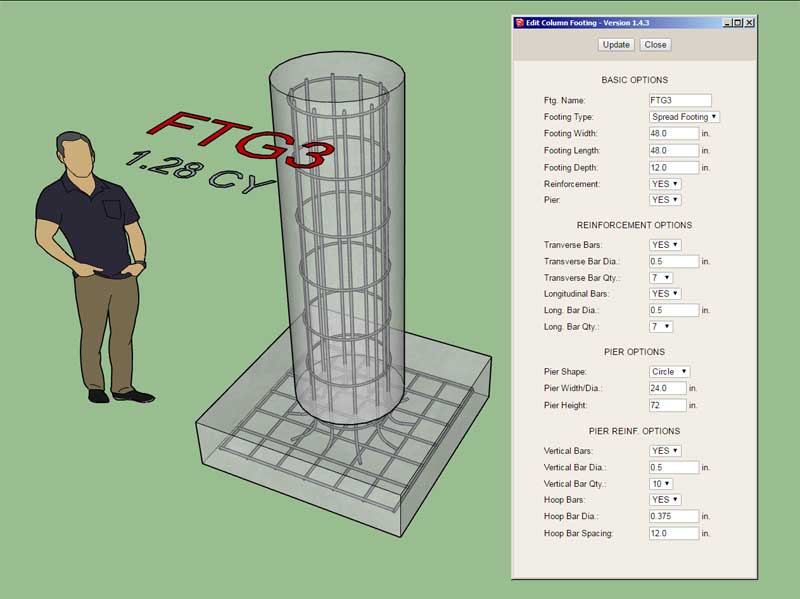
Sorry, useful or not, that pier rebar was just too tempting to pass on. When you enable piers and rebar you are now presented with an additional section with options for vertical and hoop rebar within the pier. Square piers are currently limited to two, four or eight vertical bars, round piers are limited to the following number of bars: 2, 4, 6, 8, 10, 12.
If you need more than twelve vertical bars then you are probably not designing a residential structure.
I'm not a concrete guy (haven't done a lot of reinforced concrete engineering, mostly lumber and timber), so this is kind of my best guess at what is appropriate for residential work. If you need specific details changed up, please let me know.
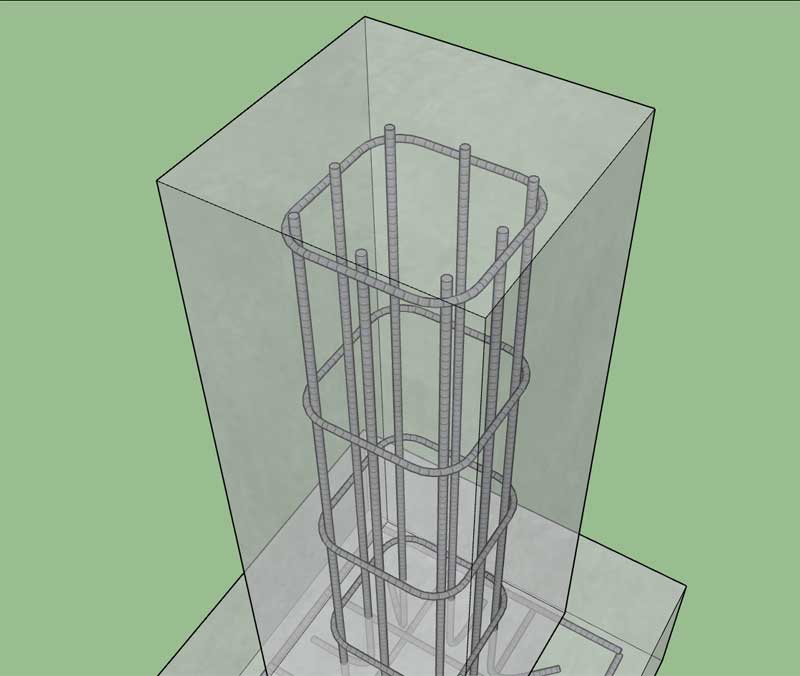
Square pier with eight vertical bars:
I'm also thinking about adding in sonotube footings/piers (no spread footing) with an option for a bell shaped footing:

-
Version 1.4.5 - 09.11.2019
- Added Sonotube footings to the "Draw Column Footing" tool.
- Added a flared "Bell" footing option for sonotube footings.
- Added vertical and hoop rebar for sonotube footings.
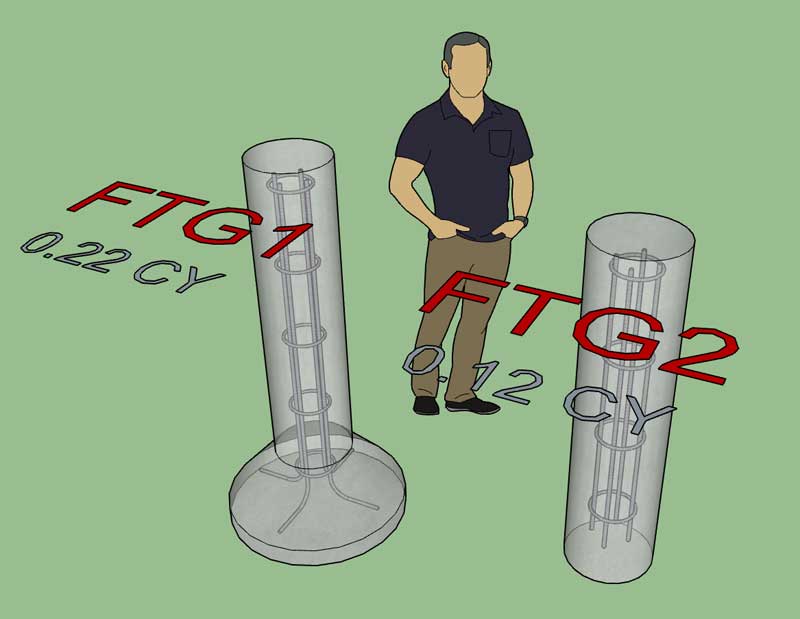
When you toggle the "bell" option on I have the vertical rebar bend 90 degrees as shown and extend to the perimeter of the bell (ground clearance maintained).
Sonotube footings without a bell option have vertical bar as shown.
View model here:
3D Warehouse
3D Warehouse is a website of searchable, pre-made 3D models that works seamlessly with SketchUp.
(3dwarehouse.sketchup.com)
-
Version 1.4.5b - 09.11.2019
- Added the option to place a double mat of rebar within a spread footing (top & bottom).
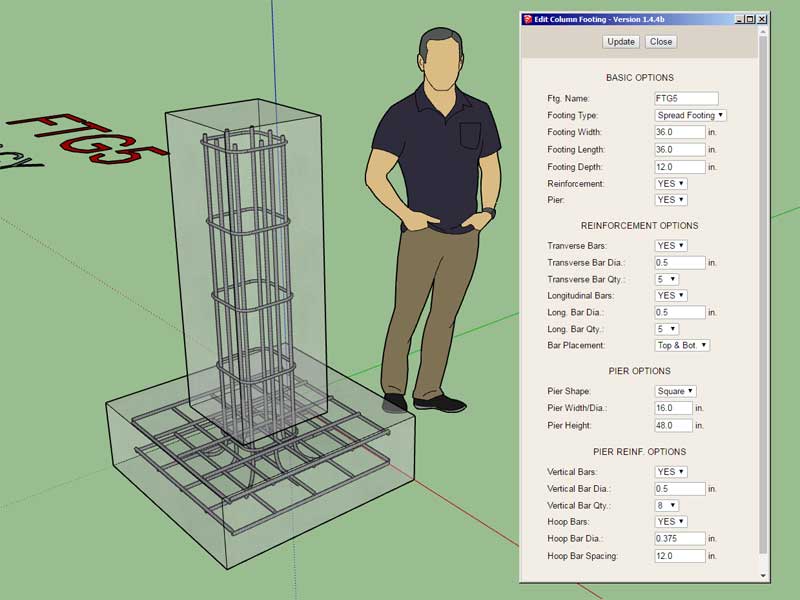
Note that the top mat is identical in size and spacing as the bottom mat.
View model here:
3D Warehouse
3D Warehouse is a website of searchable, pre-made 3D models that works seamlessly with SketchUp.
(3dwarehouse.sketchup.com)
-
@juju said:
thanks for the efforts!
the toolbars for your extensions are becoming rather elaborate and taking up a bit of toolbar / screen space, any chance you could implement a single initiation button/icon instead and have a secondary open when the primary has been triggered, much like Fredo does some of his extensions?
@medeek said:
Hmmm, you might be on to something with this.
I agree that the amount of toolbars has multiplied quite rapidly as I keep adding more features to each plugin, it does take up quite a bit of screen real estate now.
Thank you for the continued efforts Nathan! I see the toolbars are steadily increasing, any chance you can look into the request / suggestion above?
-
@juju said:
@juju said:
thanks for the efforts!
Thank you for the continued efforts Nathan! I see the toolbars are steadily increasing, any chance you can look into the request / suggestion above?I am looking into this further. Again, not entirely sure on the best possible solution but I will see if I can either consolidate or provide some other system.
-
First look at the blockout tool and its results:
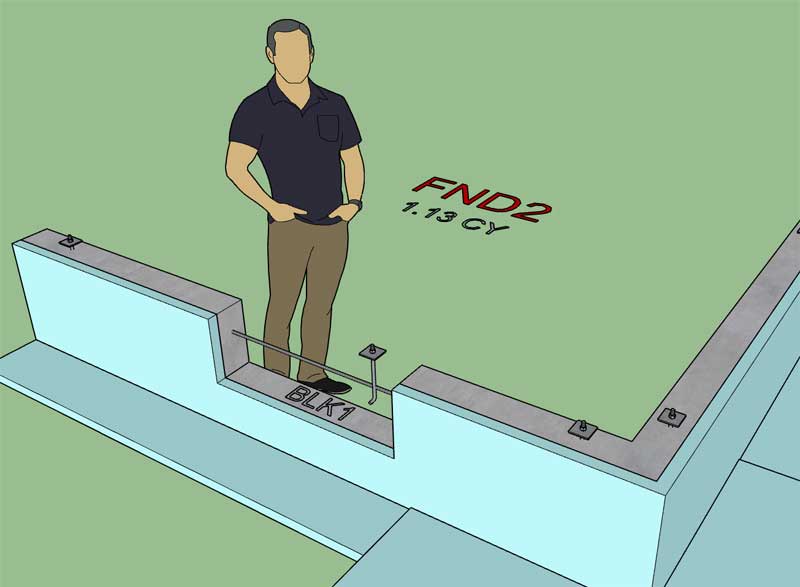
Now I just need to have it trim out the rebar and remove anchor bolts that are in the way.
I'm also including an option to have it remove anchor bolts or not remove them in the case that for some reason you don't want to remove anchor bolts that clash with the opening.
I'm going to assume that designer would always want to trim the rebar out and the insulation, but I could also be mistaken on this and might need to provide a couple more options that allow for toggling this behaviour on and off for each blockout.
The edit and delete functions seem to be stable, I just need to get on the move tool and make it work similar to the move tool for openings in the Wall plugin.
The blockout label is on the hidden layer and toggles on and off automatically with the blockout tools.
-
First look at rebar trimming and anchor bolt removal:
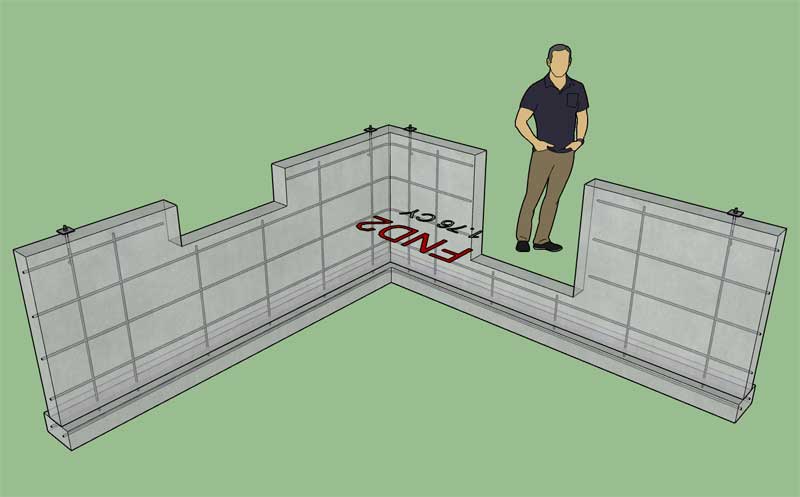
Now I just need to get the move function working correctly and I think this new set of tools is ready for prime time.
And yes, when you insert blockouts the plugin is correctly calculating the decreased volume of concrete or CMU blocks for the stemwall.
-
CMU stemwall with blockouts:
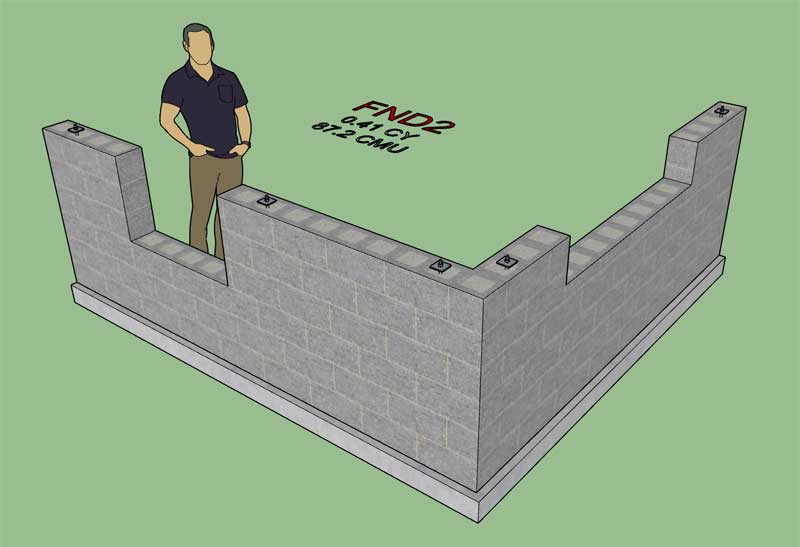
I think this plugin is finally beginning to coalesce into a legitimate extension.
Still, a few more items remain that need attention but I will need to put those on the back burner for a couple of months while I turn my attention to the truss and wall plugins. The biggest items are:
1.) Doors and Windows in foundation walls.
2.) Internal footings for basic slabs (not slab-on-grade)
3.) Finish integrating the Medeek Estimator with this plugin
4.) Engineering (footing calcs primarily), see example here: http://design.medeek.com/resources/footing/SQUAREFOOTING_CALCULATOR.pdf
5.) Retaining walls with engineering
6.) Additional interior bearing types
7.) Move/Stretch tool for SOG and Stemwall foundationsThese are the big items that come to mind right now. The actual list is probably four times this list in size. Please let me know what additional features or improvements you would like to see.
-
Version 1.4.6 - 09.14.2019
- Enabled the "Draw Blockout" tool for polyline stemwalls.
- Enabled the "Edit Blockout" tool for polyline stemwalls.
- Enabled the "Move Blockout" tool for polyline stemwalls.
- Enabled the "Delete Blockout" tool for polyline stemwalls.

I will put out a short tutorial demonstrating this new tool even though it is mostly self explanatory.
One to thing to note is that this tool only works for the "new" polyline stemwalls. I'm not sure yet what I'm going to do with the old stemwall tool. Basically everything you can do with old tool you can achieve with the new polyline tool (with the exception of joist pockets). I will need to give this some more thought.
-
Tutorial 7 - Blockouts in Polyline Stemwalls (8:35 min.)
Unfortunately, I forgot to demonstrate the CMU option with the blockouts, so I will leave that up to the user to try that out for themselves.
If you are using stemwall foundations at all this newest feature is critical in my opinion. Manually creating blockouts in your stemwalls renders the parametric ability of the plugin mute, hence this latest addition was necessary.
-
It just occurred to me that the method/algorithm I use to remove rebar for a blockout can also be used to remove slab rebar or mesh from a slab depression. Now I have a solution for the slab depression reinforcement problem.
The only potential issue I see with this is the shear number of solids (reinforcement) that may need to be trimmed, especially if the user has specified wire mesh. I will give this some additional consideration and see if it will work.
It also just occurred to me that a stemwall opening (door & window) tool is very similar to the tool I just created and I can probably utilize almost 90% of the code I just created to quickly put together a tool for creating openings in stemwalls. So much for a relaxing Saturday evening and Sunday, I’ve got this.
-
What is the convention for calling out openings (windows and doors) in a basement foundation plan?
Do you list the actual size or is it similar to floor plans where you are using the nominal sizes (ie. 3040, 3068, etc...) but the actual opening is something entirely different?
To be honest, in my neck of the woods I don't see very many basement plans because of our high water table, most everything is stemwall foundations with crawl spaces.
Also would it be useful to have the plugin provide window and door bucks? If so what should that geometry look like?
As far as the actual window and doors, my plan is to eventually split out the window and door module from the wall plugin so that it can also be utilized to place windows and doors into basement walls.
-
As nearly I can tell the convention for doors and windows in basement plans is the same as in regular framing, so here is my proposed solution for openings in foundation walls:
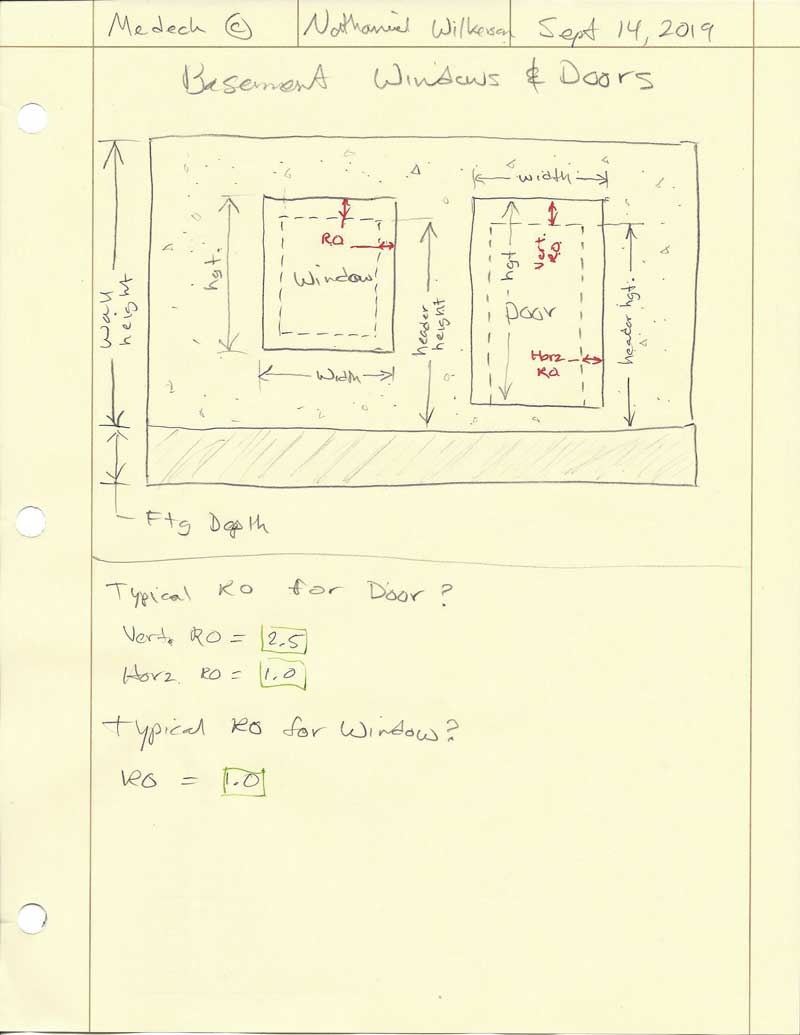
Note that the header height is measured from the top of the door or window opening with the RO taken into account.
So for example a standard 3068 door would have an actual opening width of 38" and an actual opening height of 82.5" (blockout dimemsions), assuming the rough opening dimensions given. Assuming that a 4" slab is poured on the top of the footing then the header height would need to be 84". The height of the top of the door opening measured from the top of the footing would be 80" + 4" + 2.5" = 86.5"
Correct me if any of this goes counter to common practice.
However, another way of dealing with the door may be to actually blockout the foundation all the way to the footing so that the 4" slab extends through the doorway (I've seen it done both ways). In this scenario you still want the door height (80") to remain the same so that the callout is still given as 3068, however to maintain the vertical position of the door within the foundation wall the vertical RO would need to change to 6.5" and the header height would need to be 80".
-
The seventh and hopefully final toolbar (at least for now):

This toolbar will allow the user to create, modify, move and delete openings (two types: doors, windows) within polyline stemwalls.
Once this toolset is added the plugin I think most of my major functionality issues with the plugin will be resolved.
-
The proposed parameters for Stemwall Openings (with default values):
Opening Type: Door (default), Window
Opening Width: 36"
Opening Height: 80"
Header Height: 84"
Horz. RO Offset: 1.0"
Vert. RO Offset: 2.5" -
Version 1.4.7 - 09.15.2019
- Enabled the "Draw Opening" tool for polyline stemwalls: Windows and Doors
- Enabled the "Edit Opening" tool for polyline stemwalls.
- Enabled the "Move Opening" tool for polyline stemwalls.
- Enabled the "Delete Opening" tool for polyline stemwalls.
- Fixed a bug with the Edit Blockout tool menu.

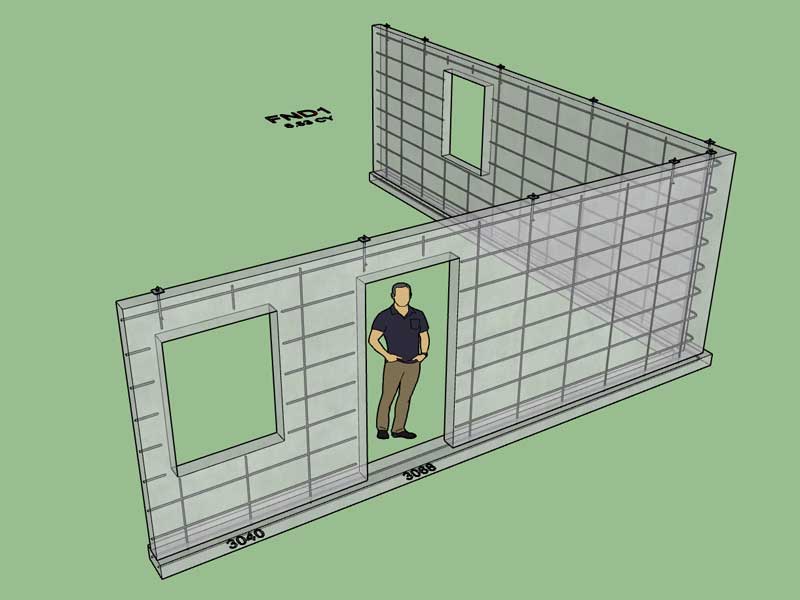
Similar to the blockout tools this new feature only works with polyline stemwalls as noted in changelog.
If you have a lot of rebar in your foundation walls and a lot of openings in those walls then the plugin will have a lot of boolean subtraction to do in order to trim out the rebar as shown, this will cause a performance hit but should not be unreasonable on an adequately equipped PC or Mac. For older machines one way around this is to only toggle rebar on as a final step after all of your other edits to the foundation wall are complete.
-
Tutorial 8 - Windows and Doors in Polyline Stemwalls (8:31 min.)
-
I'm really enjoying the new parametrics and the blockout functions:
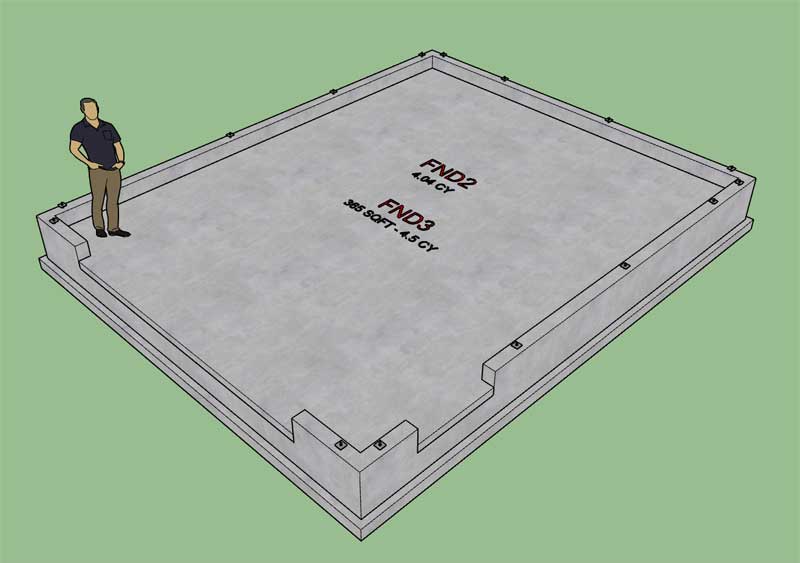
I initially created the (polyline) stemwall foundation then cut out the garage door with the blockout tool. Then I drew in the slab (polygon) option. At that point I decided I wanted a man door 4" off the right front corner, so I used the blockout tool again to create this opening.
Then I realized that slab needed to also flow into this opening so I used the "Edit Slab Outline" feature to modify the outline of the slab and, Voila! Done.
No manual edits and no having to delete and then recreate assemblies, I like this.
View model here:
3D Warehouse
3D Warehouse is a website of searchable, pre-made 3D models that works seamlessly with SketchUp.
(3dwarehouse.sketchup.com)
-
Version 1.4.8 - 09.17.2019
- Added the "Move Stemwall Segment" icon to the stemwall toolbar.
- Added the "Move Stemwall Segment" function to the context menu for polyline stemwall assemblies.
- Enabled the "Move Stemwall Segment" tool for polyline stemwalls.

I think the best way to explain this new feature is to provide a demonstration. I will be releasing another tutorial shortly showing how this new tool is used. I think you will find it very convenient.
Note that openings and blockouts are going to need some further adjustment to their algorithms in order to play nicely with this new feature. I'm already working on the solution.
Advertisement


