Create inset 3D text on a curved surface
-
Hi all,
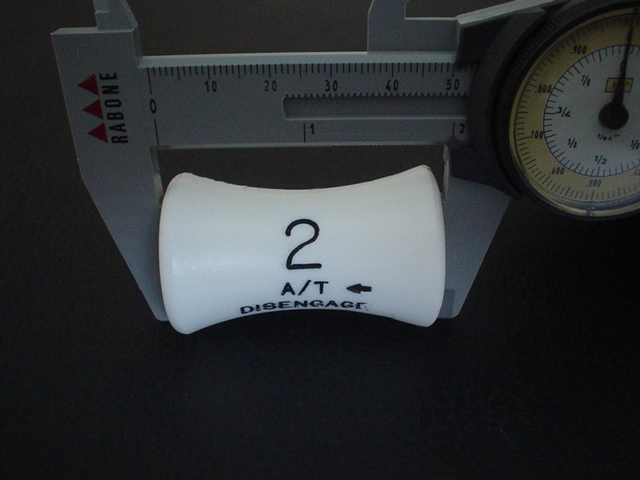
I'm trying to create inset 3D text on a curved surface that is actually a tube shape but also with a waist. The item is in fact a handle for a Boeing 737 Throttle.
This has to be 3D inset text, because it will be 3D printed and the text will be filled with a different colour. (Picture attached!)
The image shows the problem better I guess than my description, any suggestions or extensions that might help with this would be gratefully appreciated.
Joe.
-
Create the 3d text and position it so that you can use intersect faces with...
You could use solid tools or just do it with raw geometry. -
Thanks for the Quick reply,
I have tried that and it is possible to create the text, then intersect the face, but that makes the depth of the inset very deep each side of the curved section. In fact in both axis. It also leaves too much geometry to patch up, trying to adjust the depth of each letter is a nightmare. Because of course you can't push-pull the curved surface.
Joe.
-
Insert the text to the depth you need but extend it out a significant distance. Explode and intersect the text, then select the extended text and delete it, then select the faces of the letters and delete them, finally you will probably need to right click on a white face and choose Orient faces.
-
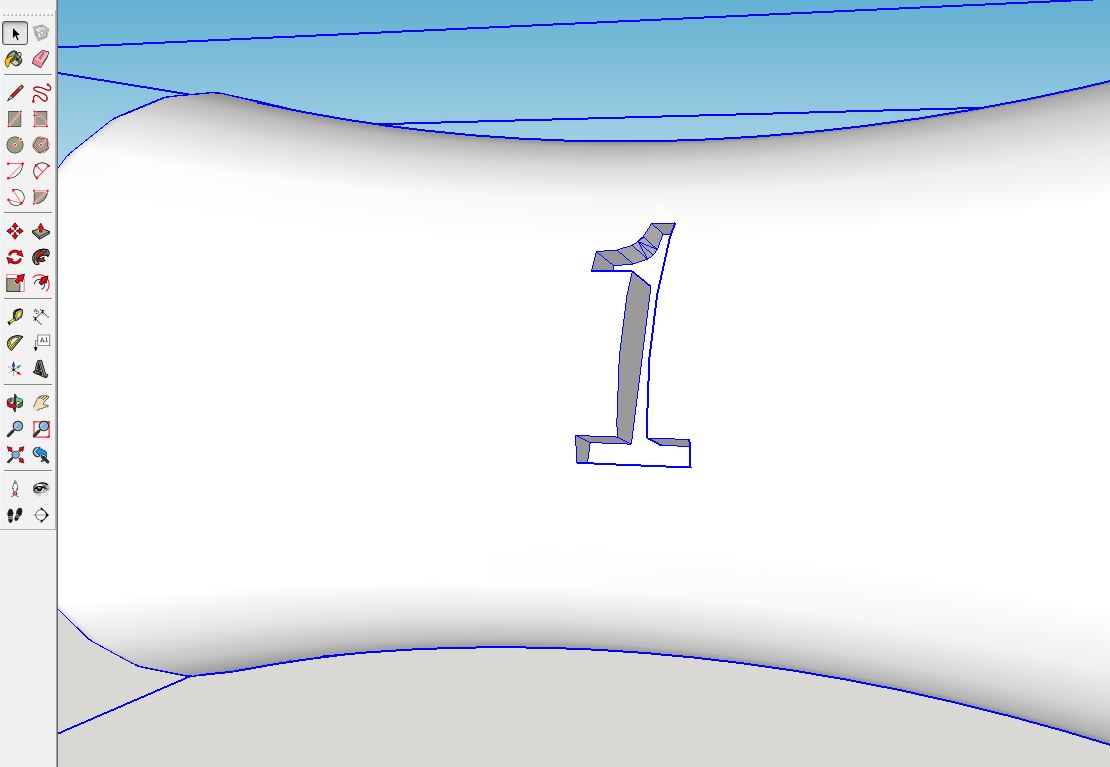
The text needs to be 1mm deep, so the intersected text in the example above is deeper at each end of the intersection, because the text when created is in effect equal is both planes. If you imagine drawing an arc then placing text across the arc you can see what I mean.
The image explains it more easily, but the problem is much worse when using a string of text because of the double curvature.Joe.
-
So you want the text to curve the same as the face, yes that can be done but is fairly advanced. Could I ask who is going to notice whether the text is straight or curved?
-
That's not really the problem, it's the fact that the inset will be filed with paint and it would be impossible (realistically) to fill such a deep void that would be created at each extremity.
-
I did think of creating a second smaller tube inside the first, so effectively intersecting at the inner and outer surface but sketchup has an issue with that methd.
-
We are moving into fluid dynamics and the physics of a meniscus.
So you want the text to follow the face?
Fred's Joint push pull should do what you need. -
I have that Plug-in, so I had a try with it.
It seems the only method would be to do each letter individually, otherwise the geometry gets screwed, but it looks like it can be done. I need to have a solid at the end of it in order to 3D print it. I think some time editing will be the case... No magic solution.
Thanks for the input, it's much appreciated.
-
Make a double skin, by copy,scale and paste in place, then intersect your lettering. On phone so can't show you.
-
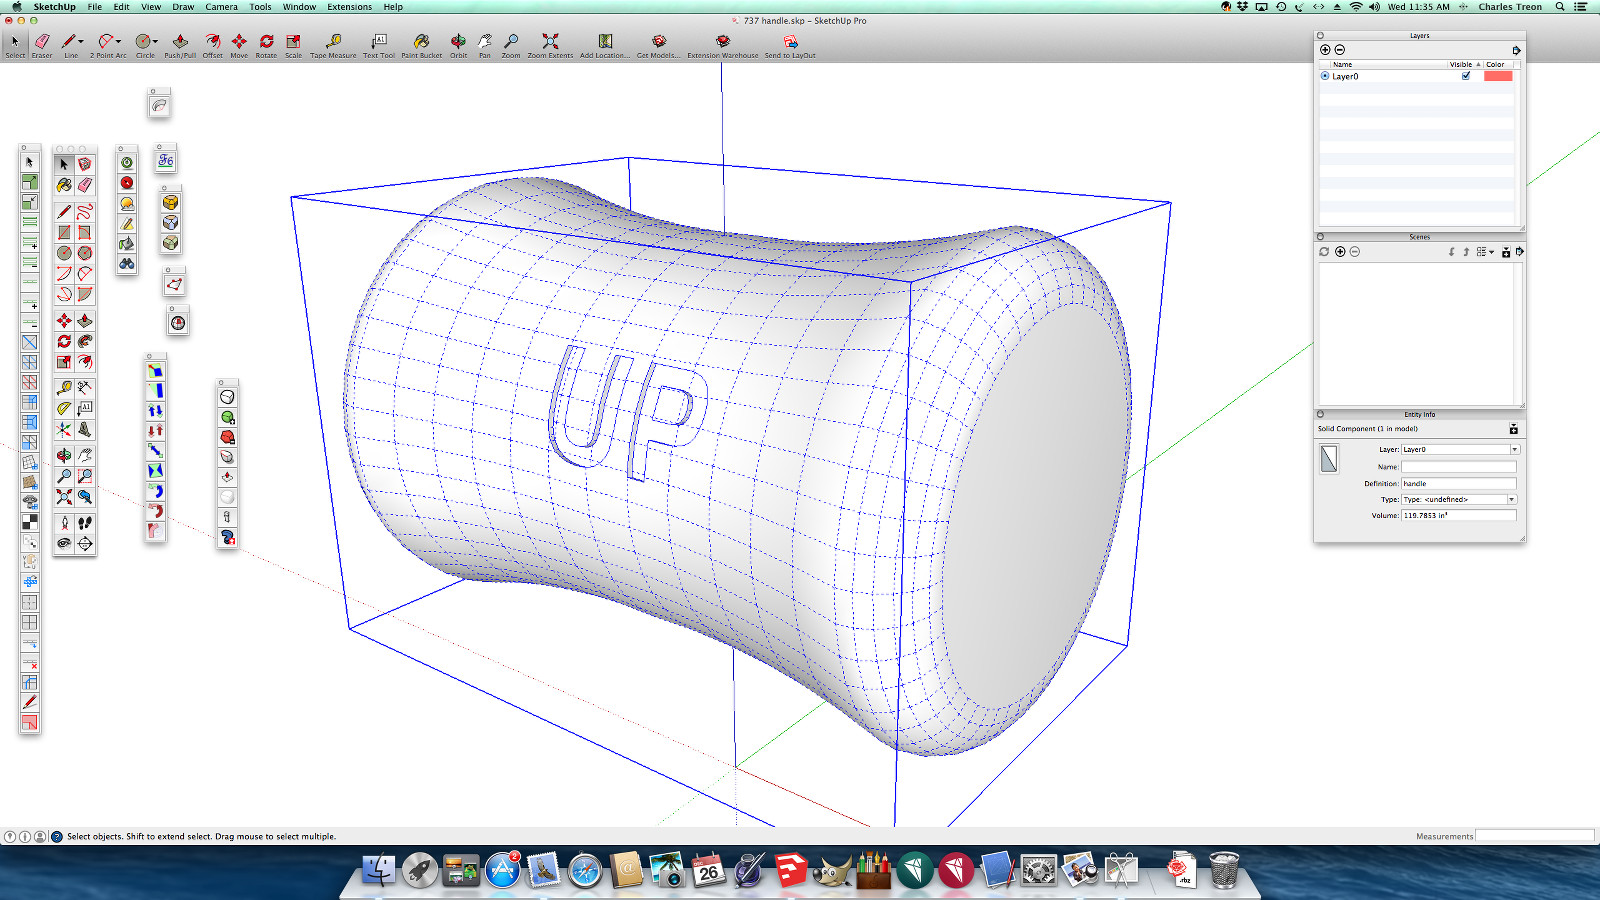
You can do this with native tools. See my example... Drew the handle and grouped it, made a copy and moved off to the side. Text tool for "UP", Placed text and rotated slightly until it looked perpendicular to where I was placing it. Push Pull letters well to the inside. Explode letters and handle run intersect. Clean up excess letters on outside of handle. Select your handle copy and uniform scale down, I scaled to .98 . Move scaled copy centered in Handle with letters. Explode select all and intersect . Clean up excess bits on the inside and there you have it. It would be best to scale your handle up before doing all this , you insure good intersects and less cleanup at the end. took way longer to type this than do the sample....
-
Thank you for such a concise tutorial tuna1957, Ive been away from the PC for a few hours making other bits. I will have a go in the morning and report my efforts.
It's great to have such knowledgable folk to lean on, it's much appreciated.
Joe.
Hello! It looks like you're interested in this conversation, but you don't have an account yet.
Getting fed up of having to scroll through the same posts each visit? When you register for an account, you'll always come back to exactly where you were before, and choose to be notified of new replies (either via email, or push notification). You'll also be able to save bookmarks and upvote posts to show your appreciation to other community members.
With your input, this post could be even better 💗
Register Login


Advertisement