Medeek Wall Plugin
-
Another very good question:
QUESTION:
How can you release drawn geometry (wall plug-in) from being parametric?
Is there a global setting to deactivate or is exploding the only way to achieve this?
ANSWER:
Exploding the main wall group is one way to do it, then group it back together if you wish.
If you do this you essentially eliminate the attribute library of the wall group so this action is irreversible once you save the file and exit the model.
Another method is to rename the Instance Name of the group (remove the RECT_WALL_ASSEMBLY keyword string). If you do this the plugin will not recognize the wall panel group as one of its own and will essentially ignore its existance.
The good thing about this method is that if you at some time in the future do want to restore parametric ability to this wall panel you can do so by renaming the Instance Name to include the keyword string above.
Just make sure the trailing digits or text after the keyword is unique to that wall panel, so that the plugin does not somehow confuse it with another wall panel.
-
Just a side note:
I've dug myself in pretty deep with the garage door module. Yet another fun rabbit hole (ie. arched doors, portal frames, separate garage door plugin within a plugin).
If I'm a little slow to get back to you on a specific bug or question or potential fix this is why. I'm trying to keep focused on the garage door module so that I get it right. I appreciate your patience.
-
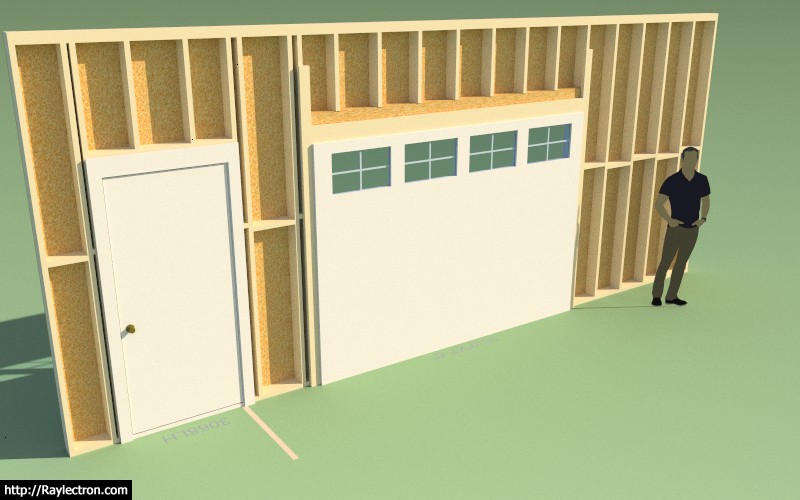
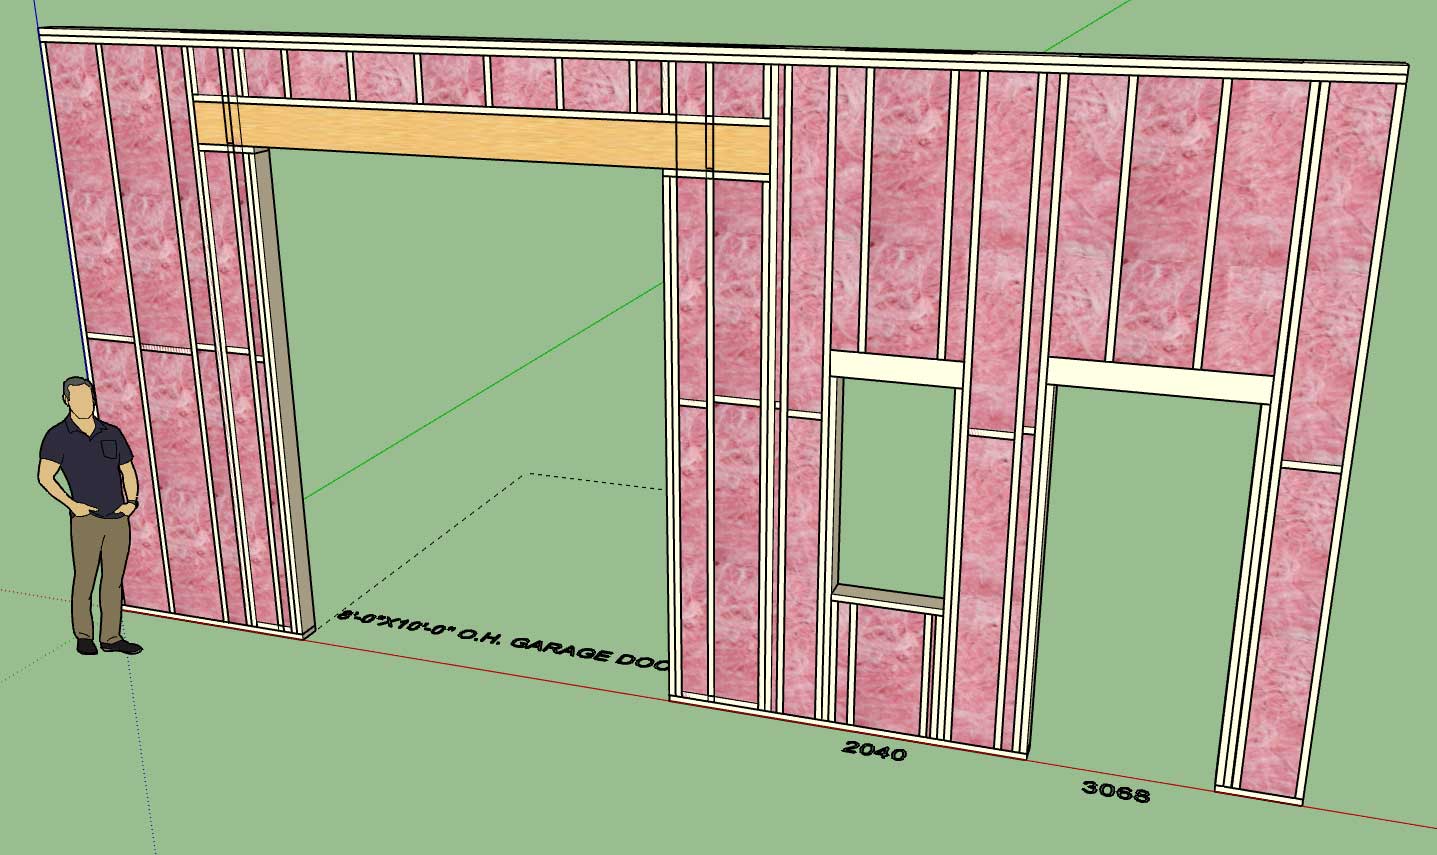
The detail below shows most of the basic elements of the portal frame that will be drawn by the plugin:
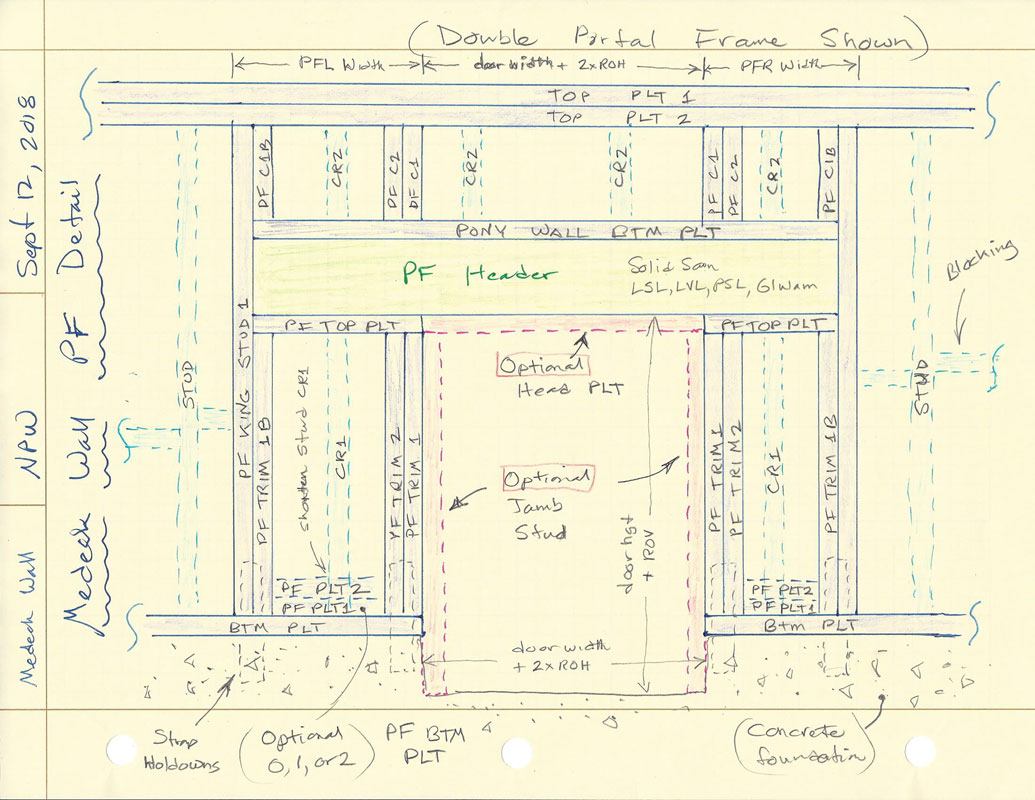
The PF King Stud and PF Trimmer Stud parameters will allow the user to increase the quantity of the king and trim studs accordingly.
The PF Bottom PLT parameter will allow PF Bottom Plates to vary from zero, one or two.
Optional head and jambs studs can be specified (shown in red).
The detail shows a double portal frame, a single portal frame is very similar with one side conventionally framed and one side portal framed as shown.
The light blue elements are the regular studs (or cripples) on their typical 16" o/c spacing.
PF C2 and PF C1B are probably optional elements but I like to include them, please let me know if there are any objections.
For now only strap holdowns will be available since this seems to be the prescriptive path most people employ. However in my professional opinion other holdown types (HDU) could be permitted provided that the proper engineering has been done.
Eventually I will include a PFH calculator in the plugins engineering module based on my own Excel based Portal Frame Calculator:
http://design.medeek.com/resources/PFH/PFH_CALCULATOR.pdf
Please feel free to chime in with any comments, suggestions, concerns or additional options or parameters you would like to see added to this module.
-
Leonard's codex!

-
PF Framing algorithm is complete:
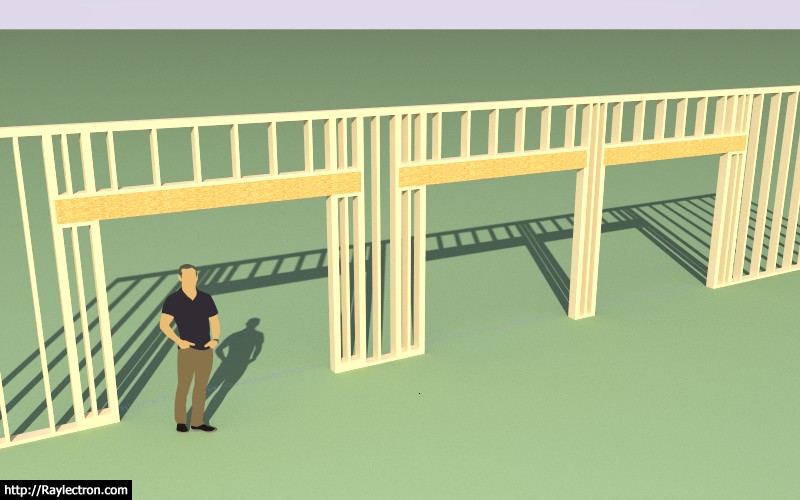
Double, Single (Left), Single (Right)
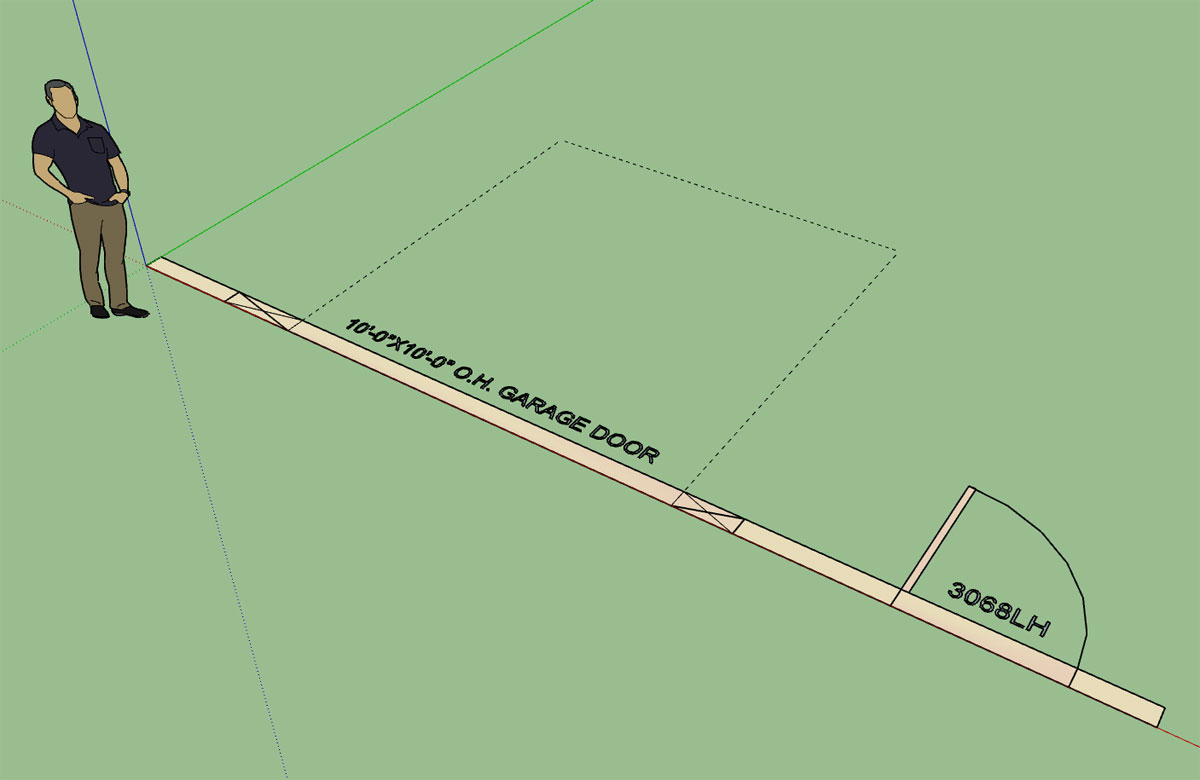
In this case a 10' wall creates a pony wall above the headers.
Now I just need to add in the logic for the optional jamb studs.
-
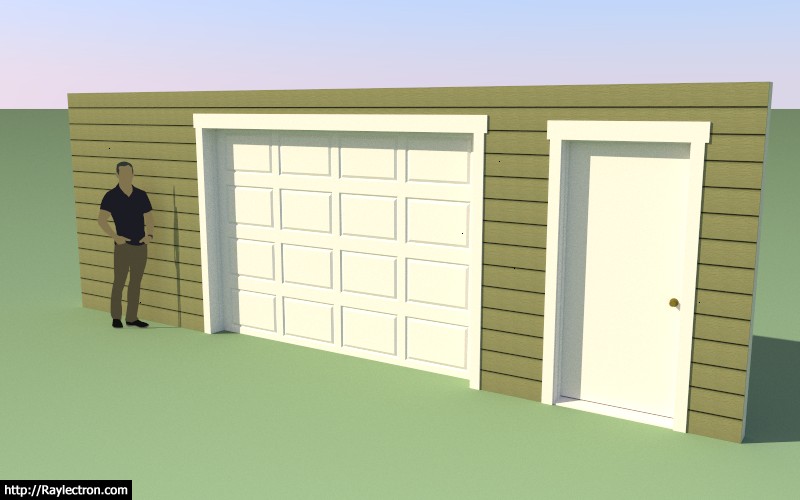
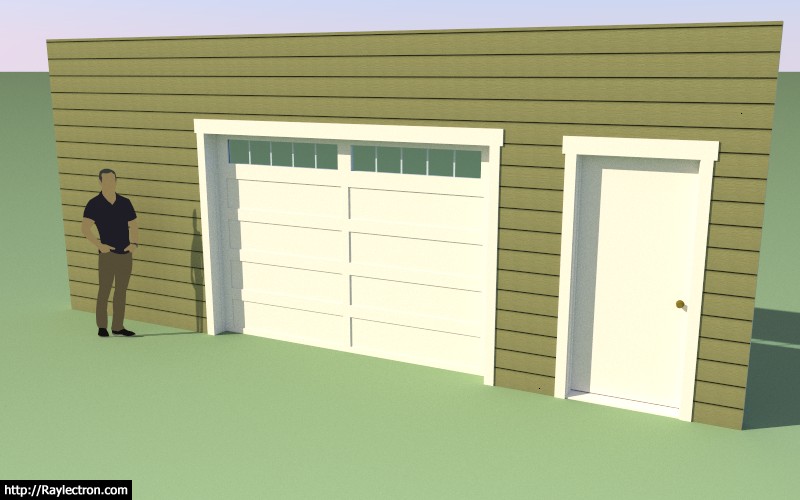
A garage door with optional head and jamb studs enabled:
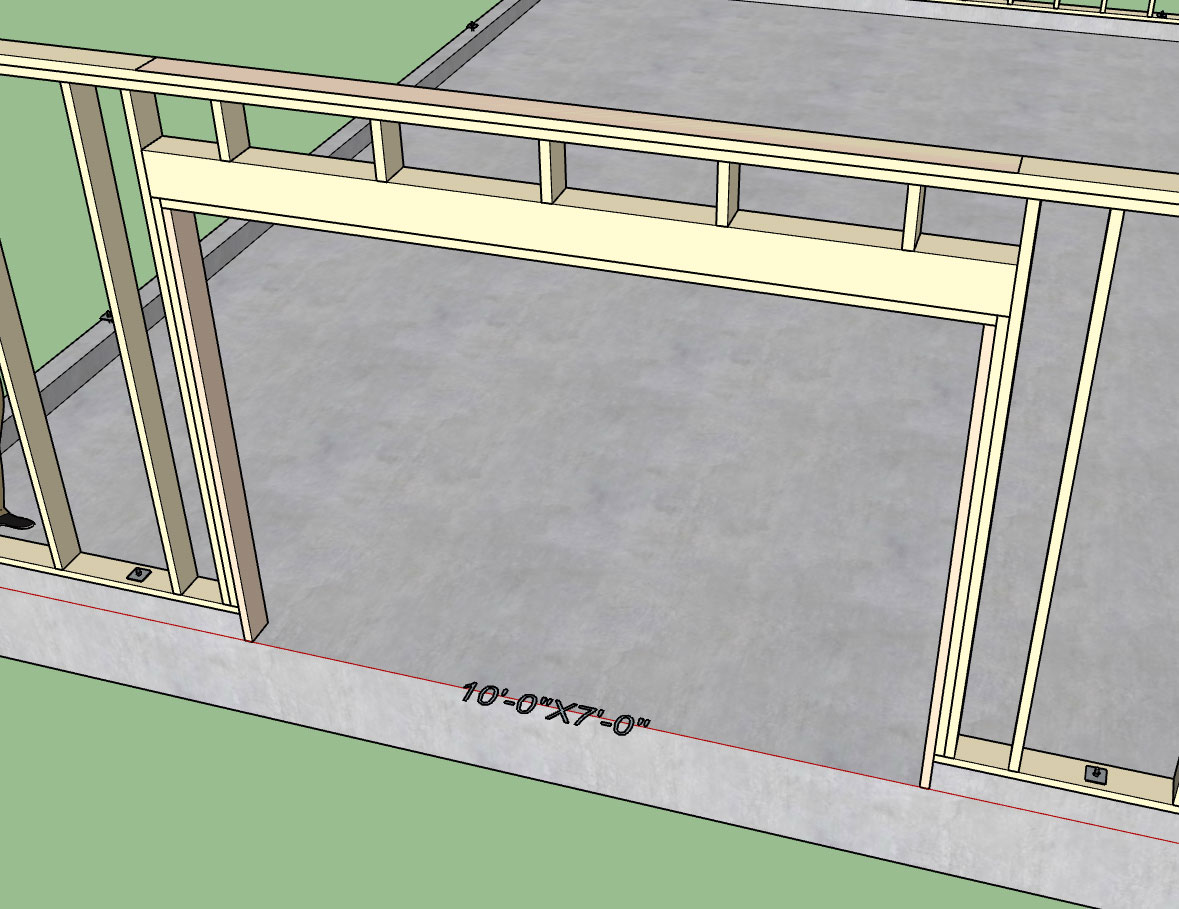
Also note that this feature can be utilized in the CMU or no framing mode:
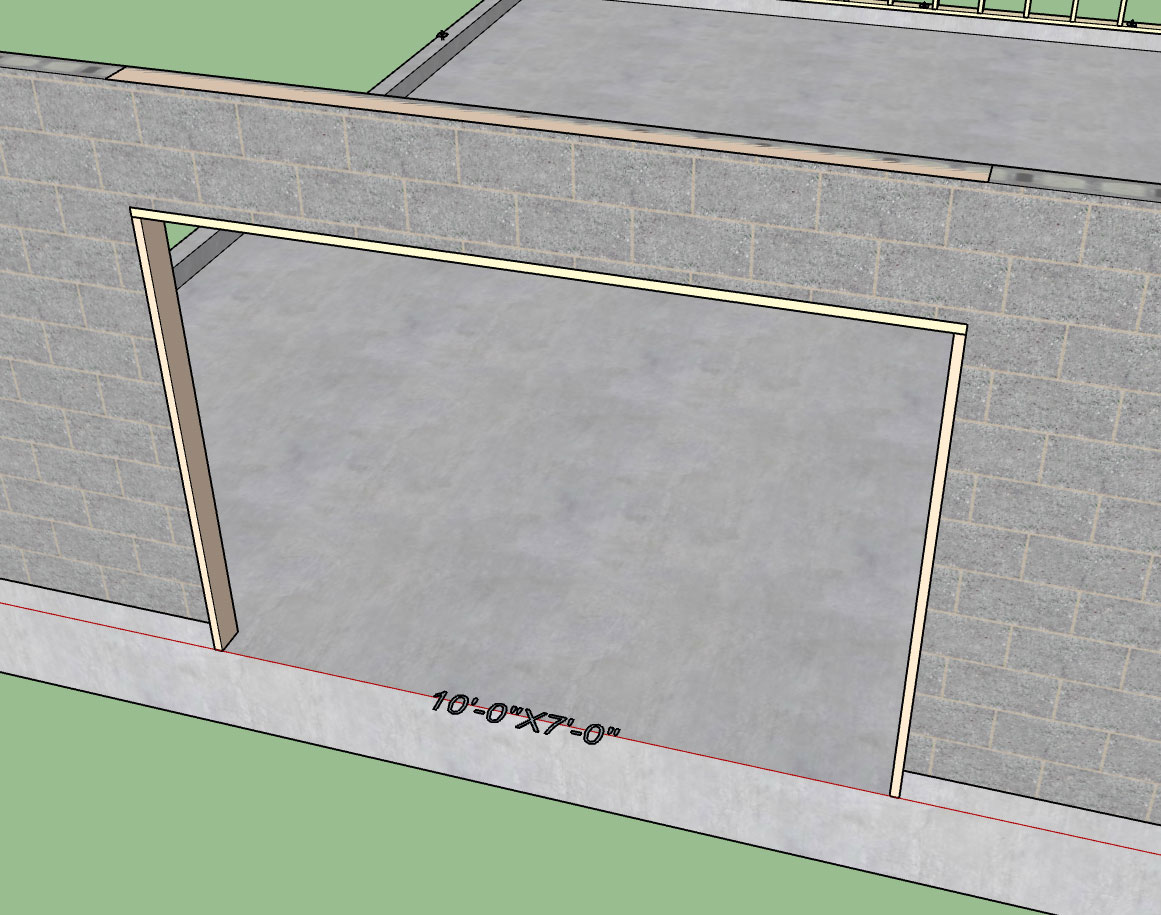
Typically I see jamb studs used in a situation like this, where the door drops below the framed wall (vertically offset) into a garage curb or stemwall. By default the jamb studs are assigned to PT lumber. However, they can also be utilized without a vertical offset.
-
I've been thinking about the parametric ability of the plugin and the fact that manual edits to the plugin geometry are for the most part discouraged since they will be blown away when the wall panel is updated by the plugin.
With that in mind does it really make sense to use components rather than groups, even for wall studs?
Components are essentially the same thing as groups and actually involve more overhead and hence a heavier model.
-
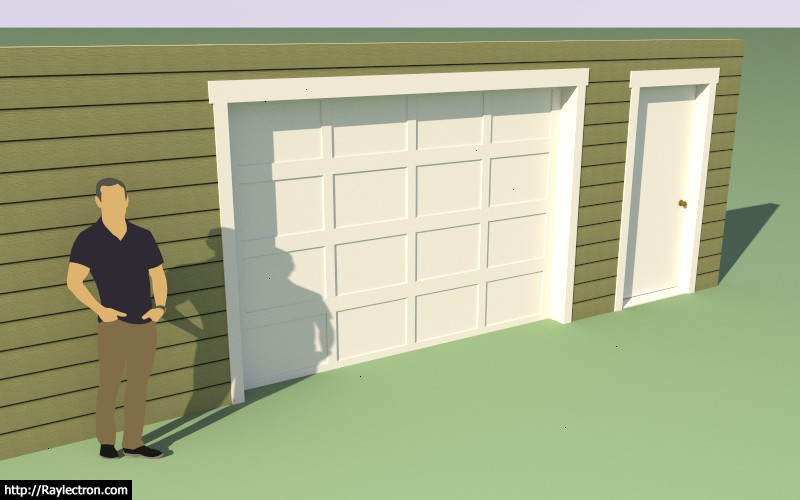
A typical raised panel and flat panel garage door (10'x7') with the panels parameters set to "AUTO":
I may need to fine tune the spacing parameters a bit (I have not exposed the parameters to the user, it would probably just over complicate things) depending on feedback from designers.
Working on the window versions of these two variants now.
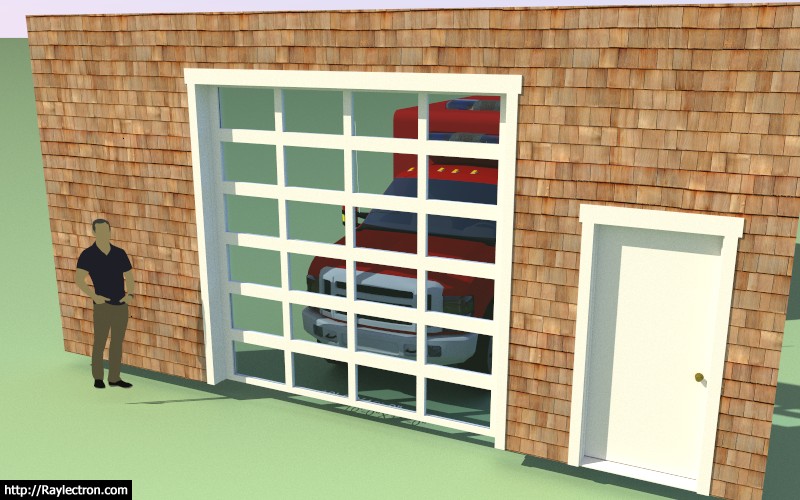
Then the all glass version for commercial applications (ie. Fire Station overhead doors etc...)
I will probably not release a carriage door style just yet, not until I have further researched this type of door and determined what configuration and additional parameters might be needed.
Below is a preview of the Garage Door Edit Menu (note that most of the advance options have been disabled so that if fits on the screen):
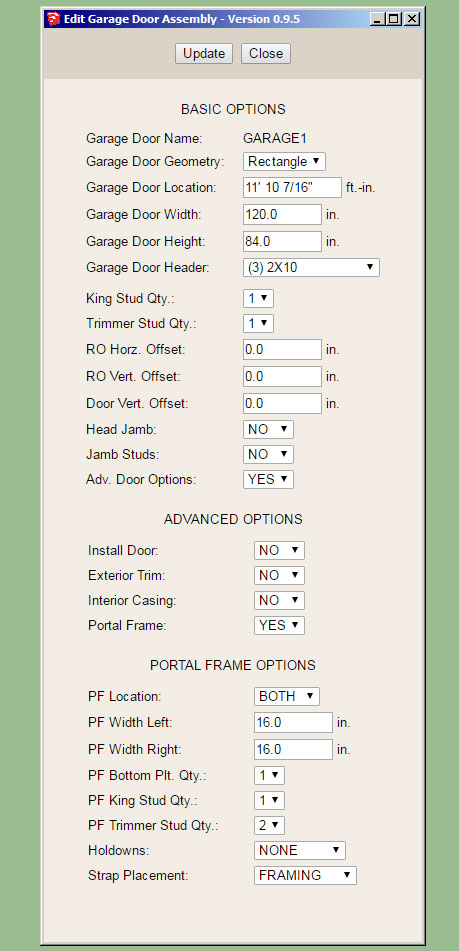
I've enabled the Portal Frame option so that you can see the available parameters.
-
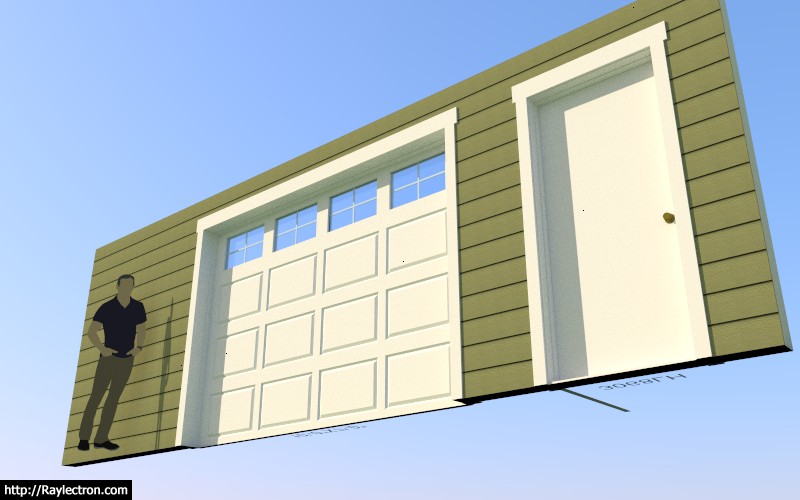
Exterior and interior of a 10'x7' garage door (raised panel with glass and 2x2 grille):
-
The number of horizontal and vertical panels can be specified or be set to AUTO so virtually any number of combinations are possible:
Full glass door exterior and interior. However I'm noticing that these types of doors usually have a kick panel (no glass) installed.
-
A glass door with a threshold and door lever (hardware):
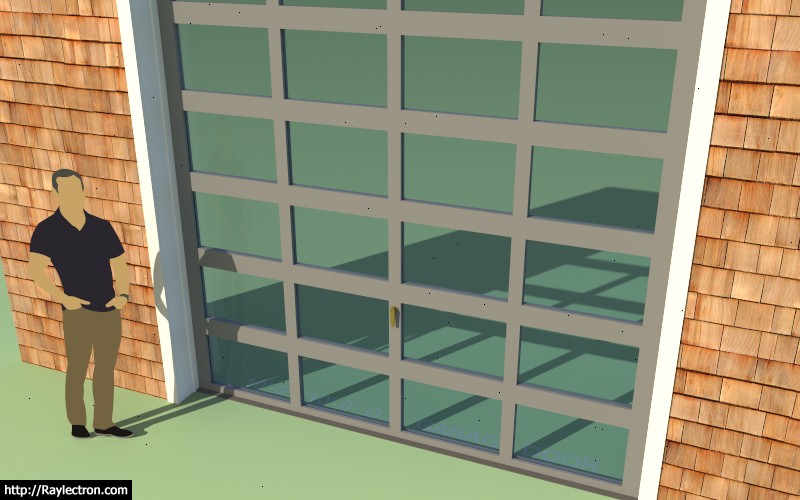
Note that the grey material applied to the door was first created in the material manager in the global settings and then applied in the garage door edit menu. I am very happy with the implementation and added functionality of the new material manager.
The blocked out areas on each side of the garage door indicate the extent of the portal frames when enabled:
-
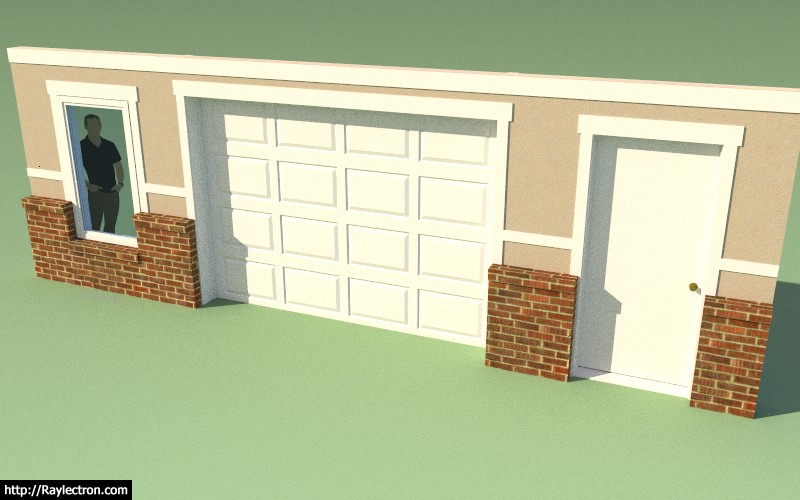
Garage door with ext. trim and wainscoting:
-
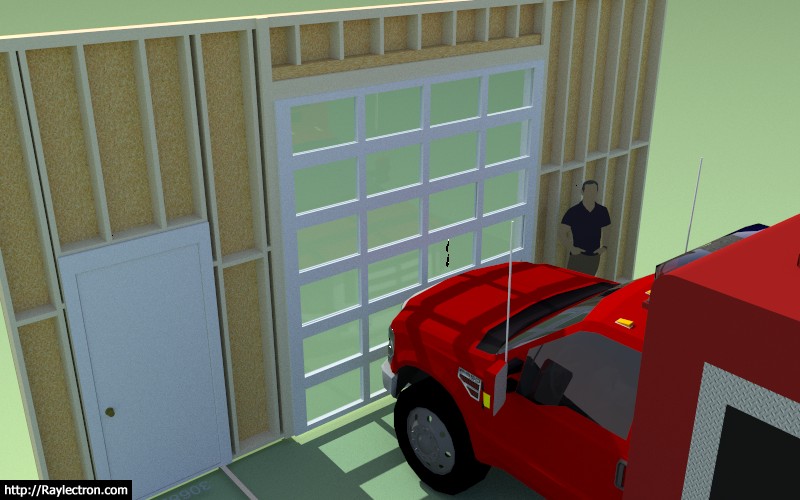
I was just about to release the latest release when I noticed a few issues with the insulation when portal frames are enabled for the garage door openings:
The portal frames added a whole new level to the stud framing, blocking and insulation algorithms.
I will hit it again tomorrow and see if we can't finally push out this latest version. I think everyone will be pleasantly surprised with the new functionality and bug fixes.
-
Now that the garage module is finally out I'm able to refocus back onto the gable wall module, and hopefully get something going with this in the next week or two.
As I've been contemplating it implementation this morning I've come to the following realization. A gable wall can be separated into two cases:
1.) A true gable wall (ie. balloon framed wall from rafters to floor)
2.) A gable pony wall that rests on top of a regular rectangular wall.
However a gable wall is still a gable wall whether it rests on top of another wall or floor. So the basic algorithm for it remains the same. Like a regular rectangular wall it also still has inside or outside corners as well as tee intersections and also an end case.
Unlike a rectangular wall when it intersects other walls its top plate(s) don't mesh neatly with the other walls. This has been cause of some concern for me as I want to make sure I figure out the best way to handle intersecting sloping walls.
Also gable or sloping walls can get quite a bit more complicated than just your simple symmetric gable or shed wall, there are a lot of possible variations with the potential for multiple pitch breaks with the top plate(s). Even more interesting are special pony walls between various roof lines where the bottom plate of the wall is also sloping or has multiple pitch breaks (probably not as common).
The simplest incarnation of a dual pitched gable wall (vs. a shed wall with a single pitch) should have four basic parameters:
1.) Left Wall Height (start)
2.) Right Wall Height (end)
3.) Left Pitch (x:12)
4.) Right Pitch (x:12)By default wall heights and pitches will be equal, resulting in a symmetric gable wall.
Setting the wall height to zero will result in a triangular shaped wall segment.
Please feel free to offer any corrections to these observations, comments or additional suggestions with regards to gable walls.
-
On a slightly different note I've also been thinking about an easy way to fully implement a system for "painting" the gypsum of walls:
Currently the gypsum can be assigned a material per wall panel section which yields something like the screen shot above.
The only problem with this method is that the same color is applied to all the gypsum sections of the wall panel so it prevents the designer from specifically assigning unique colors to each room of a residence (note the blue wall panel above).
What I really need is a way to apply a color to separate gypsum panels within a given wall panel. It needs to be more granular and also easier to apply or change these colors. Keeping track of each panel (gypsum section) and the color assigned to it may be a bit more complicated than it looks, I will need to give this some more thought.
-
Version 0.9.5 - 09.17.2018
- Added advanced options to the column edit menu which allows for notching out of gypsum, sheathing and cladding for beam pockets.
- Tee intersections will now automatically remove gypsum where walls meet.
- Added the garage door module with the following garage door variants: Solid, No Panels, Raised Panel, Flat Panel, Glass Raised Panel, Glass Flat Panel, Glass Panel.
- Added Portal Frames: Both, Left, Right to the garage door module.
- Removed garage door option from door draw and edit menus.
Just a word of CAUTION when upgrading to this latest version from previous installed versions:
Upgrading to 0.9.5 will break all previously installed plugin models. The reason being is that the door module and attribute library associated with doors has been changed in this latest version.
I'm not saying don't download and install the latest release, since it is a significant improvement over 0.9.4c, just do not use it with prior models that you have created with the plugin.
-
Here is a first look at the HTML preview screen of the Medeek Estimator Module:
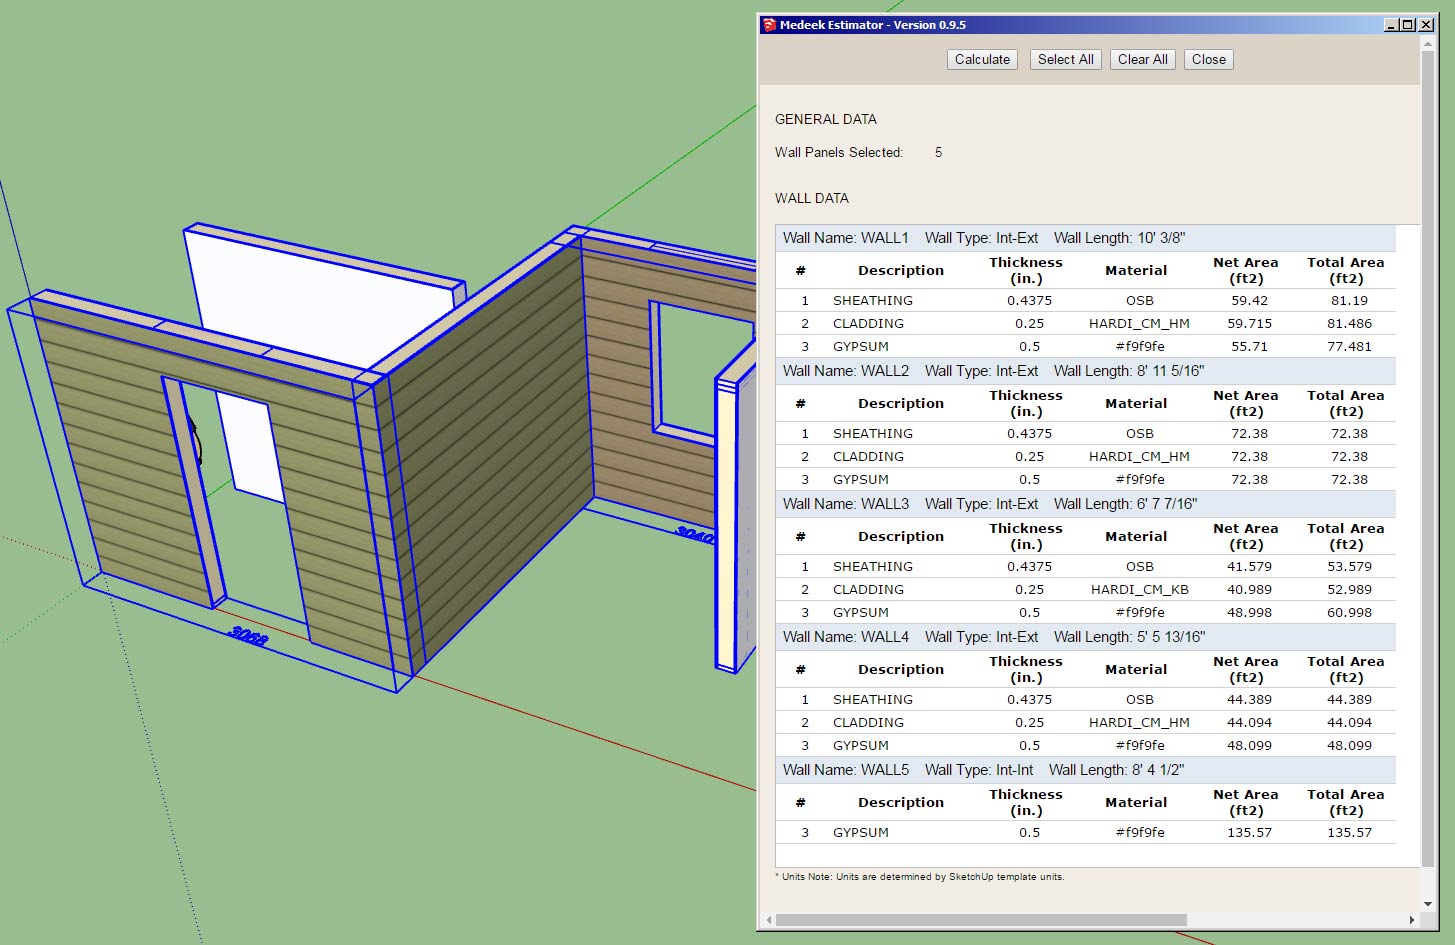
I've only added in the sheathing, cladding and gypsum so there is a lot more things to add yet.
Also noticeably absent is the download link for the Excel (CSV) file. I will see if I can make that happen tomorrow.
Each wall panel has a lot of data and meta-data associated with them. I really could use some feedback on what is important in this regard and what is not.
Now that I have the basic framework in place it is really not too big of deal to add additional items (ie. stud counts, lineal feet of trim, etc...)
Separate from the wall panels are beams, I will get to those later. On the preview screen I will probably provide a tabbed navigation so one can move between walls, windows, doors beams and so on.
The CSV file however will contain all of the information in large sheet.
-
The CSV piece is now working (HTML and CSV output in Excel):
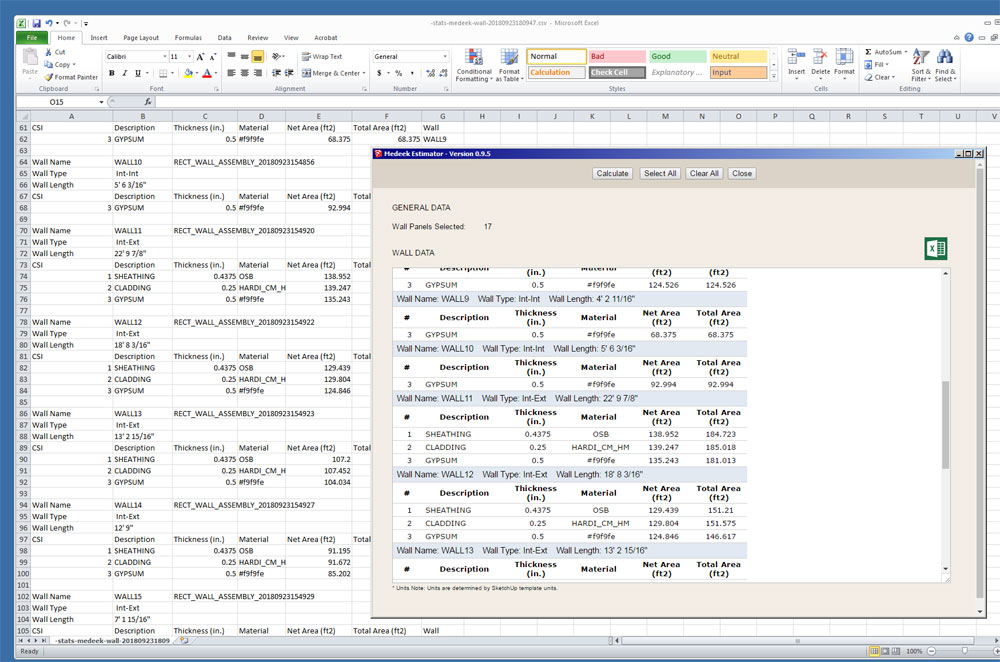
Rather than just a meaningless number I could use a CSI number for the various building elements.
To get your data involves only four mouse clicks:
1.) Click the estimating icon (calculator in the Wall Plugin Toolbar).
2.) Click the Select All button which will then automatically select all of the Medeek Wall Panels, or you can individually select desired wall panels by using the SHIFT key.
3.) Click the Calculate button, review your data in the HTML preview table if desired.
4.) Click the CSV/Excel (Green) icon and download the CSV file which can be opened up directly in Excel for further analysis and costing computations.
-
Version 0.9.6 - 09.23.2018
- Created the initial framework of the Medeek Estimating Module.
- Added sheathing, cladding and gypsum to the Medeek Estimator.
- Corrected the group description for pressure treated bottom plates.
- Added the ability to export data from the Medeek Estimator in CSV format.
Currently only three items are added to the estimating module, many more items to add.
The saving grace is that I think I've set it up quite cleanly and organized so that adding in new elements should be relatively easy and really not a whole lot of coding.
I'm releasing it now in its prototype stage so that everyone will have a chance to test it out and put it through its paces. Once I return from the upcoming Basecamp I will hit it hard again and add in a multitude of building elements.
I also need to nail down the proper CSI numbers for the various elements, I'm sure I'll make a few mistakes along the way.
I haven't had much of chance to test it (Estimator) out in a metric template so I apologize if anyone encounters any bugs while using a metric template. Further testing in a metric template will be the first thing on my list when I return.
-
Interesting question today on using presets in the Draw Wall Menu. In response to this question and to help people further understand the order of operations when using presets see answer below:
ANSWER:
I may need to change up the logic a bit to make it a bit more intuitive when utilizing presets within the Draw Wall Menu.
First, when you hit the save button it will prompt you for a name to save the preset as, then you enter in a preset name and hit "Save Wall Preset". You should then see the new preset added in the drop down box, if you do not then there was some type of an error. Please enable the ruby console and duplicate the error and send me the ruby console output if you encounter this behavior.
Second, when you are loading a preset it is a two step process. First you select your preset in the drop down box, then you click "Load", this loads the values into the HTML menu, it does not make them live just yet. To accept these parameters and draw the wall with them click on the "Update" button, and then begin drawing your wall(s).
I think it may be useful to just eliminate one of these steps and when a user click "Load" it automatically brings the presets parameters into the HTML form and also makes them the active parameters, thereby eliminating the step where you need to click the "Update" button. Thoughts?
Also note that you do not need to close out the Draw Wall Menu before drawing walls, nor should you, however the option to do that does exist. The idea is to keep the menu open so you can change up the wall parameters and keep drawing walls without having to continue to click on the draw wall icon. To quit the Draw Wall tool completely you simply click on the space bar. To start a new polyline of wall segments or just a single wall panel, click the ESC key.
Hello! It looks like you're interested in this conversation, but you don't have an account yet.
Getting fed up of having to scroll through the same posts each visit? When you register for an account, you'll always come back to exactly where you were before, and choose to be notified of new replies (either via email, or push notification). You'll also be able to save bookmarks and upvote posts to show your appreciation to other community members.
With your input, this post could be even better 💗
Register Login


Advertisement