[Plugin] GKWare Cabinet Maker
-
I'm now working on merging face frame cabinets.
-
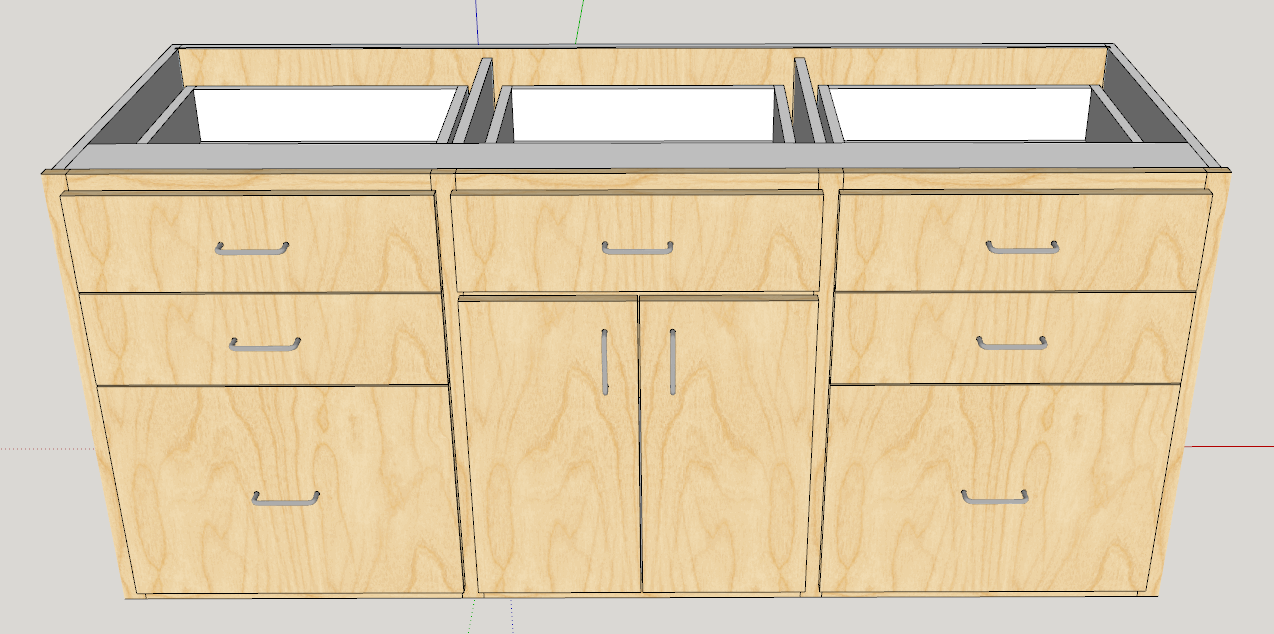
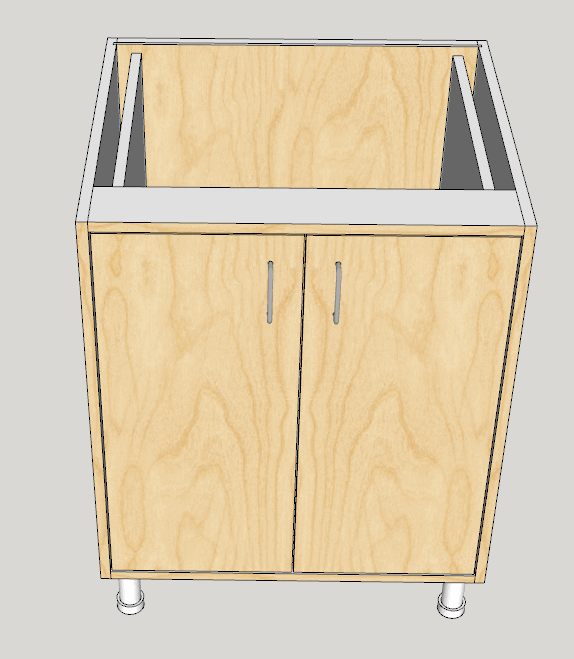
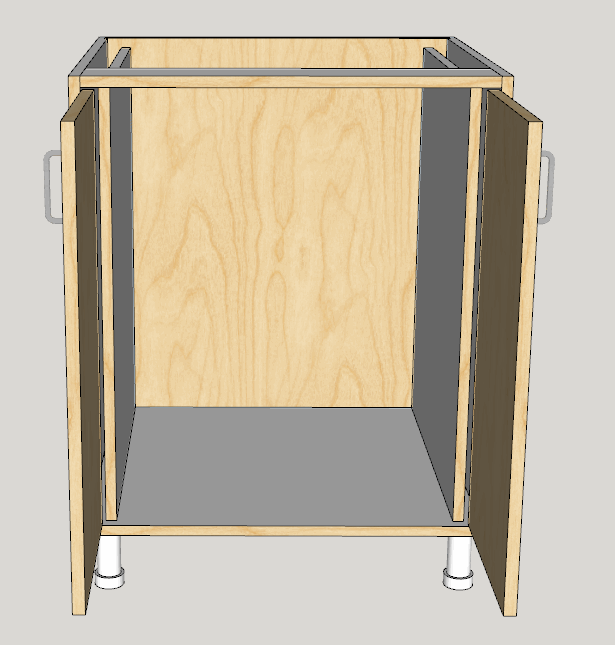
With a little imagination you can put cabinet inside cabinet. Here is an appliance garage
The outside cabinet has no doors and no drawers.
The inside cabinet has no back, no top, no bottom and the rule adjusts the bottom gap.
-
CabMaker 3.0.113 is now available for download.
- Added merging for face frame construction.
- Added Omit top rail, Omit bottom rail, Omit left stile and Omit right stile.
- Added Block Inserts for DXF export.
- CabMaker editor now honors SU locks.
CutMaster 3.0.1.68 is now available for download.
- Cutmaster now supports Bottom Overlay.
- Modified how Cutmaster handles drilling for the back panel of split tops.
- Added drilling from underside for legs for bottom panels of base cabinets.
- Added Leg levelers for corner cabinets.
-
CabMaker 3.0.115 is now available for download
- Fixed bug where PROJECT settings aren't being read properly.
- Translations now look at storage folder first.
- Added Bottom Rail Overhang Override at the cabinet level.
- You can now use one of the other cabmaker features without having to first use cabmaker dialog.
- Changed all components to groups. This ends up with smaller files and quicker response times.
CutMaster 3.0.1.69 is now available for download
- Fixed merging.
- Completed the Joinery editor.
-
Wow !! Great improvement. !
It is so nice not to have an uncluttered component browser.
I use groups for my plugins and was hoping for it in yours.
And the animations are still there too. ! Good work. -
Hello,
I don't find any "how to update" on your site or here.
In the extension manager the "update" button is greyed.
I I click on "install extension" and select the file I downloaded on your site nothing happen. MAybe I have ton uninstall the former version first?
I guess i'm missing something...
-
Martin,
Email me directly and we'll figure out your problem.
Problem was solved fairly quickly.
Garry
-
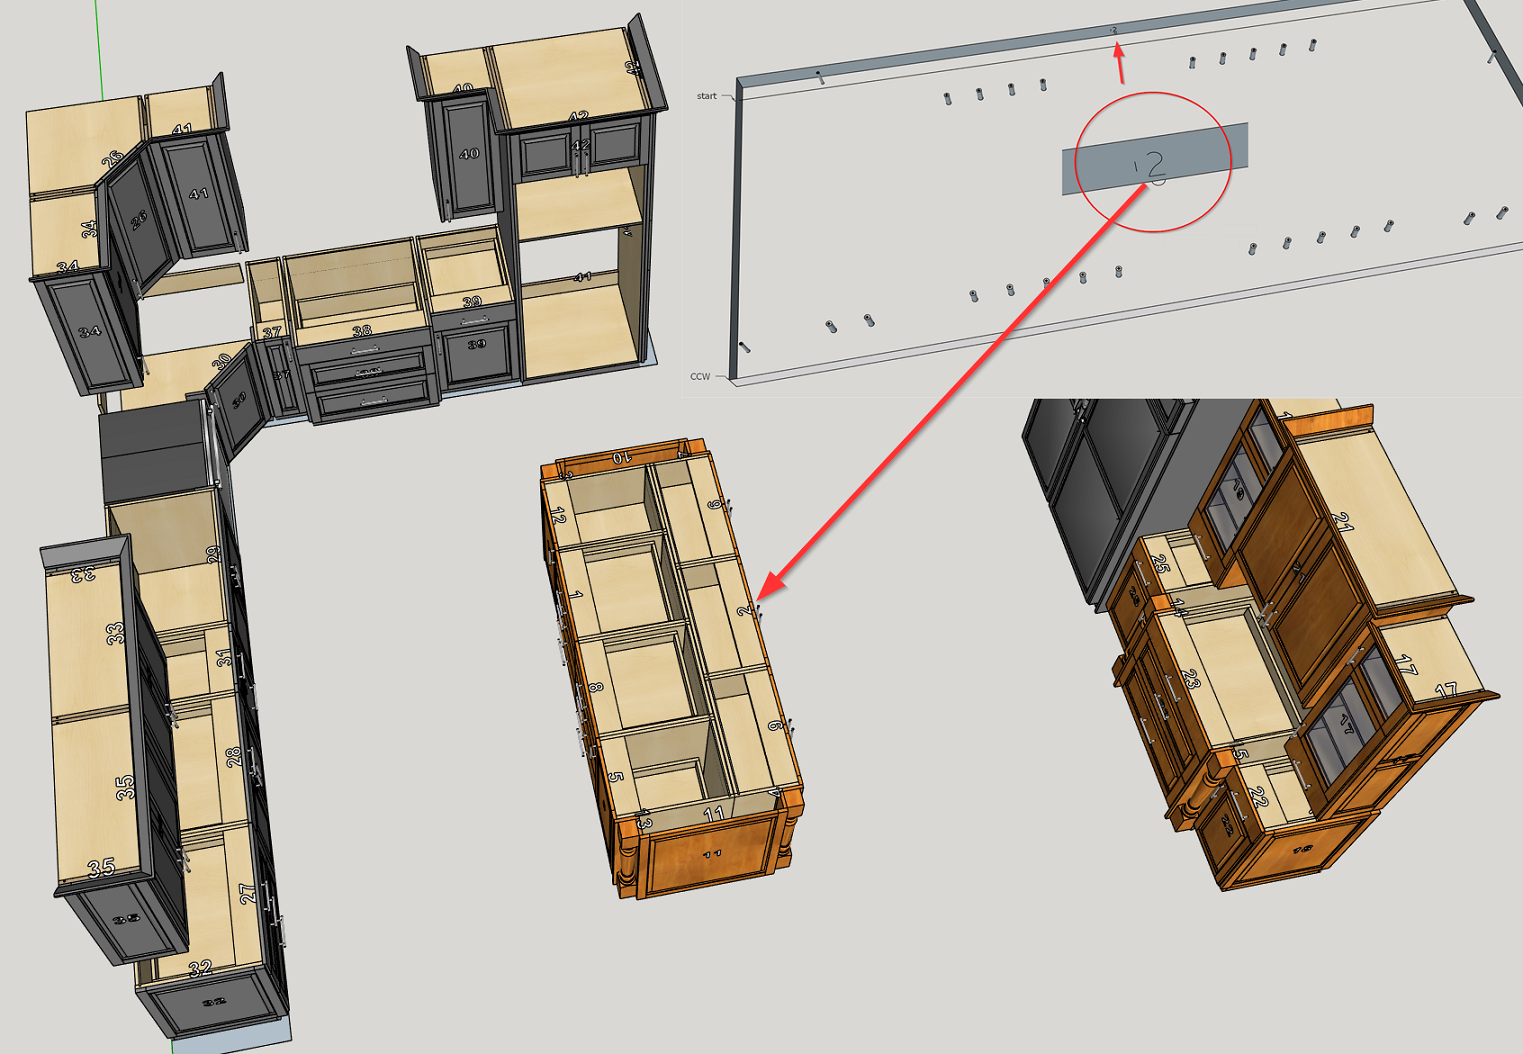
As I was processing a job this morning using CabMaker and Cutmaster I couldn’t help but think about how I was using one of the best kept secret tools available to cabinetmakers. Garry has been adding features at a pace I’ve never witnessed in my 30 years of using software in my cabinet making business. What he has developed over the past few years is way too powerful of a tool to be kept secret.
In this order I’m working on today I’ve got a kitchen with a cherry island and hutch in a kitchen where all of the other units are painted. All boxes cut out of prefinished maple plywood. Having to break this job up into two batches so that the edgebanding color is handled properly by the banding operator causes yield issues.
Creating optimized patterns and g-code for this job as single batch while handling different banding colors through notes and other manual methods for making sure the banding color per cabinet is accurate requires extra time and is error prone.
With CabMaker and Cutmaster it is easy to route the cabinet number on each part and then provide banding instructions per each part including using different symbols to denote different banding colors.
In this example you can see how the arc facing the front edge of this side panel tells the operator to band that edge with matching cherry pvc while the straight line aligned with the top edger tells the banding operator to band that edge with another color.
This is just one example of power Garry is providing with his CabMaker plugin and CutMaster program.
-
Version 3.0.120 – May 7, 2018
- Added 2 parameters in Edit Config for dimensioning. Users can now choose Number
or Model for dimensioning. Users can now set the dimensioning offset. - Modified dimensioning so information is now on 2 lines.
- Added Side by Side Pullouts.
- Modified Shaker Doors. You can now set panel thickness in Materials to 0 and
cabmaker will omit the center panel. - Fixed glass panels in doors. You can again set drawer and door panels to glass or
mirror. - You can now specify Top Rail Width and Bottom Rail Width independently from Stile
Width.
Version 3.0.119 – Apr 29, 2018 - Modified cabinet insertion points. Face frame construction insertion for front of cabinet
uses the edge of the face frame and insertion for back of the cabinet now adds a
construction point. - CabMaker now allows Fixed Shelves and or Adjustable Shelves without room for
doors.
Version 3.0.118 – Apr 24, 2018 - Added cabinet labeling for plan view and for front elevation view. Uses number field
- Added 2 parameters in Edit Config for label height and label font.
- Added a parameter in PROJECT tab for label color.
Version 3.0.117 – Apr 21, 2018 - Tall cabinet Mid Doors now use the handle height for horizontal handles placed at the
bottom. - Fixed Door Profiles - it now uses the alternate location
- PROJECT tab settings are now saving when you batch edit
- Fixed the bug splat if you tried to undo an edit.
- CabMaker now uses groups or components for cabinet. It uses groups when you
create a new cabinet - but will use components for editing if you change the group to a
component. - Door parts weren't getting the correct material name in CutMaster. Fixed
Version 3.0.116 – Apr 19, 2018 - Fixed bug where shelves would show up in Cutmaster with quantity of 1.
- Added 2 parameters in Edit Config for dimensioning. Users can now choose Number
-
Here is the new Cabinet Labeling. You can turn it off in Edit Config by setting the label height to 0. You can also turn it off in the model using layers.
This also shows a shaker door where you can set the rail heights independently.
-
Here I've set the panel thickness to 0 and CabMaker omits the panel.
I turned on side by side pullouts. I've set the partition height to 75 mm. You could have multiple pullouts if you wanted.
Also I've set the left pullout depth to 0 (means cabmaker will figure out the deepest pullout that will fit. I've set the right pullout depth to 300. This can help for a sink where there is plumbing on one side of the sink cabinet.
-
HEllo Garry,
I was trying to quickly draw several alternative of door templates for a client, and I figured out that my usual way of doing it (copy the whole 3D, make some component unique, modify) won't work with cabinet made with your plugin.
How would be the right way to do this?
In this case I'd like to male 3 versions of the same set of cabinet, with different doors template (embossed square with mid rail in the middle, or on another height for example).
thanks in advance,
-
One way to make cabinets unique is to:
- Copy and paste the set of cabinets for Version 2
- Paste a second time for Version 3
- Select all the cabinets and perform a batch edit. This will break the connection between all the cabinets.
You can then make door changes to individual cabinets.
I usually save the skp with a different name and then change the doors at the PROJECT level within a batch edit. This is very quick and means you don't have to edit each cabinet separately. Of course you would end up with 3 separate models.
-
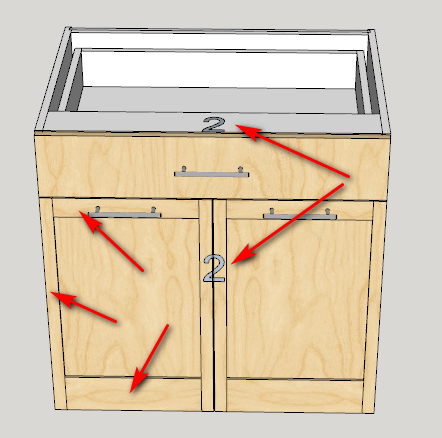
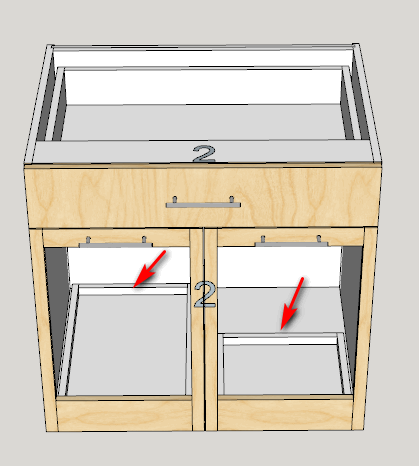
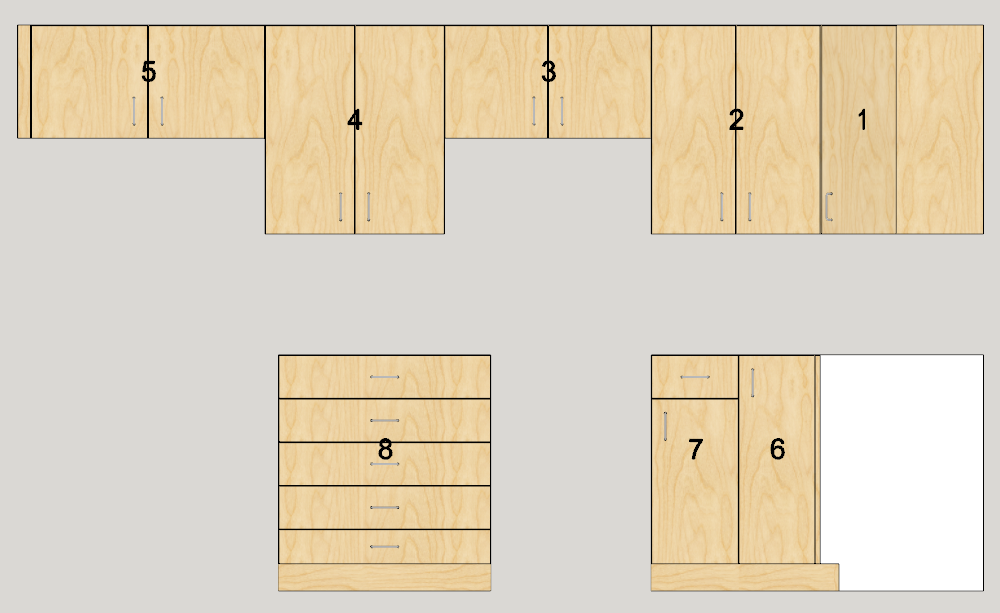
CabMaker 3.0.123 and CutMaster 3.0.1.73 are now available on my website.
Added scene automation. Start by setting your perspective and choose from Standard Scenes "Perspective / Plan"
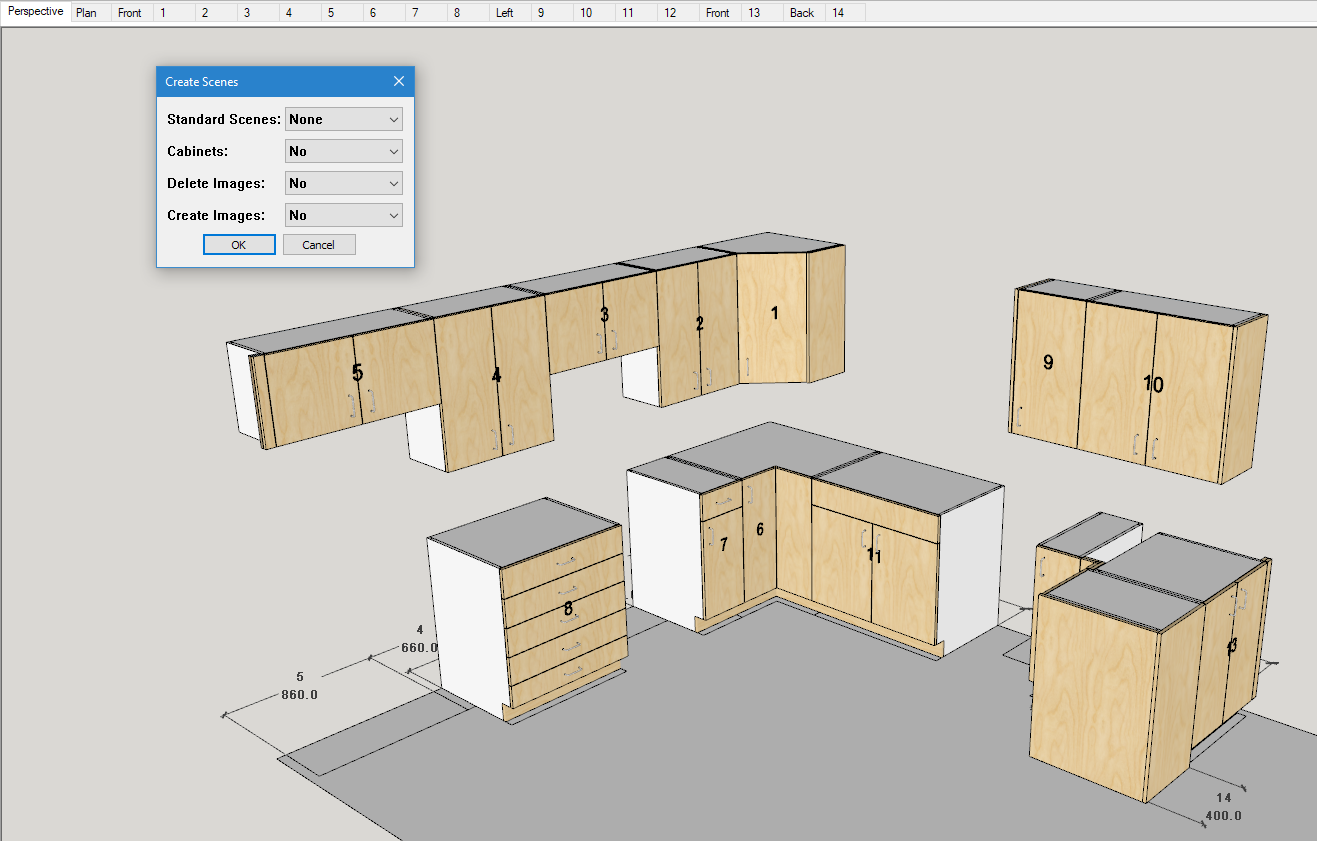
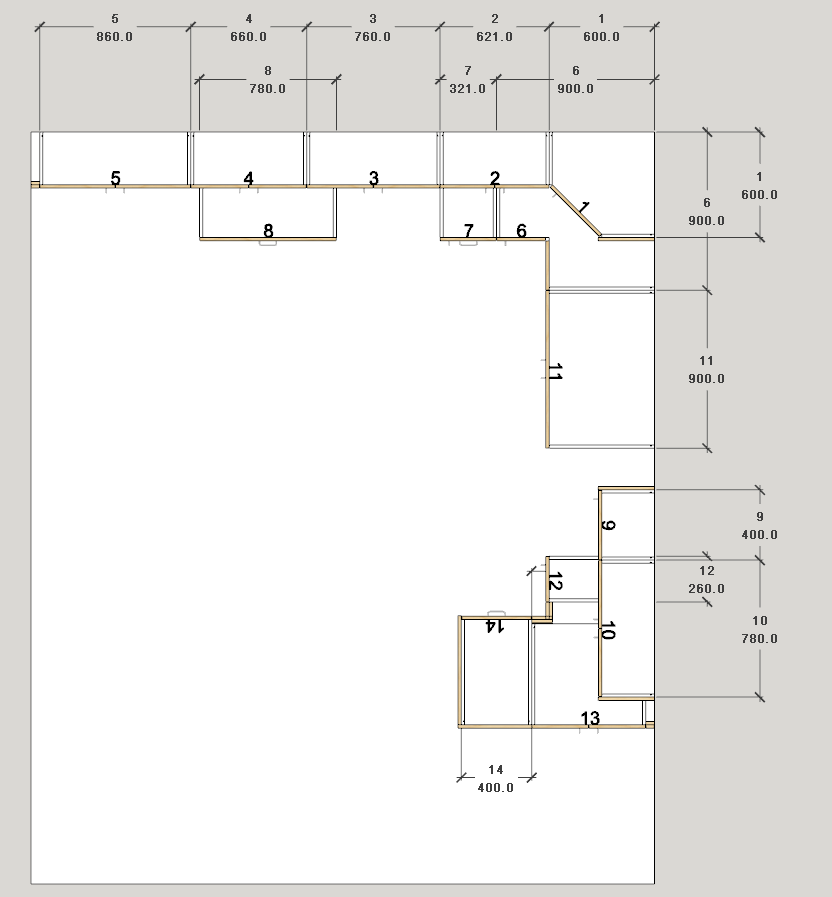
Then I selected cabinets 1 through 8 and then I chose from Standard Scenes the appropriate View. In this case it is the "Front Elevation". I set Cabinets to Yes and this creates 2 images per cabinet - one with doors and one without.
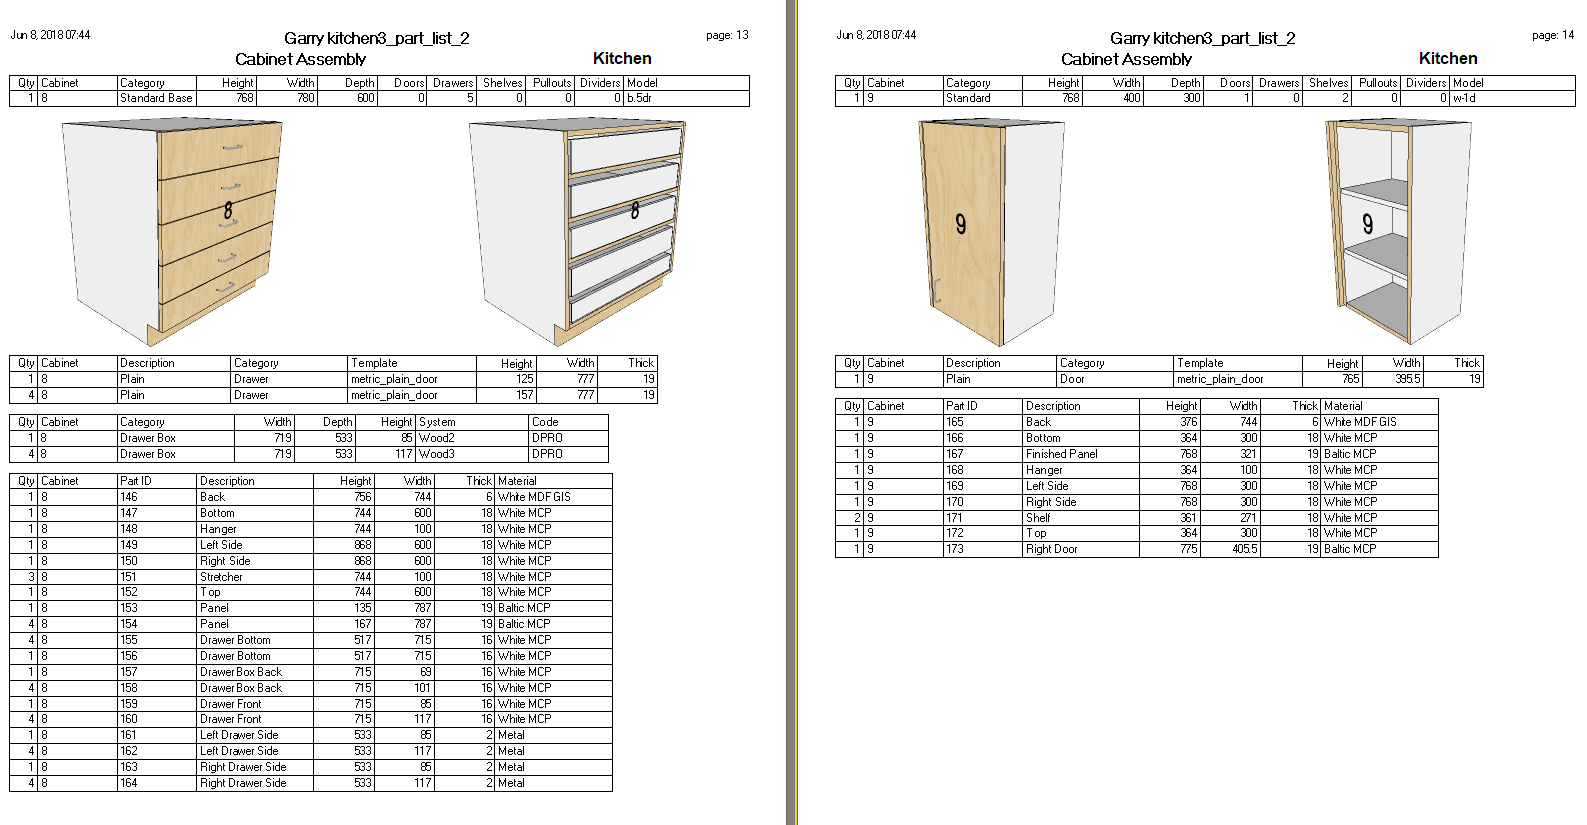
Run the report and CutMaster imports the data. Then click on Assembly reports.
-
-
CabMaker 3.0.126 and CutMaster 3.0.1.76 are now available for download.
Now locking cabinets after a merge.
Cleaned up the workflow for automated scenes.
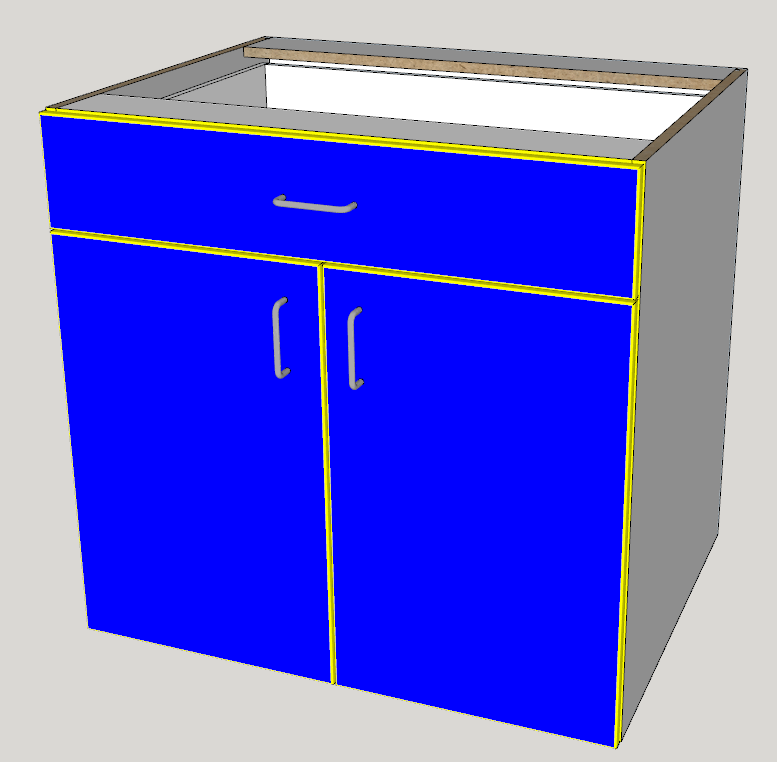
Slab doors have their own edging.Added user control for CutMaster CNC labels.
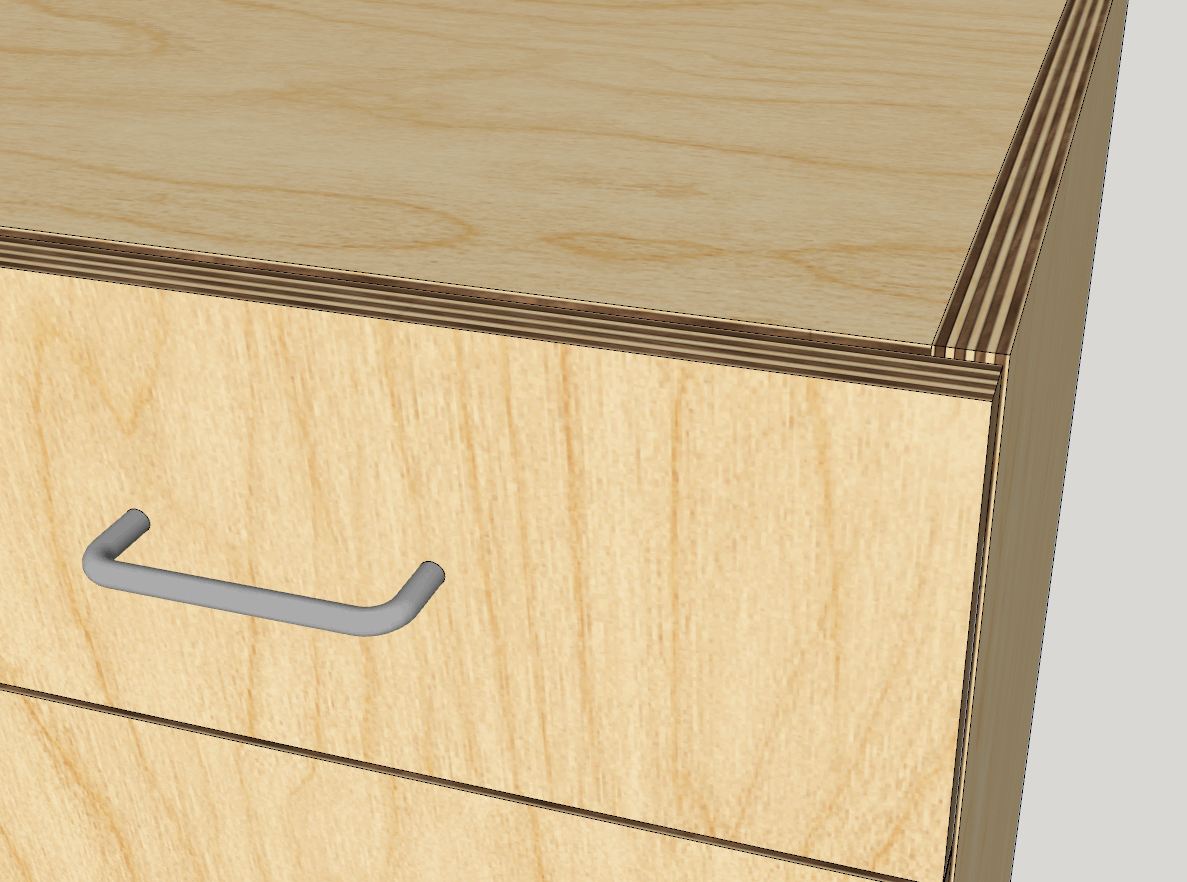
Here are blue doors and yellow edging. The edge profile takes on the edging color. In this case the doors have a 3 mm radius.
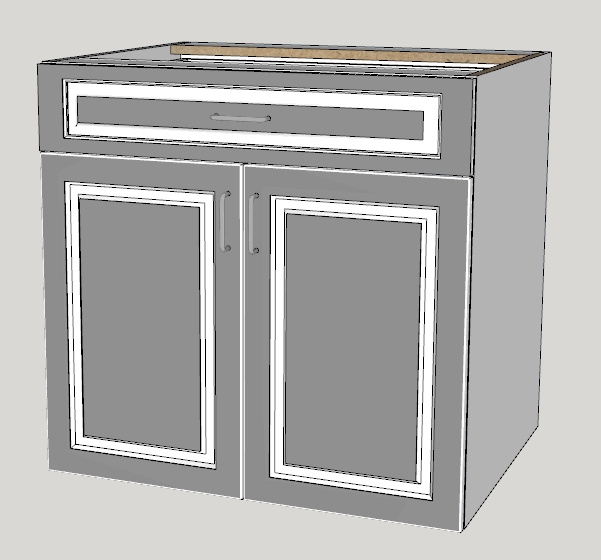
You can achieve different effects with the embossed doors.
-
I am now adding additional support for textures.
- You will be able to add png or jpg files for textures.
- In the Color.txt file you will now be able to add optional opacity for materials.
- In the Color.txt file you will now be able to add your own color names providing you supply either RGB values or Hex value for the actual color.
- You can now specify your own textures for glass, mirror, closet rods and raw edges.
- I'm providing 2 textures for plywood edging for 3/4" (18 to 19 mm) panels.
I am now providing an Ikea.txt file that contains 200 IKEA colors along with RGB vales.
Here are the first 10 IKEA colors
IKEA 001=250,241,231
IKEA 002=240,232,225
IKEA 003=250,242,236
IKEA 004=248,242,235
IKEA 005=237,232,224
IKEA 006=239,231,221
IKEA 007=245,240,229
IKEA 008=241,228,211
IKEA 009=249,243,233
IKEA 010=244,236,222Here is an example of named colors with and without opacity:
my_color_1=255,0,16=0.4
glass=0.3
my_color_2=#FF000F
my_color_3=#DD000F=0.2 -
Hello,
IS there a way to choose between horizontal or vertical texture for wood texture? That would be nice.
br,
-
What some users have done is create their own horizontal texture.
-
[quote="Garry K"]One way to make cabinets unique is to:
- Copy and paste the set of cabinets for Version 2
- Paste a second time for Version 3
- Select all the cabinets and perform a batch edit. This will break the connection between all the cabinets.
You can then make door changes to individual cabinets.
/quote]
HEllo,
I tried this for the second time since a asked the question but i cannot make it happen.
In the 2 different projects I tried, the behavior is the same. When I copy the cabinets and try to bbatch edit the new ones, nothing happen to them... but the first ones moves a little bit!In the first project I had 6 tall cabinet and some of them were moving sideways for 60cm or more. In this project one of the cabinet move along the green axis (it goes behind , just on cabinet depth).
I tried to change materials set, door type, handle type, sizes, it's always the same behavior. No changes happen. There is just those move of the cabinet I'm not editing.
br,
Hello! It looks like you're interested in this conversation, but you don't have an account yet.
Getting fed up of having to scroll through the same posts each visit? When you register for an account, you'll always come back to exactly where you were before, and choose to be notified of new replies (either via email, or push notification). You'll also be able to save bookmarks and upvote posts to show your appreciation to other community members.
With your input, this post could be even better 💗
Register Login


Advertisement