My furniture
-

You have the exact measures when you start your model or it's by eyes? -
@pilou said:
:fro:
You have the exact measures when you start your model or it's by eyes?At the beginning it was a normal sized armchair, later I decided to resize it according to this little man (attached image). H860 x W600/1285 x D835 mm
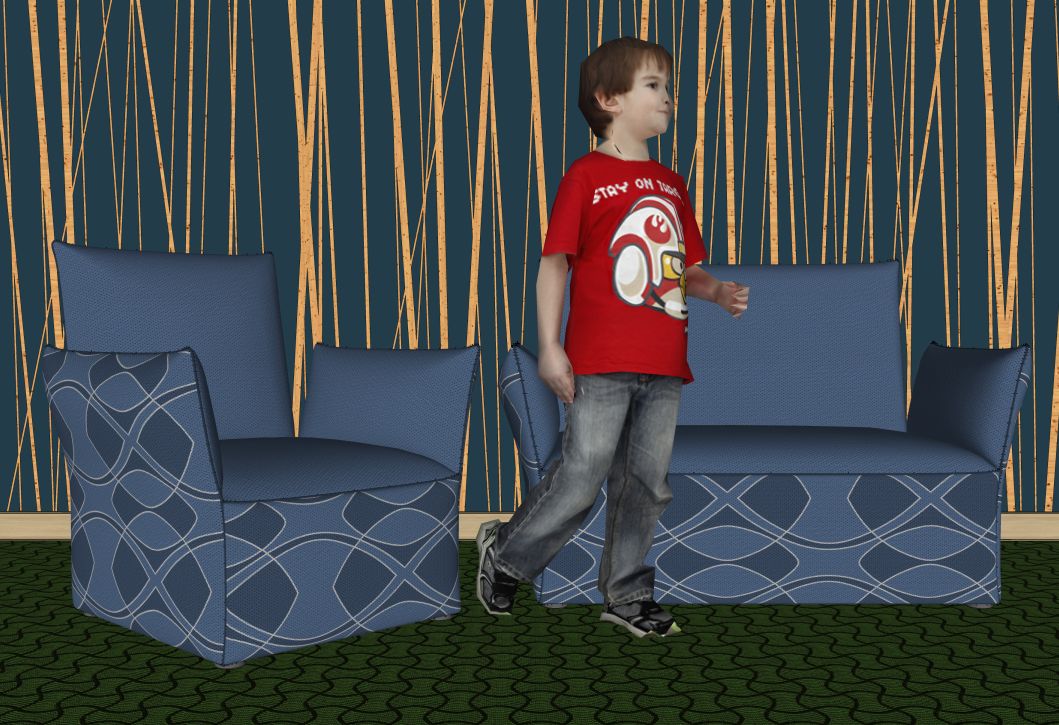
-
Amazing models man! Really cool! I've been drooling over them
Could you share some tips on how you create the piping or seams in your models? Perhaps some images or a video, before you smoothen it out?
-
@infernovak said:
Amazing models man! Really cool! I've been drooling over them
Could you share some tips on how you create the piping or seams in your models? Perhaps some images or a video, before you smoothen it out?
Thanks,
All seams/pipes are added after smoothig with this plugin "Pipe along path"
Just mark the lines/edges where you want to add the pipes (make sure that selected lines/edges are not softened/smoothed) or make a "road" for piping with "SketchUV: path select tool"iping with "SketchUV: path select tool" -
That's a wonderful way to do it. Will try it out!
I also noticed in your models that there is a clear and distinct dark line when 2 edges of the fabric meet. It looks really clean!
How you achieve that effect? Is it in the geometry or done using a plug-in after smoothing?
-
@infernovak said:
That's a wonderful way to do it. Will try it out!
I also noticed in your models that there is a clear and distinct dark line when 2 edges of the fabric meet. It looks really clean!
How you achieve that effect? Is it in the geometry or done using a plug-in after smoothing?
If you are talking about these lines (see attached image with red marks) so it's a tubes/seams.
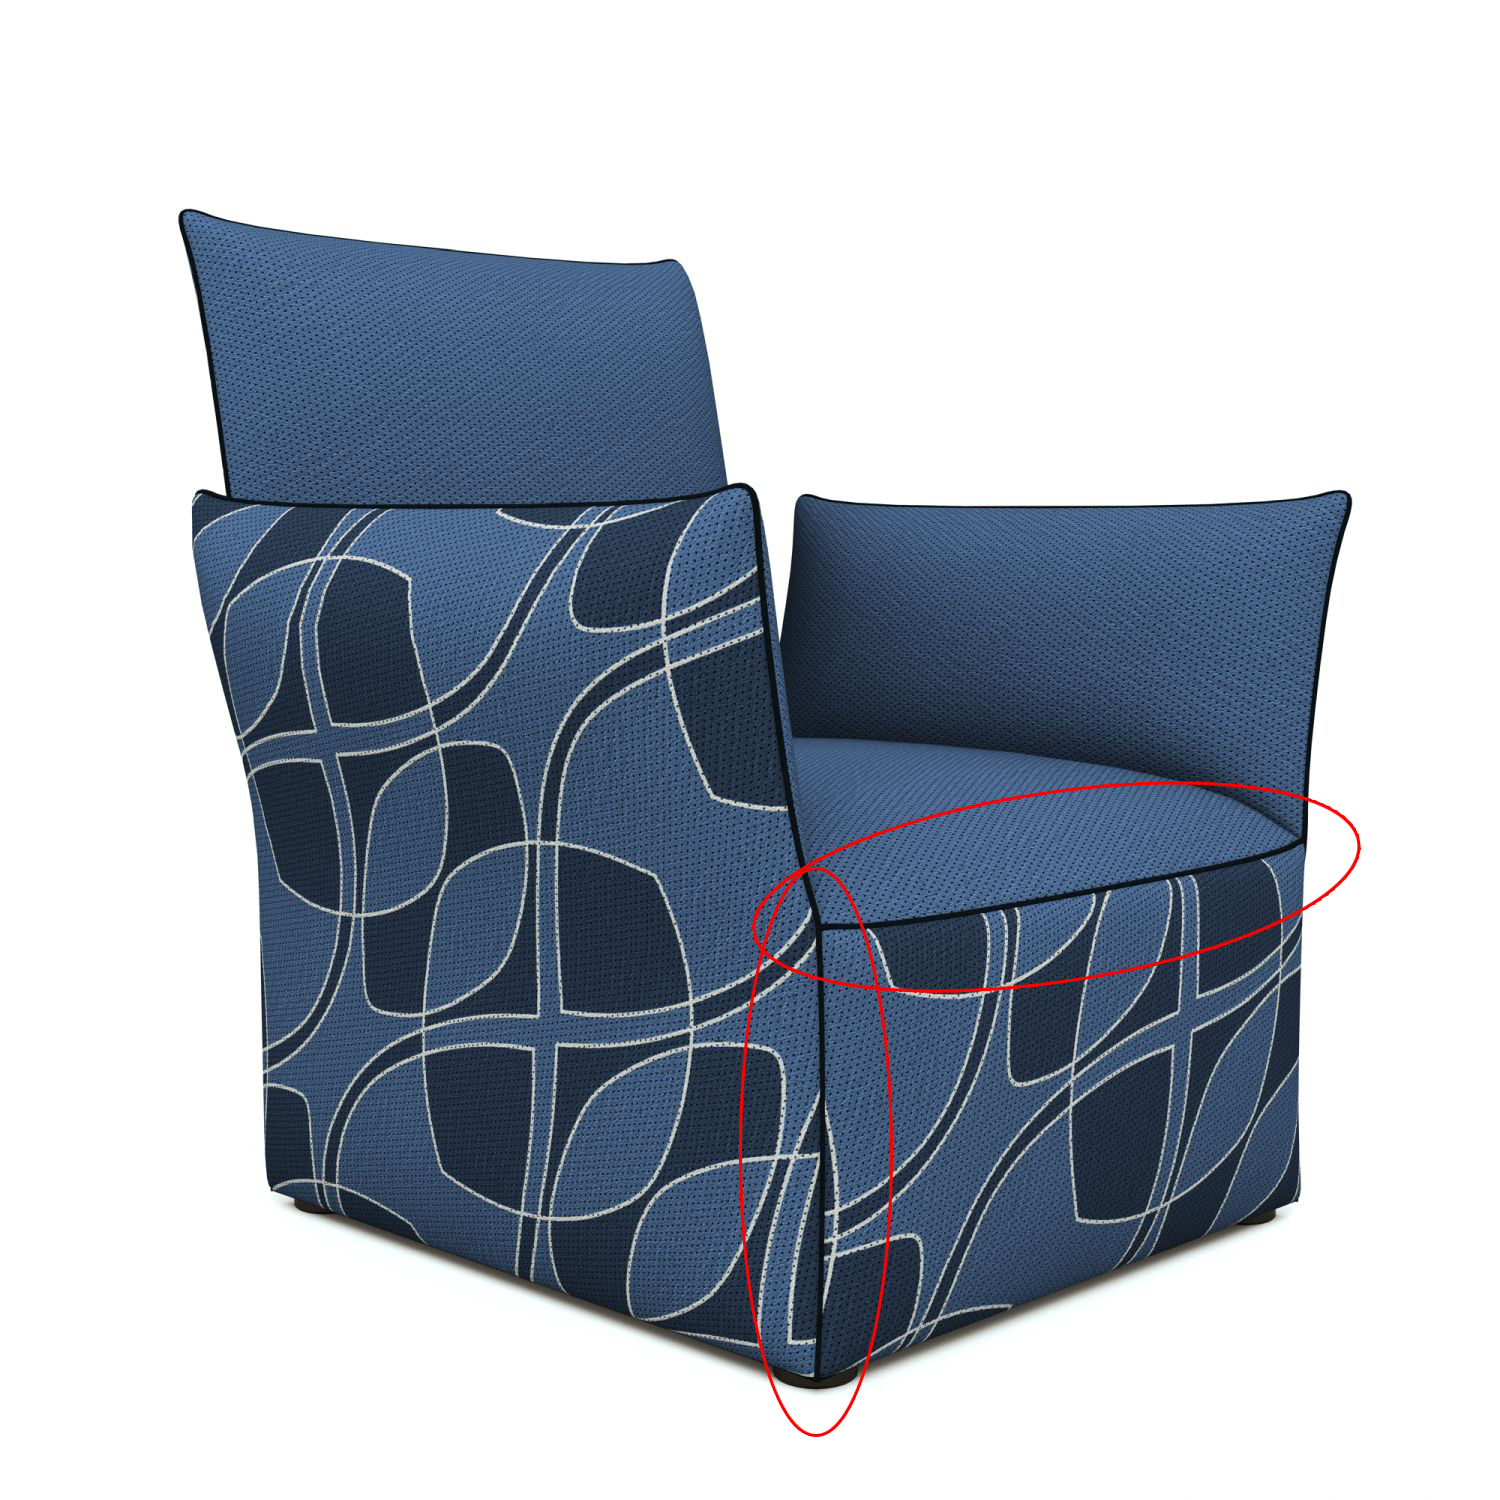
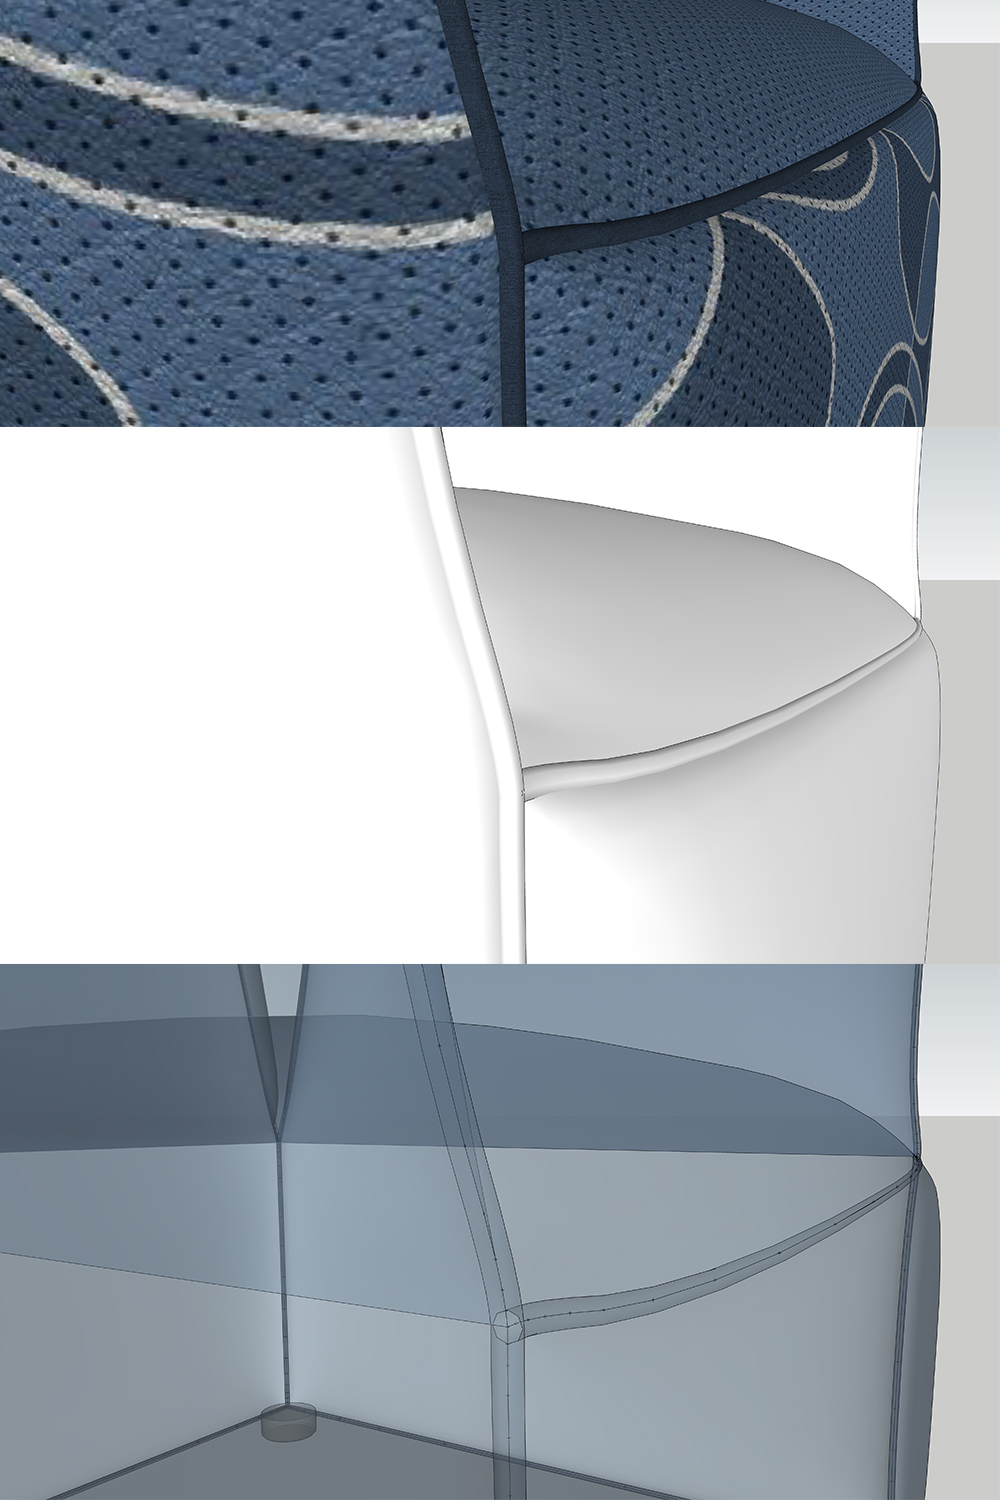
-
@ginchius said:
@infernovak said:
That's a wonderful way to do it. Will try it out!
I also noticed in your models that there is a clear and distinct dark line when 2 edges of the fabric meet. It looks really clean!
How you achieve that effect? Is it in the geometry or done using a plug-in after smoothing?
If you are talking about these lines (see attached image with red marks) so it's a tubes/seams.
I was referring to your Madison sofa model, labeled as 1,2,3
1 - The small, horizontal joint in the armrest
2 - Similar joint running along the arm
3 - The cuts in the tufting part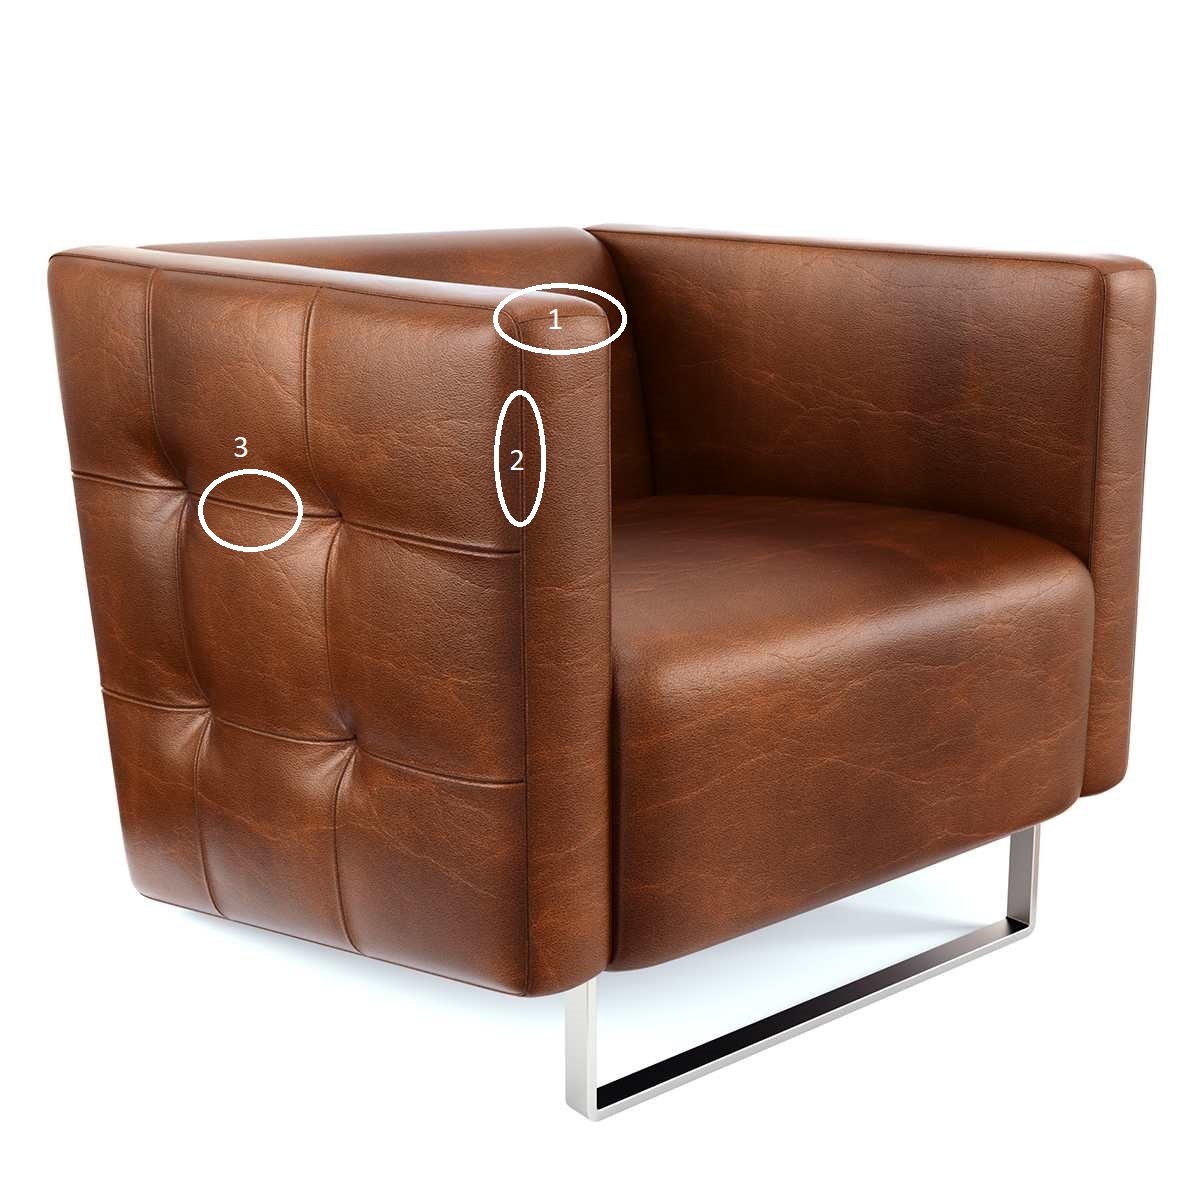
-
1 and 2 - pipes
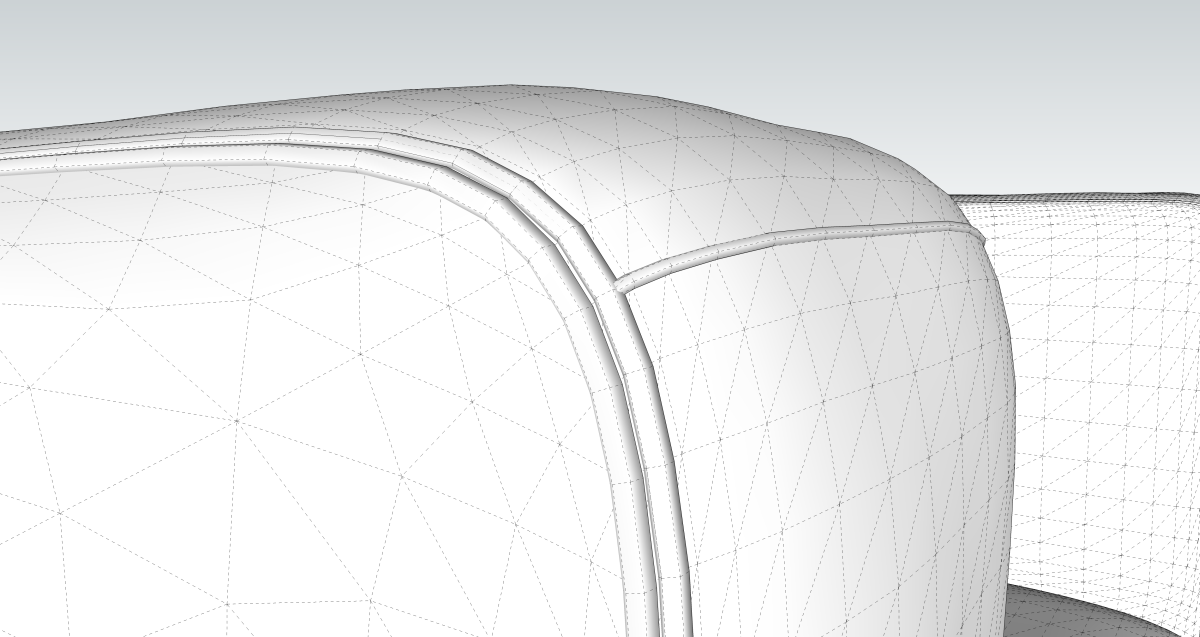
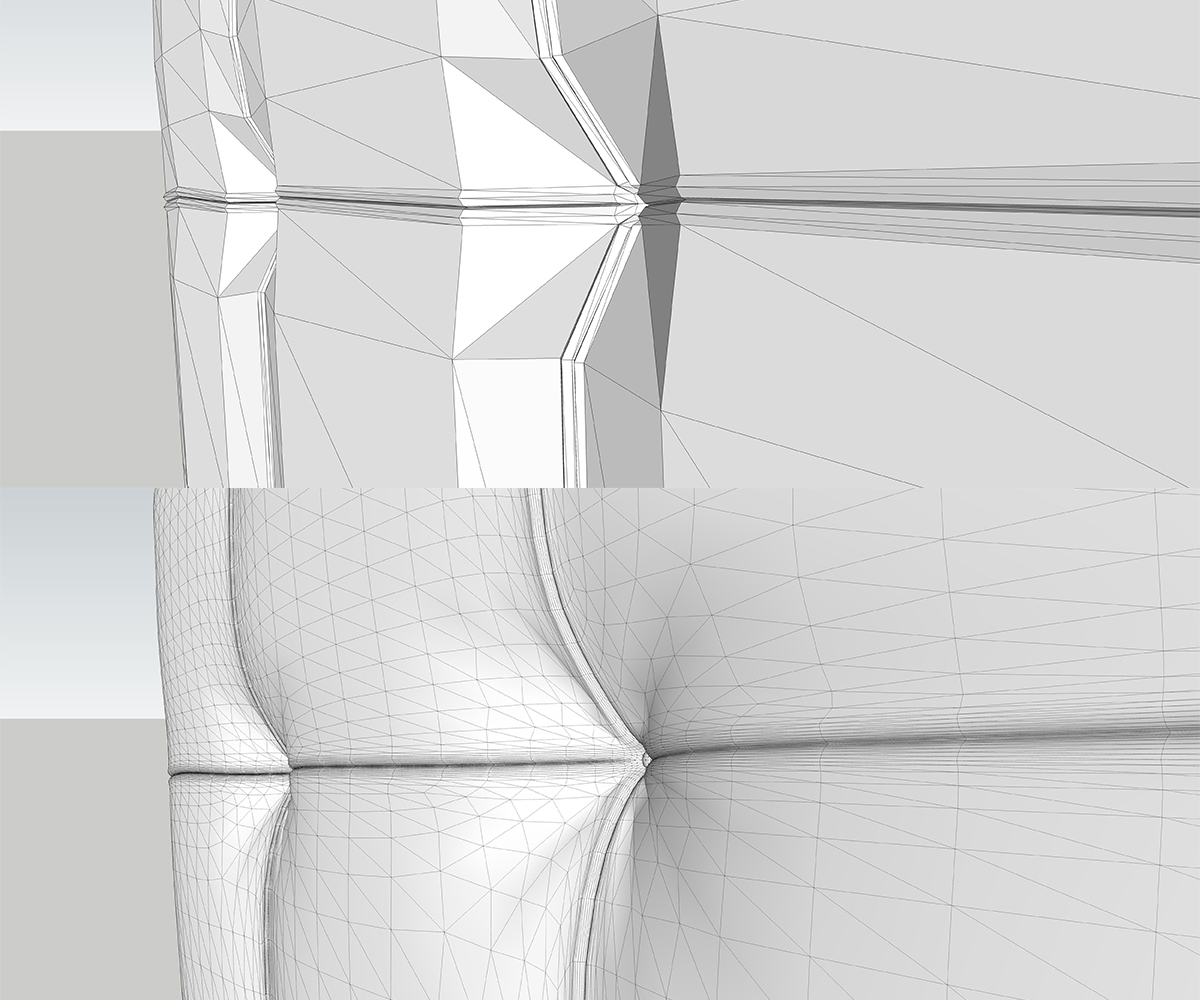
-
Thanks for the details!
-
Thanks for sharing these tips! They are amazing

You should consider doing your own Youtube channel for 3d Modelling in Sketchup. Trust me, a lot of beginners like me would look up to your work for inspiration!
-
@ginchius said:
1 and 2 - pipes
In #3, how were you able to fuse the piping into the fabric? I am trying to test how it happens but it destroys the model.
Here is what I am trying:
- Select path, add pipe
- explode pipe out of group, so that it merges with model
- Smooth and subdivide
What am i doing wrong here?
-
-
@ginchius said:
Leave the pipes in group, do not explode them. Attached an example.
Thank you for sharing this. Will test it out!
-
ginchius , I really like your models, they are so neatly done. It appears in your models that you like to use artisan (with tris) than Subd (with quads). Do you find it more practical to use tris than quads in SU at least for upholstered furniture?
-
@cuttingedge said:
ginchius , I really like your models, they are so neatly done. It appears in your models that you like to use artisan (with tris) than Subd (with quads). Do you find it more practical to use tris than quads in SU at least for upholstered furniture?
Modeling with Artisan is much easier and faster than with SubD. No need to worry about quads.
Also, Artisan has a few imortant tools for me: Sculpt tool is very useful for adding some wrinkles to make furniture look more realistic. Crease tool is very important for me... -
About the apply texture...
Some UV or not ? And with what prog ? -
@pilou said:
About the apply texture...
Some UV or not ? And with what prog ?"SketchUV" and "Roadkill UV tool 1.1" https://www.youtube.com/watch?v=NXS6_WdXZ3s
and sometimes using "Fredo ThruPaint" -
Great work! Have you thought about Marvelous Designer?
-
@rv1974 said:
Great work! Have you thought about Marvelous Designer?
A great software, had to use a trial version. It's easy to make a simply pillows with this softwre.
Advertisement


