Private Motorbike Gallery
-
Thanks for the comment the Bikes are either bought or found. I am only responsible for their texturing and very light modelling adjustments. I made them into proxies so not to bog down sketch up. They are part of my library to add entourage to works.
-
Thanks for the comment Olishea, the tone mapping could be done by adjusting the gamma setting in maxwell ? Or would you pull around curves in post ?
-
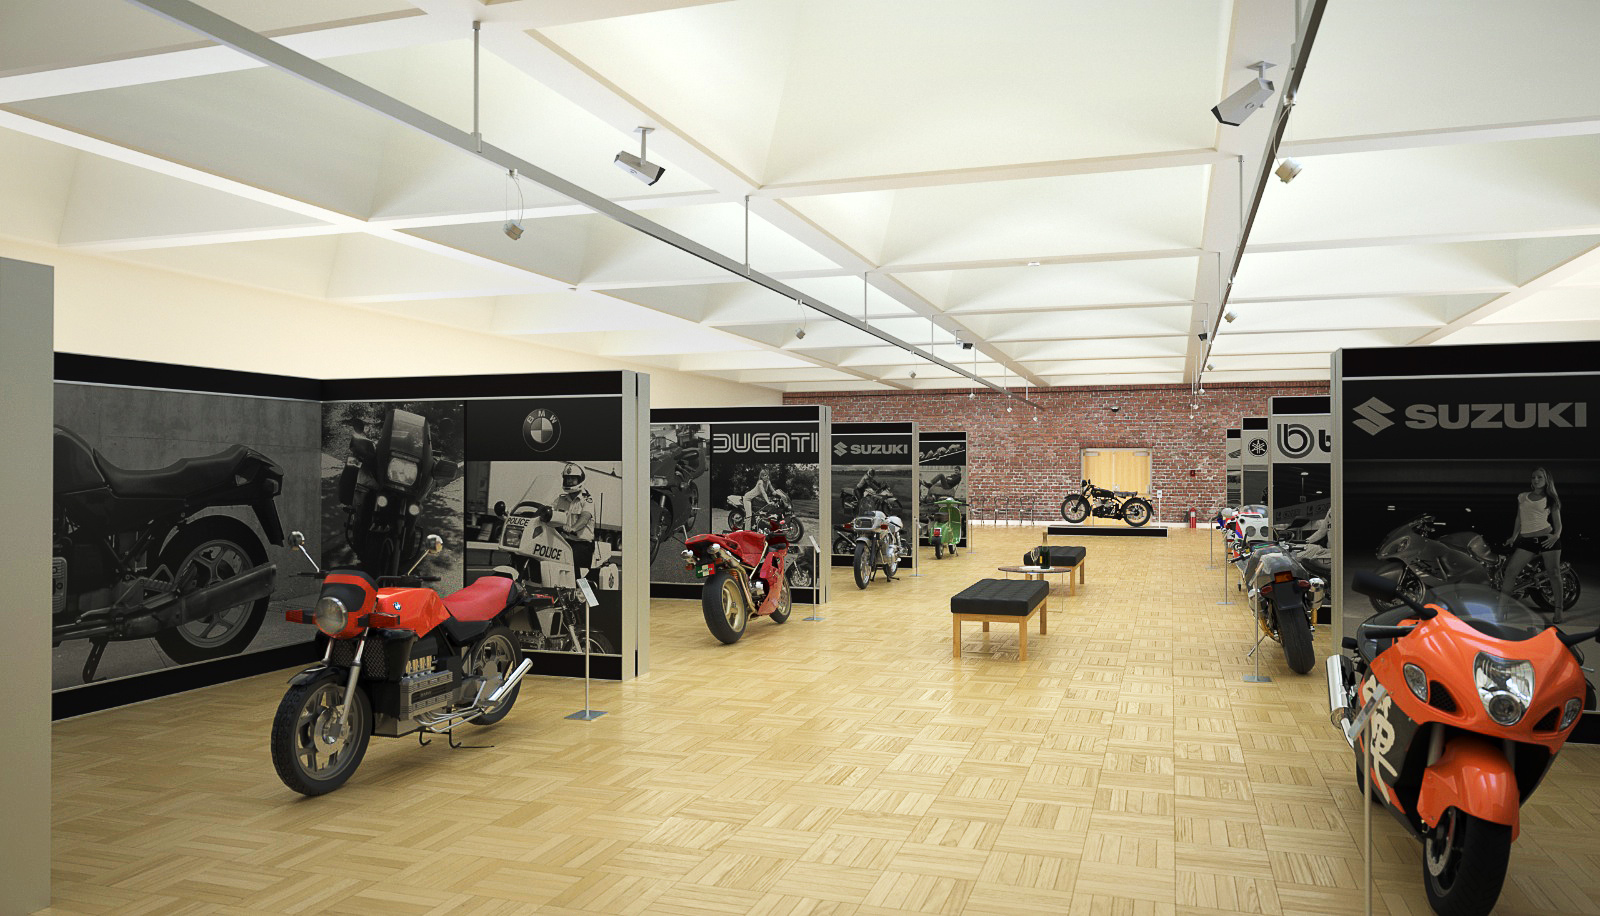
Chedda, lovely model and rendering. However, I think they need more contrast in the tonemapping. Will really spice things up. There is too much midtone going on.
-
-
I adjusted levels very slightly so there was no absolute white or black.
-
Adjusted curves by increasing the highlights and darkening the shadows.
-
Used dodge and burn to add highlights to the floor.
-
High Pass Filter overlay to add detail.
There are parts to the ceiling which are burnt out by too much light. There is nothing you can do with overexposure so I just burnt the "hotspots" down a bit. Also if you darken the ceiling paint or reduce light intensity you will remove the hotspots which have washed out the detail. It looks like your ceiling is just a flat colour too. If you use a paint texture like a fine stucco/render it should not become overexposed like flat colours do.
None of this needs to be done in Photoshop...if you adjust gamma and exposure in maxwell you should get a much punchier and realistic image.
Hope this helps.

-
-
Yes it helps thanks Olishea. I am not too concerned with burnout its something that exists with human eyes and cameras. Sometimes i recover areas but rarely. The white areas have a normal map and are an .mxm i think it's ok i use this texture a lot. Just indoors getting the exposure and EV number sweet inevitably lead to burn. I agree with the punch !
-
Wow. Well done!
-
I swear I'm going to have start wearing a chin guard when looking at the pictures around here.
The bruise on the bottom of my chin is really beginning to hurt.

-
VERY NICE mate! I do like Oli's rework of the final image. Needed the punch - it brings out highlights on the bikes. Admittedly though I'm finding the B/W prints needing level adjustment. I'm not sure if these are native without gloss settings added. For any such materials I find the plugin's built in Lacquer wizard is the BOMB! I have checked out how the resulting MXM is built but it does the absolute best job of maintaining the images levels.
-
Thanks for the comment Richard. I'm getting there slowly ! I'll remember your lacquer tip, sometimes i shy from reflective shaders because of added render times.
-
Simon
really nice design, I like the way the scene is indirectly illuminated... great collection of bikes
best
Vp.s. Im taking note myself of Olisheas 4 tips for postproduction, nice reworked image as well
Hello! It looks like you're interested in this conversation, but you don't have an account yet.
Getting fed up of having to scroll through the same posts each visit? When you register for an account, you'll always come back to exactly where you were before, and choose to be notified of new replies (either via email, or push notification). You'll also be able to save bookmarks and upvote posts to show your appreciation to other community members.
With your input, this post could be even better 💗
Register Login


Advertisement