[TUTORIAL] Herringbone Patterned Wood Floor
-

The other day I was experimenting with making a wooden herringbone-patterned floor. I showed the following quickie render and someone asked for a tutorial. So here it is.
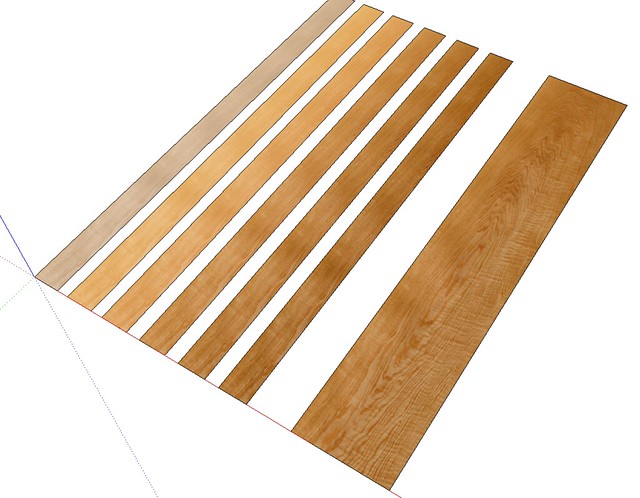
It starts with a decent wood material. If you want something that looks realistic you'll need a good material. Those worthless little square texture images just won't cut it. The image above shows six different versions of the same texture. the one in the upper left is the unfinished wood and the rest have subtle color modifications to simulate different finishes. The wide image shows the full size of the material and is the one I chose for the floor. It scales out correctly at 105" long by 19-1/8" wide.

Next, I made a tile for the flooring. In this case I was after the three dimensional tile and I wanted a small bevel to catch the light. This will eventually become a component. Actually there'll be 24 separate components in the end.

I copied the geometry into an array. I made sure the array is slightly smaller in each direction and I left a small gap between tiles.. I could have likely gotten one more row in the narrow direction but I was being lazy. I then applied the material to all of the tiles. With them laid out like this it looks like the board cut into small pieces and laid out in order. I went through and made a component of each time.
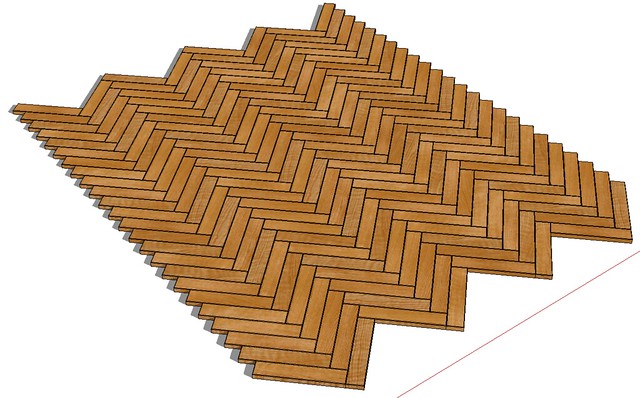
I picked the tiles at random and laid out the floor. In some areas the tiles look like they repeat too often. They are actually different parts of the board but the grain is very similar. This was done only as a quick example so I didn't play too much with moving the tiles around. You can flip tiles or shift the texture slightly on the faces of some of them. You could even cheat and use some overlap in the regions you select for the tiles.Another thing I could have done to improve this even more is to create more material images from the same log and make an even larger selection of tiles. One could use a similar method to create standard hardwood floors or parquet floors if you were so inclined.
And that, as they say, is that.
-
very nice...
-
Thank you, sir.


Hello! It looks like you're interested in this conversation, but you don't have an account yet.
Getting fed up of having to scroll through the same posts each visit? When you register for an account, you'll always come back to exactly where you were before, and choose to be notified of new replies (either via email, or push notification). You'll also be able to save bookmarks and upvote posts to show your appreciation to other community members.
With your input, this post could be even better 💗
Register Login


Advertisement