Match Photo and axis
-
I am trying to draw a pylon but I have problems:
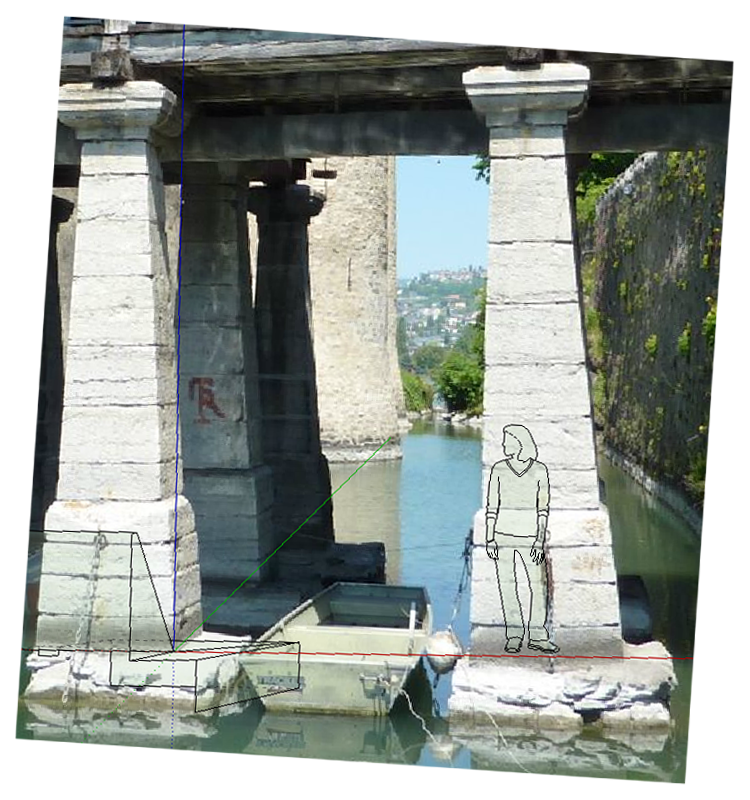
Front view

Back view

I have accidentally drawn on bad axis.
I send attachment
More photos bellow, in the post from Sep 03, 2012 9:36 pm
-
-
OK. I've seen the video thanks.
-
Google SketchUp Techniques: Match Photo Part 1
http://www.youtube.com/watch?v=fhzpqf7fywMCan you post the photo only - small would be fine - I would like to see the vanishing points/perspective.
-
I think this could unswer it:
Top down view

I drawn triangle instead rectangle and I see the base of the pylon.

The base is skewed

Could it be because that I closed Match Photo window or does it not have effect? I had established axis before starting drawing.
Axis here:

-
beginner, I have seen this video 3x times. You can download the file on first post, it contains the photo. Actually I am not sure where is the photo, coz there are many ones
And see last images in my previous updated post.
-
I downloaded your SKP file and there is some small part of the photo.
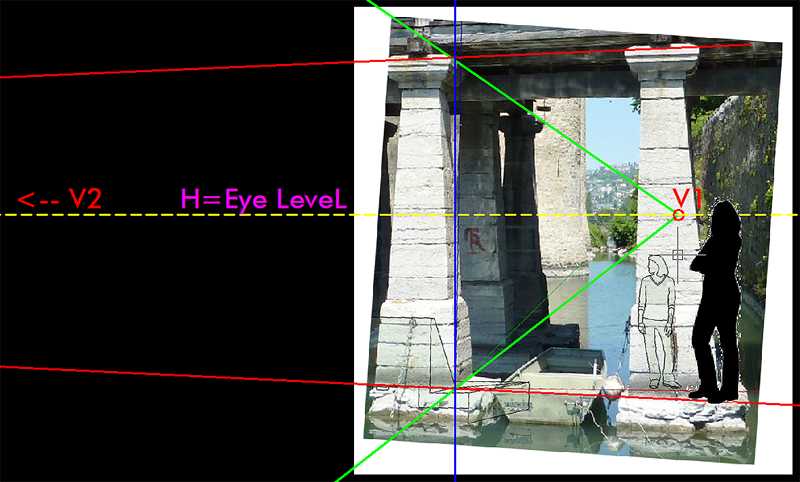
First comment - Your 'Match Photo' perspective is wrong...
Definitely, separate photo would help.PS. You can see that the horizon is set in the wrong place and subsequently the whole 'Photo Match' would be wrong.
The photo should be rotated (I would use PhotoShop) to a point where you have 'proper horizon'.
-
Step 1

-
Oh. Do it like so?

Or more to right? The top is streight (almost), the bottom looks much more skewed.
-
Thanks. They are from one source. I probably printscreened it. One printscreen was from zoom and one from whole image. I dont remember.
Can you explain the image?
-
Hi rumcajs,
Please wait - I will draw some main elements for the perspective...
Also, I don't trust the photos as it seems that they could be already assembled from two or more...
I have corrected the perspective in your SU file as well - have a look

-
So can it be like so?

-
Looks better...
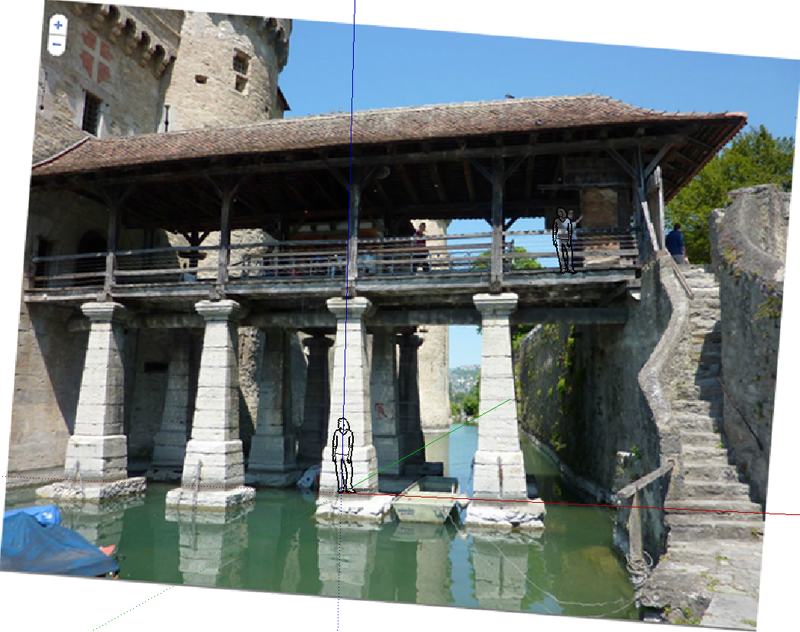
I did the perspective for the bridge - have a look.
It was difficult to judge the scale of a person in comparison to the scene based on your first photo...
Size adjusted - Now you have some good starting point.

-
Wait, I will check googleEarth to measure the distance
-
I recalled a plan that bridge (exactly level of the bottom of the door in wall) is in 10m above ground. There is shallow water in this area, so I think door bottom could be 9,5 m above water surface.
Check this - GE

-
The perspective should be fine.
Adjust SU's object scale by dragging along the 'BLUE' axis when in 'Edit Matched Photo' -
It does not seem as good as should be. I did it in detail. Open my file and check with Orbit the hand of the woman and the edge of pylon (the hand is just beside it). It is very big.

-
I've calculated 4 persons with 165cm height per height of the bridge. This should be correct:

-
This is not a good photo to use with PhotoMatch. There are hardly any distinctly visible vertical (and few horizontal) lines for reference, the photo was taken almost frontally of that bridge face (instead of from a corner - which I know would be hard here) finally you do not know if it was cropped therefore it's not trustworthy at all.
Generally speaking: when you do a PhotoMatch, it will not do it to correct scale at all. You need to scale your structure after you made the PM and projected the photos - so do not even expect it to come out correctly first. All it does is adjust the camera angle and FOV to match to that of the photo. Moreover, it's "best" for those cubic, "blocky" buildings you can find in newer districts of towns but in older quarters, where hardly any building has right angle corners, it is practically useless.
-
Please, tell me how can I get 165 cm high figure/person in the image? I will go back to the yesterday's night project, the cut image was good, but needs to scale to fit with a figure.
Advertisement


