Quick Fotosketcher Sky Adjustment Tutorial [Photoshop Mask]
-
Based on Boofredlay's post:
http://forums.sketchucation.com/viewtopic.php?f=81&t=29905We are going to take his already excellent presentation and alter the sky a bit.
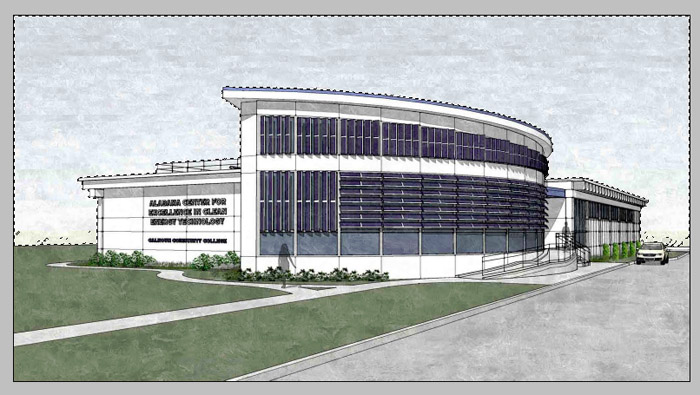
First open your image and use the magic wand tool to select the sky. You may have to add some holes to the selection set using the Marqee tool (M) and hold down Shift key.
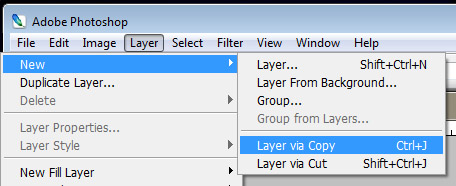
Once the whole sky area is selected goto the LAYER pull-down and select NEW then select "Layer Via Copy" on the fly out. (see image below)
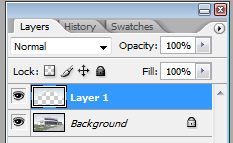
Now you have the sky on a separate layer, all by it's lonesome.
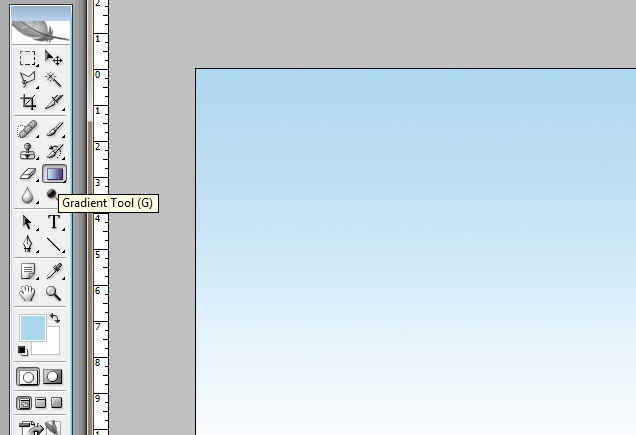
Next hold your tongue out like Michael Jordan and create a New Blank Layer and use the gradient tool to create a light colored sky. This should completely cover the whole photo.
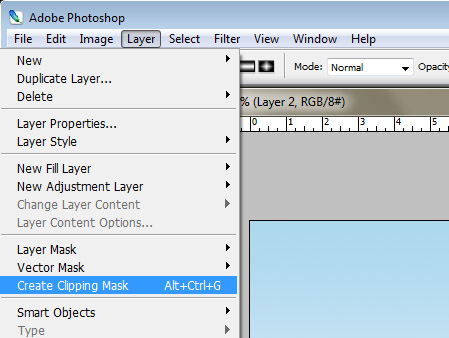
Now with the gradient layer selected, goto the LAYER pull-down and select "Create Clipping Mask"
This will force the gradient layer to only show up in whatever area is filled in the layer below.
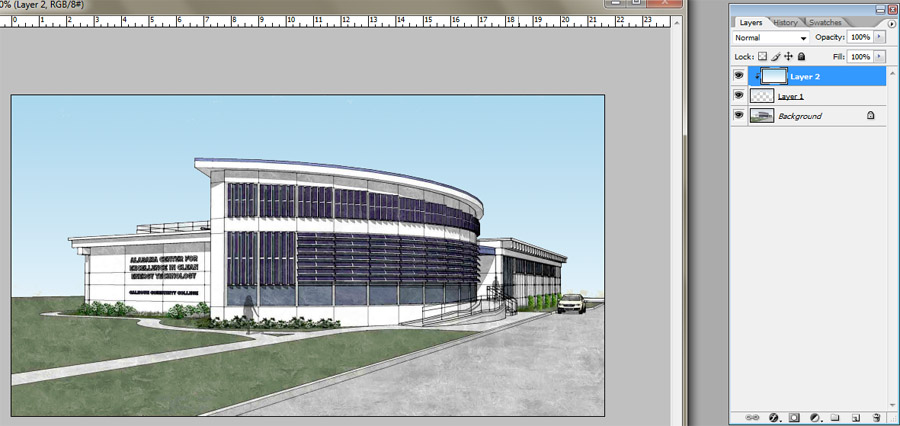
You should have something that looks like the image below. Basically your gradient is covering up where you used to have a really cool textured sky.
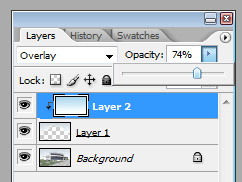
Finally set your layer state to "Overlay" and your opacity to 74%
You should end up with something like this.
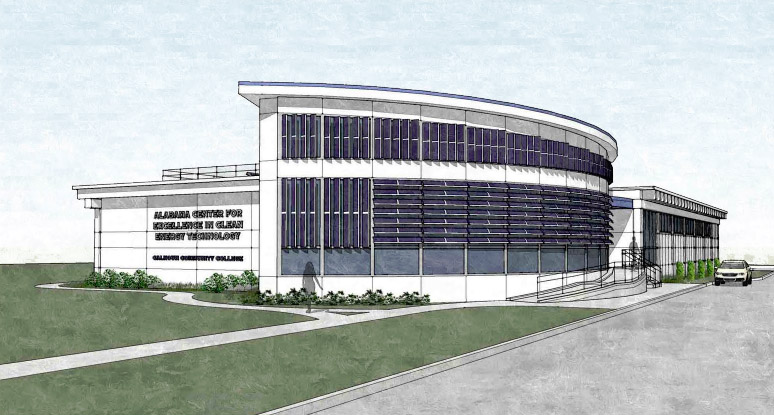
This setup now allows you to drop in a sky image in between the two masked layers. This will cause the newly added layer to become masked as well. A different result below.
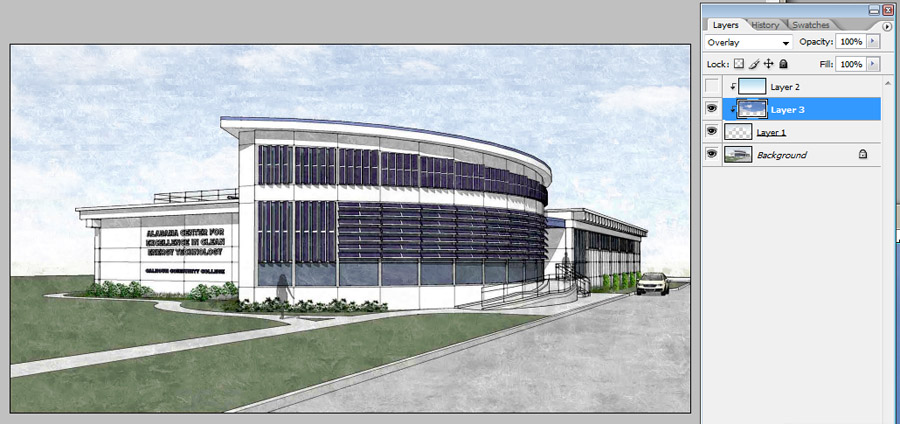
You can blend the gradient layer and the sky layer by using transparency (opacity setting) or you can set the gradient to overlay and the sky layer to screen or soft light.
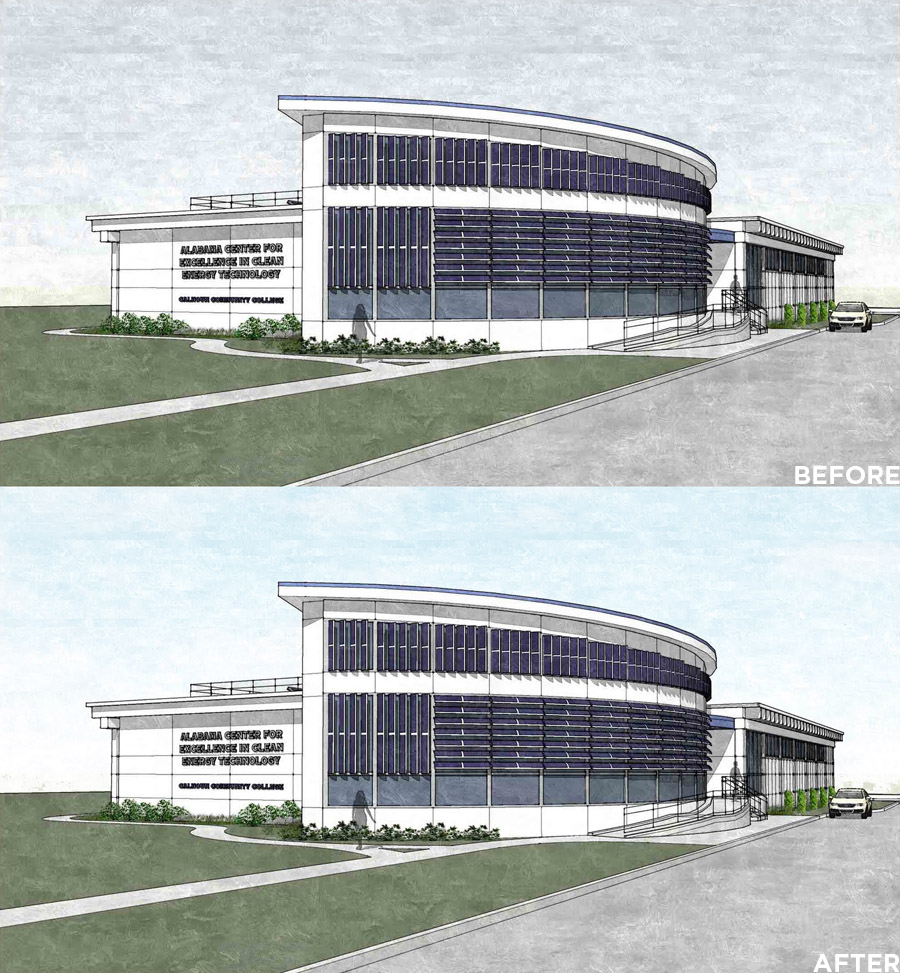
Here is the before and after. It's a slight change but I feel it makes the image more warm and inviting. Thanks Boo for letting me use your image.
-
Nice one cheffy.

-
-
thanks to this tread i just discovered fotosketcher. Where have i been all this time? I have found my true calling!
Hello! It looks like you're interested in this conversation, but you don't have an account yet.
Getting fed up of having to scroll through the same posts each visit? When you register for an account, you'll always come back to exactly where you were before, and choose to be notified of new replies (either via email, or push notification). You'll also be able to save bookmarks and upvote posts to show your appreciation to other community members.
With your input, this post could be even better 💗
Register LoginAdvertisement


