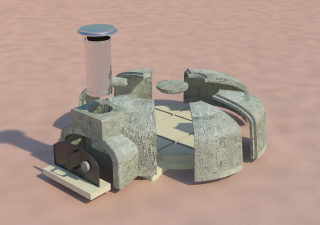
Help Me Draw A Dome [TUTORIAL]
-
Hey D0me I just came across this:
Have you seen it before?
See the bung, the simple floor, the position of the smoke vent ...
-
Hi Chris
Nice find. Thanks for the link.
Thanks exactly what I am looking to do. One difference is I will pour in my cement to fill the bunghole rather than how they have done it by having the keystone already made.Thanks
-
Hi Gaieus
I'm starting to redo my model and was wondering if you have any tips on how to implement my pipe into the model.
Thanks
-
Did you notice the rebated joints?

You don't want to cast each segment on its back (sketch 1) and then stand it up to demould (sketch 2)?
-
@d0me said:
Hi Gaieus
I'm starting to redo my model and was wondering if you have any tips on how to implement my pipe into the model.
Thanks
Which pipe in this case? The one in the middle you will build the dome around?
-
Hi Gaieus
Yes, the middle pipe around which the dome will be built.
-
I think I should try and clear up any confusion here.
I suggested spinning a screeder around a pipe to realise the job of the
follow metool when you have a point for the apex of the d0me and a circle on the brick base. The curved rule replaces the profile that is extruded. This works fine when there is no obstruction.When you compartmentalise a segment the form sides get in the way, but the sides do provide the opportunity to draw reference curves not very far apart. You can still use a curved rule and get sufficently accurate substrate layers. Most important the last layer will be most accurate using the other curved rule in the opposite direction.
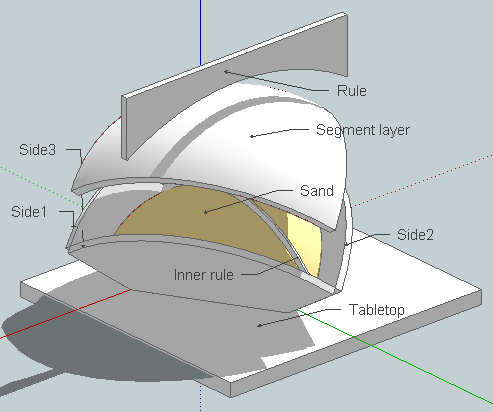
Revised skp showing the inner rule attached.
-
Hi
Chris, should there be any concern or precautions taken should I still choose to leave a bunghole and fill it later. I will require a pipe in my center to help create the bunghole?
Gaieus, I completely forgot about looking through the attachment you posted when i requested how to print my model to scale. Thanks for showing me the steps. That is exactly the way i pictured it my head. Now, just for me to add my pipe and then redo the model, print it to scale and get this "Baby" started.
Look forward to hearing from you guys
Regards
D0me -
@d0me said:
Chris, should there be any concern or precautions taken should I still choose to leave a bunghole and fill it later. I will require a pipe in my center to help create the bunghole?
Just cut a piece out of a plastic pipe if you want a round bunghole or plywood if square; wedge either into top of form. Remember to set on the splay to create a bevel; or form a rebate. But it is really not necessary now you have only four pieces.
Good luck!
-
@d0me said:
Hi Gaieus
I'm starting to redo my model and was wondering if you have any tips on how to implement my pipe into the model.
Thanks
So how thick this pipe would be?
-
Hi Gaieus
The pipe is 2" diameter and about 5mm Thick.
Thanks
-
OK, although 2" is not exactly 5 cm (I guess you meant centimetres, not millimetres?) here is the way with our existing domes - although best would be to do this either before we make some of the pieces unique (for the entrance) or to do the whole thing with the hole applied as shown in method 2 later below.
So method 1 is very similar in theory to how we made the entrance. You need to pull that pipe up, intersect the pieces as well as the pipe itself, delete unnecessary geometry and insert bits copied from the pipe back to "heal" the hollows.
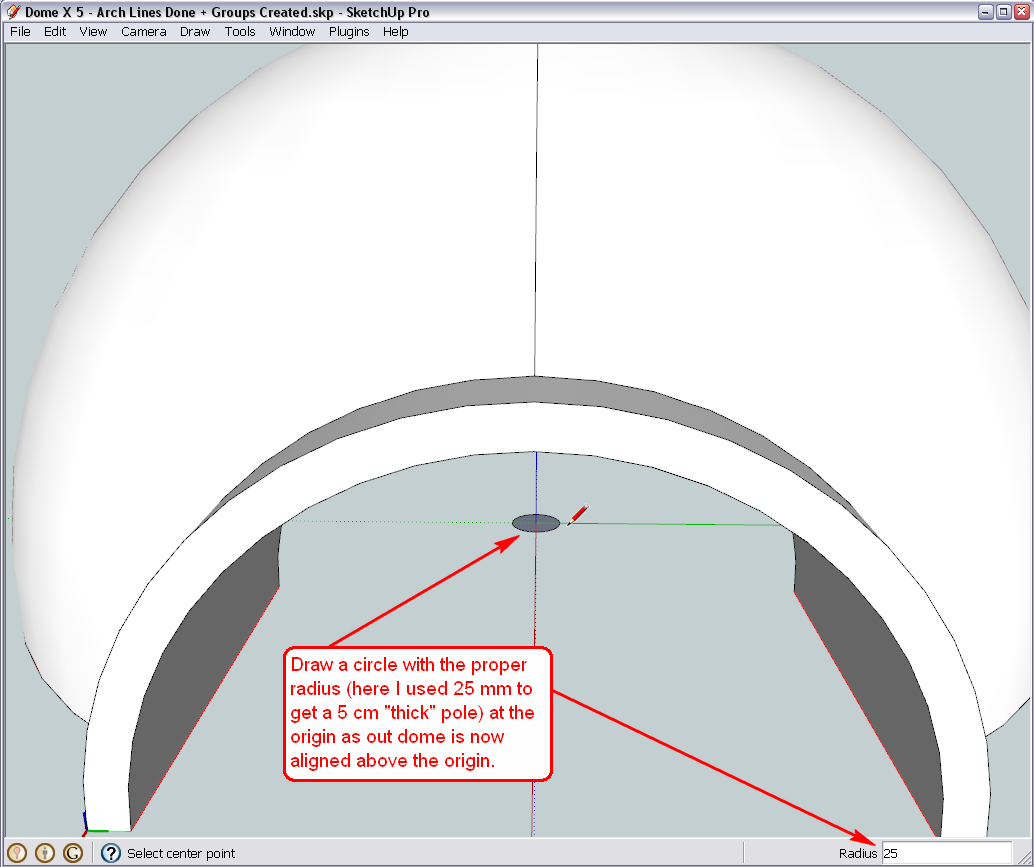
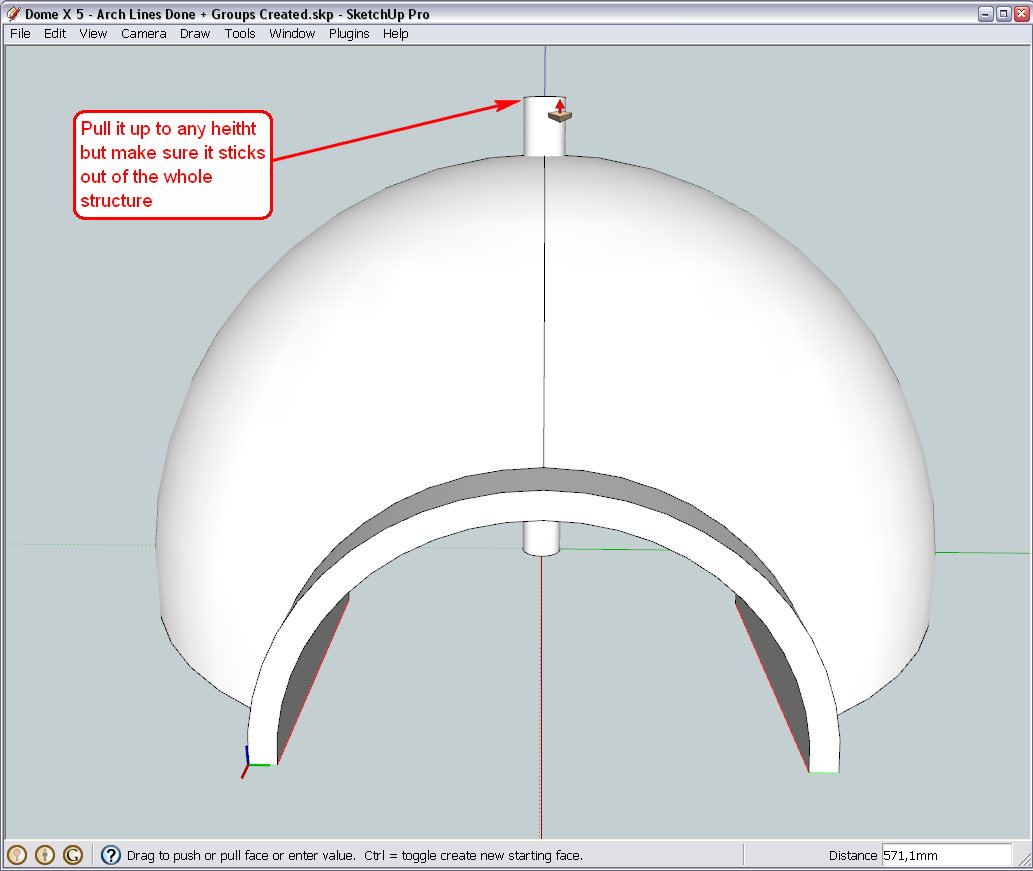
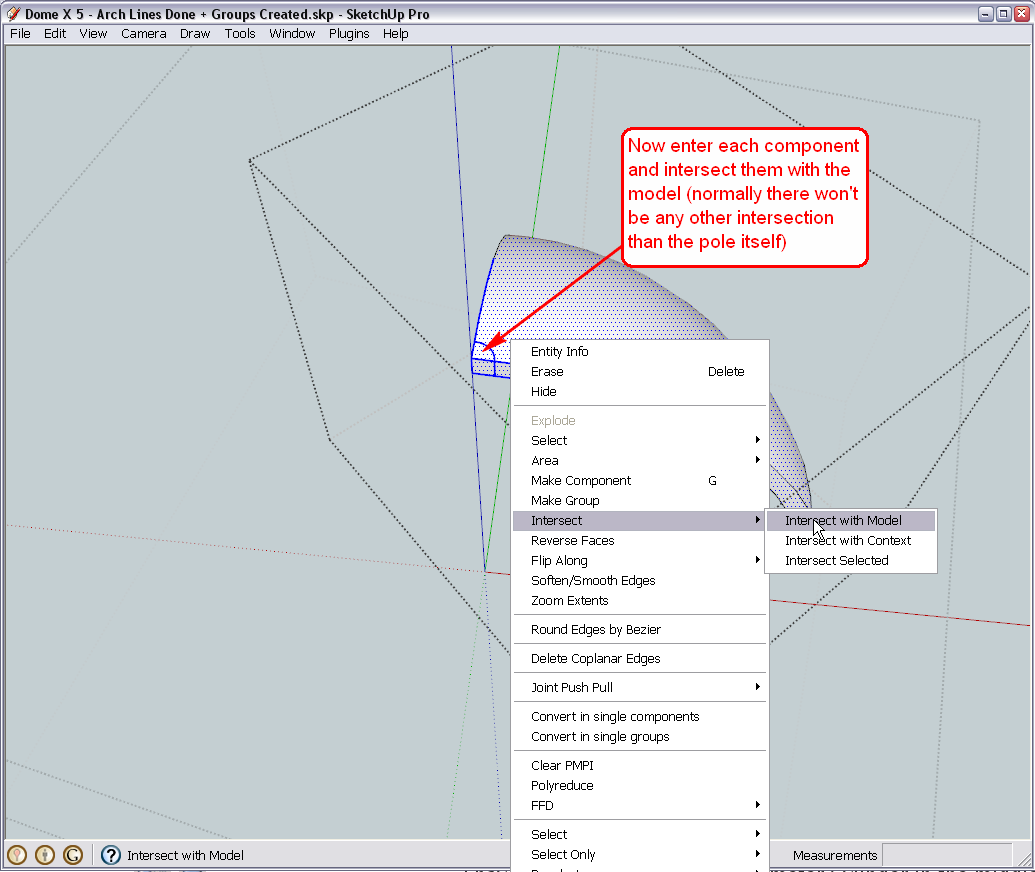
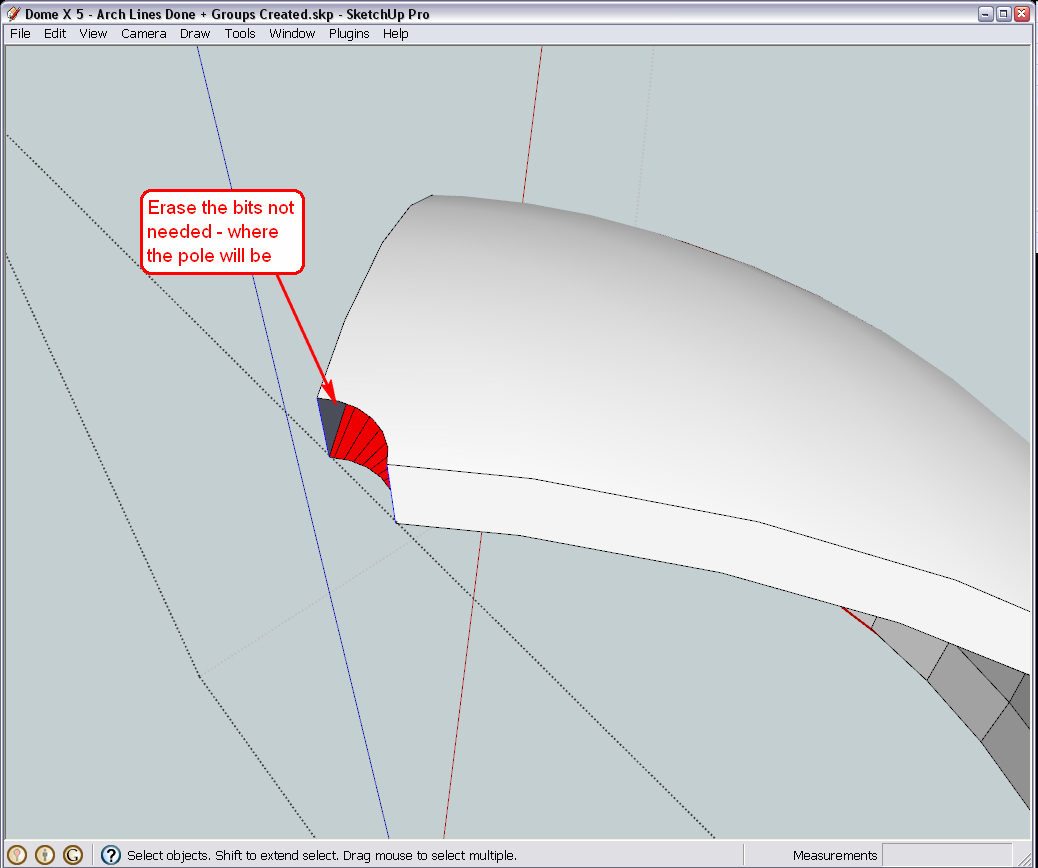
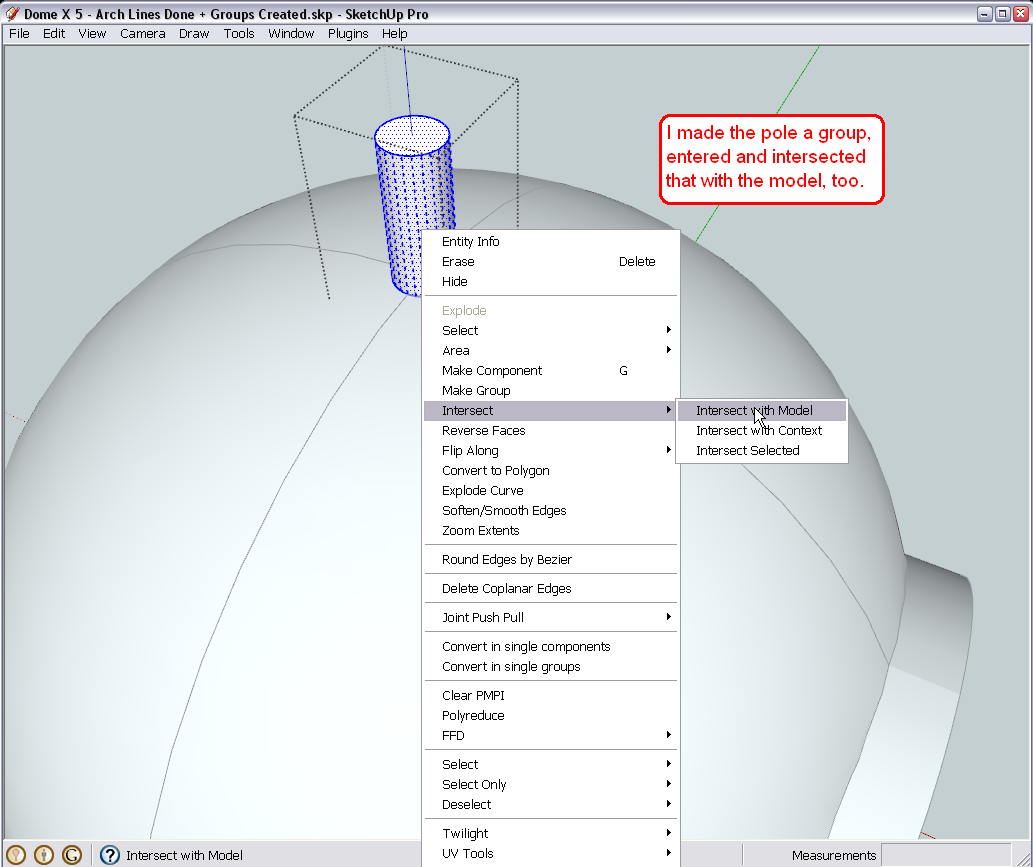
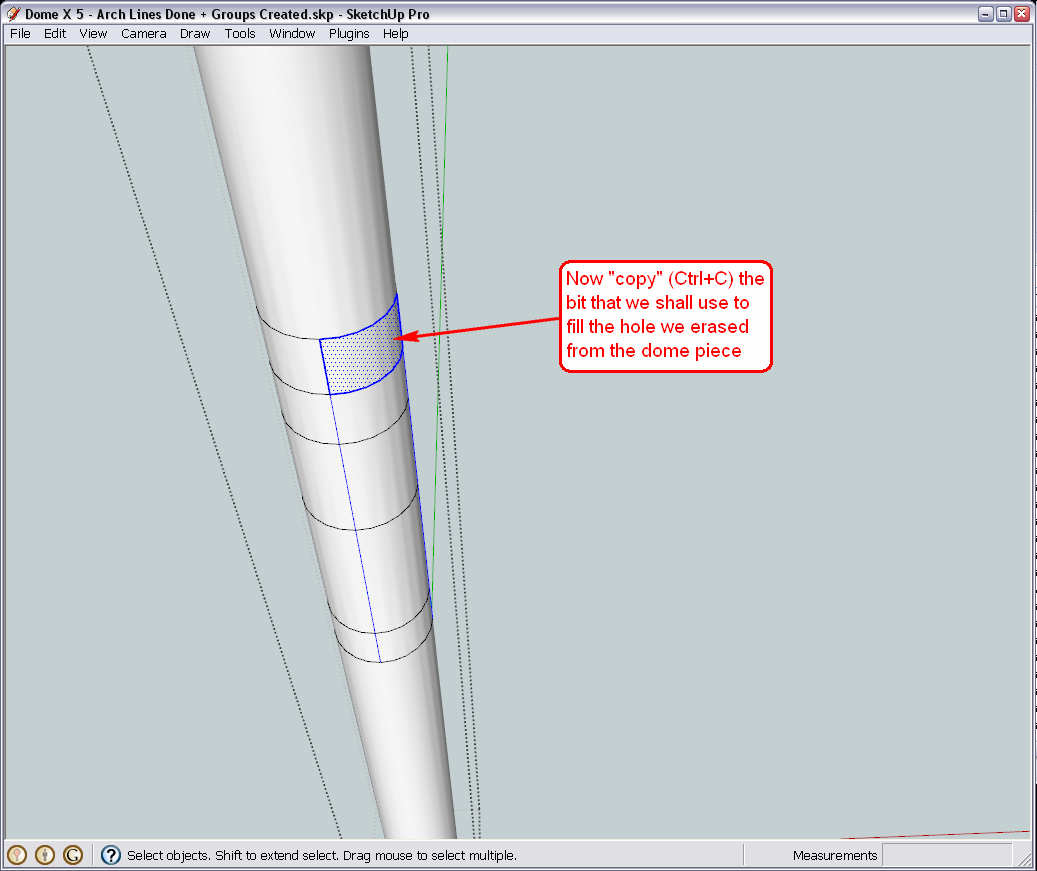
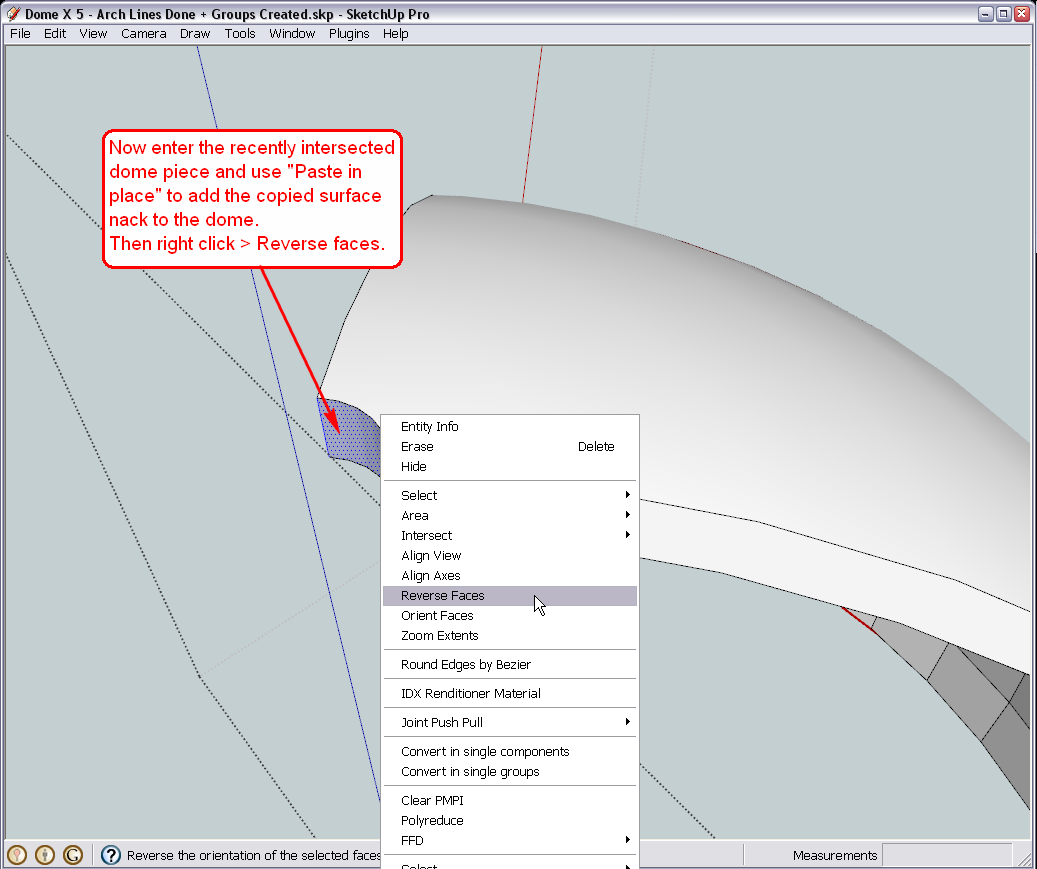
It is obviously a tedious process. If you did it before making some of the dome pieces unique (for the entrance), you could halve the pieces needed be intersected and to insert back as when you do that with one component, all the other instances change, too.If you restarted your project, you could already include the pipe hole into the domes as per this second method:
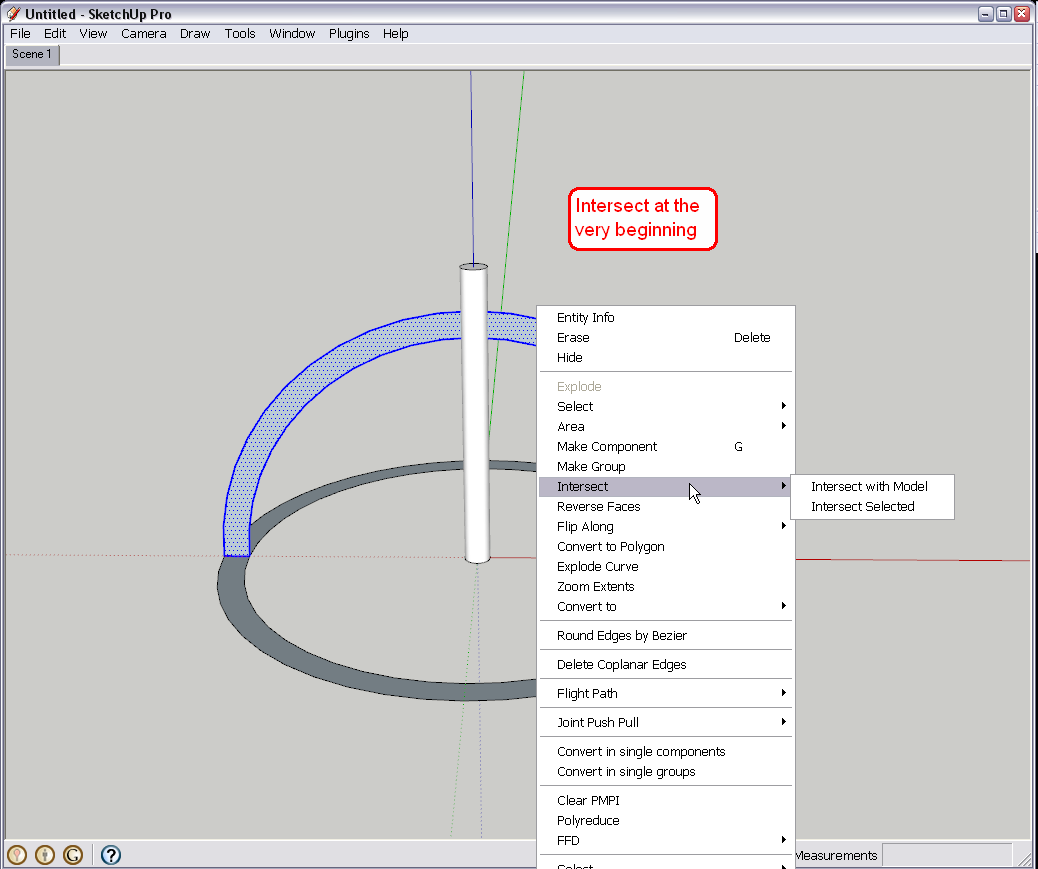
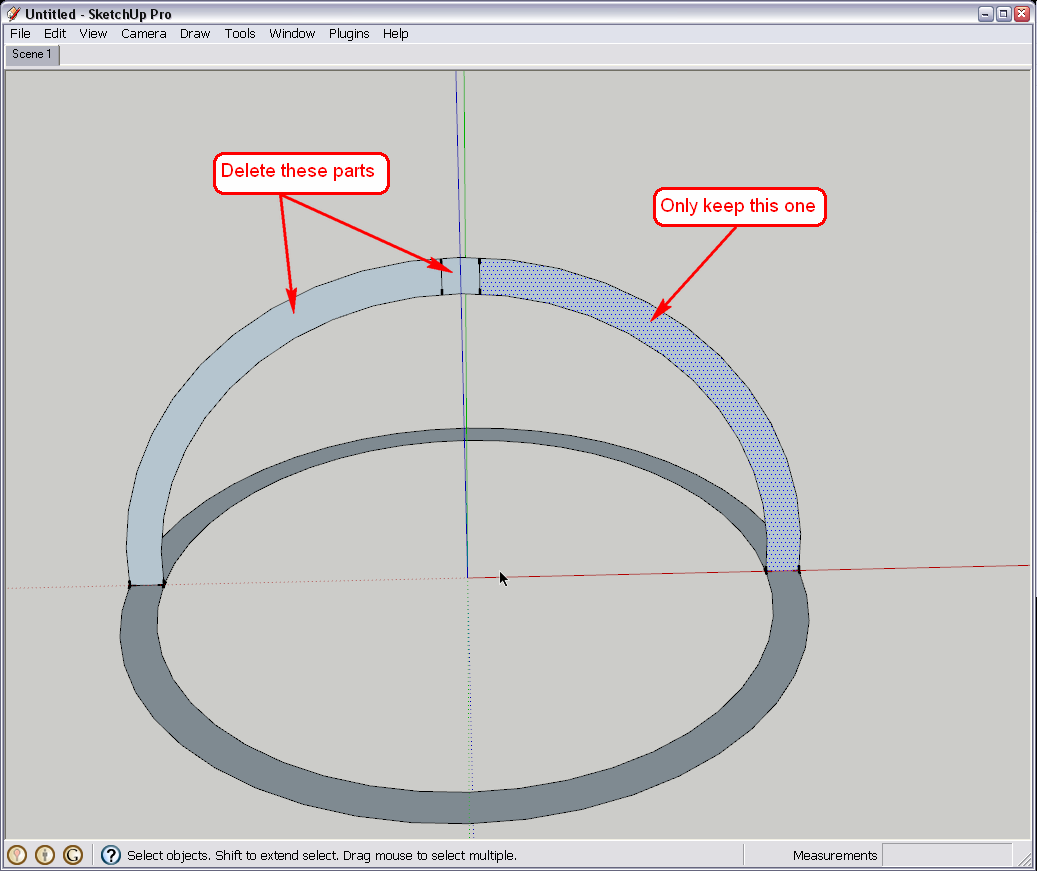
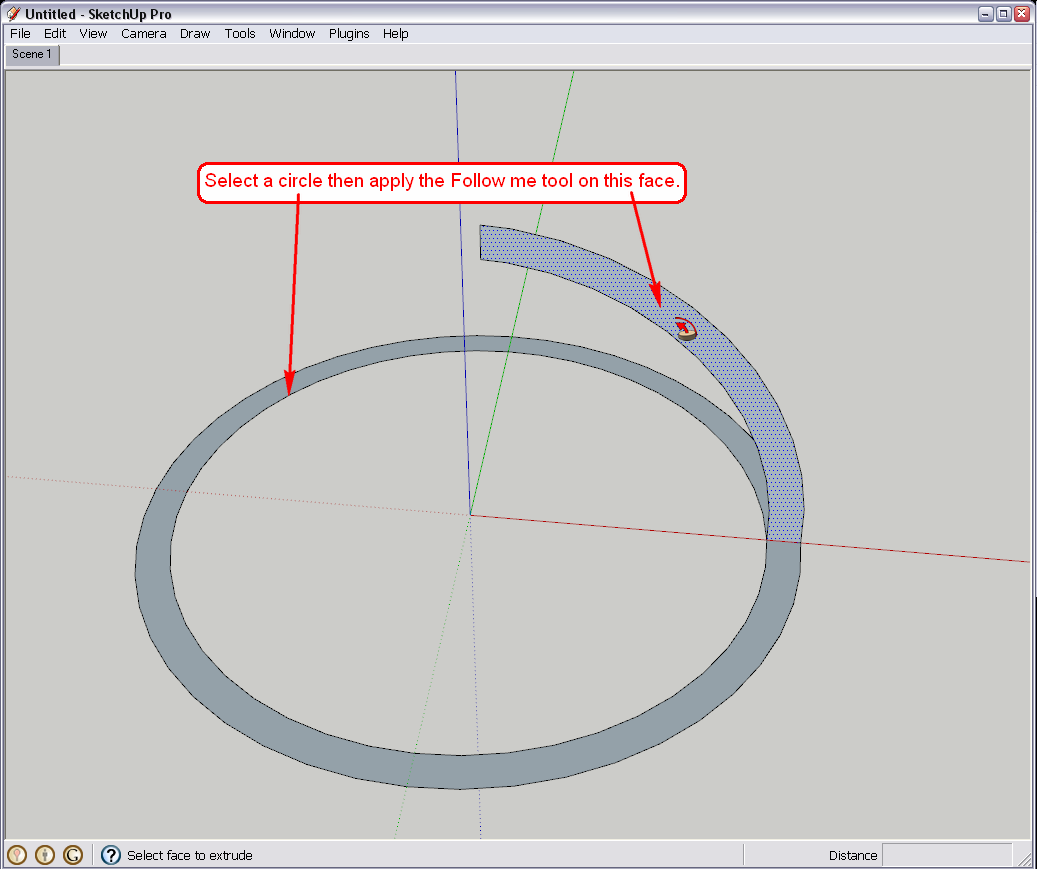
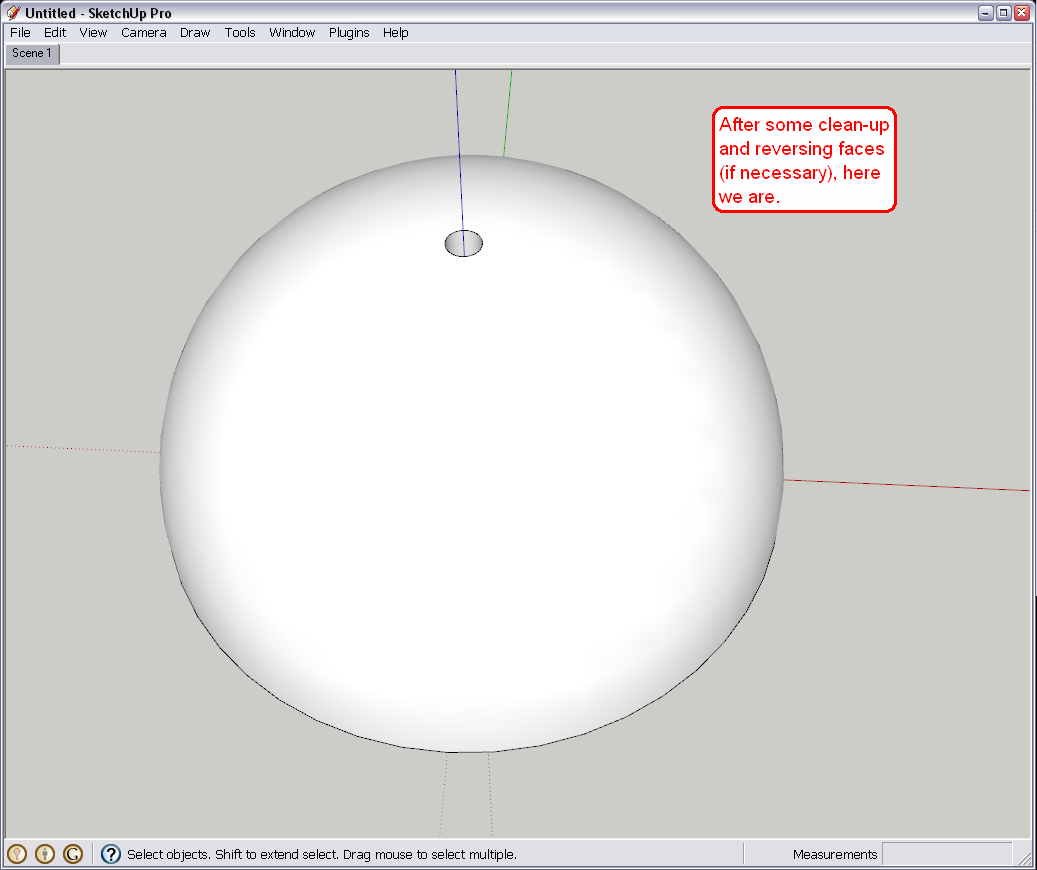
Of course, here it is demonstrated with one dome only - do the same with each. -
Hi Gaieus
Thanks for the step by step on how to add the pipe to my model.
I redid my model from scratch and incorporated the pipe from the beginning as you advised. All went well. I’ve attached my model. May I ask that you take a quick look at it too see if anything seems amiss.Now I am ready to print my model to scale.
@gaieus said:
Now I also added a section plane to the model so that you can print the section cut to scale. Certainly the cut looks quite ugly this way but with some plugins we can easily fix that later
How do I go about adding section plane to my model?
The cuts on the model you posted in the above post did look quite ugly. Can you show me how to use a plugin to fix this?Thanks
Regards
D0me
-
To me, it looks okay - unless you wish to consider accommodating the entrance a little bit better to the inner dome and leave that sharp face for it - somehow like attached here.
Dome V2 Final.skp
As for the plugin, download the SectionCut.rb from the bottom of this post into this folder (where by default SU is installed - if you have it elsewhere, find the path):
C:\Program Files\Google\Google SketchUp 7\PluginsRestart SU and when you placed a section plane correctly, right click and "Make section cut" (or something like that). It will add a group with faces inside which "cover" all the hollows for you.
-
Hi Gaieus
Thanks for cleaning up the entrance further. May I ask how to sort out the sharp curve in the entrance as I’ve tried but continuously failed so I just left it as is?
@gaieus said:
Restart SU and when you placed a section plane correctly, right click and "Make section cut" (or something like that). It will add a group with faces inside which "cover" all the hollows for you.
I’ve added the plugin to my plugins folder in program files. I restarted SU but now I am a stage where I need to place my section plane and I don’t know how. Please can you assist me in placing my section plane and then use the section cut plugin to see what is does to my model?
Thanks
Regards
D0me -
Well, I took all the necesary snapshots and all and even finished the tutorial both about the funnel-like shhape and the section cut WHEN I noticed something:
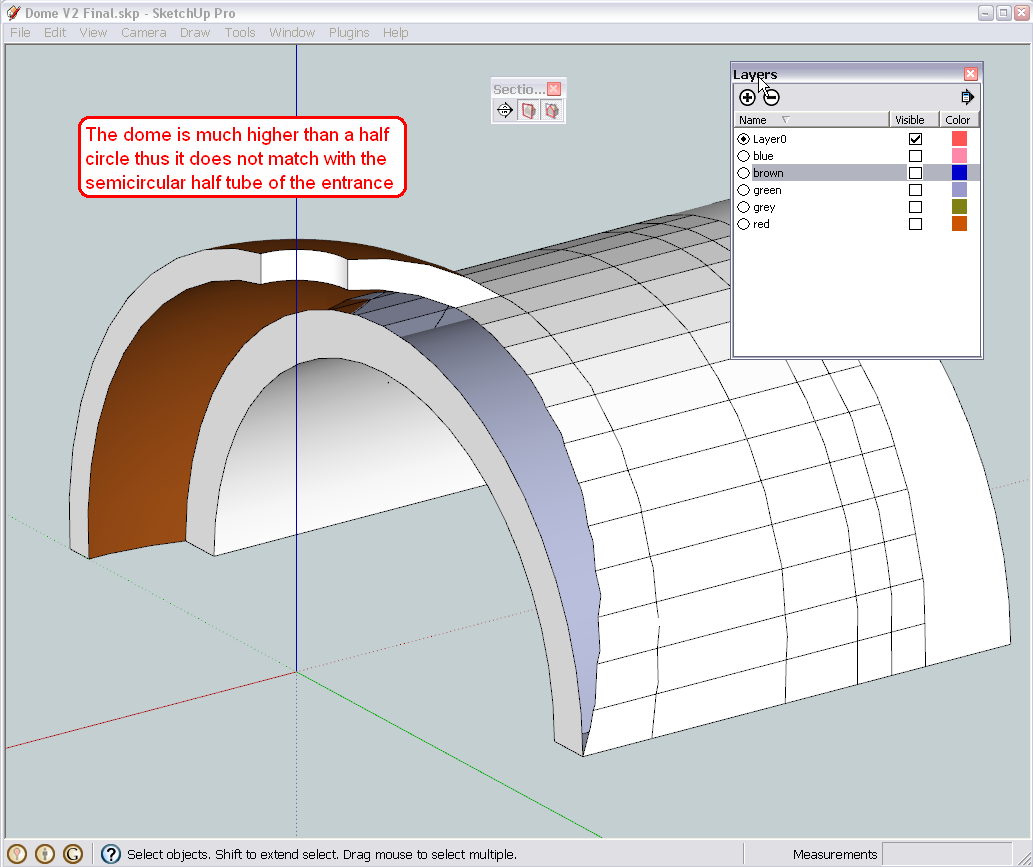
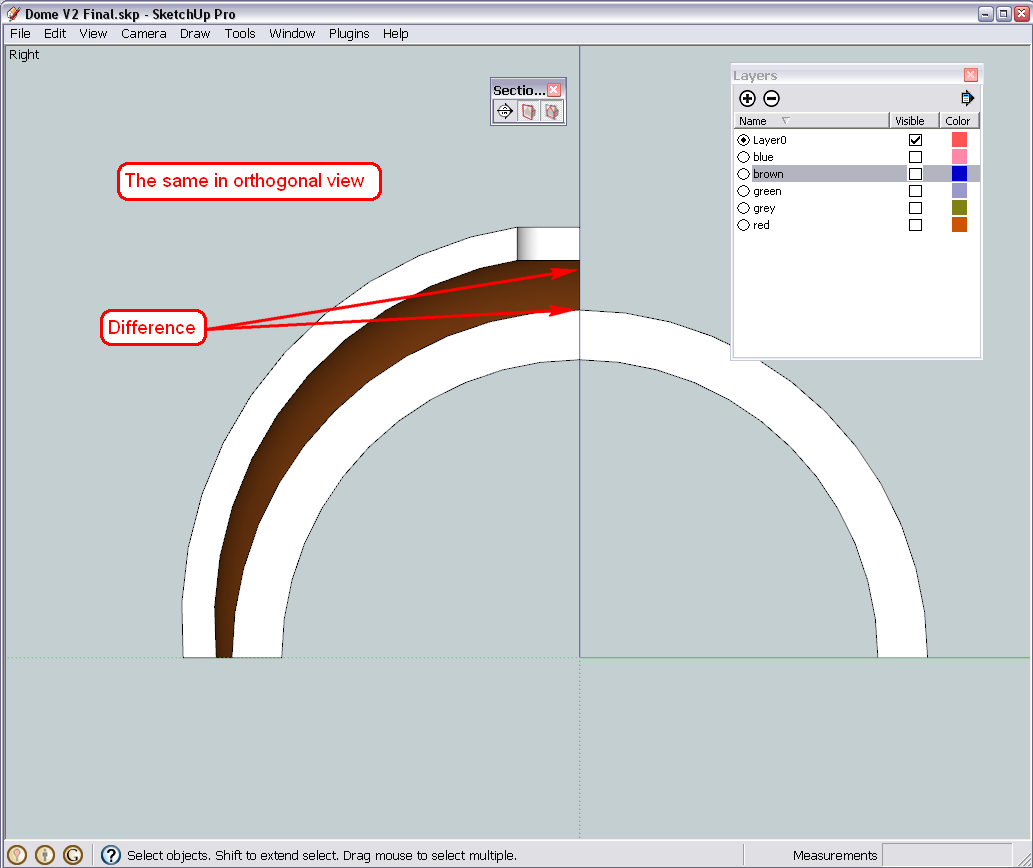
Sorry that I did not notice this before. I have now assigned the different shells of the dome onto different layers (see the layer dialog) except for this very last quarter of the brown dome to demonstrate the problem.Layering is definitely a good idea in such cases as you cannot work on certain groups of the model separately.
So basically I have not done any useful now.
-
Hi Gaieus
Thanks for picking up the problem with my last dome. Didn't realise that myself.
Should there be need for concern on that last dome not touching the entrance?
@gaieus said:
So basically I have not done any useful now.
I didn't quite understand what you meant in the quote above. Did you mean that you haven't done anything useful?
Thanks
Regards
D0me -
Well, I did all the screenshots and commented them but later realised that they were useless as there was something else.
They may be useful/relevant fo another series but this needs to be fixed first.
-
Hi Gaieus
I'm sure you are working on a fix already?
I'll wait to hear from you before proceeding with any further.Thanks and sorry for adding extra work for you.
Just don't know what went wrong and really appreciate all your help.Regards
D0me -
Hehe...
I haven't done anything yet - I had to leave yesterday and could not come back to the machine till now so I will dive in a bit later.
Advertisement
