Need help cutting a hole
-
I dont fully understand what he is telling me to do (my fault not gaieus!) Do I explode the top and then place the sink in position and intersect with model and then delete the sdurfaces marked by the intersection lines?
-
You can do that but you don't need to explode (if it's a group/component). Just place the sink, edit the top group/component (double click on it) and do the intersection "inside". Make sure to use "Intersect with model".
-
Does it take a huge chunk of processing power to do this as my machine is struggling big time to cope with this intersect with model.
-
Well, you would only need to intersect the perimeter of the sink but as I see, when it's sunk into the top, there are lots of other edges being intersected.
-
Thanks Gaieus & Rich
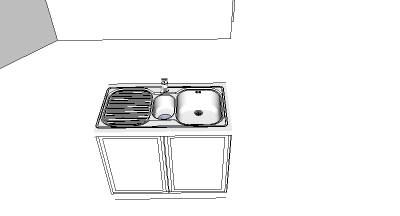
I finally got it - jeez but i'm slow at this!!! Pic to prove it!
-
Did it take a lot to clean up unwanted geometry?
-
Quite a while - what I should have done was to put the unit / top on its own layer then when I needed to clean up just turned off the layer and I would have been left with all the unwanted geometry.
Thanks for all your help Gaieus
-
So what I would have done (provided you had the top as a separate group) is to
- double click on the face of the top which should remain in place (this should select the face and both its external perimeter edges and the outer edges of the mess the sing made)
- Copy it to the clipboard (Ctrl+C should do it)
- now triple click everything and delete
- paste in place what I need - the top with the clean hole in it.
-
Cheers Gaieus
I will try that in a later model - deadline looming large because of that last trainwreck!!!Thanks again
-
This would be a case of think like a carpenter. The carpenter doesn't need the hole to exactly fit the sink, the sink just has to fit in the hole and since it has a return around the top edge, it will cover the parts of the hold that don't match the sink.
The lazy man's way:
First, hide the sink. Double click on the top until you get through the different groupings to where the top most surface is highlighted. Draw a rectangle on the surface of the top. Push pull the rectangle through the depth of the top. Turn on Hidden Geometry under the view Menu without exiting the sink top group, you will now see the ghosted view of the sink. Using the move tool or the push pull tool, move the sides of the hole until they are under the apron of the sink edge. Once that is done click out of the group, right click on the hidden sink and unhide it, turn off the hidden geometry under view and you are done. This uses very little geometry and represents what the carpenter will really do (they may put a radius in the corners but not always).
Hope that was clear.
Hello! It looks like you're interested in this conversation, but you don't have an account yet.
Getting fed up of having to scroll through the same posts each visit? When you register for an account, you'll always come back to exactly where you were before, and choose to be notified of new replies (either via email, or push notification). You'll also be able to save bookmarks and upvote posts to show your appreciation to other community members.
With your input, this post could be even better 💗
Register Login


Advertisement