Rainy day
-
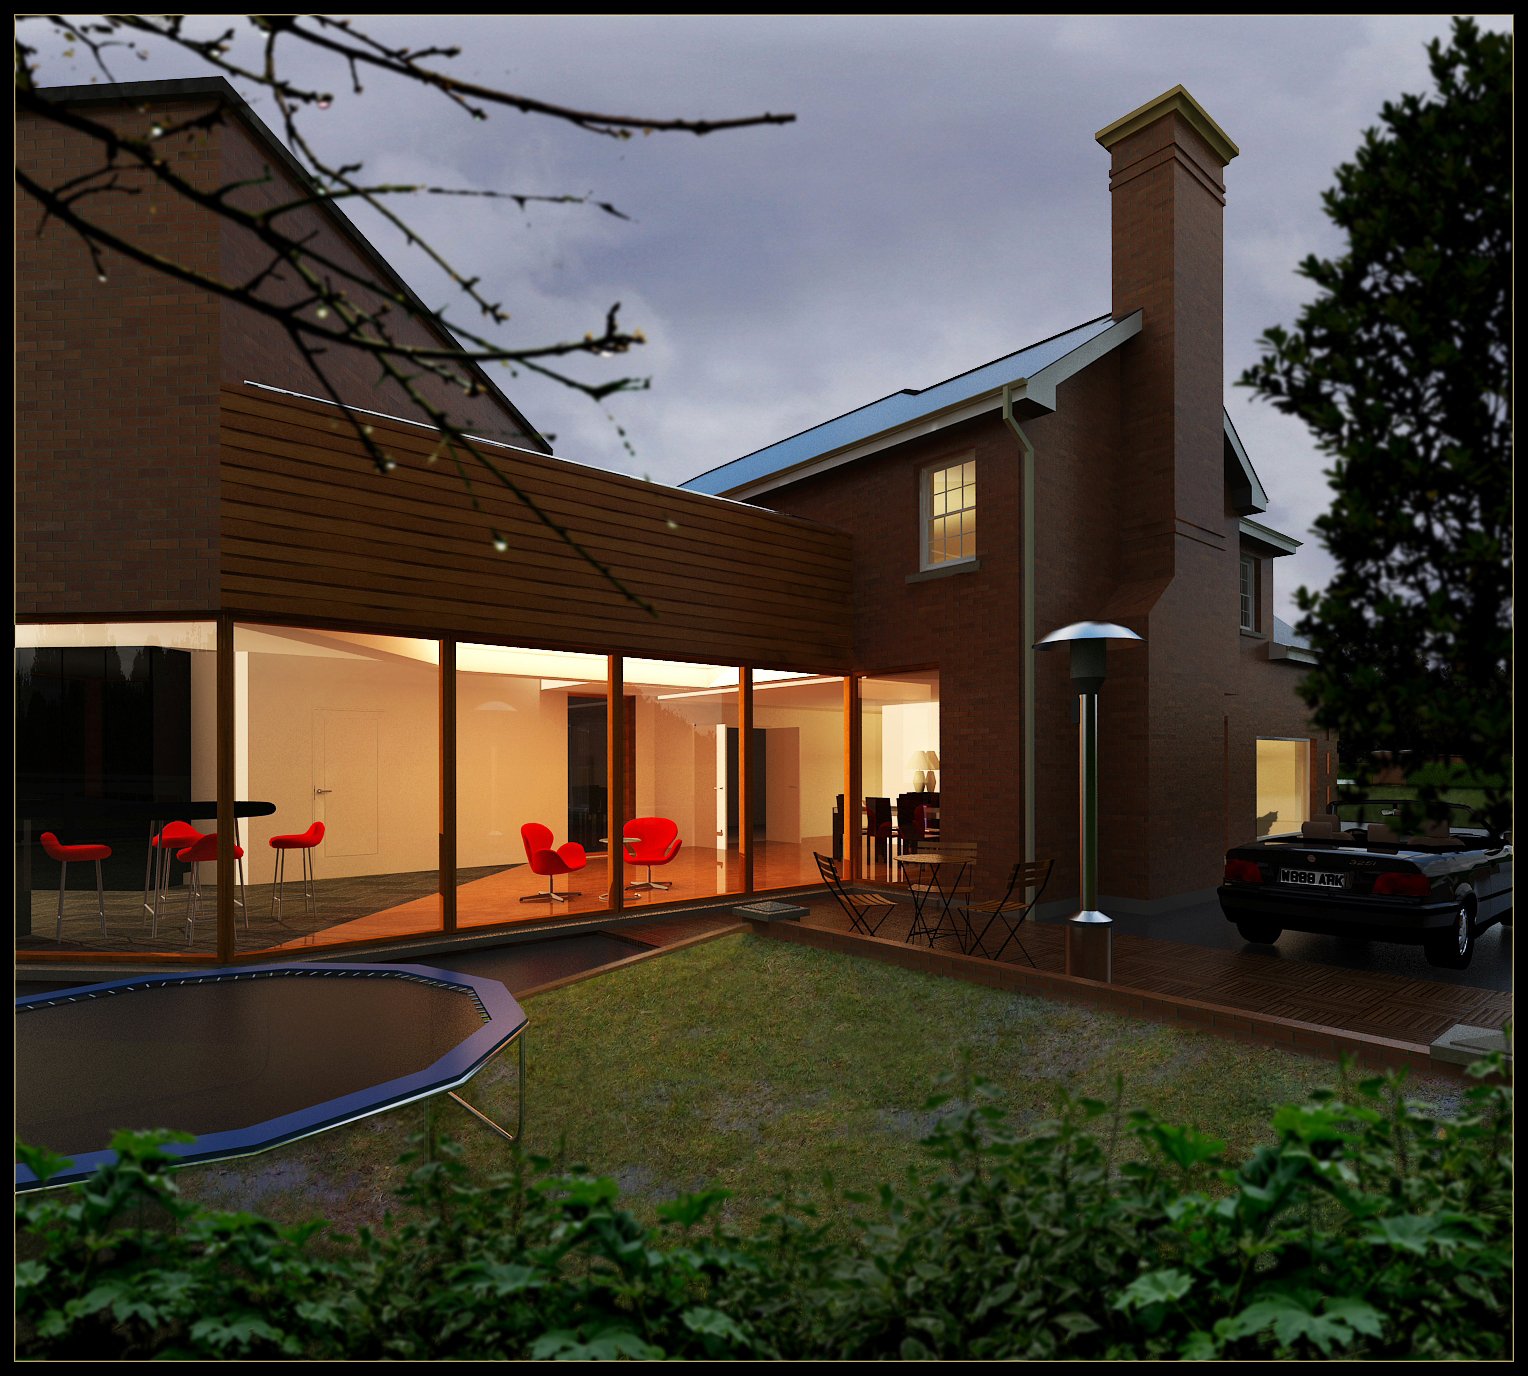
attached is my first attempt at rendering a rainy/wet day.Im happy with most of it but I think the brick needs more of a bump map to bring out the specularity/shine/wetness.
The grass is made up of 5 layers with various layers overlayed/multiplied and opacity reduced.
Im not that happy with the sky so Im going to try it with a different darker sky to see if that makes it better
-
The grass looks really good, could you share with us your workflow? I agree with you for the bricks.
Nice job. -
-
hey massimo
I normally render out the image with a sky image in the environment & background map and replace the background with the same background image in photoshop.this ensures that the GI lighting on the building matches the background.
I would always increase the contrast and saturation by up to 50% and also increase/decrease curves depending on wether its a nighttime shot or a daylight shot.
Regarding the grass, attached are some images showing the process.
I first render the grass in vray.then I OVERLAY this with a different grass texture,reducing the opacity.I will then copy this layer and MULTIPLY it,again reducing the opacity,in this case down to 15%.
Sometimes i will copy this layer again and play around with the opacity,depending on how it looks.
Finally I create a top layer ,and,using the clone brush and a selected image(in this case the WET GRASS LAYER image attached)i copy the wet grass into my image.This layer also has its opacity altered.
I much prefer to use the clone brush than directly copying the area i want as the clone brush allows for softer edges and bleeds the cloned image into the working image.I hope this is clear,ultimatley I find that playing around with the same layer copied and multiplied/overlayed etc can give amazingly different results.
Finally attached is the original image with some slieght tweaking and rain added.


-
Thanks!

-
this is amazing. very convincing. never thought a rainy day could sell a scheme but this could!
what's your method for adding rain?
I hate to say it....but not good weather for a convertible

-
hi oli
i found a tutorial for creating rain at http://www.photoshoplab.com/rainy-day-rain-effect.html.
Regarding the car I added a licence plate to the car and roughly amended the number only to realise the last 3 digits look like they spell "ARK"-I think they call that serendipity!the only reason i did this as a wet/rainy day was purely for fun and experimenting-I wont be showing this to the client - but wait until he gets a load of windy/snow!
-
i dont think you need more bump, if you do it, will mess up. What you need is a reflection map to brake the specularity and refl.
-
@olishea said:
I hate to say it....but not good weather for a convertible
Exactly what I was thinking. Someone should inform them to put the top up because it's coming down in buckets.
Nice render I really like it, although I think you could do without the trampoline. It really takes down the overall classiness of the image.
David, I would love to see you do a similar rainy day in a backyard scene with a pool. That would be pretty cool to see.
-
@davidh said:
hi oli
i found a tutorial for creating rain at http://www.photoshoplab.com/rainy-day-rain-effect.html.the first half tutorial basically creates a rainy overlay mask.
I grabbed a rainy overlay from the web and applied it to a rendering as a watermark.
Al Hart

IRender nXt from Render Plus

Hello! It looks like you're interested in this conversation, but you don't have an account yet.
Getting fed up of having to scroll through the same posts each visit? When you register for an account, you'll always come back to exactly where you were before, and choose to be notified of new replies (either via email, or push notification). You'll also be able to save bookmarks and upvote posts to show your appreciation to other community members.
With your input, this post could be even better 💗
Register Login


Advertisement