Am I going nuts? [found, thanks]
-
@ecuadorian said:
Wow, thank you, TIG! With this line and some manual work, I can do it.
I tried with RickW's "cameralines" but it won't work when there is a photomatched camera in your model.Can you show us what exactly want to do ? Maybe it helps us and we can help more

-
Hi, thanks for the interest.
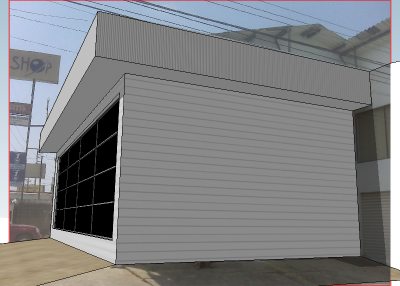
I'm trying to find an easy way to place a big plane perpendicular to the camera behind your model so you can project your photomatch photo to it and be able to render your model in context. You can do this with any big plane and then "Make unike texture" to avoid distortion from the projection in the rendering, really, but I wanted a cleaner, more elegant way.Rick's script works fine, but I had "show edges" turned off.
 Add this to my "Duh!" list. Anyway, TIG's code gives me more control as the line has a known length.
Please don't pay attention to the model as this is just a test.
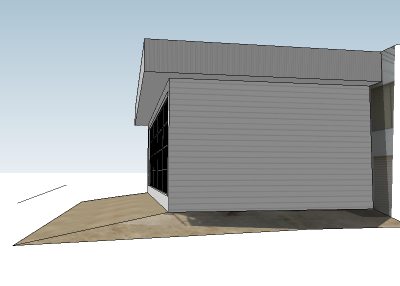
First, I input TIG's code while in the Photomatch camera, with a line instead of a cline. After orbiting a bit, this is what I find:
I now use the lines to tubes script by Didier Bur to add a cylinder with diameter=2m and precision=4 (made it transparent for clarity)
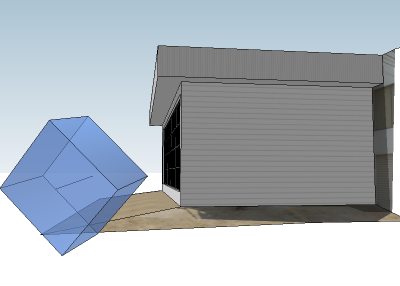
I then rotate it 45 degress around the axis represented by the line, left only the face that interests me, and reversed it to make it show its "frontface":

I now create a component with the line and the face, taking care of placing the component axes in the extreme of the line not touched by the plane:
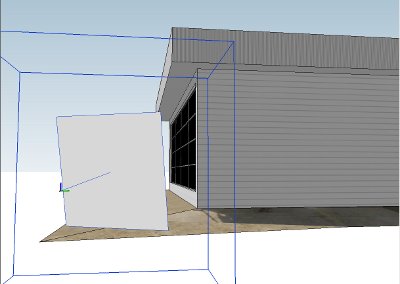
But... I can't seem to find the option to scale a component around its axes. I need it for the last steps, making the plane big enough to be behind your model and then projecting your photomatch photo into it. -
Ecu:
You can change the model axis temporarily relative to your the geometry you want as component before creating the component. Once you make the component you can reset the axis. I think component scaling handles will then conform to the component.
OR
Make your component, right click on the component from the context menu, choose "Change Axis" which allows you to redefine the components axis without effecting the model's orgin/axis. Note the selection handles now.
Does this help you?
-
Thank you, John, I tried the second one and the scaling worked almost perfect.
By the way, Frederik pointed me to the script I was looking for: It's "Bring my View Back" by Tomasz Marek:
http://www.tomaszmarek.eu/sketchup_1.html
Now I need to find the most efficient workflow. -
Seems you have also a plug by Chris Fullmer "Perpendicular face tool" that allow you to draw a square, a circle, or any surface at the end of a line

-
Wow, thank you, Pilou, this one comes in handy, too.
Update: A combination of TIG's line and Chris Fullmer's "Perpendicular Face Tools" seems to be the ticket.
-
@ecuadorian said:
I have a vague memory of the author having a Japanese name.

I am glad you have found the plugin. You can modify the distanceuser_dir.length=2.0. I have used the plugin even to cut-out an opening for a proposed building and has left the plane at the standard offset.
It was like doing a photoshop mask in SU. I could then export a photomontage straight form SketchUp. There is an issue with such a method when the Sun points towards camera, cos the photomatched plane gets too dark in relation to the model itself.Tomasz


-
Hi, Tomasz, thank you for your great work with the KT exporter. At the end I decided "Bring My View Back" was the quickest and most precise way to add a background. All I needed to do was change the axes of the component and then I was able to scale it as I wanted. I'll post a video tutorial soon for anyone interested.
And I found a way to solve the problem of the sun and sky interacting with the background plane when rendering in Twilight:
http://twilightrender.com/phpBB3/viewtopic.php?f=12&t=471
This means now I can use an HDRI or physical sky + sun for illumination, and another image as a background. -
@ecuadorian said:
Frederik pointed me to the...
 my name's not "Frederik", but I'm flattered you would confuse us.
-
@ecuadorian said:
All I needed to do was change the axes of the component and then I was able to scale it as I wanted. I'll post a video tutorial soon for anyone interested.
Here is a new version 1.1 for you. No need for changing axes
Tomasz
-
Wow, thank you very much, Tomasz! Please, mods, add this to the ruby index. And thank you, Shane, for pointing him to this thread (I can't explain how he'd find about it otherwise).
-
@tig said:
Do I understand correctly that you want a script to draw a guideline from the camera eye position 1m towards the target ?
If so this line of code pasted into the ruby console will do it...m=Sketchup.active_model;v=m.active_view;c=v.camera;e=c.eye;t=c.target;e1=e.offset((t-e),1.m);m.active_entities.add_cline(e,e1)???
To make it a solid line change the text 'add_cline' to 'add_line'.Thank you TIG for this piece of code.However it seems that executing it, doesn't draw the line...(I am on SU 7)
Another little question (I am such a ruby noob :") Is there some template ruby file where I can paste this code in so it becomes a .rb file I can put in the plugin folder?
Is there some template ruby file where I can paste this code in so it becomes a .rb file I can put in the plugin folder?Thank you in advance,
Chris
-
@kwistenbiebel said:
@tig said:
Do I understand correctly that you want a script to draw a guideline from the camera eye position 1m towards the target ?
If so this line of code pasted into the ruby console will do it...m=Sketchup.active_model;v=m.active_view;c=v.camera;e=c.eye;t=c.target;e1=e.offset((t-e),1.m);m.active_entities.add_cline(e,e1)???
To make it a solid line change the text 'add_cline' to 'add_line'.Thank you TIG for this piece of code. However it seems that executing it, doesn't draw the line...(I am on SU 7)
Another little question (I am such a ruby noob Is there some template ruby file where I can paste this code in so it becomes a .rb file I can put in the plugin folder?
Thank you in advance,
ChrisWorks fine for me in v7. You won't see the cline unless you change your view as you are looking straight down it...
You need no special 'Ruby' file - just make a plain text file (xxx.txt) with Notepad and change it's sufffix to .rb (xxx.rb) - on a PC you must have filetypes set to display their suffixes...Putting in plain code would cause problems since it'd run as soon as the script loaded as soon as the model opens... So you make a 'def' so you choose when it runs [I'll keep it simple and miss out Modules and Classes etc], thus:
def clinefromeye
  model = Sketchup.active_model
  view = model.active_view
  camera = view.camera
  eyepoint = camera.eye
  targetpoint = camera.target
  eyepoint1m = eyepoint.offset((targetpoint-eyepoint), 1.m)
  model.active_entities.add_cline(eyepoint, eyepoint1m)
end#def
I originally abbreviated the code so it was in a one-liner - above shows the same code but made more readable - note that the
#=='comments' and previously ';' were=='newline'...
To run it now typeclinefromeyein the Ruby Console...
To addclinefromeyeto a menu or toolbar... I suggest you see other scripts for examples... -
@ecuadorian said:
Hi, Tomasz, thank you for your great work with the KT exporter. At the end I decided "Bring My View Back" was the quickest and most precise way to add a background. I'll post a video tutorial soon for anyone interested.
A bit late, but here it is:
http://www.forums.sketchucation.com/viewtopic.php?f=18&t=22786
Hello! It looks like you're interested in this conversation, but you don't have an account yet.
Getting fed up of having to scroll through the same posts each visit? When you register for an account, you'll always come back to exactly where you were before, and choose to be notified of new replies (either via email, or push notification). You'll also be able to save bookmarks and upvote posts to show your appreciation to other community members.
With your input, this post could be even better 💗
Register Login


Advertisement