How to recreate the silhouettes of a model?
-
Again I am struggling with a problem and looking for a solution.
This time it is about sculpturing. I think SU could come in very handy, but I am having trouble in finding the solution.
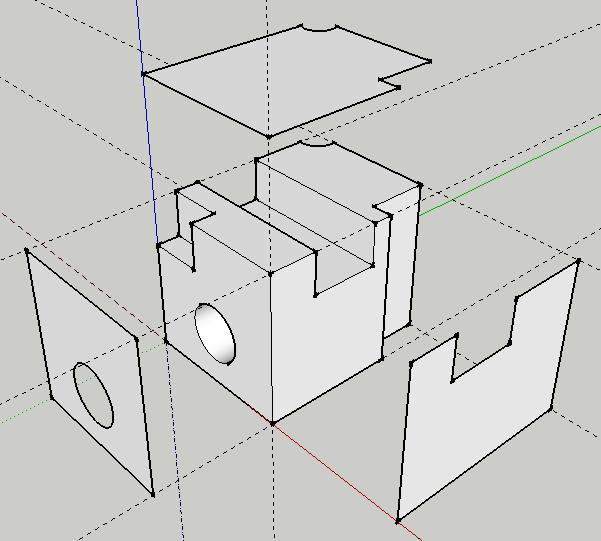
If I would make a model in SU with all of its tools and maybe rubies, would there then be a way with which I can recreate the outline/silhouette of the front, the rear and the top of this model?Normally I would think of a statue that I wanted to make, draw the front and side on a piece of paper, copy the front on the stone and then start removing everything from the stone that is outside the picture. So basically, I am starting with everything and start deleting.
But now I want to use SU and I want to make my statue by starting with nothing and then add 'rock' to it until I have got what I was looking for. So afterwards I want to see how big the rock should be and would like to make drawings of the front, side and top I can then work with.
Anybody have any idea whether this is possible?
(3 drawings are also not enough to make the whole statue of course, and there are some more problems I can think off, but I will try to deal with these later. This first one is already making my head spin.For clarity I have added a (simplified) model and the 3 drawings I am then looking for.
(by the way, I have posted a similar question somewhere for someone but I think he is not reading this one, so hopefully in this community I can find the answer)Thanks!
-
Hi Fred,
Would printing out the Top, Right, Front views in parallel projection mode (In the main menu, Camera->Parallel Projection; then Camera->Standard Views) work for you? If not, can you clarify why not?
-
Oops,
do I feel silly now.
Yes, as a matter of fact I guesss that is exactly what i was looking for...Sorry for not thinking about that one.
And I do have a next question, but I will try to make a picture of that one too (and think if this one is not also that easy to solve myself...
Thanks Nemosuke! -
I am not sure I completely understand what you are trying to achieve however have you tried extruding each face then intersecting them and removing the unwanted parts, or using 'Booltools' (a bolean toolset)?
-
-
I think he was after simple 2d drawings in order to check sizes against the rock he would use for sculpting...at least that is how I understood.
-
Hi Solo,
I can understand that it was not exactly clear what i was looking for, but Sepo is right. (thanks anyway of course for the advise!)I have read and seen tutorials about making a model based on three pictures (for instance making a car), but what i was looking for, whas the other way around. I have a 'car', but now i was looking for the three pictures.
Well, actually, i was looking for the three pictures because i could use them to find the right size of stone like Sepo mentioned, but after that i am only using one of those 3 pictures and actually need another second picture.
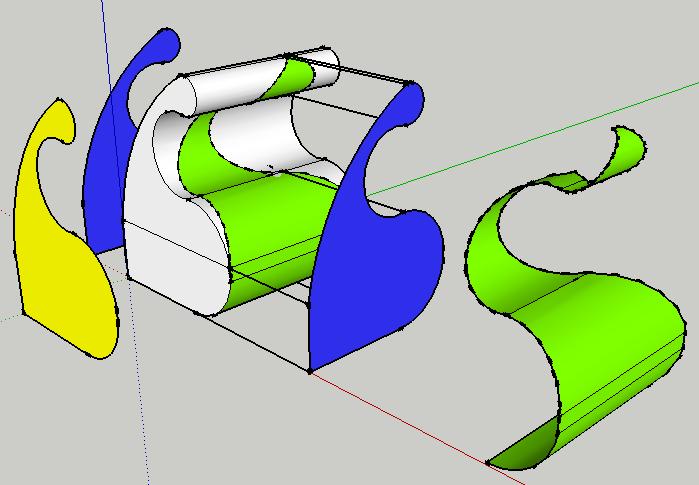
I'll try to explain.Once I have the three drawings, I know what the minimum size of the rock that I am going to work with should be. I now have got a picture of the front, (thanks Nemosuke) so I can draw this one on the front (the yellow one in the next attachment) and the reverse picture (the same yellow one) on the back and easily start removing everything. (The model you see right now is a result of this step)
Now it is time for the left and right side (the blue one). (In this example I have taken the same shape, normally it would be another shape).
What I would like to do, is to take the print that I have of the left and right side (the blue one) and draw it upon the statue. But this would only be possible if had not removed the stone in the first step.
So basically what I would have to do, is to draw the green one in order to get the blue one in parallel view.
So here’s the question. Is it possible to recreate the green one (being able to print it) if I have got a model which will show the blue print in parallel view?
(In this case, the left side will also have the same blue one in parallel view, but will result in another green one).
-
One more, which might help.
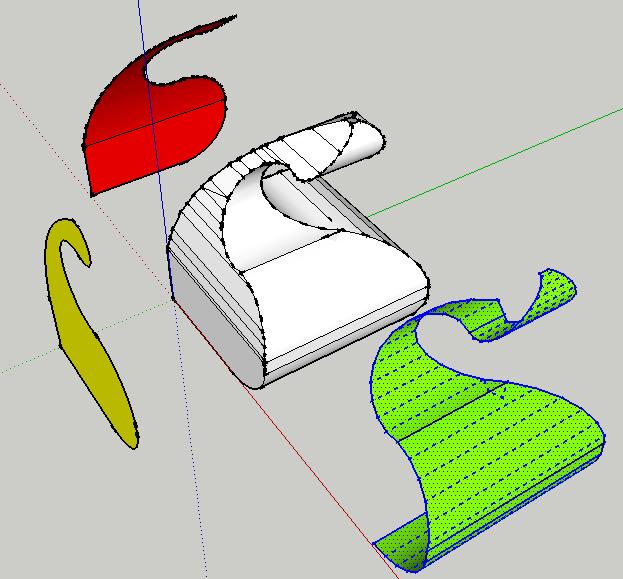
let's say if been playing with SU and created the next model that I like and I decided that I wanted to make this out of stone (or some other material).
I know by now that it is possible to create the yellow picture.
But is it possible to generate the green and the red one in such a way that I can print it?
-
Are you again talking about 2d elevation view? If you are than you should do it again in a same way.Go to camera, parallel projection. You should have views toolbar activated. That will give you all 2d views which of course can be printed.
or are you saying you would like to unfold it and than print it? If that is the case than you can use Jim's plugin
which you can download from here http://sketchuptips.blogspot.com/2007/08/plugin-unfoldrb.html -
Hi Sepo,
this is why i really like this community forum. I've been thinking on how to do this for some months (before i had even heard about SU) and for some days now that I know SU and after posting my question it is already solved...
Yes, indeed I was looking for something to unfold (didn't know that word) the green part. Didn't know the plugin existed (or what to look for), and i just read some of the comments and that really sounds great!
Thanks for the link and your fast reply!
One happy sculpturer
-
Hi Fred,
First I thought simply using the drape tool would do it but then it only likes to work verticall. There is a nifty plugin by Didier however: "project_faces_plane.rb" (it's also included into his projection projection tools above this plugin). With this you can simply project any shapes onto planes and this way getting all the desired 2D, parallel projection views as geometry. Find it here:
http://www.crai.archi.fr/RubyLibraryDepot/Ruby/em_geo_page.htm -
Hi Gaieus,
i will sure check this one out but tonight I started playing a little with the unfold and
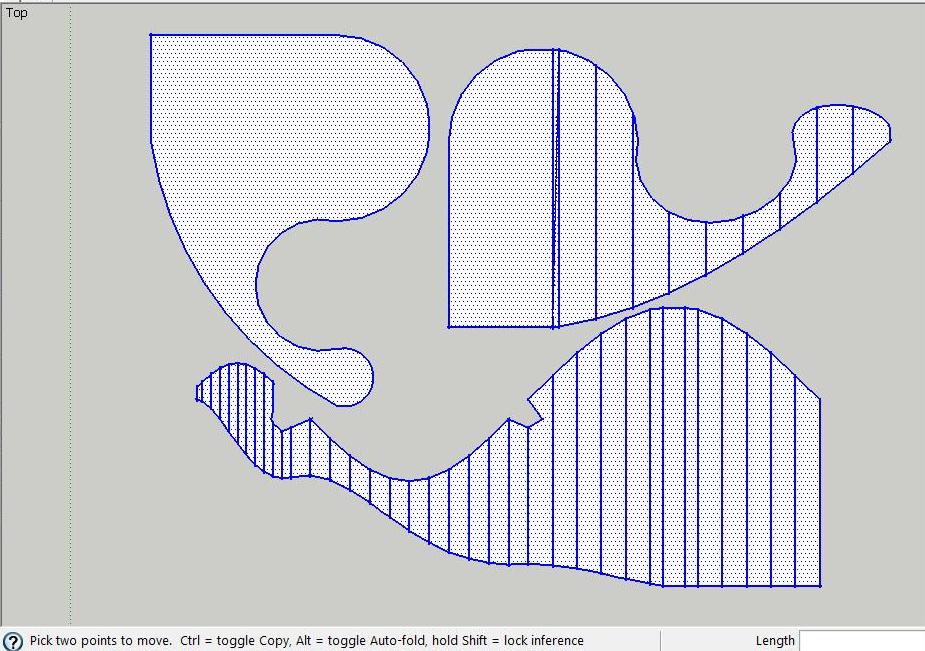
And because I asked this for using it with sculpturing, I made something (out of 'piepschuim'(foam?)). Next time I will use stone again.
So now I can use SU to make a model I like instead of trying to draw it on paper in 2d and hoping that everything can be made in 3d.
Thanks for all of your help and with this help I was able to make the following.
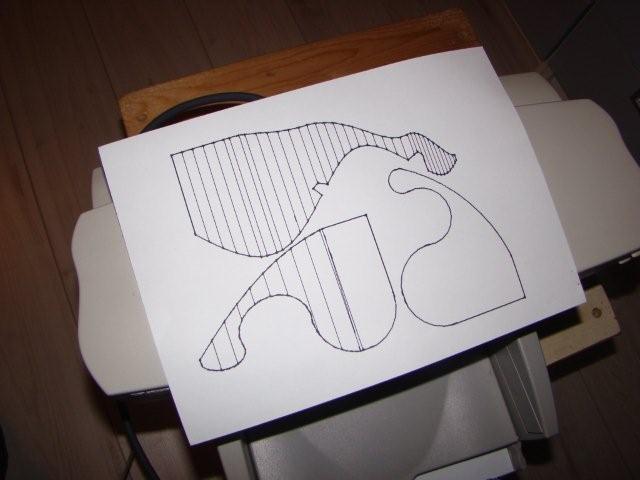
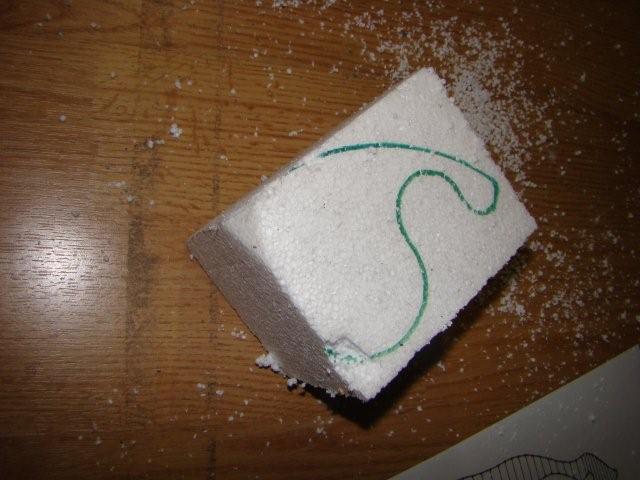
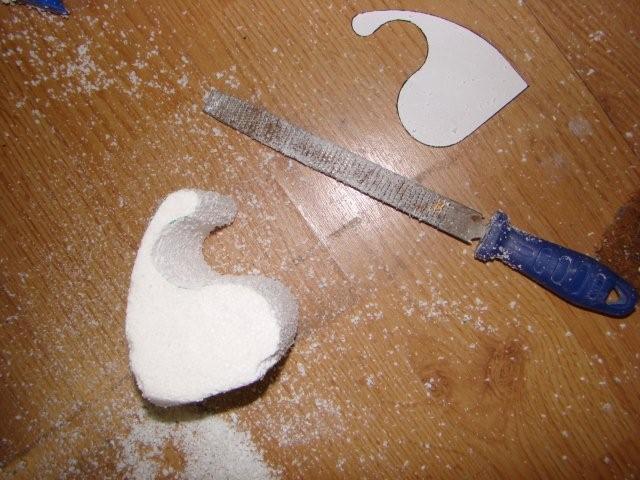
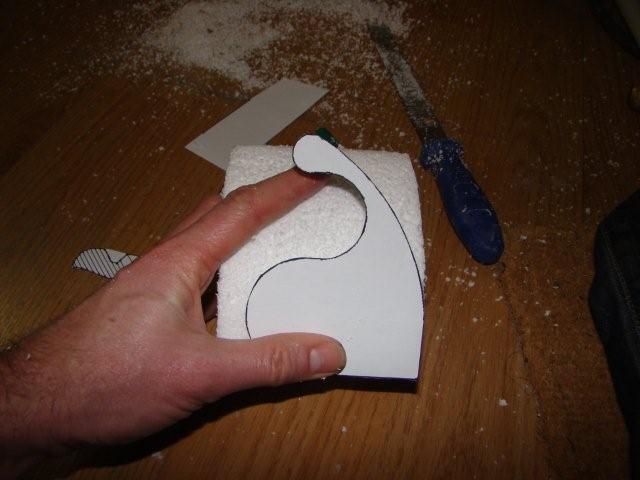
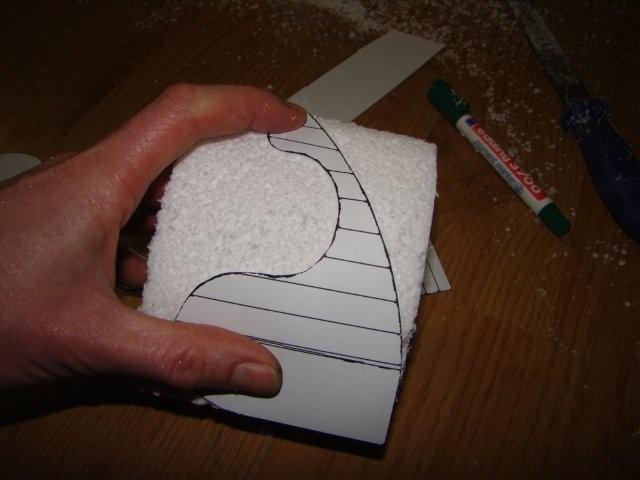
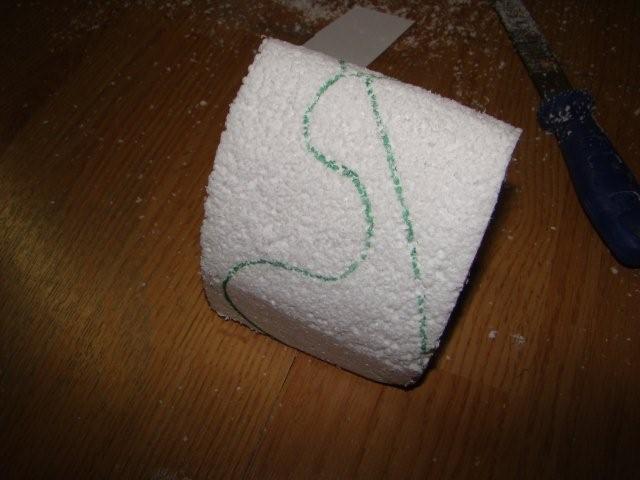
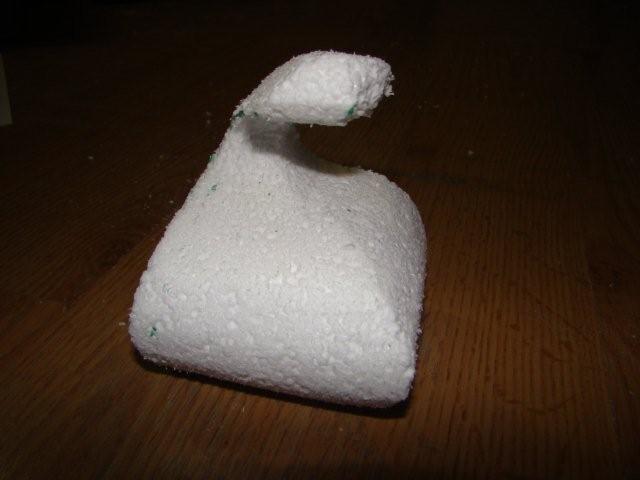
-
nice sculpture, Fred. and thanks for the image-documentation. it is great to see SketchUp being used for different purposes. and what you do is definitely an exciting area.
now that you have found an ideal way to get your models from bits and bytes to stone and foam, your next challenge will probably be to rise the level of complexity of the models. I would suggest you have a look at Whaats Subdivide & Smooth script. it is definitely worth the money.
(of course I am telling you this with the hope, that you will keep us posted with images of your projects )
) -
Looking good and I am glad it worked for you..
-
Hi Plot-Paris,
I've heard a lot about it and indeed i think it will be inevitable

And i sure will keep you posted if i have created a real sculpture from stone with the help of SU. I always make pictures of my "WIP" and SU sure is an extra dimension!
Unfortunately it is in Dutch but here is an example: http://home.tiscali.nl/beeldhouwer/htm_bld83.htm
(C&C are welcome of course, also possible on the homepage itself ('Naar alle beelden', 'Home', 'bericht achterlaat') or directly in http://www.koekjes.net/cgi-bin/gastenboek/schrijven.pl?rodin) (nice to see visitors from outside the Netherlands
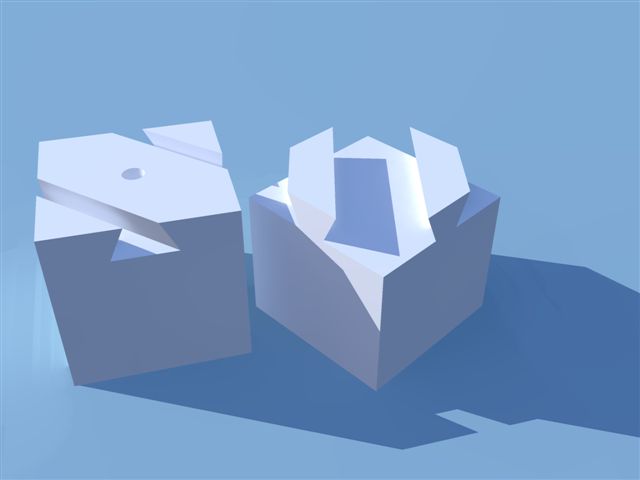
For this statue i did a lot of calculating, something that would have been sooo much easier in SU...
Afterwards i drawed this one as an exercise:
-
Today i am starting (to give it a try that is) with a real statue.
I received a model from Solo of a dog and i think this will be my subject. I want to try to create a real statue and along the way i will take a look at the problems i am facing with a real one instead of a simple imaginary one that i made up before.
Well, i have just found the first challenge.Is it possible to automatically create faces if you have the outlines, but not the faces?
I mean, suppose you would have made a square and divided it with a line (like an '8') then SU would automatically create 2 faces. Suppose you would have selected both faces and deleted them, than you only have the '8' left without the face.
Well, this i like the situation i am having right now. A lot of connected lines but all without the faces.
Is is possible to let SU create all of them? Or do i need to use some plugin?Thanks again!
PS all the lines are 'coplanar?' (i am already trying to find an answer in this giant forum, a lot of post regarding faces

-
Hi Fred,
If you draw a giant face (say a rectangle) coplanar with and on the (already) coplanar faces, select all > right click > Intersect > ...selected or model, you should end up with all the linework merged into the face thus creating the individual, split faces.
Delete the excess of the rectangle and you are there.
Also,the drape tool and the plugin I linked above are just for this.
-
why didn't i think of that? And then to think that all the lines were even already on this big rectangle (i did use the "project faces on a face" you mentioned earlier). Thanks, that does the trick, although now i am having a 'flat' projected dog with a lot of faces, of which a lot seems to be normal and a lot are reversed so still not really able to pushpull...
Clicking 3 times (selecting the entire projection and 'reverse faces' does not exactly what i want and in this case it is 'impossible' to select every single face that i have to reverse.
I will try to find a solution myself, but if you feel like helping...
-
Right click on just ONE face (that is oriented correctly) > "orient faces". If there are no inside faces in a "solid", it should orient all the faces in the same direction. (Sometimes unpredictable however
 )
) -
indeed it seems to be acting unpredictable, but i have played around with it a lot, so i guess i will start all over. Thanks for the tips so far!
Advertisement


