Texture: how to map it to a bending cylinder
-
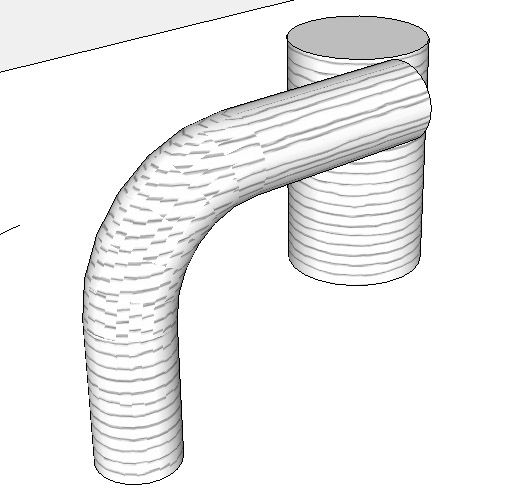
I'm trying to apply this material to a bent cylinder as per the attachment.
I can't figure out how to map it correctly so the lines wrap around the cylinder all the way through. Can you do this in sketchup?
Thanks
-
Mapping textures can be tricky in some situations, but what you're talking about doing is fairly straightforward using a projected texture.
Paint the texture on a vertical face, like a rectangle, then right-click > texture > projected. Then sample the texture and apply it to the cylinder or bent cylinder.
~Voder
-
To achieve the result taff got in you can always bend the texture in photoshop or a similar package. I think theres is a warp tool that can be used for this sort of thing...
-
Voder Vocoder,
How would you approach this? (...which is what I think CurryPork may be after.)
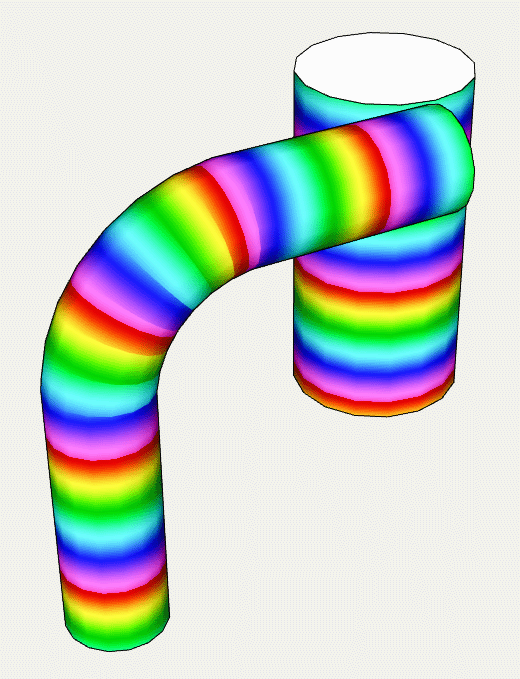
I know that, for me, it was a pain in the butt. I tried "UVtools," but it's obviously inappropriate to the task. Is there, perhaps, a "follow me" type tool for texture, with which I'm not familiar?(To obtain the above result, I had to repeatedly sample/paint adjacent faces, with hidden-line viewing turned on.)
Taff
-
Taff,
I'm afraid the tedious method you describe is the only way I know of. Luckily, I thought, that wasn't what CurryPork was looking for, judging by his image and phrasing of the question.
He certainly could have made it a bit easier for anyone trying to help him, first by posing his question with greater precision, and second by providing the texture itself to work with. I'm embarrassed to say I wasted about half an hour just looking around for a stripe like that (unsuccessfully).
Remus, I'm extremely skeptical about your suggestion of "bending the texture" in PhotoShop, but I would be very glad to be proven wrong. Please show me.
~Voder
-
Remus,
My apologies. If using projected texture this way is what you were talking about, then it does indeed seem to work. Very clever idea: my compliments.
And Taff, it was real quick and easy.
~Voder
-


-
I based my wrap-around interpretation upon...
@unknownuser said:
...so the lines wrap around the cylinder all the way through...
...assuming he meant "...all along the length."
I first considered using a projection from the side as well, but that would only work with specialized cases (and it works well, as demonstrated by Remus and solo.) I, myself, have put side projections to good use, in the SU modeling of terrain altitude:
http://sketchup.google.com/3dwarehouse/details?mid=77627ea5941ff3d387ecd6083924dbaI sought a solution that would work with any geometry, no matter how it twists-and-turns in 3 dimensions. No such luck, without the tedious, repeated sampling/painting. Makes me wonder if our community ruby gurus have pondered this?
Taff
-
Sure, Taff, if you want to add emphasis on "around," be my guest, but one could just as easily add emphasis this way:
@unknownuser said:
...so the lines wrap around the cylinder all the way through...
As I said, CurryPork could have done us all a favor by selecting his words--and his picture--with greater care.
At this point, I guess we could either assemble a panel of semanticians, cryptologists, and empaths to try and unravel this mess for us, or we could simply say we gave it our best shot and walk away from it, with no cause for shame.
I vote for the latter.
~Voder
-
I apologyze for my bad english (my third language). I knew my question didn't make sense, but what I meant is how would you wrap that texture as TAFF had shown with his colored image. And thanks Remus and Voder for demonstrating that this can be done with the projected map. It works well for what I wanted to accomplish.
Thanks everyone.
-
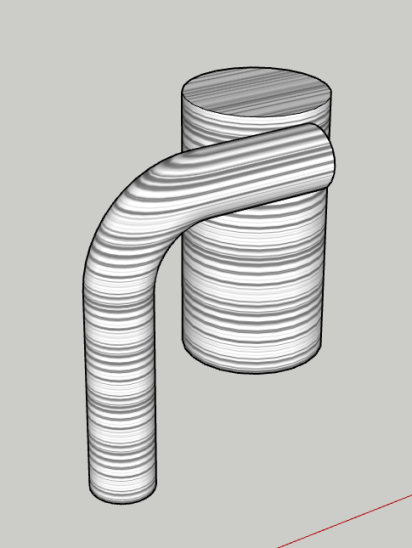
OK, it's not working as well as I thoght... I applied the projected texture to the bent cylinder and it looks fine but when I rotate this shape, it doesn't hold the texture since the texture is "projected". Any suggestion on how to resolve this is appreciated.
Thanks
-
Could you post the model? i cant reproduce the issue.
-
Hi Curry Pork,
When you have applied the texture, turn on hidden geometry (View menu), right click on one of the facets > texture >position and without doing anything else, hit enter.
Now turn off hidden geometry, select the Paint bucket tool and press Alt. It will turn into a sampler; sample the still selected facet and apply it to the whole surface of your tube.
If this does not screw up the UV coordinates (in which case I second what Remus says; post your model), it should fix the texture move issue.
-
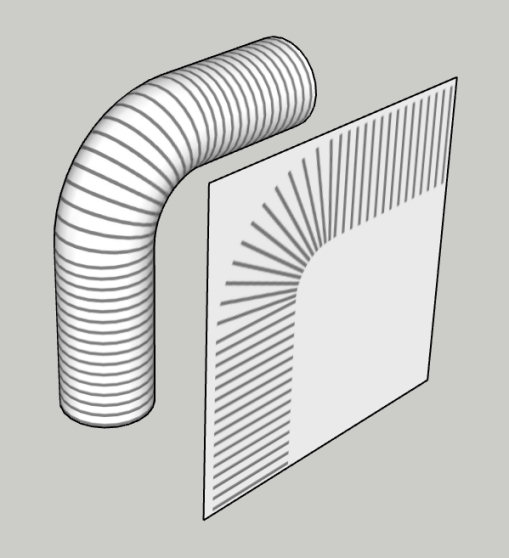
To reproduce the effect I depicted above (which is a series of circumferential rings running all along the bent cylinder, and which consistently gives that appearance from all angles), paint the texture with the stripes turning through a bend onto a vertical surface (a rectangle) that is lined up with the bent cylinder itself, just as I have shown. Then right-click the rectangle and select Texture > Projected. Then use Alt-Bucket to sample the projected texture, and finally click on the bent cylinder with the Bucket tool.
See attached.
~Voder
-
Thanks everyone and thanks Voder for posting that model. I think I got this figure out so there's no need to post my model anymore.
Again, thank you all.
-
-
That's because of projecting the texture. It is "best" when seen from the front you project it on AND from the back (although it's mirrored there) but on the sides it's always "smeared" like that. This is the nature of projection and it is (well) intended to behave like this.
You should rather wrap that texture around or use Whaat's UV Tools plugin to map it cylindrically.
Could you attach that Kerky image itself?
-
@gaieus said:
That's because of projecting the texture. It is "best" when seen from the front you project it on AND from the back (although it's mirrored there) but on the sides it's always "smeared" like that. This is the nature of projection and it is (well) intended to behave like this.
You should rather wrap that texture around or use Whaat's UV Tools plugin to map it cylindrically.
Could you attach that Kerky image itself?
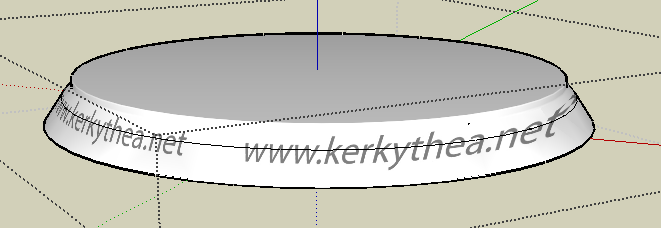
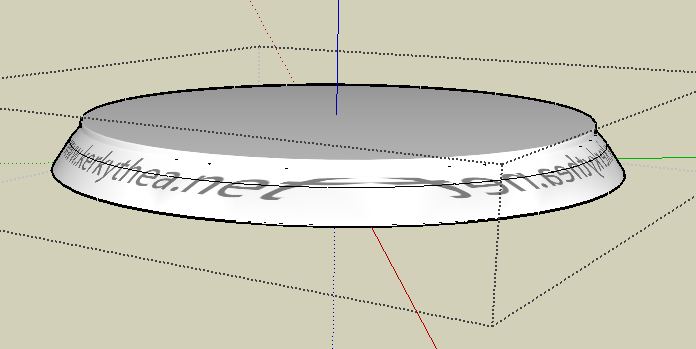
this is what i got... i moved to a different project but got a UV mapping problem again
the second image is where i got a problem again


-
Well, a texture is extremely hard to position in 3D in a way that it looks seamless all, three connected faces. But this is similar to real world; an upholsterer (is that the proper word?) couldn't adjust the pattern seamless either. You can, of course, achieve much better results than in your picture (see attached).
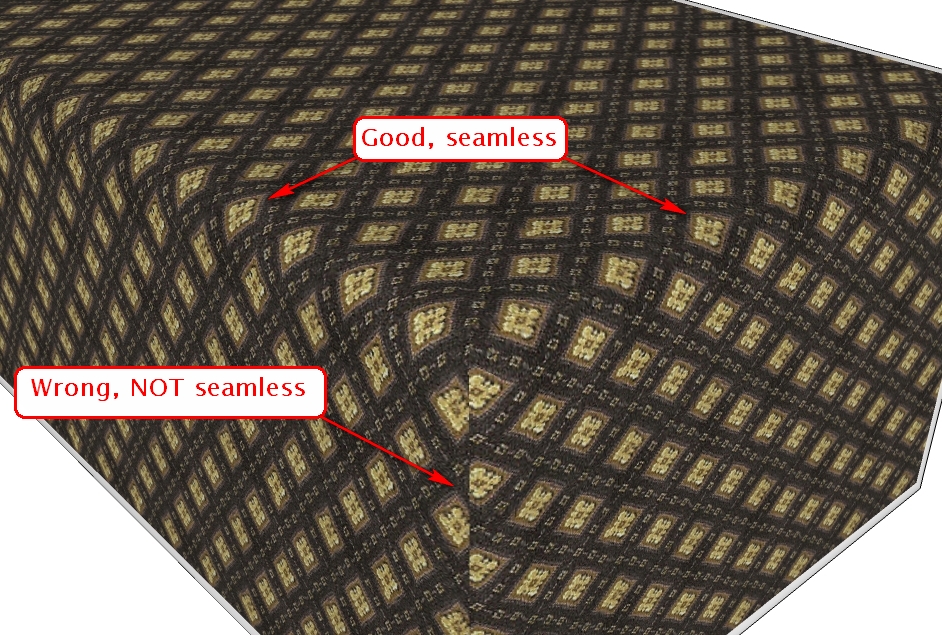
Here I made the rounded edges with Fredo's RoundEdge by Bezie plugin. Then made the following steps:- Turned on hidden geometry
- painted the top face with the material
- right click > Texture > Position (do nothing but...) hit Enter
(this will "fix" the texture coordinates to the face instead of the word coordinates) - sampled the material and applied it to the small facets of the rounded edge one by one advancing from top to bottom on both sides
- sampled the material from the side and applied it to the vertical facets proceeding from outside towards the corner - where eventually you can see the inevitable seam between the two sides.
Of course, you can "hide" this corner seam with some "carelessly" and "untidily" placed blanket or anything here but as I said above, this seam would (most probably) be there in real world, too.
-
Is there any way to do the opposite? Make the texture follow the curve rather than go perpendicular to it - as in the grain of wood following the curve in bent wood furniture? Or following the line of a railing?
Hello! It looks like you're interested in this conversation, but you don't have an account yet.
Getting fed up of having to scroll through the same posts each visit? When you register for an account, you'll always come back to exactly where you were before, and choose to be notified of new replies (either via email, or push notification). You'll also be able to save bookmarks and upvote posts to show your appreciation to other community members.
With your input, this post could be even better 💗
Register Login


Advertisement