Attaching image texture
-
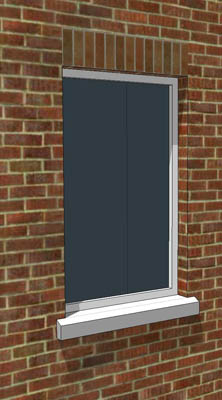
Is there a way to apply texture on to a one of coplanar surface? Here I attached door image and window image on to part of the wall that is recessed. I faked the door part by creating a separate surface on outer wall. When I try to apply door image to the surface where door goes, door image get pasted on to adjacent wall. It jus jumps on to other surface. How can I constrain paint to go onto specific surface? I ended up deleting adjacent surfaces than applying the texture to the center surface.

-
I'm not sure what you mean by coplanar faces but if you add coplanar edges, you can stop the "photo-match" on the spot you want. If you're trying to recreate a building, any reason why you're not using Photo-match??
I hope this helped?!
Mike RL
-
I was trying to attach clips of images on single face. The image elements are all broken and repeated in different ways. No single shot is possible. The building sides are covered with trees!

-
Hmmm, i reckon your best bet would be to sort out the textures in ps (or similar) then apply them in SU. I dont think SUs texture manipulating tools are good enough to be able to do it soley in SU.
-
Why not named the material image door1 for one precise surface, door2 for another one etc...
so you will have any regulates for any surfacesAnother trick will apply the all projected photo on a plan surface then push any wished surface
And last I don't understand the problem, as you can paint any isolated surface with any material


-
If what you mean is that you want to apply a single image on the coplanar front of the building without it repeating all over the front, then you'll have to constrain it within vertical edges either side...then hide the edge lines. To apply something different to the sides, the edges will need to be visible (either unhide them or turn on hidden geometry) If you try to paint the sides with the edges not visible then the texture will flood across the central section also.
You can use exactly the same technique for soldier courses etc.

-
Sorry it is hard to explain what is happening. Here is the image that shows what is going on:

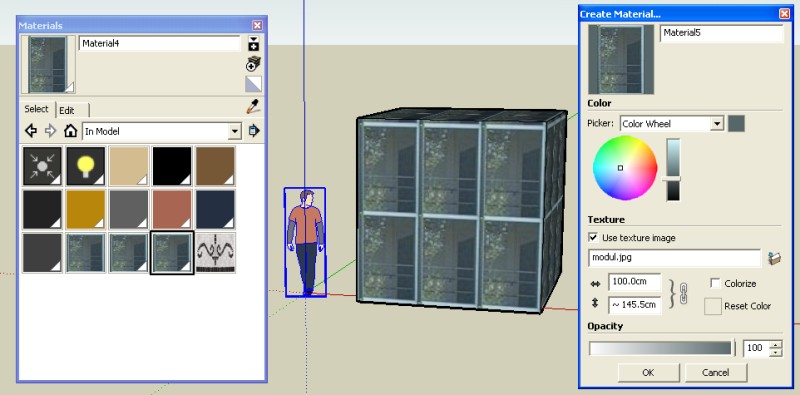
Here I am trying to attach a texture next to door texture. By doing so the first floor window will tile all along the base of the building as seen on the photo image I posted before. As soon as I click it, the image flips and jumps right on top of my door texture!
This happens with imported texture. If you try to “fill” an area with paint bucket, the texture stay within bounded area.
-
Are you applying these images as textures on import or import them as images?
Can you try to use the already imported texture again from the materials editor? It should be there under the "In model" tab.
-
Though I'm not sure I quite understand what's going on, are you talking about "projection"? when you apply the "brick" texture, it changes the "window" texture one the second floor?!? If that is the case and you don't want to change to windows and it's doing it anyway, deselect "projected" from the texture menu (left click on chosen urface/texture/projected).
I hope this helped.. if not .. disregard

Mike RL
-
I use File > Import and “Used as Texture” checked. When apply to divided coplanar surface, the texture sticks in all kinds of wired ways; totally uncontrolled. In my case the window image wiped out the door image. This is before getting to pick “projection” step.
But it is true, once you have the texture listed in material, Paint Bucket will fill the area one specify. The texture needs to be positioned after fill.
-
don't let the texture touch the edge at all.
The method works ok; an acceptable workaround.
Photo match is fun for quick mass-up
I agree, but like this building I am working on, 80% of building is obscured by trees! So I tried to use tiling repeating elements. Problem with this method is that using multiple photo is not accurate. When I combined different tiling elements from different photos the size of those elements were all over the place. I tried to massage tiling scale to match different tiles, but SU texture scaling method is too coarse. Fine work is almost impossible.

-
You can get images in SU to scale with absolute accuracy...but you need to import them as images, not textures.
You then draw a line on the image of known length, such as a line across the top of a window frame, obviously, the longer the known length, the more accurate it's going to be...then group the line and image together.
Entering the group, you then use the tape measure tool to measure the line. Ignore whatever value appears in the VCB, but type in the actual length and hit Enter. You will the be asked if you want to resize the contents of the group....obviously yes.Having now sized the image with absolute precision, you can place it in front of the appropriate section of the building, explode it, sample it and then paint it onto the wall.
Advertisement


