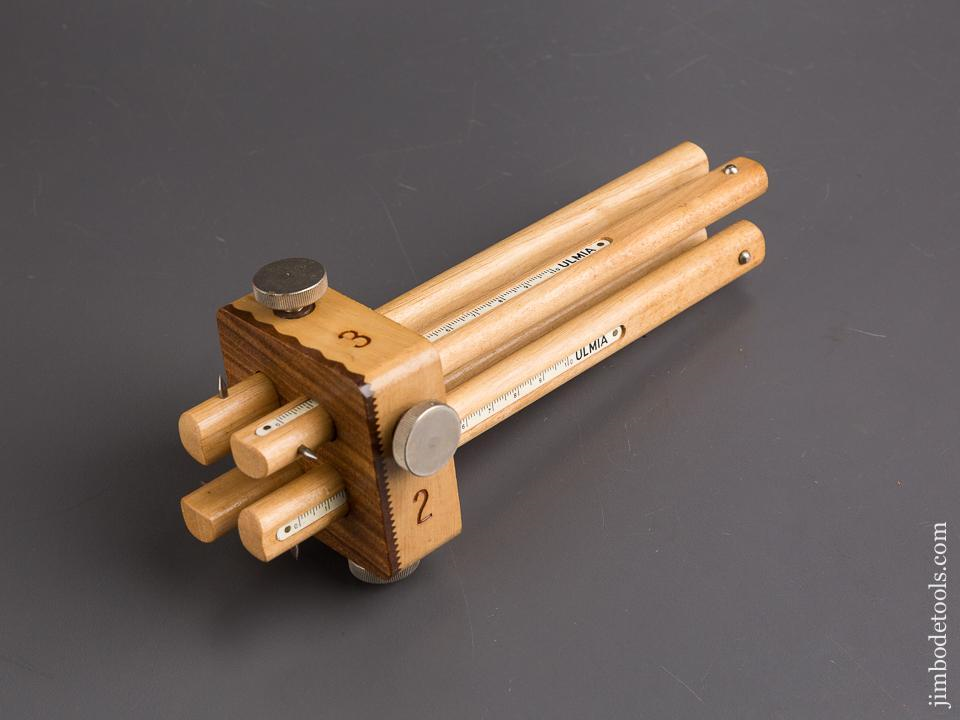
4 Beam Marking Gauge
-
Very nice. How did you do the metal bits radiating out to the corners in the real one?
-
Nice model and a super, innovative tool. You might consider inlaying a strip of brass on each arm, so that the screws holding the arms don't dig divots in the wood.
-
Dave - for metal dowels in the corners I reamed the holes for a press fit with some adhesive. To form the X of the metal in the middle I joined 2 pieces of 1/16" stock to form the X and it is a loose press fit into grooves in the wood. That fit needs to be just so. I split the wood on my 1st attempt as it was too tight, 2nd attempt also!
David - I considered the inlay in the beam for the bearing surface but decided to use an "L" shaped piece for metal to spread the load and keep the beam clean. That piece of metal is held into place with the slotted screws on the bearing surface of the gauge.
Your thoughts on adding a scale or ruler to the beams?
Thanks for the complements, the only innovation I added was each beam is independently secured. It was a lot of fun to make.
Jeff -
most excellant

-
Nicely done! I don't use marking gauges near as often as I should but I appreciate markings on the ones I have. I don't expect the markings to be accurate enough to set and forget so tweaking is the norm. That is where the markings come in. When you have to move it a smidge or a frogs hair you can reference off one of the marks and see if you have actually moved it or not and by how much.
Man ... now I just may have to make one of those. -
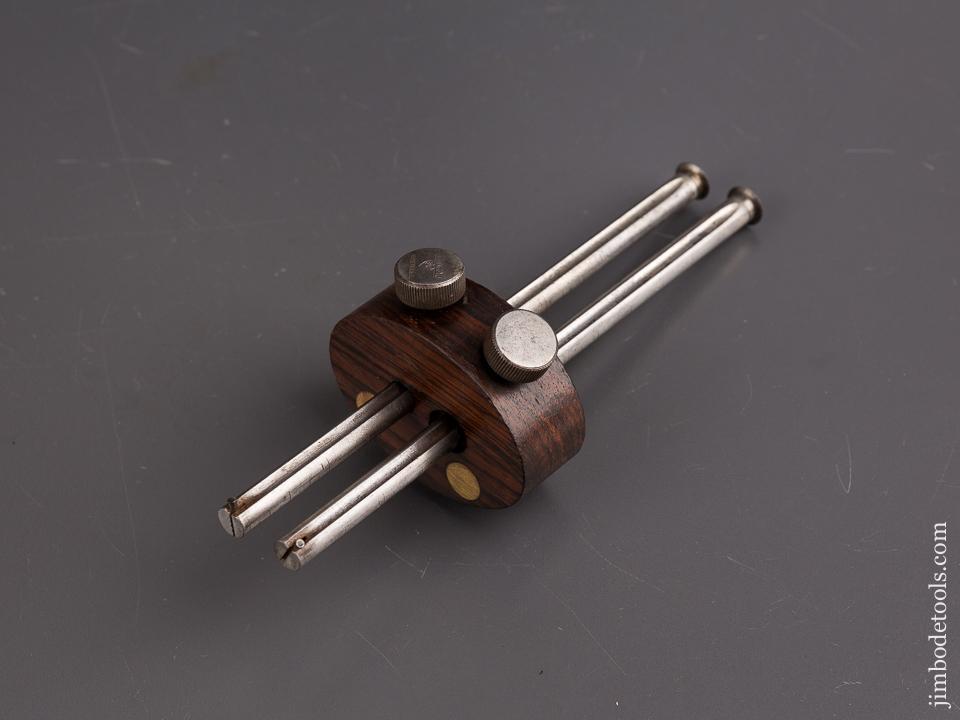
Thanks Chordwizard I hope you make one. My design is a bit time consuming so here are a couple of other options I found on the web that you might consider One by Ulmia and an old Stanley that is very nice
-
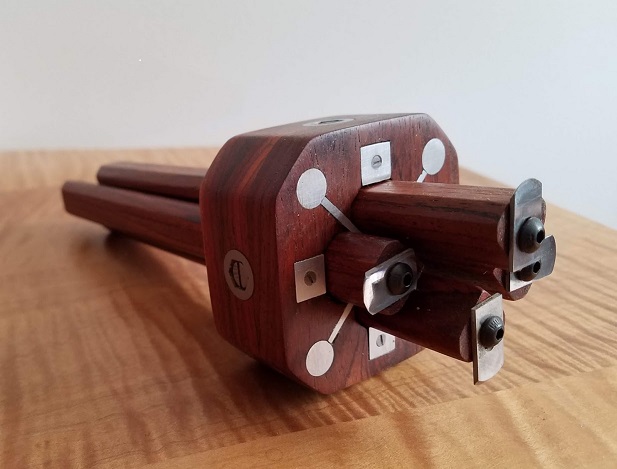
I needed to make another gauge and fix a few things. Had some cocobolo and learned the dust bothers me, so it took a bit to get it done, but I am happy with the gauge.
-
Ain't that sweet?!
-
Thanks Dave! Now thanks to you I need to make another Moxon vice. Thinking I might convert an acme nut into a die and Acme threaded rod into a tap for the wooden threads. Always wanted to try that and see how well it works. Also thinking about adding a register/stop in the vice cheek so the board when clamped is 90 deg to the top of the cheek.
-
That one I modeled uses a Gold's Gym Dumbbell handle cut in half for the screws. $6.87 with the knobs at WallyWorld. The T-track is for hold down clamps. The guy who designed it clamps a saddle square on one side to align the work with it. He uses another hold down clamp to hold the tailboard while he marks out for the pins. He was using a Veritas saddle square but he made a new one of wood today.
Hello! It looks like you're interested in this conversation, but you don't have an account yet.
Getting fed up of having to scroll through the same posts each visit? When you register for an account, you'll always come back to exactly where you were before, and choose to be notified of new replies (either via email, or push notification). You'll also be able to save bookmarks and upvote posts to show your appreciation to other community members.
With your input, this post could be even better 💗
Register Login


Advertisement