[Plugin] ProLine (RC-2019_0205_1636)
-
Motto:I hope you will enjoy using it half as much as I enjoyed creating it!
MAC experimental "support" added!
Other changes: https://sketchucation.com/forums/viewtopic.php?f=323&t=69965&p=644952#p644952Release Candidate version available in Pluginstore!
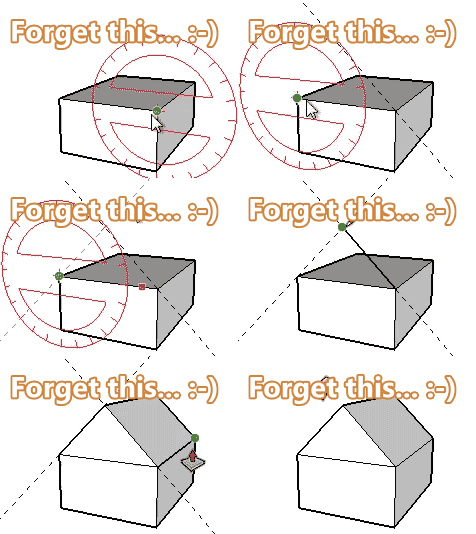
There is a better way with ProLine:
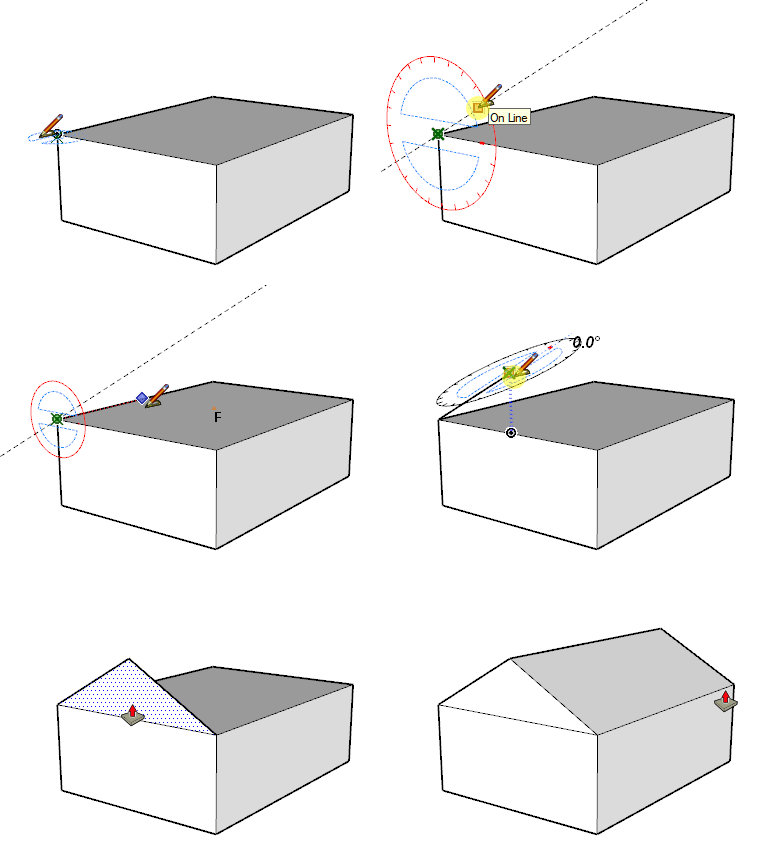
Description = 'The LINE tool combined with Protractor & more
Version = "RC-2019_0205_1636"
Creator = "Dezmo (dezmo at freemail dot hu)" (Coffe)
Copyright = "2018-2019, Dezmo"Usage:
Run from: Menu>Draw>"ProLine by Dezmo" or use Toolbar: "ProLine
  by Dezmo"
Please open the Menu>Window>Instructor to see more instructions and how the modifier keys work!
(or check the 2nd post below)The idea:
In the recent versions of SU we do have a "Rotated Rectangle" tool, so called protractor assisted rectangle creation. In the other hand reading the forums some people are asking to snap the line not only to length, but to angle as well...
Why should'nt we have a "Line" tool with protractor assistance?
This is a reason I'm created a tool: Protractor Line. The name is shortened as "ProLine", so it is also representing some more, hopefully useful, functions to create a line in SketchUp in advanced way.
I'm not a programmer or 3D designer, I just like to discover Ruby & SketchUp.Features:
Draw edges or Line entities like in a native Line Tool, but Draw edges / curves / clines / cpoints entities with special protractor and inference assistance!
~ Can be act similar as an original Line tool. (My intention is to completely replace it.)
~ Type a value of length
%(#0000BF)[~ Type an absolute or relative coordinates- Type a value of angle (or angle lock])
~ Instructor window like in other native tool. - Snap to angle, defined in Model info
- Snap to angle, defined in ProLine Settings
- Can create/remove guide line & point "on the fly" for better interfering e.g. :
....Angle snapping
....Face normal -:- centroid
....Arc/Circle/Polygon -normal -:- center
....Arc/Circle/Polygon - real tangent
%(#0000BF)[....Bisector and point as proportional division between of edges other end
....Midpoint (Line to "recorded" point, and midpoint in between)] - The protractor automatically placed and easy to adjust. (Improved.)
- The protractor can be resized
~ Can snap to length, defined in Model info - Can force length snapping, overriding some interfering (be careful with this)
~ Create edges - Brake edge if intersecting can be switched off
- Crate faces can be switched off
- Start over when create faces can be switched off
- Crate curve (polyline)
- Create point to point guide line
- Create infinity guide line
- Create guide point only or guide point together with above mentioned line types.
- Show extended information in a tooltip (can be disabled)
- Show coordinates on top left of screen (can be disabled)
- Show angle to last line (can be disabled)
- Show angle to protractor x-axis (can be disabled)
- No "drag and drop" line creation
The tool is in Release Candidate stage. However I did my best to give it out without serious errors, an unexpected problems may occur... download and use it on your own risk.
Tested: SketchUp pro 2014 on windows 7, SketchUp pro 2015&2018, SketchUp make 2017 on windows 10.
Finaly on unstable hackintosh Virtual Machine with Sketchup Pro 2016 trial.
It was created and only tested in a windows environment and may not (properly) function on a MAC.
I tried to look at the MAC specific things, but had just a "little more than nothing" to test... Any feedback of MAC users is welcome!Know issues:
-The keyboard shortcuts defined in Proline can be conflict of your predefined keyboard shortcuts...
%(#0000FF)[Context menu has been added. Use that if you have a conflict...
Check Release Notes notes too.]This tool currently only available in PluginStore:
Dezmo ProLineHow to open hepl file:
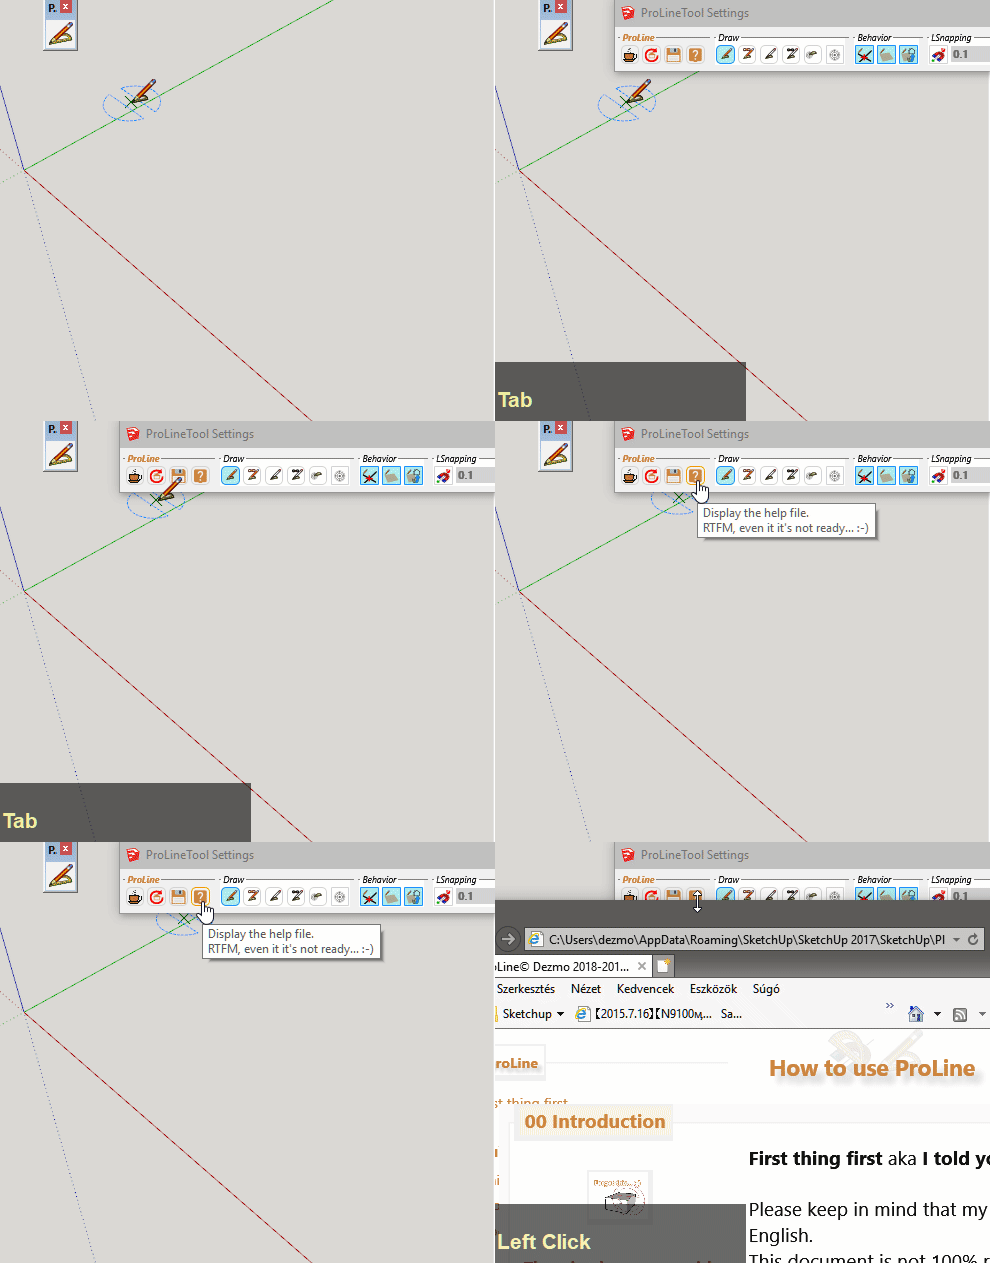
OR:
Download help folder (Download, unpack and open help.html) - Type a value of angle (or angle lock])
-
Looks great...

I'll definitely need to give this one a go...
Thanks! -
This looks interesting, thx!
I guess you know of the typo now?
length
-
@juju said:
I guess you know of the typo now?
lengthI did not even find it when I checked 100 times ... Thanks!
I hope, this will be the "biggest" problem.
-
@frederik said:
Looks great...

I'll definitely need to give this one a go...
Thanks!Hope you will find it useful! Please report any problem!
-
Very cool for lovers of precision!

Seems a new "indispensable"!
PS Have you a special file for translation ?
I can make the French one!
-
Thanks for the Nice worlds!
@pilou said:
PS Have you a special file for translation ?
I can make the French one!
There are no special file for translation, but better to wait at least until RC stage... some changes may will come. The "Instructor" file (index_1.html) is almost done, but the help file (help.html) will come later...
-
This tool now available in PluginStore:
Dezmo ProLine!The 1[sup:2527ihrw]st[/sup:2527ihrw] and 2[sup:2527ihrw]nd[/sup:2527ihrw] post have been updated!
Enjoy!

-
Thank you Dezmo, really great plugin!
-
Thank you for plugin
how i can snap to the face center? -
@ahmed0007 said:
Thank you for plugin
how i can snap to the face center?Hi Ahmed0007,
You can not really snap to it but you can get a guide line for intersecting or interfering.
As described in the chapter: "16 How to:Get special inference lines" in the help:While mowing your mouse over the faces, lines or vertices's you will see a small:
[Braun or yellow triangle with F]=[the Centroid of face]
The color is Yellow if the face have an inner loop, otherwise Braun
....
Just Hit CTRL button followed by F/R to get a normal of face/circle ...
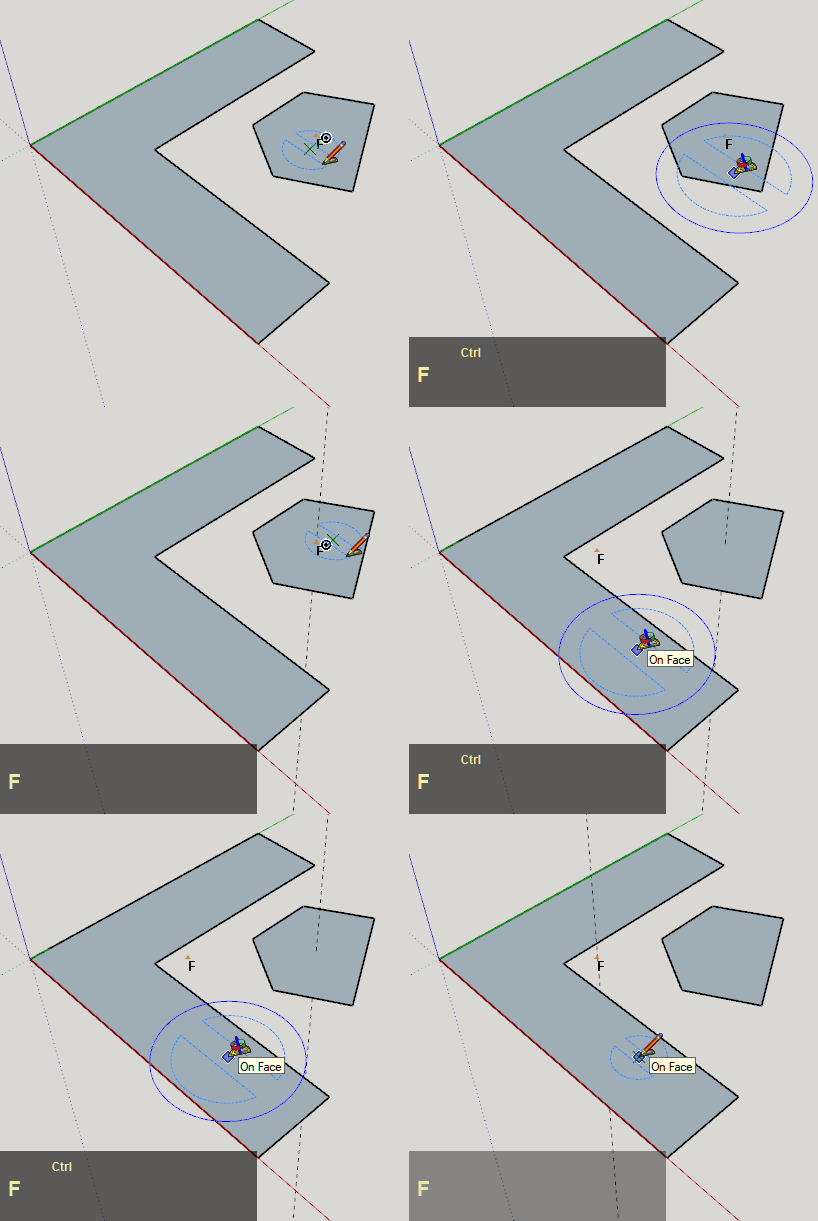
Than you can use this guide line intersecting or interfering.Just in case: I heve been added a link of help content to the first post. This is exactly same as a build in help. Please download and read it if you have not done yet...

-
Dezmo, thanks for sharing!
Do you have plans to add most important ones:- midpoint between 2 points
- bisector between 2 edges
?
Edit: I looked at your first 2 gif animations. Well both ways take roughly the same amount of time to comlete the task. So why bother and memorize tons of new shortcuts?
-
@rv1974 said:
Dezmo, thanks for sharing!
Do you have plans to add most important ones:- midpoint between 2 points
- bisector between 2 edges
?
Hi rv1974,
Yeah, I have some more ideas to implement, but can't promise any deadline... Randomly I can find time, but I can't feel any obligation to do it. Besides sometime I have to learn before I can do what I imagined... it takes time.

I'll definitely take your suggestion into consideration, however I have to think how to implement :
- I can not hover on 2 points simultaneously, so I need an other method to do it.
 (I have some idea, but have to rethink more...
  )
) - Angle bisector guide line could be relatively easy to do...

-
@rv1974 said:
Edit: I looked at your first 2 gif animations. Well both ways take roughly the same amount of time to comlete the task. So why bother and memorize tons of new shortcuts?
Wich one You looked? In the help file or in my posts?
Have you been tried or just looked?
Did you read the help file?
Actually you are not obligated to memorize...
Lot's of sorcut can be done by the Settings an other you get a letter on screen (F, R, T) to remember more easy... -
First 2 gifs in this thread. Ironically Proline takes longer.
Frankly all is needed is a standardno-brainer line tool with one simple addition of degree '<' input.
Example:
Start line tool->Make first click ->Hoover over existing edge-> Enter say <30 (to get 30 degr direction)->
enter distance->Enter
Thats it. Simply replicating Autocad input + tracking.
Brevity is the soul of wit.
BTW Some of Proline shortcuts conflict with existing (of mine) ones. -
Looks Great! Thank you!
-
@rv1974 said:
.
BTW Some of Proline shortcuts conflict with existing (of mine) ones.Can you please explain more which ones are conflicting and how?
They are breaking the function of Proline or breaking the function of your associated function?
Thanks! -
@pbacot said:
Looks Great! Thank you!
Hi pbacot,
I'm happy if you like it...

I see you are from MAC. Since I do not have a chance to test on it, I'm curious how it is looks like on MAC, especially:
- the icons and the cursor pictures. Can you please post a screenshot!
- Are the sorcuts (Ctrl + "T" ; Ctrl + "F" ..ect.) working as described? Don't you get some problems or conflicts?
Thanks a lot in advance!
-
@rv1974 said:
First 2 gifs in this thread. Ironically Proline takes longer.
Frankly all is needed is a standardno-brainer line tool with one simple addition of degree '<' input.
Example:
Start line tool->Make first click ->Hoover over existing edge-> Enter say <30 (to get 30 degr direction)->
enter distance->Enter
Thats it. Simply replicating Autocad input + tracking.
Brevity is the soul of wit.
BTW Some of Proline shortcuts conflict with existing (of mine) ones.It is in my to-do list: able to enter length;angle
Curently ProLine can not evaulate onto which plain the 30 degrees line you want to put. Unfortonately AI has not been implemented yet here.
So until I find out evaoulation of the "best plain to draw" you have to use your brain and a protractor. Or simply use Autocad in 2D.BTW: you did not answered to my questions...
EDIT:
I beleve your "Simply replicating Autocad input + tracking." works only if you draw the line in 2D in Autocad. Don't you think? -
@dezmo said:
@rv1974 said:
.
BTW Some of Proline shortcuts conflict with existing (of mine) ones.Can you please explain more which ones are conflicting and how?
They are breaking the function of Proline or breaking the function of your associated function?
Thanks!For example, I use the End key for another (s4u divide) command. it just switches to s4u divide when hit. There were other collisions, I can't report exactly because I uninstalled
Advertisement


