Layout Isometric "Full Scale" Isn't!
-
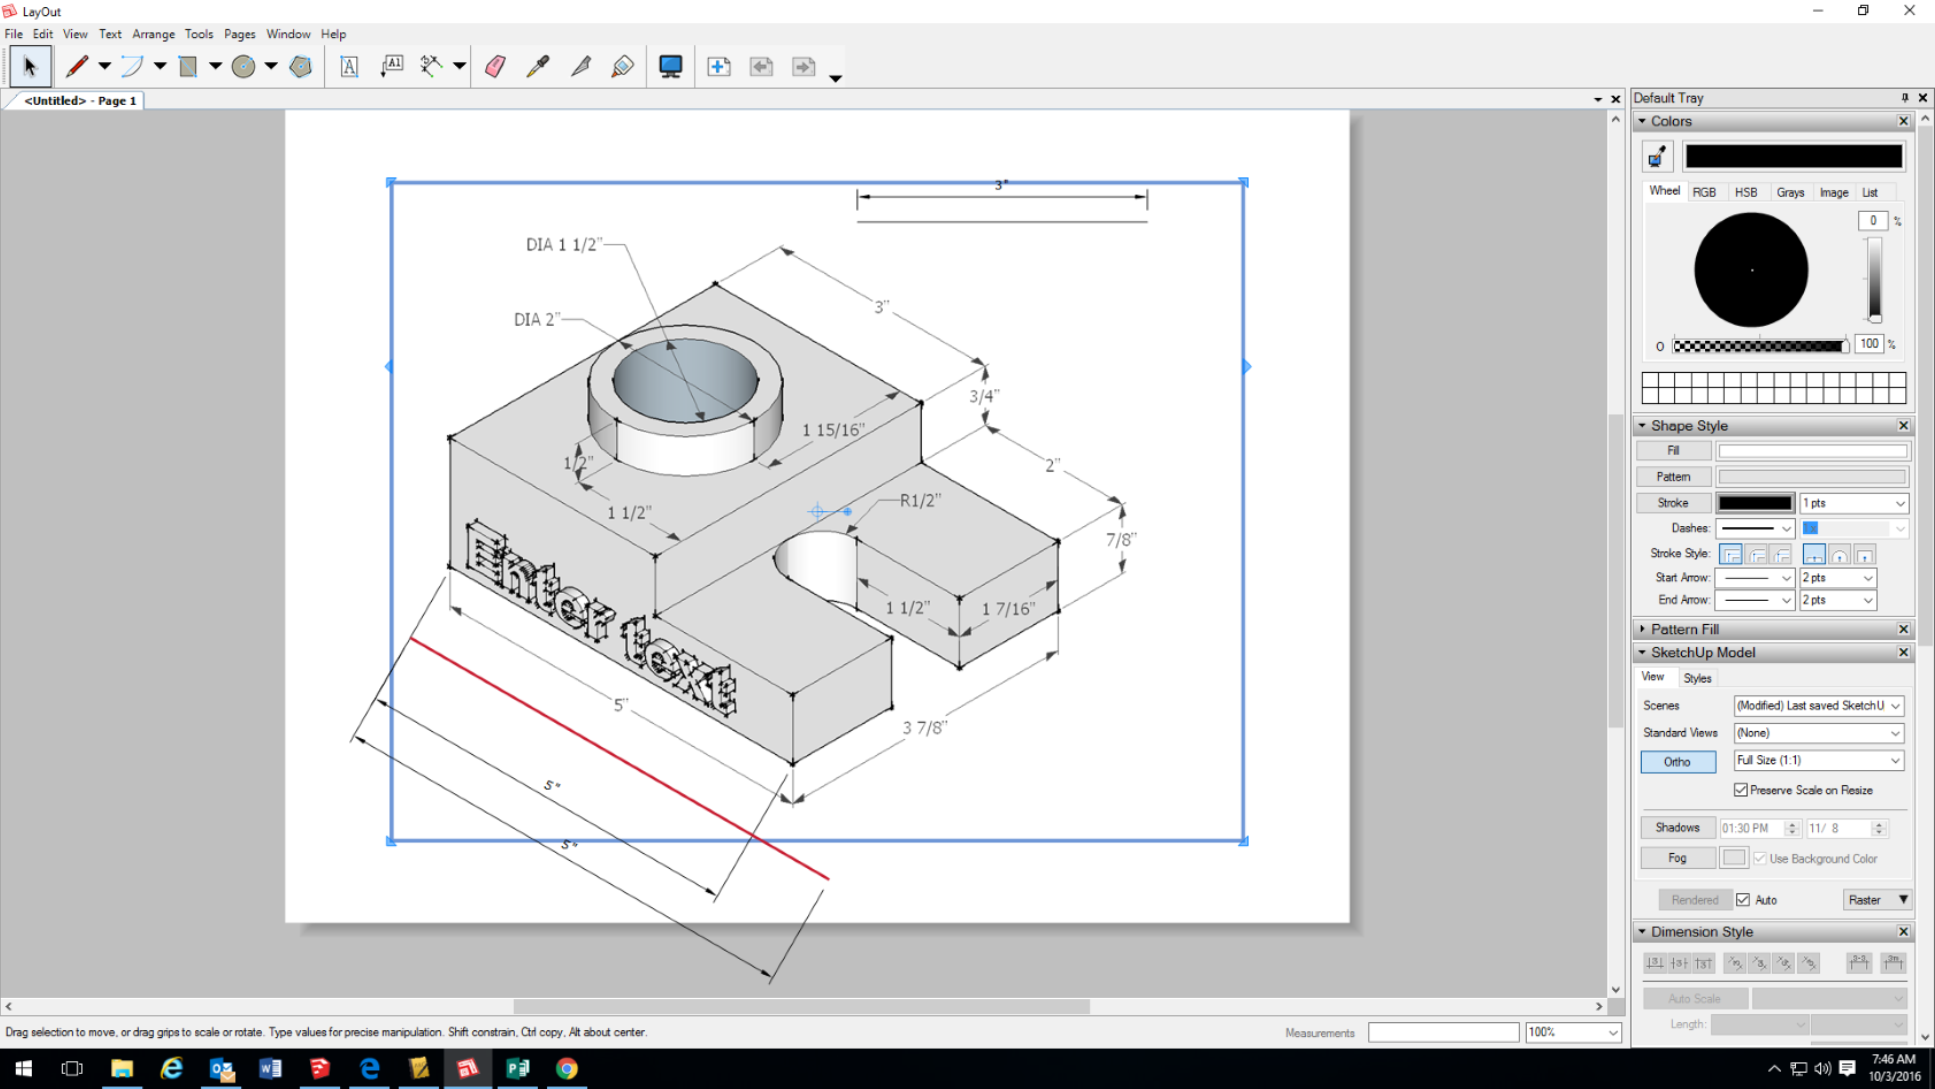
I am getting into Layout to teach my students technical drawing. Unfortunately the method I want to use doesn't seem to work. Basically create something in SketchUp and take it into LayOut to create views. Set the views to Isometric, Ortho (AKA parallel projection, Full Scale, and print. If you put a ruler on these things they aren't the right size. In a top/front/right view they're correct, but in isometric the distances are not what the dimensions suggest. This is also true for other scales.
This can be seen in the screen shot--The object is 5" long along its lower edge. The red line is 5" long and is in paper space and is clearly not the same size. The view is set to Full Scale 1:1. Other scales have the same issue.

Can anybody tell me what is going on here, and how to fix it? It doesn't seem like a bug per se.
Thanks, Sam
-
The thing is that Sketchup gives you a projection of the model wich is geometrically right considering a camera angle, while all the axonometric views you are talking about are distortions created to make our lives easy. Abstractions that are not geometrically correct but better represent what you want to convey.
You can only have a face in full size in LO at 1:1 scale if it's facing your camera view. That's why a plan view or an elevation work, while faces on planes diagonal to camera, are always smaller.
-
I would really like to know if a Layout isometric format is being considered? Dimensioning, labeling, and grid look absolutely awful. My students make great models. Dimensioning is also done in sketchup, but it still does not look professional. We have resorted to bringing in the model, scaling it, and printing it out. We would then dimension and label by hand to get a professional look. There has to be a better way.
-
In a isometric perspective, done correctly, we should apply a reduction in every edge. That reduction is the same for the 3 edges, and it's 0.816, that you can calculate why, but it's that number. In LayOut, simply prepare a custom scale with that number (1.0 mm = 0.8166 mm). It exist differences between an isometric sketch (no reduction) and a isometric perspective (0.816 reduction on every edge). Now you can print and mesure correctly your isometric drawings.
I hope it helps someone.
Hello! It looks like you're interested in this conversation, but you don't have an account yet.
Getting fed up of having to scroll through the same posts each visit? When you register for an account, you'll always come back to exactly where you were before, and choose to be notified of new replies (either via email, or push notification). You'll also be able to save bookmarks and upvote posts to show your appreciation to other community members.
With your input, this post could be even better 💗
Register LoginAdvertisement


