SketchUp Guide for Woodworkers: Advanced Techniques
-
But the video download is for the Basics--the same as the DVD offered on Amazon. The eBook is advanced methods. So the two side by side would be a bit confusing. There is a DVD for the advanced techniques, as well. Again, it is sort of a companion piece to the eBook. It is not a duplicate of the eBook.
-
FYI. The 'eBook' link appears to be broken...
-
Thanks for the heads up. I fixed the links.
-
Dave- I have this DVD and love it. Based on the DVD, I bought the Wudwurx plugins and after some effort was able to install them. But I can't get the dovetail one to work properly.
My sequence-- Draw the 2 boards apart from each other. 2) make them components. 3) Set up preferences (in my case I'm using angle 0 for finger joints). 4) Edit component board 1. 5) select Dovetail, click on baseline at both ends then drag to outside edge. Result- good set of cut tails. 6) Edit component board 2. 7) Select Dovetail, click on its baseline, drag to outside edge. Result- another good set of tails.... Can't get cut pins regardless of what I try!
I've followed the video tutorials on both your DVD and the Wudwurx site and can't figure out what i'm doing wrong, but it's clear I'm missing something.
I have a second question, but I'll save that for when I get this one figured out.
Comments?
-
Andy, I'm happy you found the DVD useful.
As for the Dovetail plugin, I find it better to have the two components in place overlapping when I use it to make dovetails or box joints. Think of a drawer box. The drawer front receives the pins and the drawer side receives the tails.
To create the pins, orbit the camera to look at the end of the drawer front and open the drawer front component for editing. Get the dovetail tool and click on the top back corner, then the bottom back corner and finally the front edge or a corner.
To create the tails, open the drawer side component for editing and click on the exact same corners in the drawer front component as you did to make the pins.
If that's not clear, try to hold on until i get home from work and I'll set up a session to show you "live".
-
Dave- Thanks!
It worked- the key was clicking on the same line both times- I never knew that (and didn't figure that out from the tutorials...)
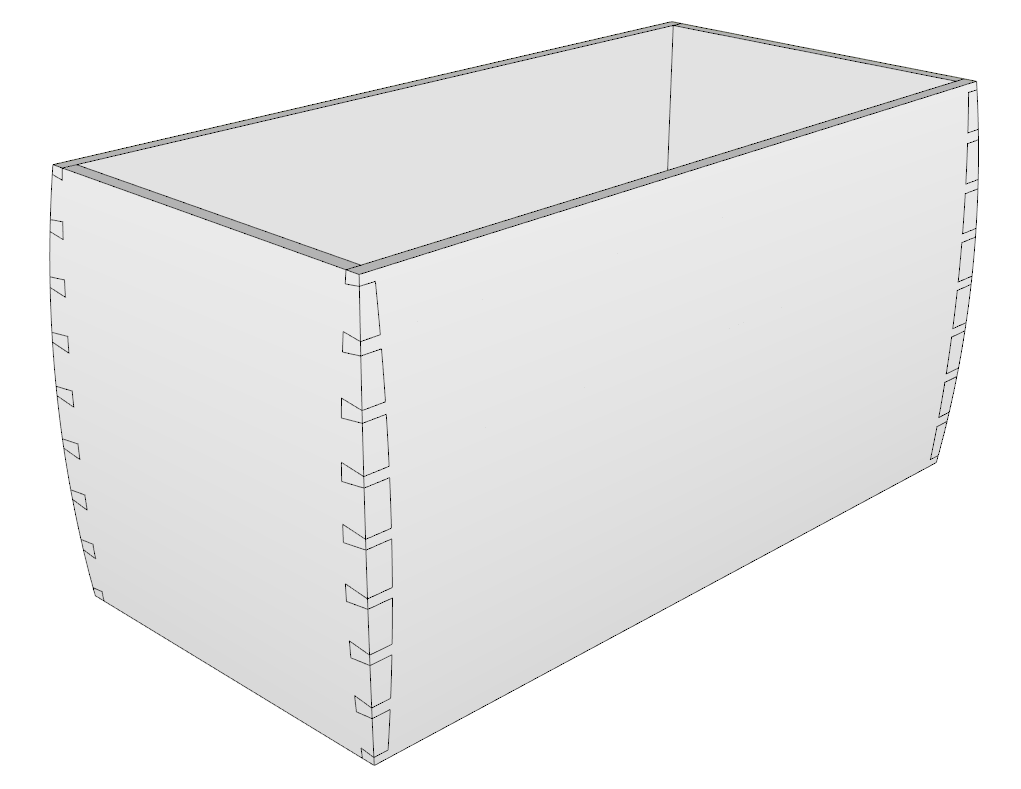
Now for the second question- (and remember I have Make not Pro)- Imagine a blanket chest 20x20x40 inches. The joinery is either dovetails or finger joints. The sides and ends are 11/16 thick at the top and bottom but bulge in a curve to be 1 1/4 thick at the centre. Kinda like a subtle Bombay style.
So I can draw the curved sides, and I can draw the joinery, but I can't draw them together (faces don't work). I have an idea that Intersect Faces is part of the answer, but every time I try that I end up with no faces at all, or at least losing the ones I want to keep.
I've looked around for a simple understandable guide to doing this but haven't found one that I can pound into this old bone... -
Glad you got the dovetail tool to work. This tutorial might have made it clearer.
As for the curved outside surfaces, I think I did a tutorial on that sort of thing. i'll see if I can find it or I can show you when I get home in about an hour and a half.
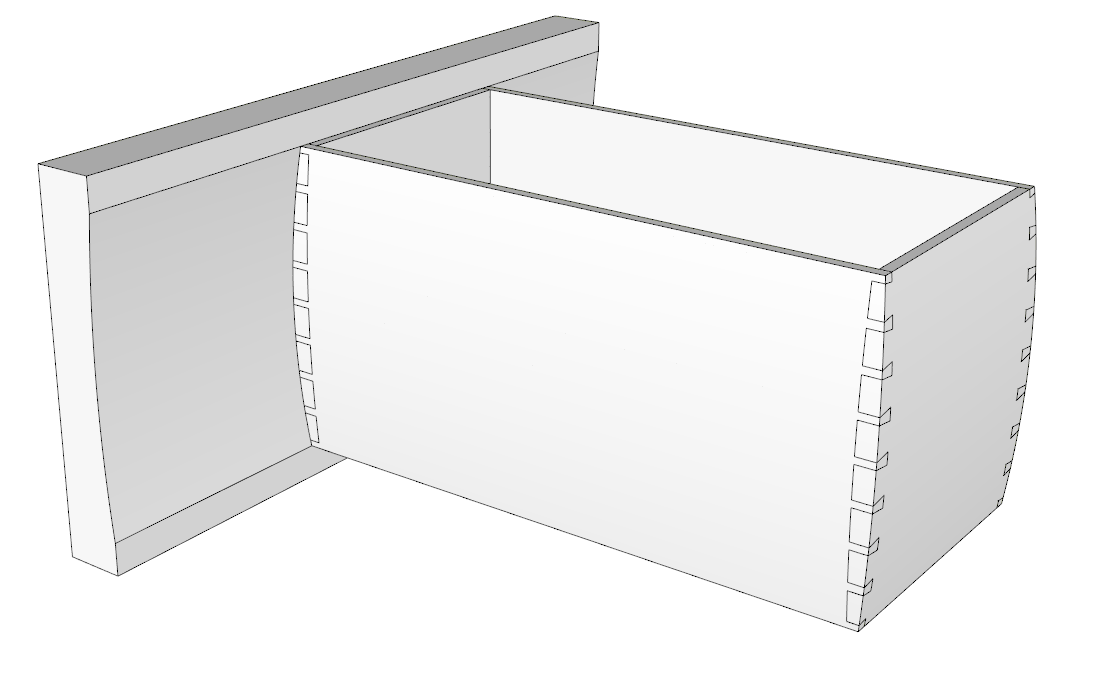
Edit to add: I think this is the sort of thing you're asking about.

Done about the same way as you'd do it in the shop. After the dovetails are cut, make a "cutter" to create the curved surface and intersect it with the sides.

You'll need to open each case side component and paste the cutter into it before running Intersect Faces so you'll have the curved surface left behind as the outer surface of the side.
-
Hi Dave-
What you've drawn is what I'm after.
But I don't understand what a cutter is and/or how to use it.
PS- now away from my computer till about 3PM Mountain time.
thanx
a. -
Dave-
Thanks again for your help.
In looking at my notes, it's unclear if I make the cutter a component. -
Glad to help.
I didn't make the cutter a component although you could. If you do, you'd need to explode the cutter component after you paste it in place inside the case side component.
-
Well, I'm trying it without much success-
Drew the boards (just 2 adjacent with dovetails at this point) and made the cutter- seems ok
Think I got the cutter copied ok to the clipboard- paste in place seems to work
But if I select the cutter I lose that selection when I open the component for editing.
And if I have the component open I get an error that there are no intersections in the model.
Guess maybe I wasn't paying as good attention as I thought I was.... -
Andy, I sent you a PM.
-
Argh!!!
Made the box. Cut the dovetails.
Marked the curve and made the cutter oversize.
Copy to clipboard. Delete the cutter.
Hide the ends (didn't bother to rotate but I've done it.)
Open a side for editing. Edit-> Paste in Place. Everything now within Edit box.
Edit-> Intersect faces with Selection
"No intersections found between selection set
and the rest of the model"Tried again- same thing
Probably a simple answer- usually is
-
Did you make the cutter a component before copying it to the clipboard? Why did you delete the cutter after copying it?
-
No, it's not a component.
I deleted the cutter after copying it so I could open the side for editing and then paste the cutter back in place.
Was that the wrong way? -
@lockha said:
No, it's not a component.
I deleted the cutter after copying it so I could open the side for editing and then paste the cutter back in place.
Was that the wrong way?Well, there's no need to delete it after copying it. Just open the side component for editing and use Paste in Place. If you tick the Hide boxes in Model Info>Components, the original cutter geometry won't be visible when you are editing the component.
-
Dave-
I seem to have it working, appreciate your assistance.
We talked about the change from SU Make to SU Free- if I heard you correctly, you said that Make would be continued on offer, but not updated after 2017- did I hear you correctly? Because when I go onto SU.com, I don't see any reference to Make anywhere. Could you clarify? thanx -
You did hear that right. SketchUp 2017 Make will continue to be available for hobbyist use from SketchUp.com/download/all. Of course anyone using SketchUp in their business will need to use SketchUp Pro and should probably be using SketchUp 2018 Pro at this point.
-
Thanks I'll try that
-
Is it correct that one takes the Pro trial and then after 30 days can licence Make?
Advertisement


