Progress Report: Back To The Future
-
Here is a cut-away illustrating the interior spaces. Keep in mind that this is 8'long by 2'8" wide at the narrowest point of the floor; more than adequate for two people.

-
This view shows the storage with the nose cone removed. It also shows some of the other features like a propane stove and a cooler. More difficult to see is the 6" deep but full width closet for hanging items, etc.

-
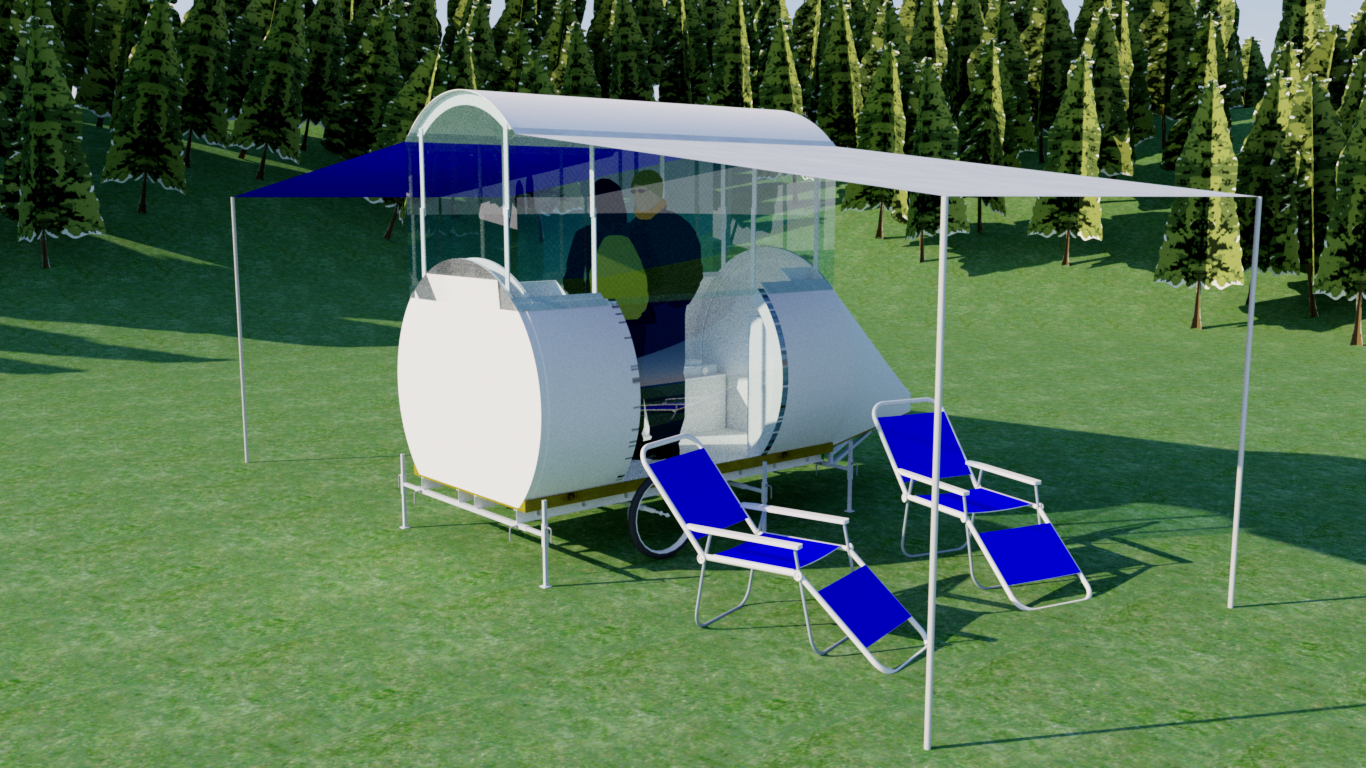
This last shot illustates some of the possibilities. It features a pop-up for standing headroom, enclosed with clear vinyl and insect netting. A roll-out awning is planned that remains attached to the top. Numerous other features are being added. I will update as they become available.
Rendering on all model illustrations was accomplished with Maxwell(free version).
-
Hi Everyone,
I just set my level of expertise backto beginner. It is something I have intended to do for some time now. Looking around this site and seeing some of the stunning work being done with SketchUp; it is truly a humbling experience. I was, and am still, embarrassed at my work. But I must post because I need your insight.
There are two things that I realize:
- I am not a designer. I am an amateur. But I am also trying to make a difference in this world. I would like to offer those willing an opportunity to help -with no expectation of commitment. Drive-by comments and criticism is encouraged.
- The membership is much too nice in this community. There are many talented people here; engineers, architects and designers of all types, people of vast skill and experience, that can take one look at these drawings and note hundreds of ways to improve them in both conceptual and practical ways. But most of the membership will not criticize unless invited to do so. Please consider yourself invited. Brutal honesty is needed.
As I make changes and (hopefully) improvements to this project - as I post the results here - it is my desire that you, the dedicated professional and the enthusiast alike, will find a moment to comment. Just a word or two is all I ask. Any constructive thoughts are welcomed.
-
In this post, I wanted to share what I learned about the ladder I'm using and how that affects my design for the trailer. The D1216-2 16 ft Type II Aluminum D-Rung Extension Ladder is rated at 225lbs or about 102 kilograms. To understand what that means I include the following:
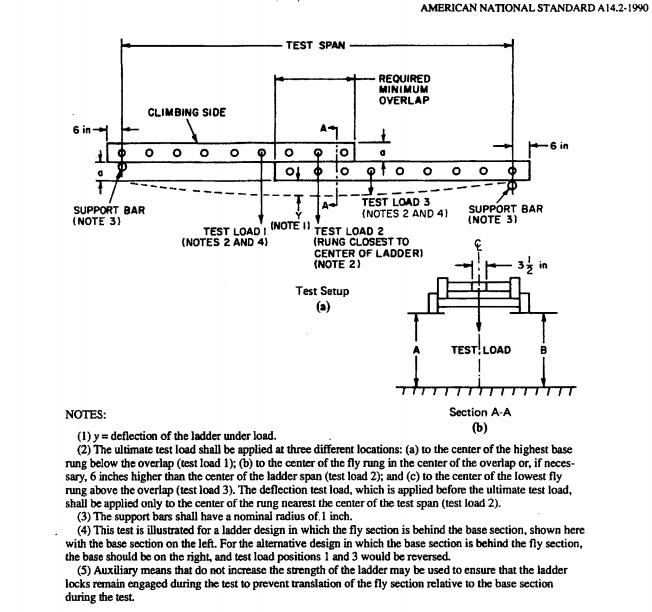
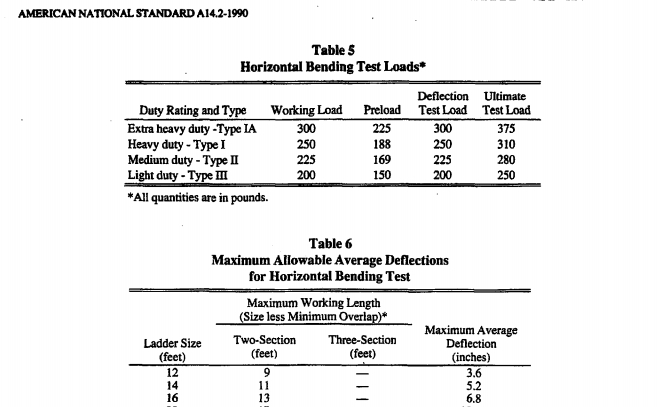
In order to increase total load capacity of the trailer and to reduce deflection under load, I have added a sheet of 1/2" (13mm) marine grade plywood. It is fastened to the two 8' ladder sections with industrial adhesive and 'tech' screws. In addition I have designed a sub-frame consisting of 1" square aluminum tubing @ 1/8" thickness to be welded to the flange of the ladder.
Each ladder segment supported at the ends, would realistically support about 300+ lbs by itself. Two segment augmented laminated between the plywood and the aluminum sub-frame should substantially increase the trailer's load capacity. However, I am not an engineer and do not understand how to calculate the final load capacity. Any feedback would be appreciated.
The Weight About 120 lbs
Ladder: Shipping Wt. Lbs. 22
Plywood: Shipping Weight 8
2 Wheels: Weight 28
Tubing: Weight 60
Misc Mat: Weight 10To be continued...
-
I'll be back to comment on these images after I attend a birthday party. Yay!

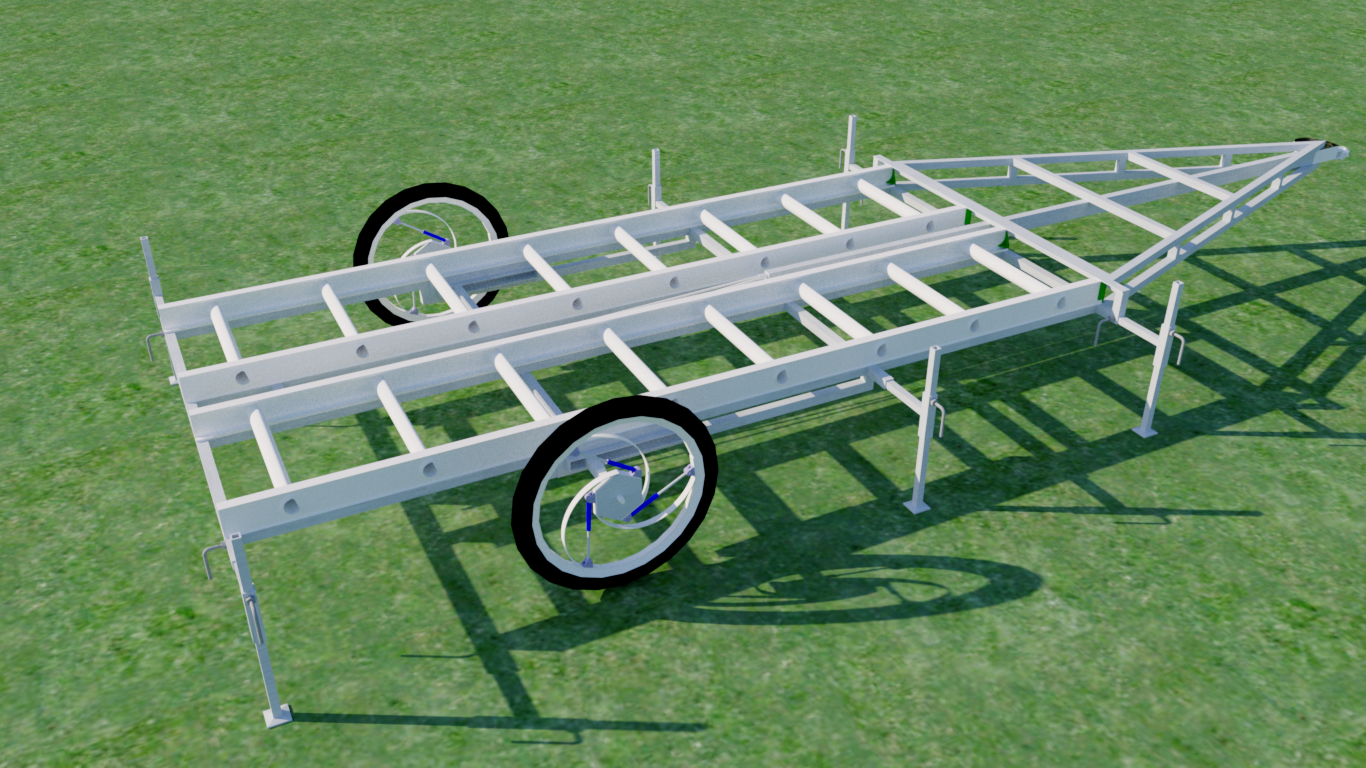
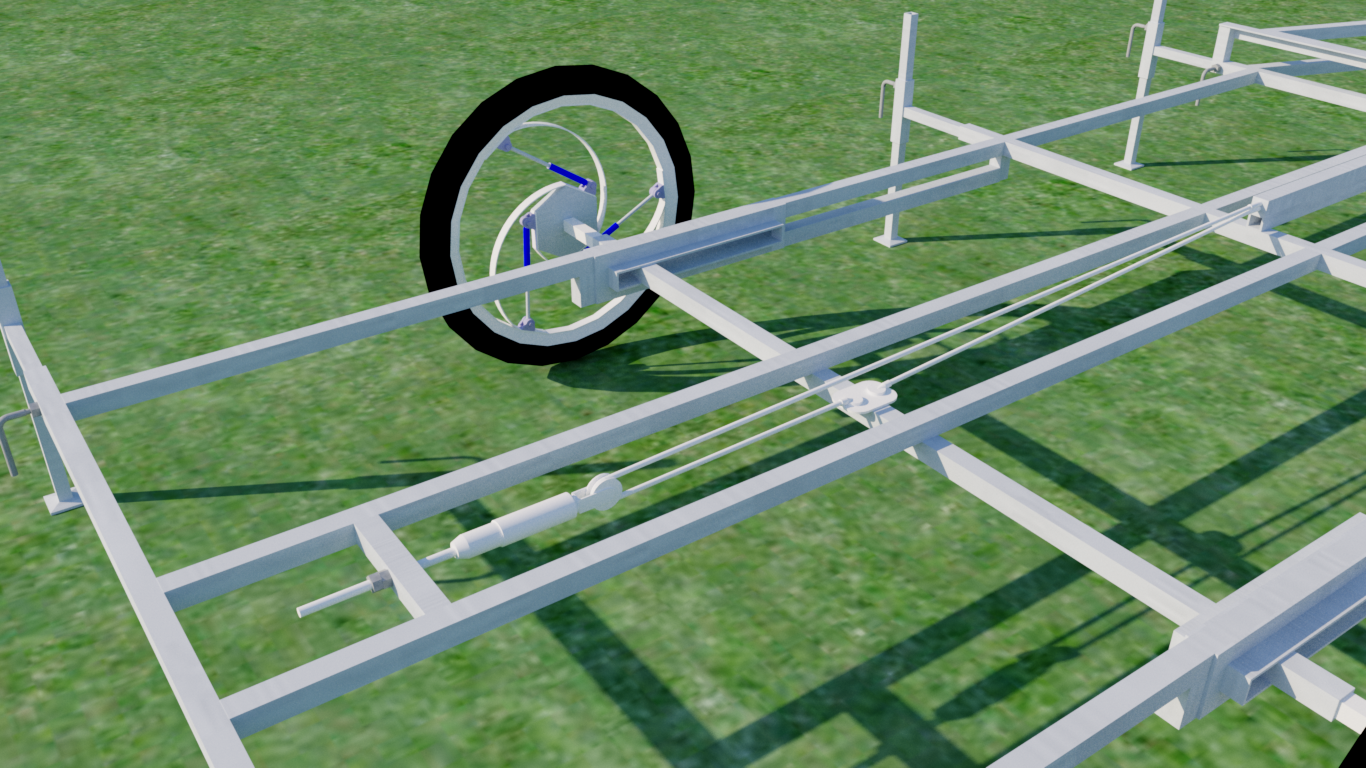
There is now a conversion made to the wheels that incorporates suspension elements. Also added is a system to move the axle and wheels so that tongue weight can be easily adjusted.
-
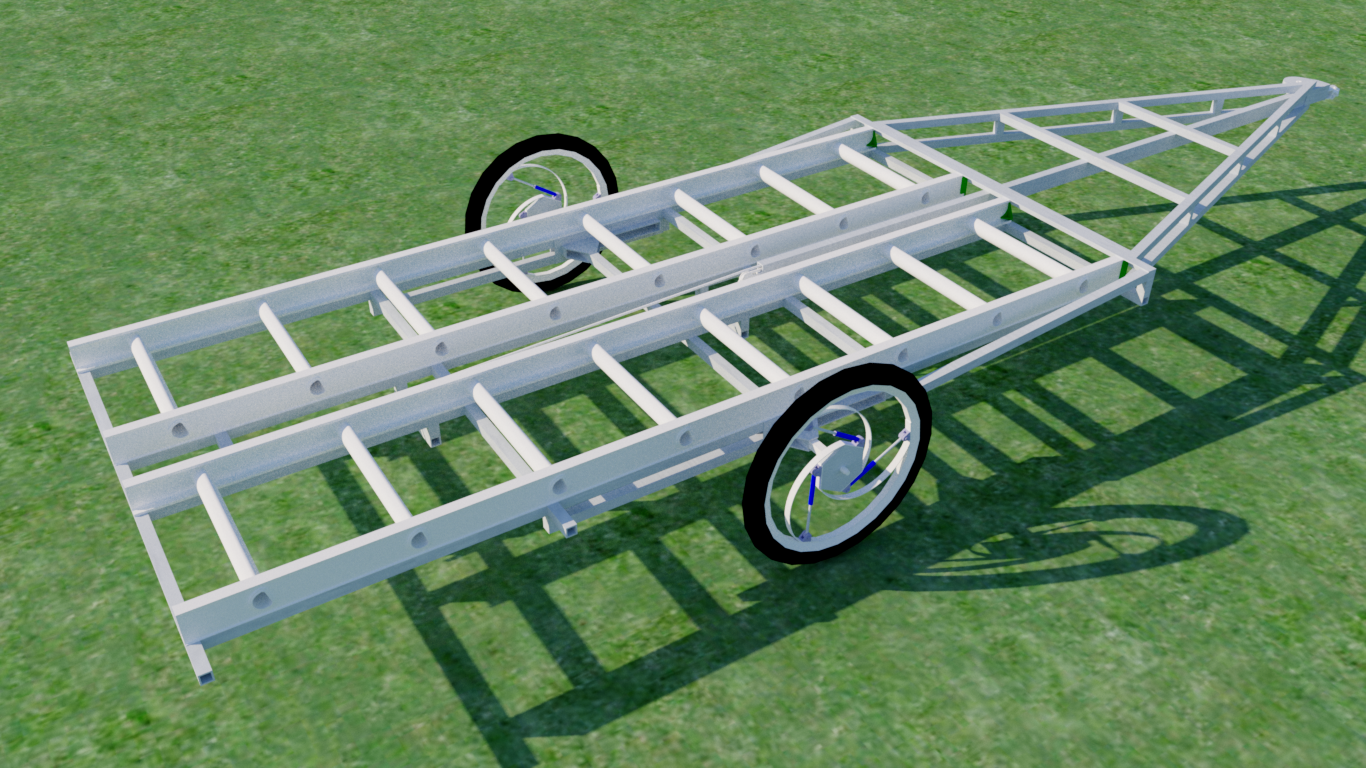
There are changes added to the trailer frame and components. The extra reinforcement where the tongue meets the bed of the trailer should increase its overall rigidity.
 Guide pulleys have been added so the cable does not contact the cross member. The control mechanism for moving the axle assembly has been added at the tongue. It is designed for use with a 3/8" drive ratchet or speed wrench.
  Tongue weight can be measured with an ordinary fish scale:

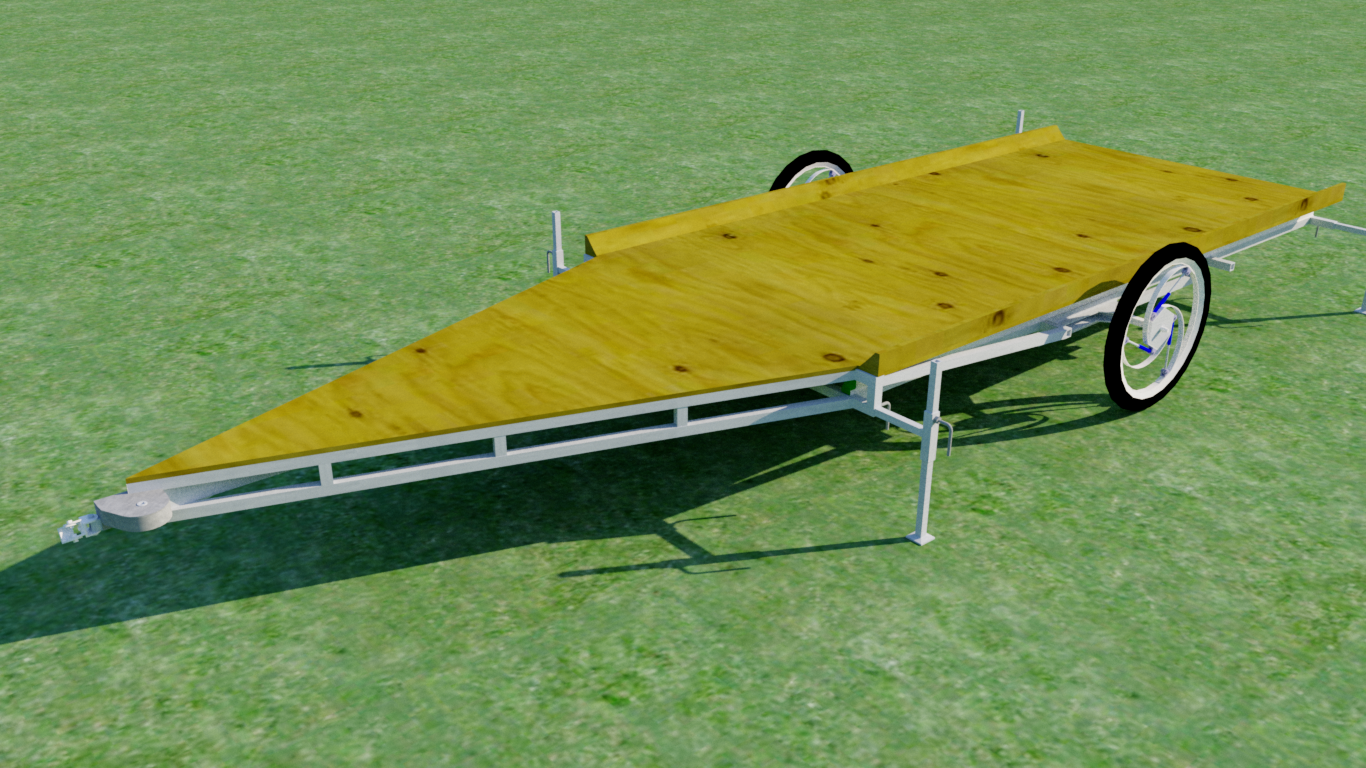
For this illustration, the wheels have been moved forward as far as they will go; near the center of the trailer but forward of the center of gravity. The only steel is in the axle, spindle and wheels. The frame is all aluminum.
 Except the wooden bed, of course.
As always, suggestions and criticisms are welcome.
Phillip
-
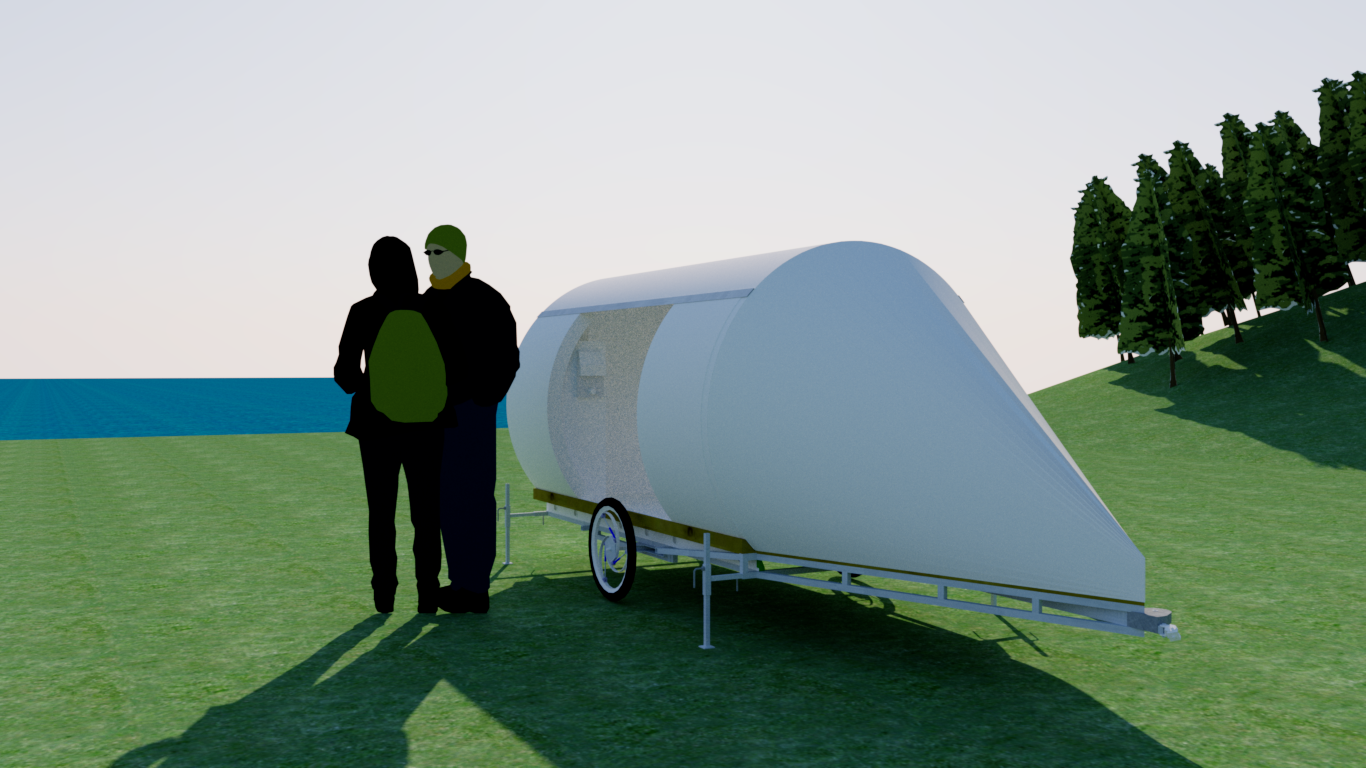
Just wanted to give you a feel for the relative size of the Micro-Miniature Small House Bike Trailer.
-
Admirable you are trying to use your abilities for a good cause. I like your ordinary fish scale, that could give your tongue weight.
-
For years, my wife and I have been bringing food, clothing, blankets, pup-tents, mini-flashlight, radios, batteries, etc., to the homeless camps in my area; whatever we could find that might help. I learned why so many of them refuse to go to the local shelters. The reasons are varied and too many to address here. But from these exchanges, I saw a real need for an alternative.
The vast majority of this project is made from Coroplast, a trade name for corrugated plastic. Paul Elkins is a DIY'er and a creative kind of guy that makes some fun stuff. It was his design for a Homeless Emergency Shelter that put me on this path. Corrugate plastic seemed a strange choice until its utility had been revealed. It's strength and durability are surprising and its uses are many.
From the mundane...

...To the fantastical, Awesome Oru Origami Kayak Folds Into its Own Compact Carrying Case
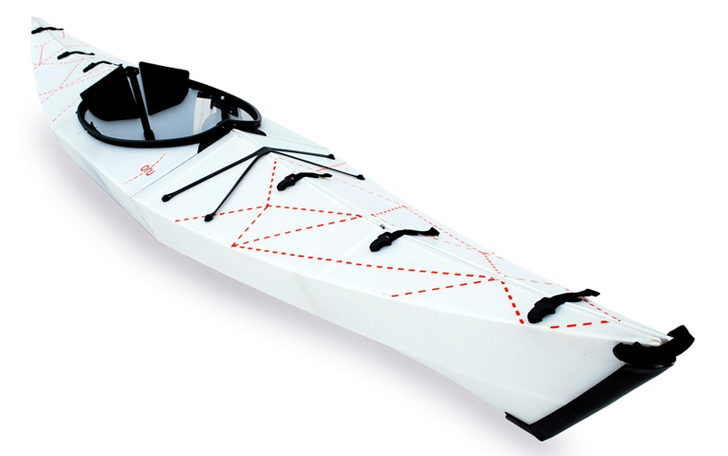
...corrugated plastic is used for an impressive array of products. But the most compelling reason to design with Coroplast is that tons of the stuff worldwide is trashed or recycled every year, especially with every election cycle. Translation? Its free.
The body of the project is being redesigned so that most of the features are folded for extra strength. Origami is very cool and this project is turning into a lot of fun!
Here are some links for information and ideas:
(Facebook Group) Velomobiles - Coroplast
Google search: corrugated plastic projects AND corrugated plastic origami -
@pbacot said:
Admirable you are trying to use your abilities for a good cause. I like your ordinary fish scale, that could give your tongue weight.
Thank you sir. Knowing the value of visualization, a graphic was needed to show how easy tongue weight can be gauged. Right tool for the job and all that.

Advertisement


