Cutting up a model for 3D printing
-
Hi All-
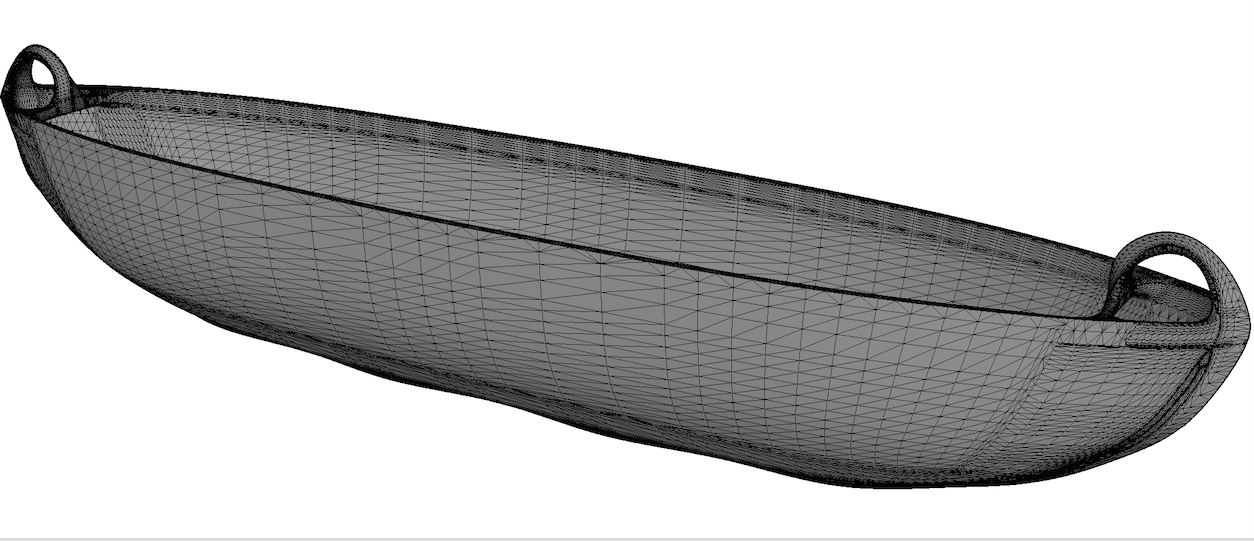
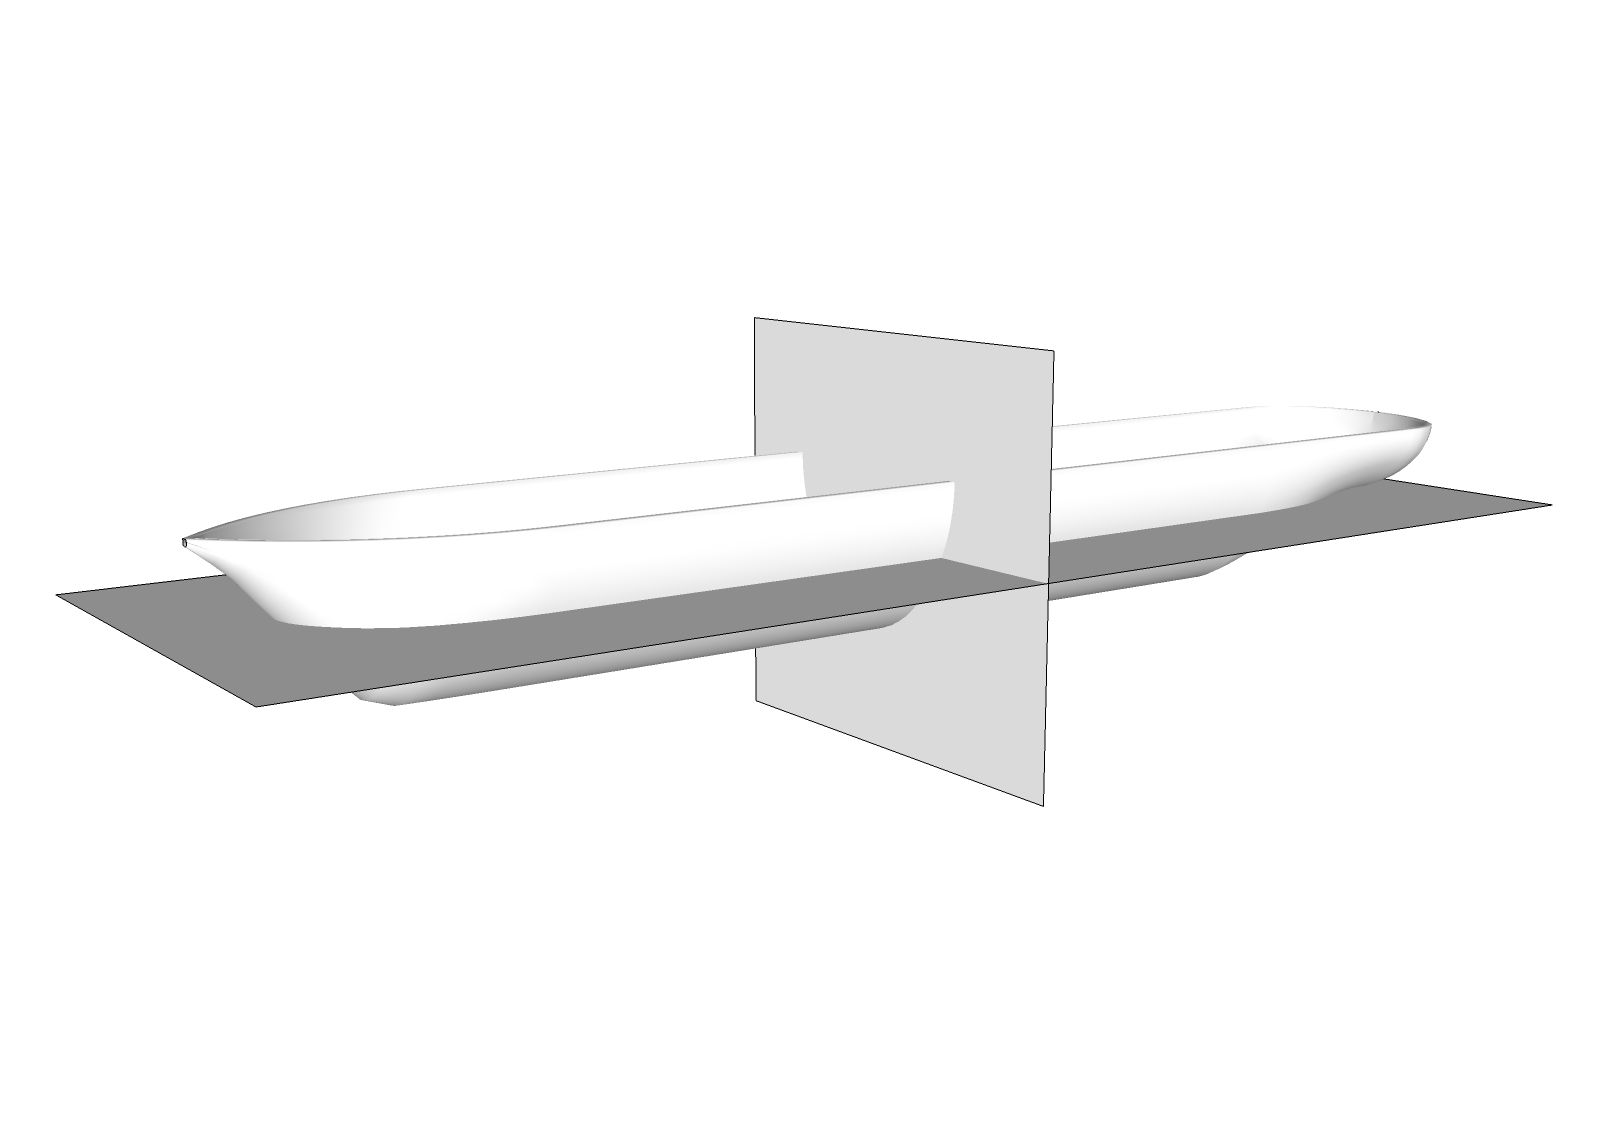
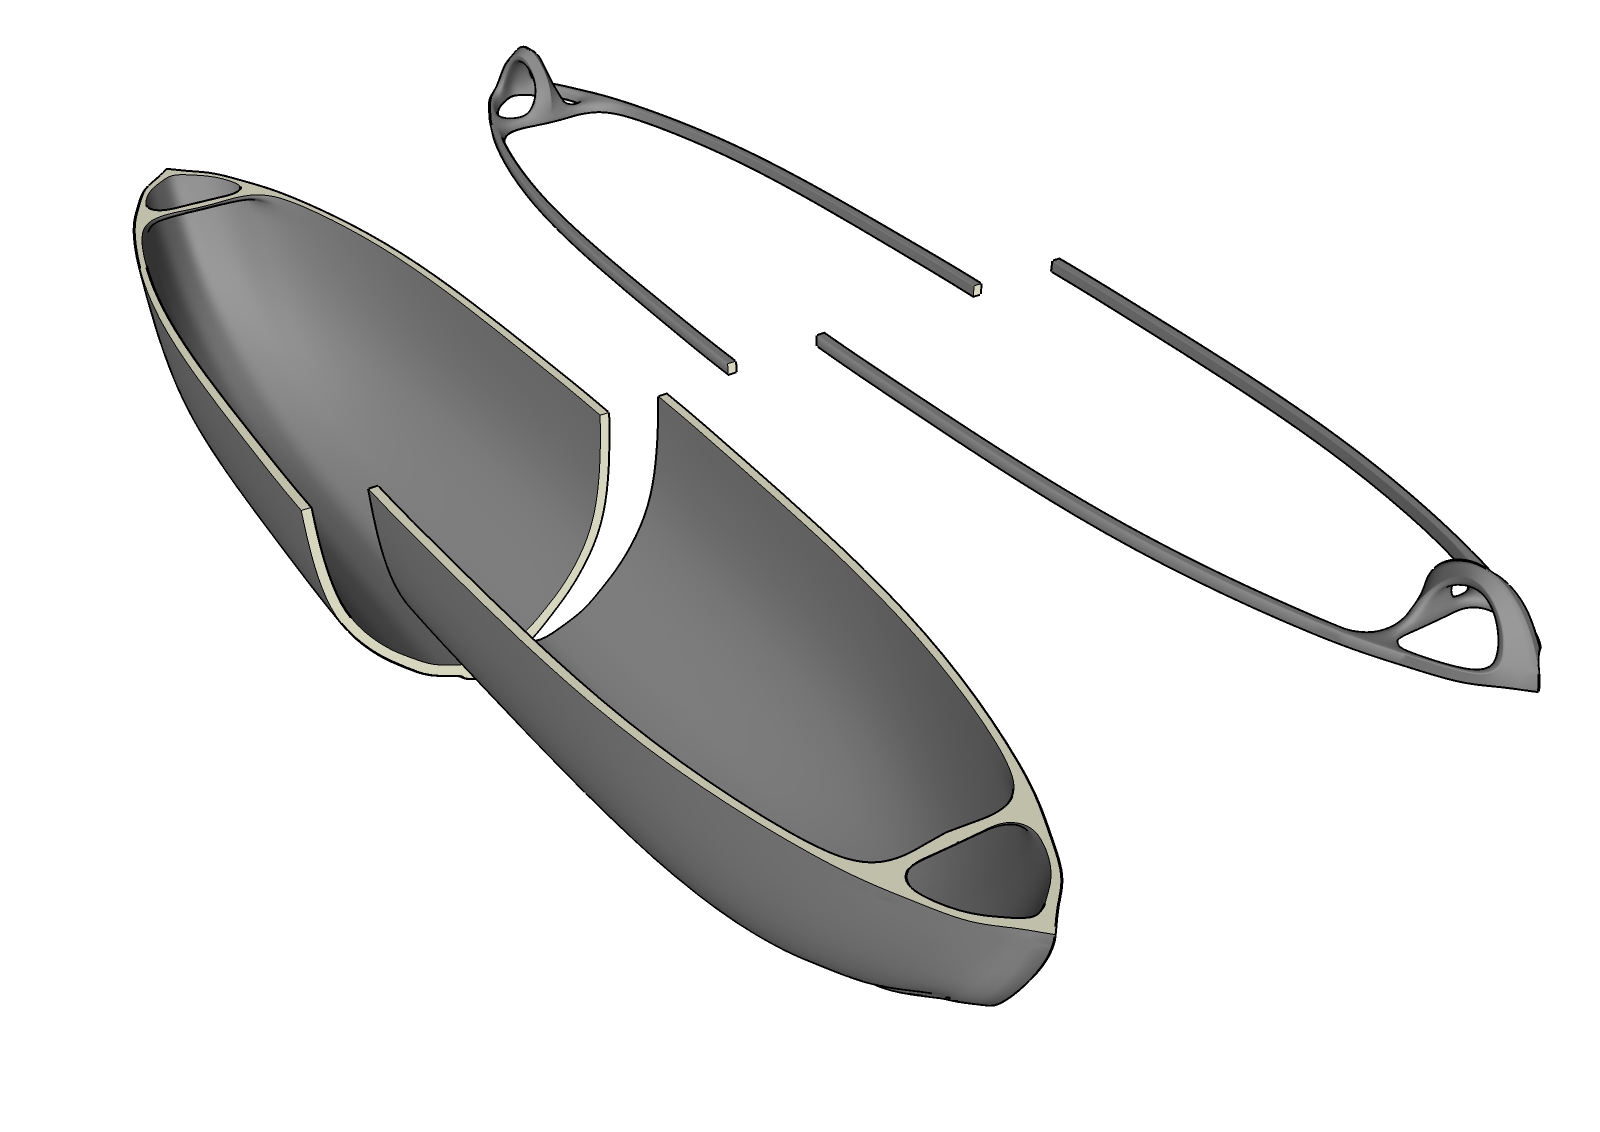
I have a rostock max V2 and want to print a model of a boat that is about 50 cm in length. You can see from the picture that is needs to be cut in half horizontally toward the top establish a plane from which to print, and cut in half vertically across its width in order to fit on the print bed. Whereas I've done some pretty big prints, I've never had to slice a model in this way.
Any advice on how to do this?
Thanks,
-R
-
I'd do what Ely said, however I'd scale it up 10x before doing it, then reduce it by 10x after, reduces the dissapearing small face issue
-
If slicing it in 4 parts it is what you are up to. Just place one horizontal rectangle and one vertical rectangle in the positions you want, then intersect the model with them. Then select each piece and make it a group. Make sure to draw a line int the corners to close the sections. It is possible because of the smaller segments to have open faces. Check the plugins for a Solid solver or something.
- What Solo said about the scale !!

- What Solo said about the scale !!
-
Thanks guys-
I forgot to mention that I had tried that, and that it froze up a number of times on me. I also tried the zorro plugin that works with the section tool and had some success, but couldn't then figure out how to close the meshes back up to make them manifold. drawing a line across the open part didn't work like it usually does.
when you intersect a plane with a model, what state is that model in, i.e. exploded, edit component mode, etc. If I am able to intersect, I am unable to then select one half or the other.
-R
-
If you post the model with the planes I will give it a go.
Mainly your model does not close in the sections because of the small open faces that were created after cutting the entire shell. That is why Solo told you to scale it up 10 times and even 100 times and then rescale to real. Perhaps you have a not powerful processor but if you wait long enough it will cut it eventually.
You can try having the model in a separated group or together with the faces. If you have it in a group you need to get inside the group and select the shell and intersect it with the model. If you have all together select all and intersect selected. After the intersection you should be able to select the individual parts. -
You can have a look at the trial of the nice plugin s4u_slice...

-
Woah, that's stunning fast !
-
@cotty said:
You can have a look at the trial of the nice plugin...
Great solution for inside Sketchup, Carsten.
If you're having trouble in Sketchup, you can cut up a model very easily using Netfabb Basic. It's usually much faster and you'll have less trouble with holes in the model. Here's a tutorial:
-
@ely862me said:
If you post the model with the planes I will give it a go.
Mainly your model does not close in the sections because of the small open faces that were created after cutting the entire shell. That is why Solo told you to scale it up 10 times and even 100 times and then rescale to real. Perhaps you have a not powerful processor but if you wait long enough it will cut it eventually.
You can try having the model in a separated group or together with the faces. If you have it in a group you need to get inside the group and select the shell and intersect it with the model. If you have all together select all and intersect selected. After the intersection you should be able to select the individual parts.Ah ok I see the logic behind scaling it up, small faces disappear rather than being bisected..
My processor is pretty good I believe, a 2.6 ghz core i7. I wish I could blame it on that but I think the fault lies with me

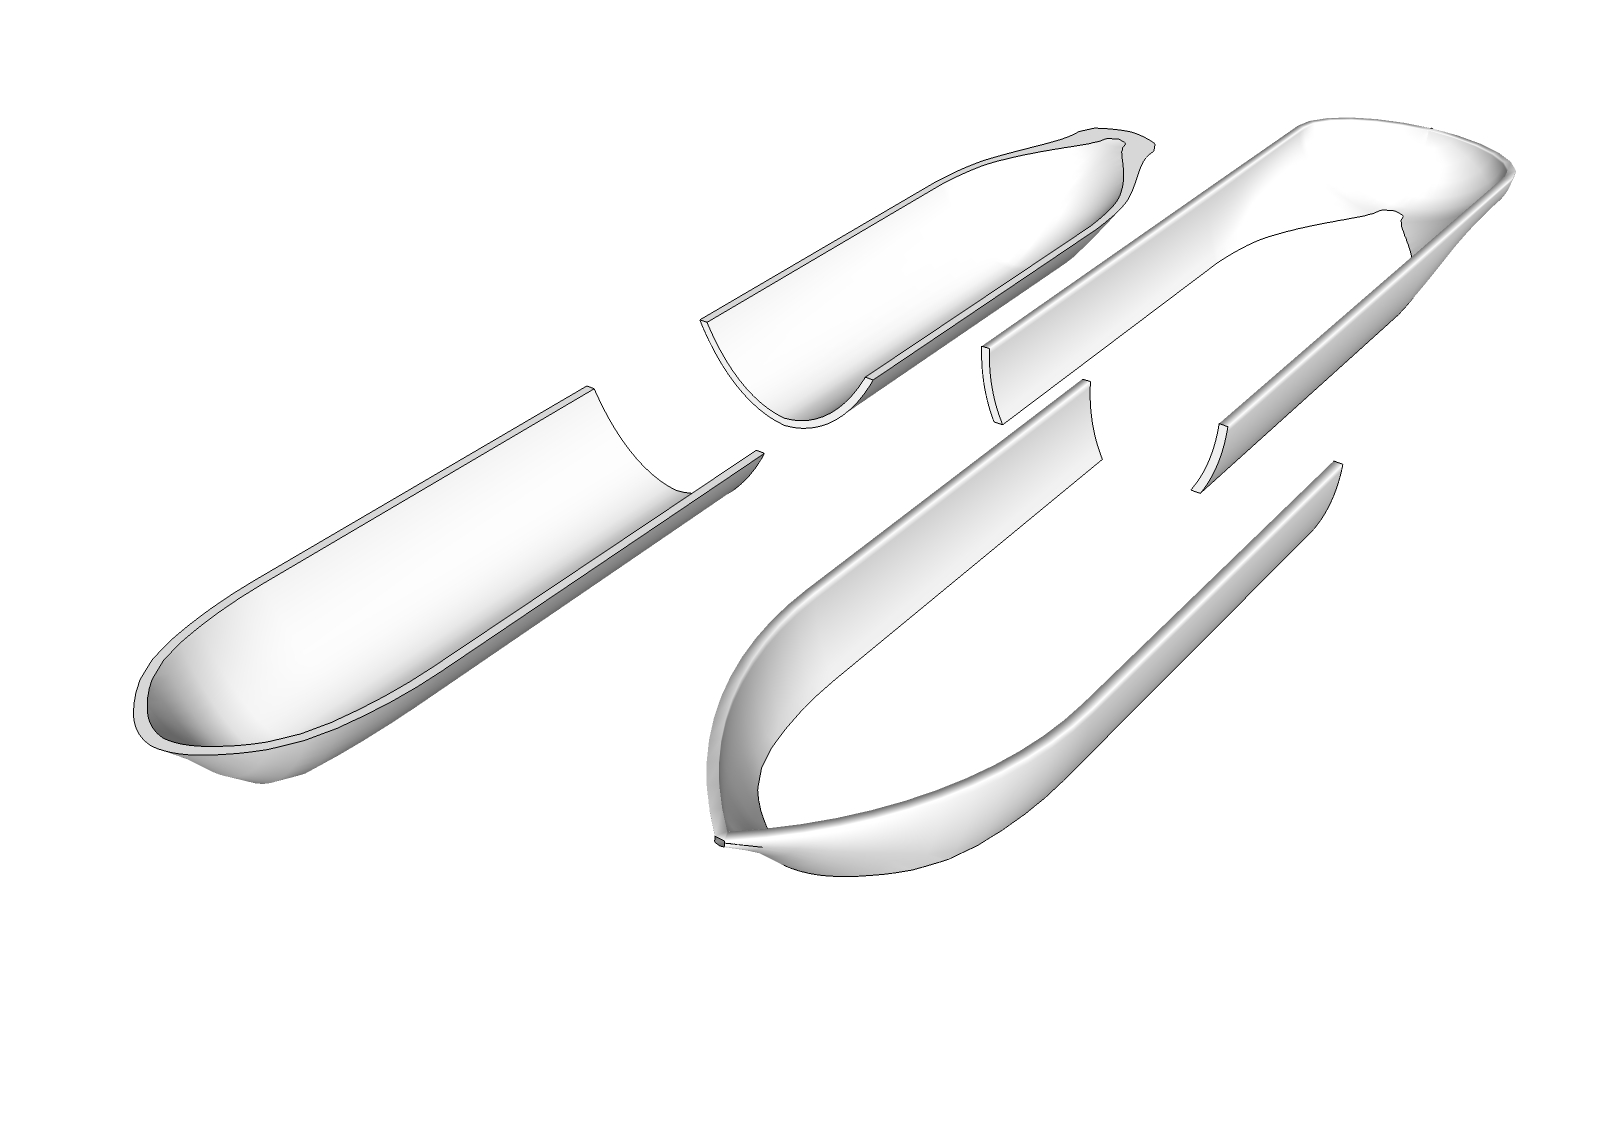
I would be very grateful if you'd give it a go, here's the model with the intersections-- whoops, so its 8 mb, can't upload here, can give you a google drive link?-Rev
-
if you 'purge' your model you may be able to upload it, it shouldn't be that big...
john -
@d12dozr said:
@cotty said:
You can have a look at the trial of the nice plugin...
Great solution for inside Sketchup, Carsten.
If you're having trouble in Sketchup, you can cut up a model very easily using Netfabb Basic. It's usually much faster and you'll have less trouble with holes in the model. Here's a tutorial:
Cool! I've heard of netfab, the 3D Printing Tips and Tricks guys always mention it on their podcast. I'll give it a shot!
Thank you ,-R
-
@driven said:
if you 'purge' your model you may be able to upload it, it shouldn't be that big...
johnHow do you purge a model? Model Info > statistics > purge? Tried that to no avail..
-rev
-
Yes, that purge.
If it is just 8MB you can compress it using winrar or winzip .. It will make it under 4MB for sure. -
@ely862me said:
Yes, that purge.
If it is just 8MB you can compress it using winrar or winzip .. It will make it under 4MB for sure.Aha yes of course ...here you go!
go netfabb loaded last night but haven;t had a chance to mess around with it yet--
-rev
-
@d12dozr said:
@cotty said:
You can have a look at the trial of the nice plugin...
Great solution for inside Sketchup, Carsten.
If you're having trouble in Sketchup, you can cut up a model very easily using Netfabb Basic. It's usually much faster and you'll have less trouble with holes in the model. Here's a tutorial:
Thanks for pointing me toward netfabb- I was able to slice up the model as needed and export .stls to Matter Control. It scaled way down which is an unrelated problem I would imagine (?)
Should I scale it up before importing into netfabb or no difference?
-rev
-
-
@revelever said:
Should I scale it up before importing into netfabb or no difference?
-rev
Shouldn't make a difference, but you can scale it quickly in Netfabb if needed. Glad it helped!
-
@ely862me said:
Here you go !

Awesome! Did you do that inside sketchup??
Can';t wait to fire up the printer
-Rev -
Yep, you just have to wait a bit, about 3-4 minutes, for each intersection to be made.
In the middle I opted to make the middle line coplanar and just cut the inside part which has no middle line. Then you just unsmooth it and you have the cut.
Keep in mind to intersect each plane separately to have faster response with the intersection. In my case I worked the middle line then each end .
I also scaled it up 10 times more, then down again. -
@ely862me said:
Yep, you just have to wait a bit, about 3-4 minutes, for each intersection to be made.
In the middle I opted to make the middle line coplanar and just cut the inside part which has no middle line. Then you just unsmooth it and you have the cut.
Keep in mind to intersect each plane separately to have faster response with the intersection. In my case I worked the middle line then each end .
I also scaled it up 10 times more, then down again.That is very impressive to me, I am missing something in my approach. However Netfabb was a breeze, and I'm up and running! First part is being printed.
Some details on the parameters:
Extruder temp: 218 C
bed temp: 60 C
Layer height: .2mm
1st layer: .3
Perimeters: 2
Layers on top and bottom: 3
fill density: .3Speed:
infill: 40mm/s
inside perimeters:45 mm/s
outside perimeters: 35 mm/s
bridge: 60 mm/s
non print speed: 300 mm/sThese numbers are not based on anything other than my experience, which is fairly minimal. If anyone has any pointers in this department, please let me know!
I could probably push the speed a bit, but I figured I would play it safe for this first one. I am printing half of the boat hull vertically which is about 25cm tall, 9.85". Originally I had planned on printing it horizontally upside down, but it barely fits on the bed, and would necessitate a lot more bridging. I've found a good rule of thumb with Rostocks is to stay away from the very edge of the bed as you will lose resolution. With the Rostock design, if you have a choice and good bed adhesion etc, go vertical!
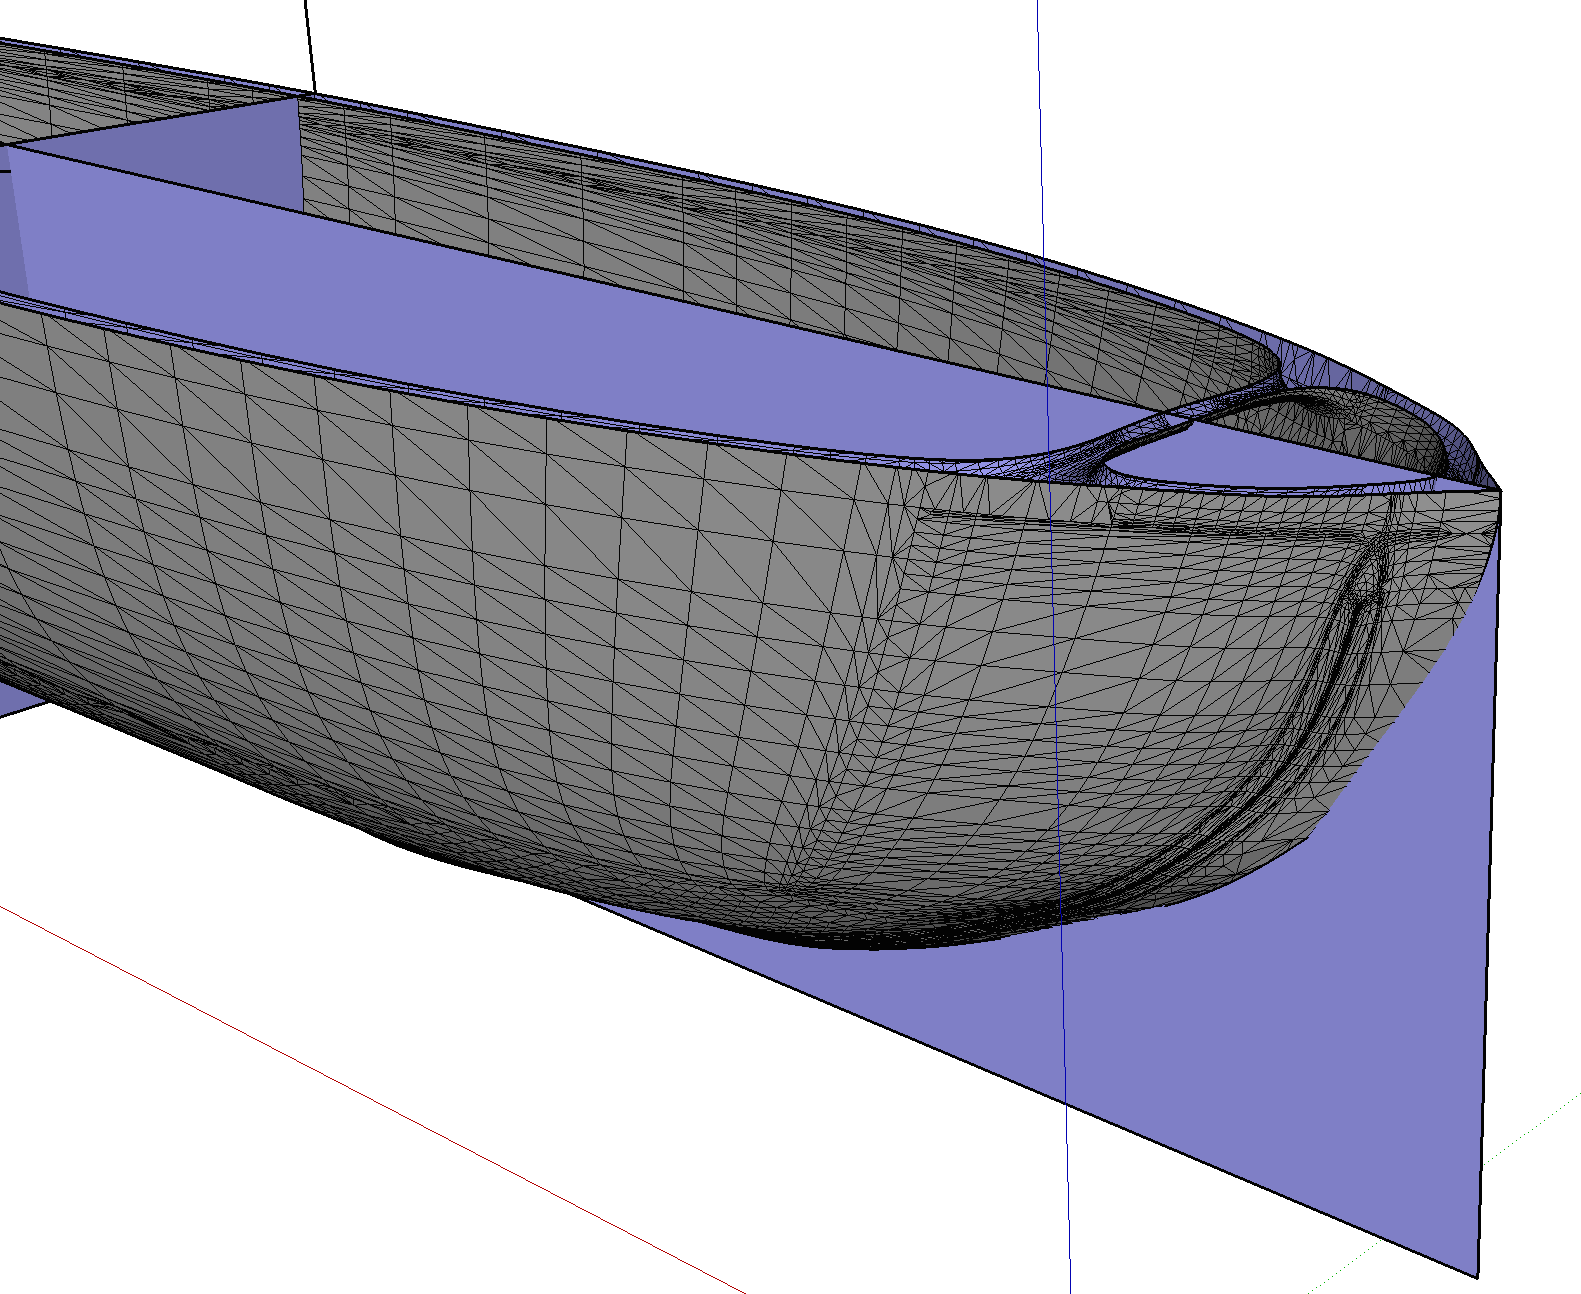
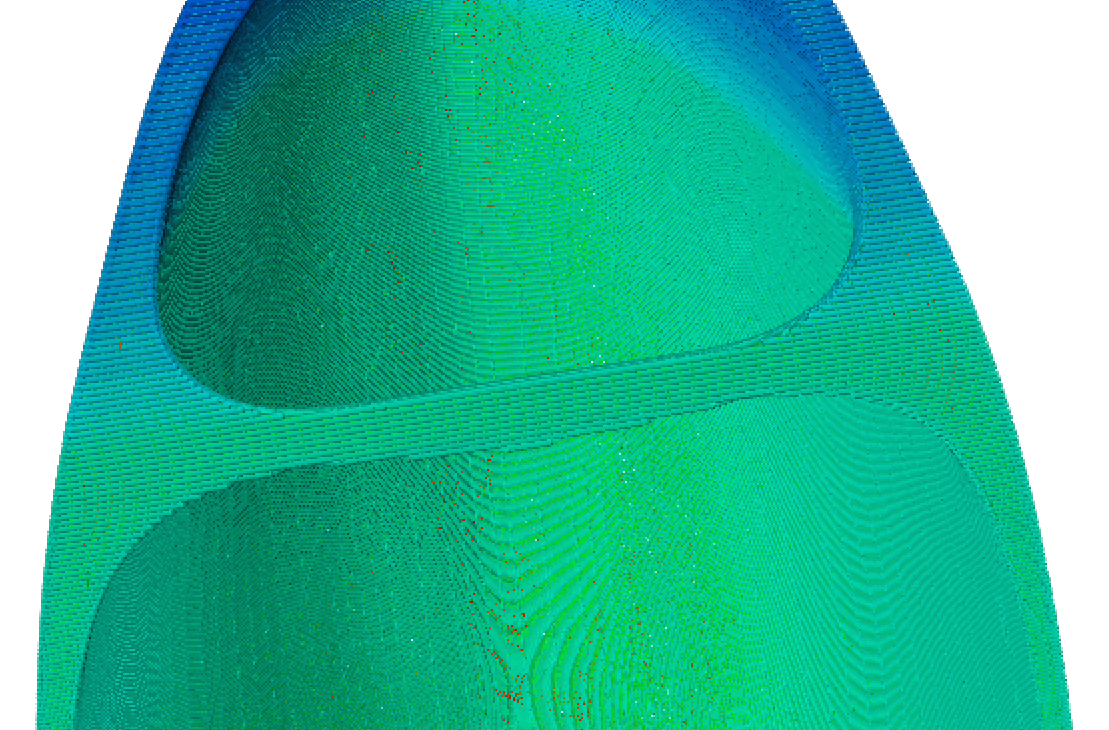
EDIT: I just realized that when I cut this up, i had been thinking i would print the hull parts upside down, the advantage being that I would have a clean seam on the upper lip to glue to. So, I sliced it wrong, as evidenced in the pic below-- there is a belly in the bridge. I would need to slice it a little lower on the Z axis to avoid this... or go back to printing it upside down. Impending Fail? we'll see. I'm 6 hr into the print so I think I'll let it run its course.


Hello! It looks like you're interested in this conversation, but you don't have an account yet.
Getting fed up of having to scroll through the same posts each visit? When you register for an account, you'll always come back to exactly where you were before, and choose to be notified of new replies (either via email, or push notification). You'll also be able to save bookmarks and upvote posts to show your appreciation to other community members.
With your input, this post could be even better 💗
Register Login


Advertisement