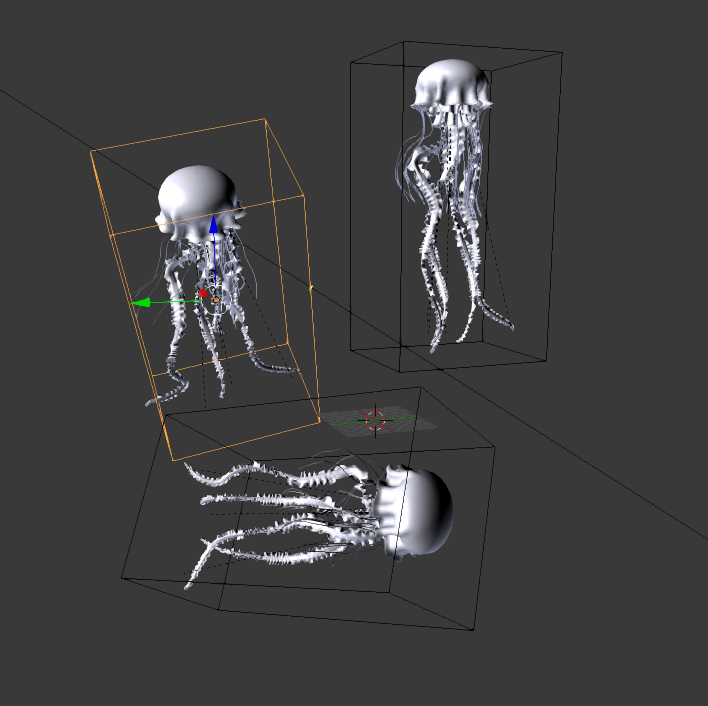
Jellyfish
-
It's a paid subscription tutorial so unless you're a citizen member you only see the intro video.
-
cool image Rich!! is it rendered with cycles or internal??
-
Cycles
-
thanks! seems that it worths every cent the citizenship...

-
Completely.
-
Cool. YOU did this? All in Blender?
-
@pbacot said:
Cool. YOU did this? All in Blender?
I did all the modeling based on the tutorial and tweaked the materials different to what was suggested.
Also I added the volumetrics and plankton particles differently.
If I was asked to create this from scratch in Blender off my own steam then I would still be scratching my head.
Things like the Chroma Abberation were tricks provided in tutorial that made the image come to life. The actual rendered output was pretty poor until you were shown how to use the compositor to add the extra fluff.
So, I would say 10% is my tweaking and 90% is down to great instruction.

There is some raw Blender.
-
Cool modeling!
-
Very nice!
I have Blender and attempted to teach myself a few years ago. I will probably attempt to once again as my future projects need motion and hey, nothing wrong with knowing more than one 3D program, right?
But that will be a few more years away. I am determined to master SU first and that is going take those years.
-
Excellent work Rich
 If you get stung I will happily pee on you.
-
Thanks, I'll remember that next time I visit Manchester.
-
What consenting adults do in the privacy of their own homes is scary where you guys come from...............
-
Apparently urine makes a jellyfish sting worse. Oops!
Gotta say I'm impressed by the volume effects rich, I thought it was composited at first. Great stuff!
-
The volumetric was separate to the render of the jellyfish.
That is why Blender is so flexible. Everything was a separate render. Composited in Blender.
I really think Blender is on the cusp of greatness.
-
Well I bit the bullet and got subscribed with Lynda.com(like the whole vaping thing where I spent a fortune at the start so I was forced to continue, spending money on tutorials will guarantee one actually uses them, free stuff is easy to give up on), gotta say Lynda tutorials are great, I just got the beginner stuff, nothing crazy, watched them all once, now going through a second time following all lessons so hopefully it sticks in my head. I hardly ever use shortcut keys as I have a navigator mouse which is pretty useless with Blender as there are just too many shortcuts to program, now I need to learn the keys and where everything is hidden. I must say however once you get going Blender is not as scary as I once thought.
-
That's great news!
I'd also recommend checking out BlenderGuru. He has some tuts I'd know you would like.
-
@rich o brien said:
That's great news!
I'd also recommend checking out BlenderGuru. He has some tuts I'd know you would like.
I certainly will, once I get the basics, I had a hard time figuring out how to get out of the render window back into 3D edit mode.

Setting up camera's right now has me frustrated, I know, it's early days, however I was able to make a fluid particle flow into a tea cup (my 3D priorities need to be reevaluated)
-
Hit N to bring up the panel and set Lock Camera to View
-
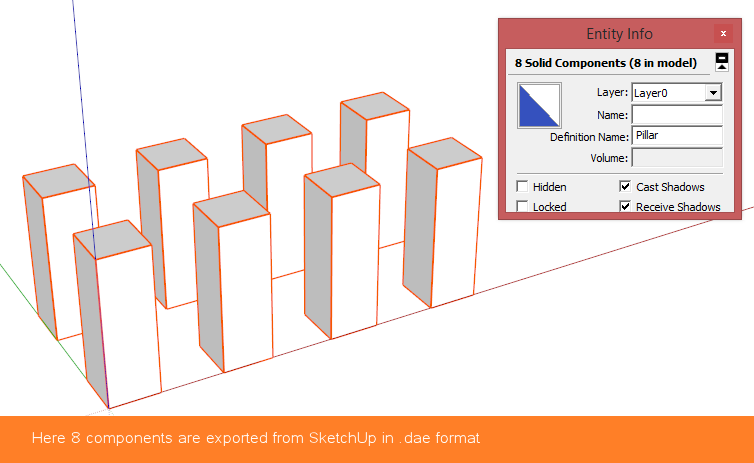
Rich, is Blender able to import SU components as instances? Saw a mate do that with C4D last week, via collada. Pretty nifty. If Blender could do that ... I might take a closer look at the app.
-
Hi Tom,
Exporting as .dae from SketchUp with Component Hierarchy checked will bring components into Blender.

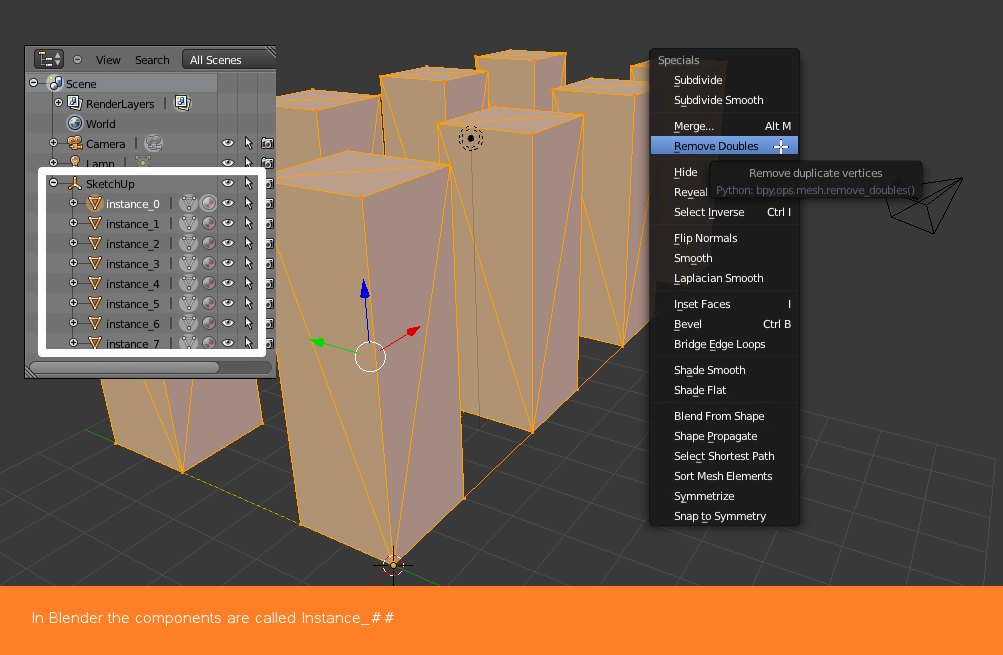
When imported into Blender the vertices are unwelded usually so hit TAB to go into Edit Mode, Hit A to select all geometry and the hit W to bring up Specials menu and choose Remove Doubles.

That will fix any issues with the geometry.
NOTE - Nested Components are not supported. If you import something that is nested then you'll get Empties. I think it has to do with how SketchUp places Component Axis and I haven't found a work around yet. Well, I have but it is a bit involved.
But when you import top level components there's no problem.
Top Tip - Because Blender names everything Instance-## it can get annoying trying to select components. But all you need to do is select the component you want to target and hit SHIFT+L to select it's Linked objects.
Then hit ALT+J to remove Tris and you are ready to UV Map and texture.
Hope that helps
Hello! It looks like you're interested in this conversation, but you don't have an account yet.
Getting fed up of having to scroll through the same posts each visit? When you register for an account, you'll always come back to exactly where you were before, and choose to be notified of new replies (either via email, or push notification). You'll also be able to save bookmarks and upvote posts to show your appreciation to other community members.
With your input, this post could be even better 💗
Register LoginAdvertisement


