Curved Staircases
-
Garry - I've already sent you this information offline, but I'm repeating it here for the record.
When I open SU, I immediately get the following error:
Error Loading File GKWare_StairMaker_Ext.rb
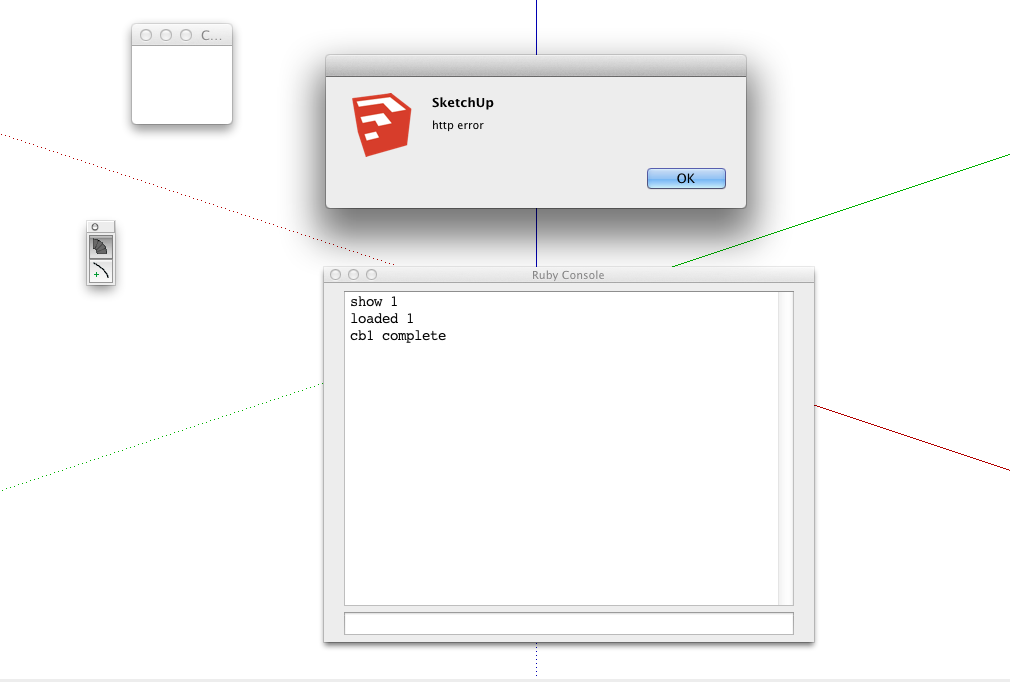
undefined method `call' for false:FalseClassOpen the Ruby Console, then select Plugins>Curved Stairs>Stair Maker, and I get this in the console:
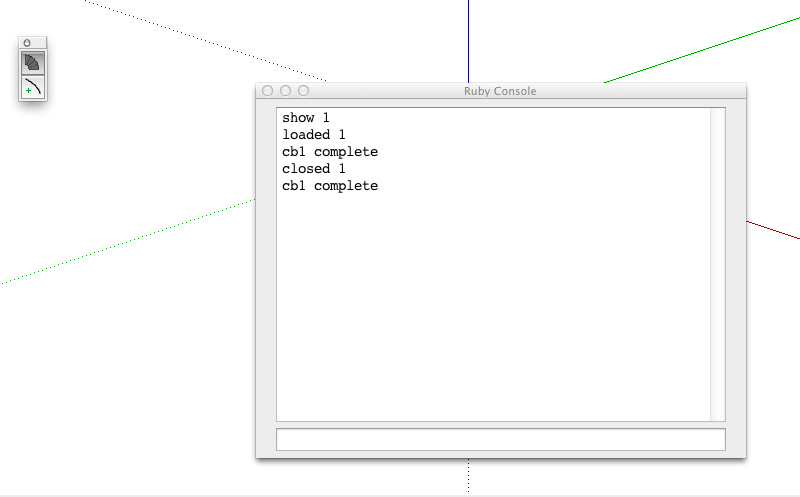
show 1
loaded 1
cb1 complete
closed 1
show 2
cb1 complete
loaded 2
cb2 completeUnless I'm mistaken, the "cb2 complete" shouldn't post to the console until I've hit the OK button, right?
-
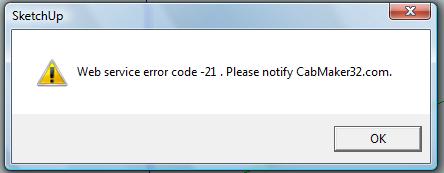
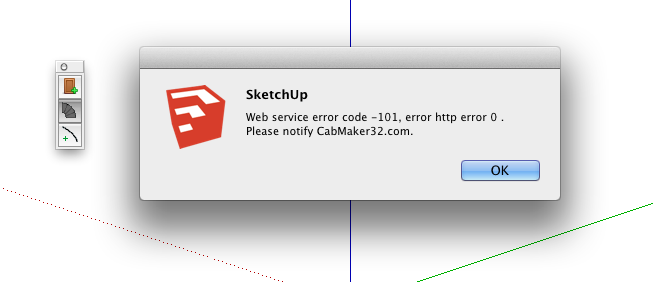
Web service error code -21 . Please notify CabMaker32.com.
john
-
Hi Garry I saw this thread when you started it and watching progress. These are my screenshots. I'm on a Mac similar to Jeff's and using SU 8 right know my My Safari build if it helps is
-
John,
You need to edit the Defaults.txt file and insert user and password.
Error -21 means "user not on file"
The shipped user in the defaults.txt file is "user" and password is "test" and these are not on file.You would have to register on my website which will email you with your password.
-
Walt,
The "http error" comes from the http call to my web service.
xmlHttp.readyState == 4
and
xmlHttp.status != 200I could have returned the status - they mostly talk about time outs etc.
I know that the web host site has been experiencing hack attacks today. So it very well could time out. -
Ok so I missed the part about registering on your website so I did just now and still getting "http error" will try later. PS handrail works good. How long is the trial good for?
-
The trial is for 30 days. I will reset everyone once I get this working.
I am adding a temporary button ( it will mess up the look of the web dialog - but then this is just temporary )
I want to rule out if this is a timing issue.
Click the load button should reload the information.
-
The other thing I should say - is the defaults.txt file gets over written each time. So unfortunately you need to go back in and edit the file.
-
@garry k said:
The shipped user in the defaults.txt file is "user" and password is "test" and these are not on file.
you need to allow for easy/simple testing, put them on file and take them off when your done...
-
Garry - No change for me with the 1.0.6 version (although the load error has disappeared, but I think that was due to cruft in my plugins folder, which I cleaned out). Plugin loads fine, and I get the same string in the console:
show 1
loaded 1
cb1 complete
closed 1
show 2
cb1 complete
loaded 2
cb2 completeNothing else happens. Data fields are still blank, drop-downs aren't operational, and entering data in the fields and clicking OK doesn't cause anything to happen in the console window.
-
with 1.0.6 i'm still getting all blank fields and non-functioning drop down menus.. same thing as Andrew above.
ruby console reports:
%(#0000FF)[show 1
loaded 1
cb1 complete
closed 1
show 2
cb1 complete
loaded 2
cb2 complete]after i push the 'load' button:
%(#0000FF)[loaded 2
cb2 complete] -
@ Garry (and Andrew)
see this post ->[EDIT]not sure why that link isn't going to the direct post.. so scroll down to the end of the page and see the thing about model units
-
I now have Stairmaker handling all of the different units.
The problem was with the single quote used for feet '
If you have feet ' and inches " then I had to deal with the single quote.I have ruby replace the ' with the back tick ` and have the javascript in the web dialog replace it back as each measurement is put into the controls.
I'm now hoping there isn't anything else wrong with the Mac version.
-
1.0.7 is working for me and my template now

-
Still having problems here. I installed 1.0.7 and changed username and password in default txt, on 1st click getting "http error" and clicking again getting "can not reach web server"
-
sorry but, have I missed something important?
-
seems Jeff is the only on one to figure it out
-
Jaryn Zlesa
You need to go to my web site and register. An email will be sent to you with your userid and password. Edit the defaults.txt file and put your userid and password in the file. Plugins/GKWare_StaireMaker/Defaults.txt.
Walt M
http error means the http connection did not complete. I will modify the code to report back the exact error code.
-
I've made a change at the server to temporarily allow access for user "User" and password "test". After testing this will be removed. At least it allows you to test without having to update defaults.txt for each version.
I've also made a change to stair maker which will give you back the http error code.
-
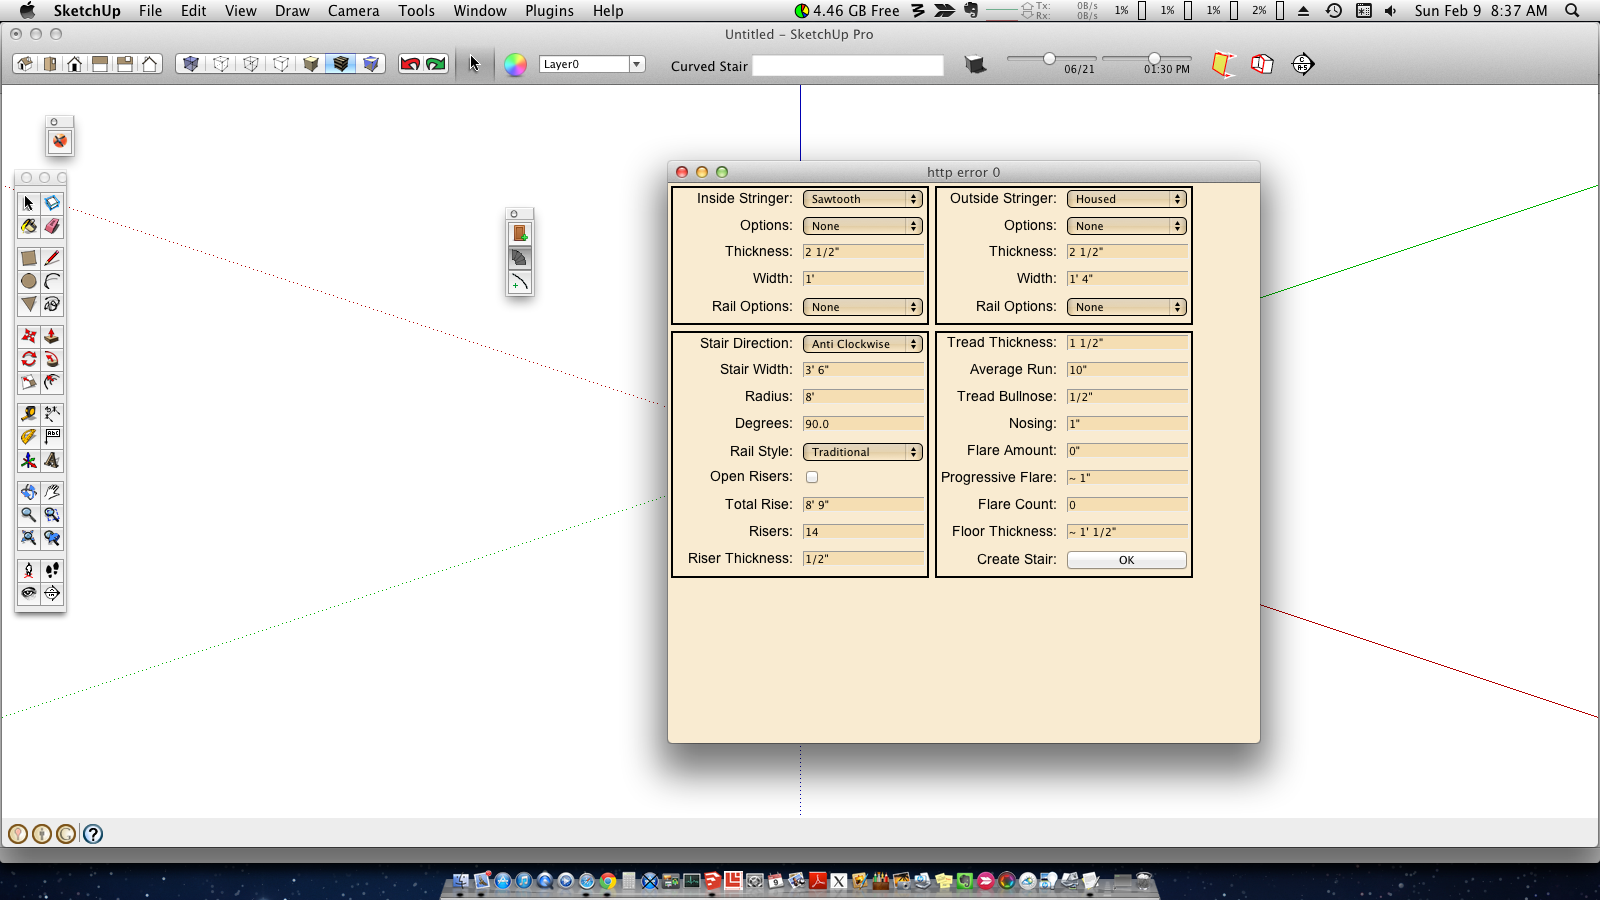
Ok so I got the two screen shots to show what I'm getting but after pressing ok with defaults noting happens.
Hello! It looks like you're interested in this conversation, but you don't have an account yet.
Getting fed up of having to scroll through the same posts each visit? When you register for an account, you'll always come back to exactly where you were before, and choose to be notified of new replies (either via email, or push notification). You'll also be able to save bookmarks and upvote posts to show your appreciation to other community members.
With your input, this post could be even better 💗
Register Login


Advertisement