Newbie with a question on importing images
-
Hello. I recently discovered Sketchup and it is truly fantastic. Over the years I've enjoyed making 2D drawings and architectural pieces using MS Paint and Paint.net and I've gotten rather good at making decent imagery using these fairly simple programs. After exploring Sketchup for the past week or so, I was curious as to whether or not it was possible to import images of architectural elements into a Sketchup file. I'm aware of how to import pngs as textures, but I'm wanting to import images that can be converted into actual Sketchup components than can be pushed/pulled, scaled, painted, etc. Here's the problem I am encountering and I'm not sure if there's a solution:
I attached an image of a typical Spanish gable found in Spanish mission architecture that I quickly threw together on MS Paint for the purpose of this topic:
What I'm wanting to do is isolate the gable shape itself from the white background and import it into Sketchup. From there I'd like to be able to push/pull it and make into a 3D component to use in Sketchup and incorporate it into actual architectural designs. Programs like Paint.net allow you to delete the background of an image. However, when I import the .png into Sketchup, the image shows the deleted background as a solid black background instead.Might there be a solution to this? I hope I was clear enough in my explanation! Thanks for your help, folks.
-
Hi Joshua,
It's not the way you should do things in SketchUp. The program cannot recognize raster image pixel difference and create vector based geometry from it. Instead, if you insist on importing images as reference, use them as such: "reference" only. Start drawing on the face of the images, re-tracing the outlines (the blacked-out png must be an issue how you saved the image: in Paint.NET, save it as 32 bit png to get transparency to work).
I would not even strictly trace the image itself but really use it as reference. For instance, in SketchUp, you can have tangent inferences for arcs: exploit these features. All-in-all, start learning SketchUp so that you can efficiently model here instead of following raster image editing customs and trying to recreate what you have done there so far.
-
Welcome Joshua.
It shouldn't be a problem. Simply import the image and trace over it using SketchUp's line and arc tools. You can either use the default number of segments in the arc (12) or change it to anything you like by simply selecting the tool then typing the number of required segments followed by Enter. You don't need to place the cursor anywhere...just start typing; you'll see the figures appear in Measurement box.
In the attached file, I have imported the image, then scaled it (by drawing a line along the base, which I then used the tape measure on...followed by typing in a nominal 20 ft, then Enter. This will scale whatever length the line happens to be to 20 ft...and the rest of the model with it.
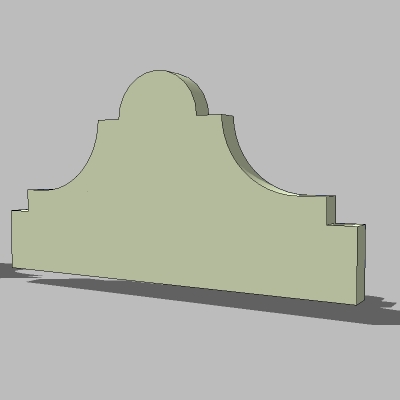
I then simply traced the outline...drawing just the left hand side then duplicating/flipping it to ensure complete symmetry...before sticking the semicircle on the top. You will then have a shape capable of being Push/Pulled.If that jpg had been fully textured with bricks and coping etc, you could have exploded the image before tracing, then deleted the unwanted exterior part, leaving a fully textured shape which could then be pulled into 3D.

-
Wow. Thank you both so much for your quick responses and welcomes! I tried precisely what both of you recommended with regard to both tracing and referencing and I was able to whip it up in mere moments. Thank you!
One last question. Alan could you explain your last comment a bit more about texturing and coping before tracing?
-
There are materials (or textures) - either simple colours or images - that you can apply in SketchUp. Now you simply had a B&W image - but imagine tracing a shape from a real world photograph. After you successfully traced the contours of the shape (and your face is created in SketchUp), you can actually use that photo to "paint" onto this face.
Once you import an image (as image) in SU, it is a special entity. If you right click, you can "explode" it - now it becomes a rectangle with that image applied as texture on its face (and already projected, too). This way (before PushPulling), you can even apply that photo as a texture on your new shape.
Of course, the photo needs to be taken carefully; excluding any perspective distorting as much as possible (or "un-destort" it prior to importing into SU).
-
Yeah, what Gai said.
Think of it just like cutting a shape out of a printed sheet or magazine page. You can actually develop quite an interesting to and fro between SU and an image editor.
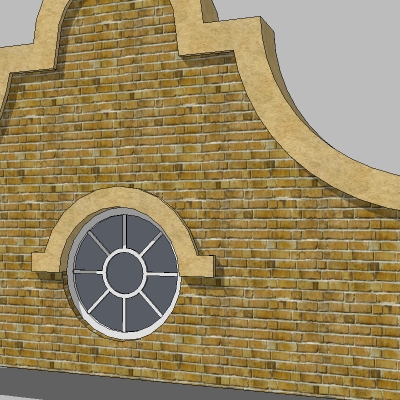
Here is your basic profile worked up a little and textured in SU.
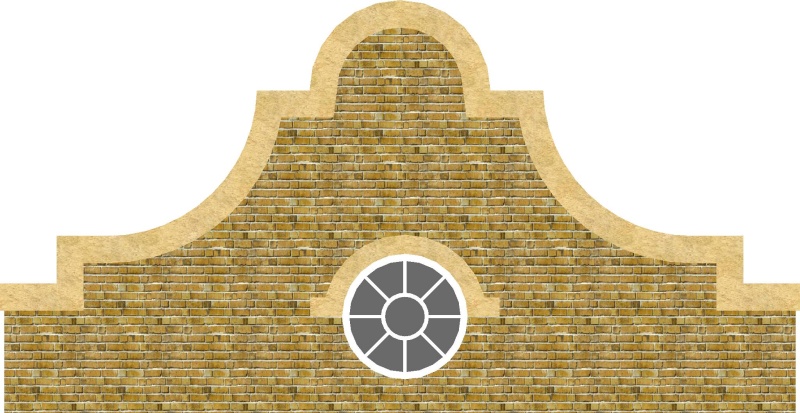
However....if you were to leave all the textures on a flat face, before push/pulling; then select the whole of that face...bricks, coping, window etc. and r-click, SU will then offer you Combine Textures...which enables you to export a single, combined texture as below.This can be quite useful if you want to produce relatively low-poly versions, but packed with detail...like an entire street. You could model detailed individual houses, export a combined texture of the the various elevations, then just do enough minimal push/pulling to make it look 3D.


-
Gentlemen, thank you so much for the patience and effort you both went through in explaining this process! I am very much obliged!
Advertisement


