Exporting SketchUp groundplanes to use in Photoshop
-
I do a lot of photo simulations (or whatever name you like to give them) where we take an existing photo, and then add elements to it to show our final proposed design. One thing I come up against often is that we want detailed ground-plane designs and just throwing in any old concrete or paving pattern won't always work. We want to show the client something a little more realistic to what we're proposing. I've come up with a simple workflow where I model the paving pattern and color in SketchUp, then export images for my Photoshop document. This is a typical outline for my process, though it varies per project. Sometimes it takes more detailed alignment and sometimes I can "eyeball it" a little more. But this is the general idea:
- Model the ground-plane. Try to use accurate dimensions as best I can (sometimes its a conceptual design and I don't know exact dimensions).
- Import photosimulation image into SketchUp as a background watermark.
- Align my sketchup model ground-plane to the photosimulation image as best I can. I typically just use the normal orbit, zoom and Field of View tools. I don't have a perfect workflow for this, I tend to just eyeball and come as close as I can.
- Once I feel its aligned well and the perspective is good, if there are parts of the groundplane that are not covered by my model, I just keep adding to my model.
- Export a black and white edges only image.*****
- Export a color only (no edges) image.*****
- Export a shaded faces image if that is relevant (which is not often when I'm doing groundplanes).*****
- Bring in those layers into Photoshop where I erase the parts of the image that are not groundplane (sky, etc).
- Erase, mask, hide, layer images as needed so they "fit" into my photo simulation
- I tend to play a LOT with transparency and blending mode to get them to feel more like they are part of the photo than a silly cartoony image laid on top of my photo.
That's it. I've included a series of photos that illustrates most of the points above. Hopefully its enough to go by, or to get you thinking of additional ways to use this workflow.
***** - I put an asterisk next to the export images tasks because I like to use "sizer", a free windows tool, to resize my sketchup window to the exact same proportions as my working photosimulation image. That way when I export images from SketchUp, they fit EXACTLY into my photosimulation. Its not necessary, and I don't always take the time to do it this way. But on the trickier simulations I will go through this step. Sizer can be found here: http://www.brianapps.net/sizer/
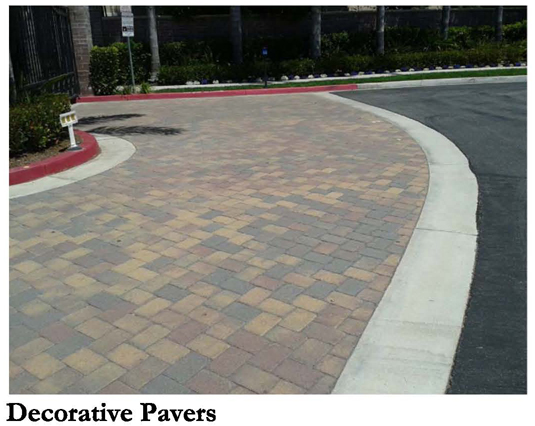
This was the reference photo I was given to try to match the pavers on this approximately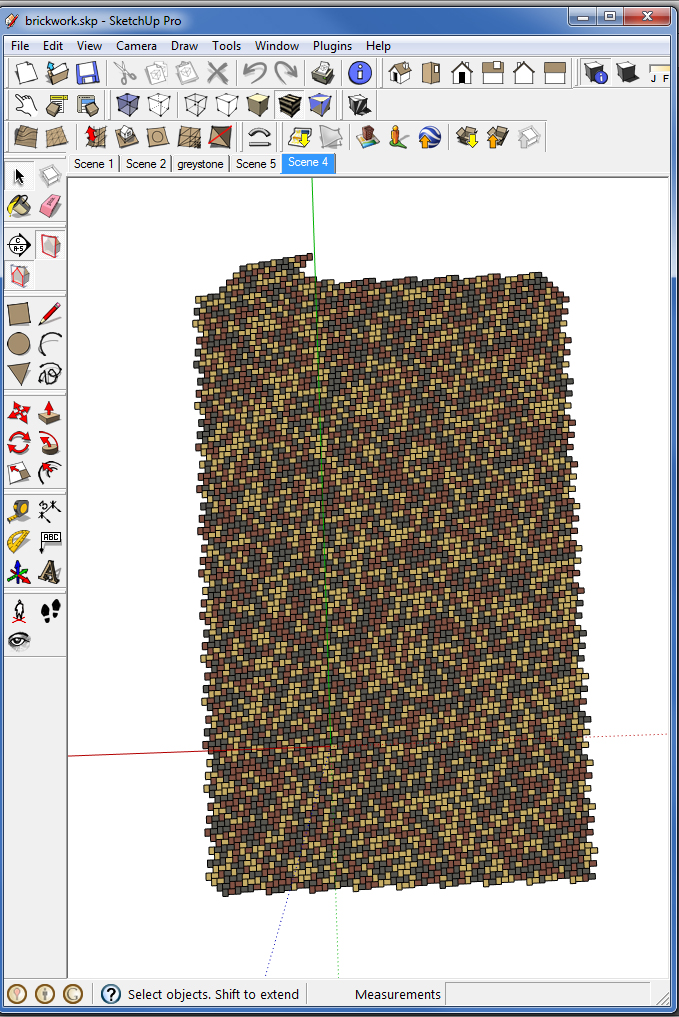
This is what I modeled in SketchUp. The irregular shapes are where I had to add more to my model to make it fill the entire photosimulation image.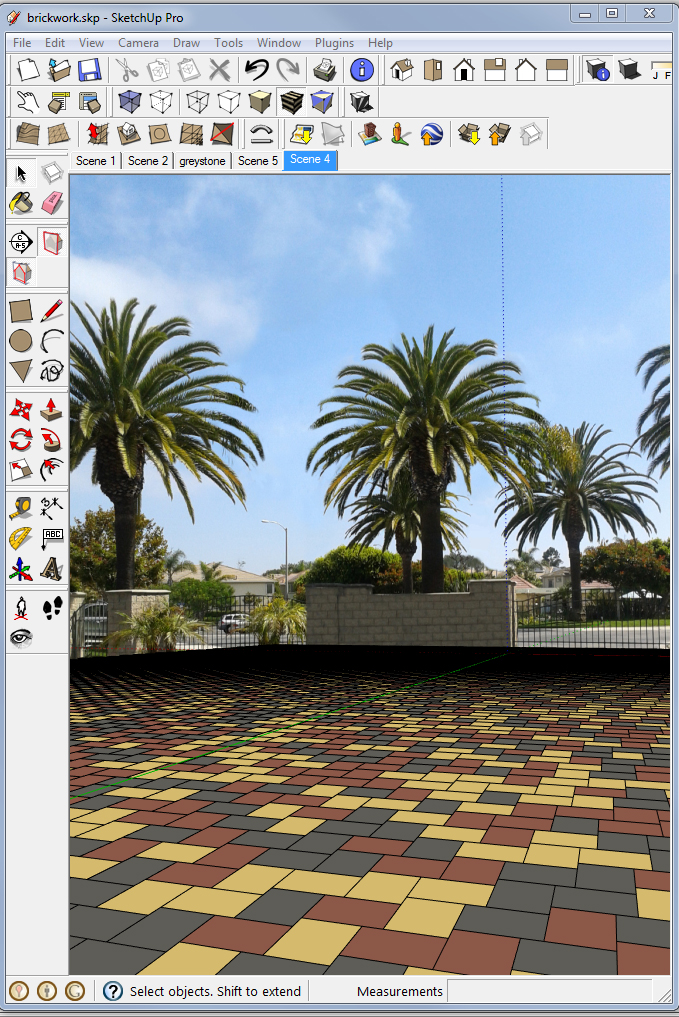
This is now aligned to the photosimulation image.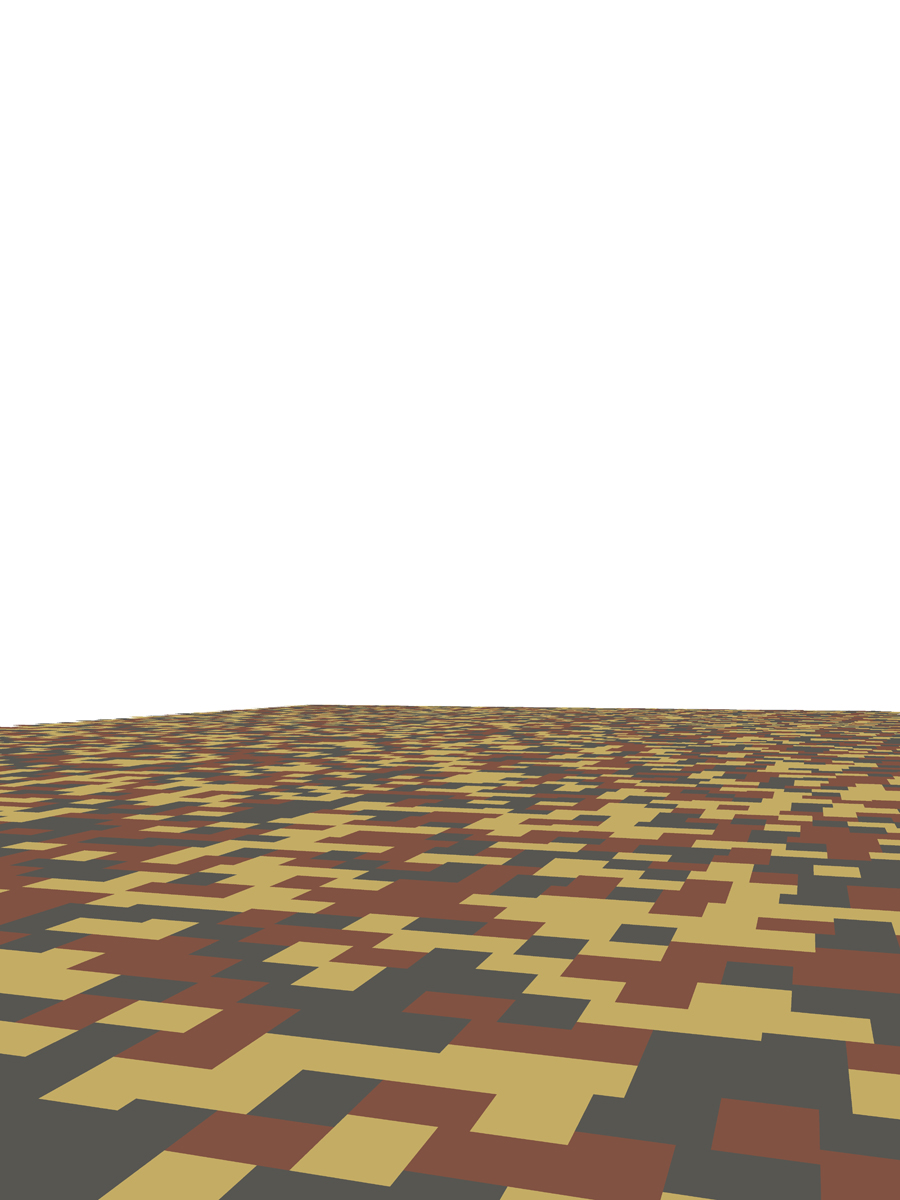
This is the color only version that I export from SketchUp.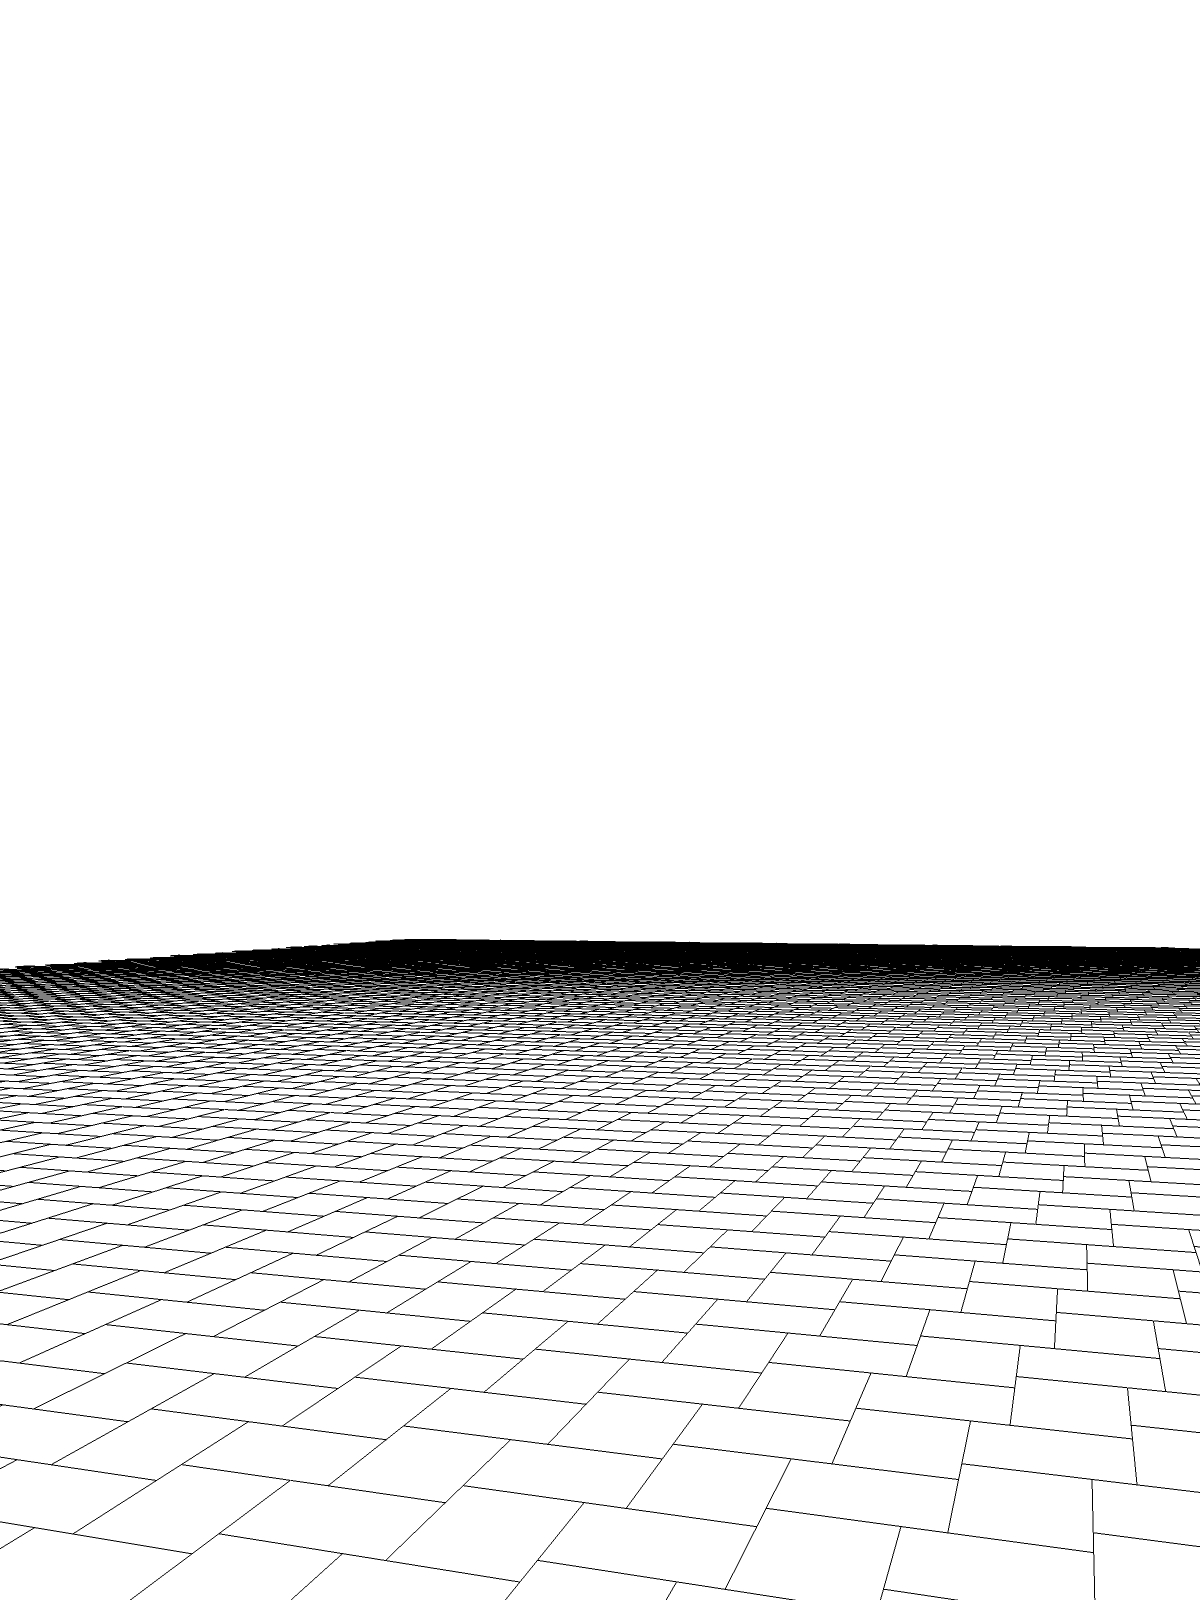
This is the edges only version that I export from SketchUp.
This is my original photo - the current existing conditions.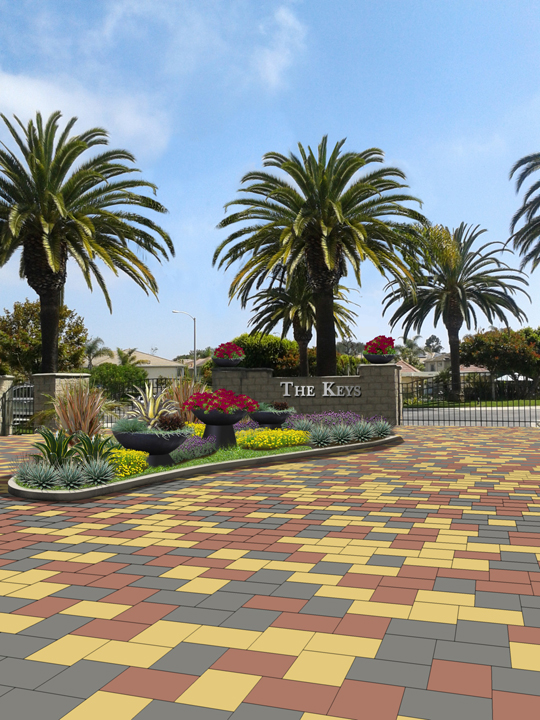
This is what it looks like when I lay my groundplane into the model. I had erased a little bit of the linework towards hte back because it was too dark.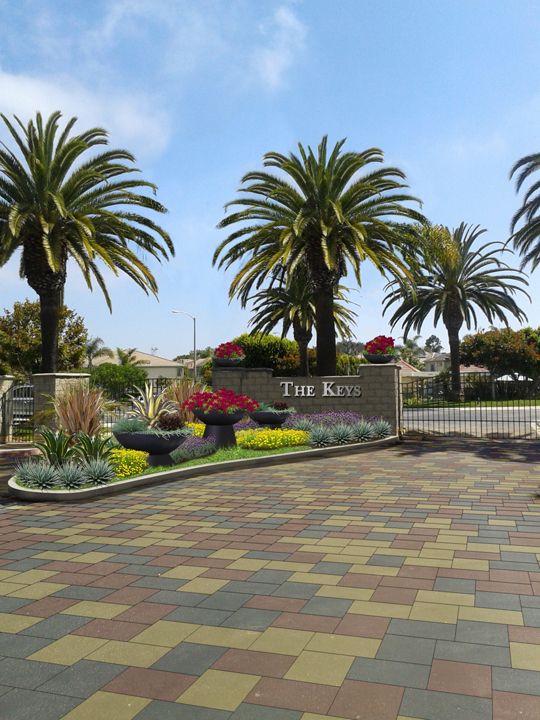
This is what I cam up with as a final image.The end, hope it was interesting.
-
@chris fullmer said:
The end, hope it was interesting.
No, it was very interesting

Thanks for sharing! -
I should add I had about 6 hours for this entire project, including all the photoshop work of adding the plants, removing the palm trees, changing the text and the wall, AND making the sketchup model and everything. It was a very tight timeline. I had considered doing a render of the pavers in Thea, but in the end I decided I just didn't have time to play with it.
-
 Wohohooo !! Must I say this is like ..what.. magic !!
I've got to do something like this ! I like it a lot !
-
great tut, chris! thanks for sharing.
-
Chris,
Thanks for this. Great tutorial! A couple of questions:
You say at Image #7: "This is ... when I lay my groundplane into the model." I thought by then we were looking at Photoshop.
Can you say a few words on line overlay in PS. Output resolution, AA, cleanup and blending method. Every time I do this I seem to reinvent it and sometimes get artifacts, struggle with resolution etc.
Wouldn't it be nice if we could just export from SU with no background and not have to erase everything in PS?
Why don't you use Match Photo for this, even just for the purposes of alignment (and use the exports the same way?)
Peter
-
Thanks Peter!
- Yup, you're right, at image 7 I'm in photoshop and I misspoke. That should not say "model"
- Hard to say just a few words about all those topics. But in a model like this, I'll often export the color layer and the linework layer a few times at varying resolutions. Sometimes I want the lines to be thick and a little chunky in my photoshop image so I'll export them at screen resolution from SU. Typically when I do screen resolution, I'll turn AA (anti-aliasing) on when I export it so the lines are thick, but also fairly smooth. I'll also export linework in the 6000x 80000 pixel range so I get VERY fine lines, which I typically prefer. But sometimes they are just too fine and don't stand out. In the end on this one I used linework exported at screen resolution and I smoothly erased it (big fat brush, 30% opacity, smooth edge on the brush) towards the back of the linework where it was converging into a black mess.
- For blending on this, I set the SketchUp color layer to "soft light" and then played around with the Hue/Brightness (ctrl-L) and the olor balance (ctrl-b) to try and get it softer and into the same tone range as my example photo. I think I even had to do a "replace color" to control the yellower bricks separately.
- Not sure what to say about artifacts and such though. I guess I'd have to see an example of what you mean.
- It would be nice if SU exported with transparent backgrounds (I think it does on a Mac?). Seems like Thomthom might have a plugin that helps with that as well? But typically erasing it in PS isn't that big of a problem for me. Maybe I use simpler models than you

- I don't use photomatch very much because I'm horrible at setting it up. That's about the only reason. I probably just need to go through the tutorials on it again. I do often have photos without vanishing lines though, so it wouldn't help me there, so I like to be able to figure it out well enough on my own.
ok, that's it. Thanks!
-
Great stuff, need to bookmark this tip. Thanks.
-
Chris,
Thanks for the notes! I'll refer back to this post next time.
Peter -
This is great, Chris. Thanks for sharing. Missed you at Basecamp, but at least you were getting some good things done in the meantime.
-
Thanks Chris! Love your plugins btw. How did you pick the colors for the pattern? Was the first image just used as a reference for your final or was that used to get your colors correct? This is seamless by the way. Really nice work. Thanks for the tip.
-
The first image was given to me as a reference of what the client was looking for (or maybe it was just what we wanted to present the client?). But either way, I was given that image as a reference to try to match approximately.
-
Chris, may I ask where you got your shrub images? I am looking for some good ones and find them hard to come by! Any advice, help or direction would be greatly appreciated!
-
I cut most of those out by hand. The rest were cut out by other people in the office by hand.
I would do a photoshop tutorial for people in the office, and one of the final projects to work on would be to cut out a person or a shrub. Then when they were done, we'd have another 20 cutouts for our library
-
Thanks, that was very helpful
...........Though does not look easy at all.
Hello! It looks like you're interested in this conversation, but you don't have an account yet.
Getting fed up of having to scroll through the same posts each visit? When you register for an account, you'll always come back to exactly where you were before, and choose to be notified of new replies (either via email, or push notification). You'll also be able to save bookmarks and upvote posts to show your appreciation to other community members.
With your input, this post could be even better 💗
Register Login


Advertisement