Weld beads, frayed ends & ribbon
-
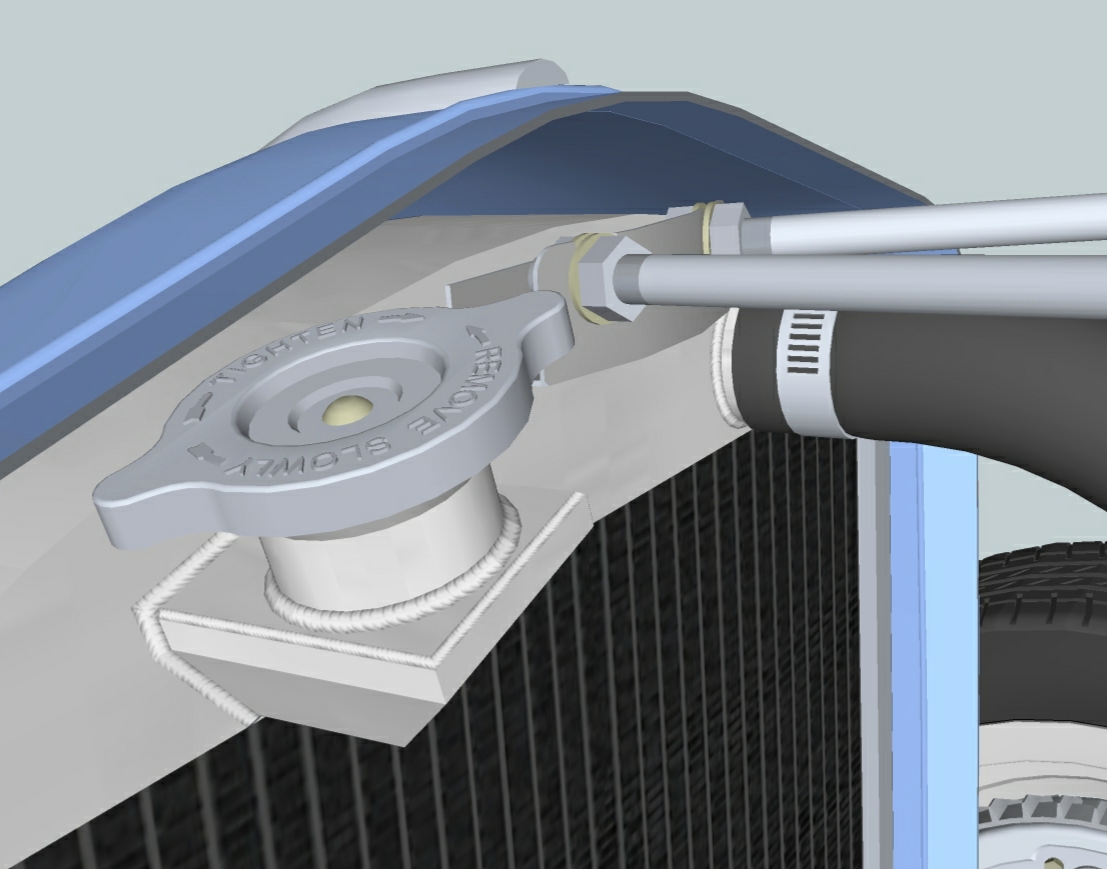
I'm adding final components and detail to my 32 Ford project and need some advice. Are any of you aware of a method for creating realistic weld beads in SU? Possibly a plug-in. In the first image I would like to dress up existing and add new welds to the aluminum radiator. Second image shows the undercarriage and endless possibilities for welds at the frame joints.

 There is a protective fiber sheath covering the lower portion of the cable running from the starter relay to the starter. As shown in image 3. I would like to make the end of this sheath frayed. Any ideas?
I struggled to create the seat belts you see in image 4 and am not overly pleased with the results. They look too stiff and mechanical. They should flow smoothly like a ribbon freely dropped into place. This is easier said than done due to the bulging and dipping shape of the fabric as it changes direction. Help!
Also, do not hesitate in offering your criticism of all else that you see in the images. It is still a WIP with some known clean-ups in process but would really appreciate the input from this very talented pool of individuals.

-
Possibly FollowMe and Keep. or FAK. Look in the Plugins index.
-
I can really see the passion you've put in all the details, JMJOhio.
I didn't complete understand what you wanted with the "welds" (english is not my native language), but for the belts (that by the way don't look bad) if you want a more detail and natural feeling maybe the best way to do it is trying to make a curve with lots of segments (bezier) and adjust it by hand to a more natural look and then use it to "follow me" (but you'll probably need to scale up your model first to avoid problems with very small faces). The other way is import it to other software with dynamics and just make a straight belt there subdivide it and "let" them fall with gravity simulation. But again, for me they don't look bad
Great work
David -
Final art and weld bead jpeg. Would have been even better if I had used a bump map. I used a quarter-round "follow me" in the valleys and applied a bead texture to it


-
That's brilliant. Those tubes or wires in the first bit look natural, and I've never seen anything like it on sketchup. if I were you I'd be happy with those seatbelts.
-
Making progress on the welds. Found a suitable jpg image of a weld bead, edited it for color, contrast and brightness. Also straightened and cropped to allow clean tiling. It is a tedious process to get the texture correctly sized and aligned to each facet. I size the texture to fit one tile to the facet width without much texture overhang. If I oversize the tile too much I loose detail at the outer edges of the resultant bead. This positioning process would be easier if the size and rotate tools within texture position were separate instead of combined.
-
WOW, is there any detail you've overlooked with this model???? Have you added all the fluids yet?
Hello! It looks like you're interested in this conversation, but you don't have an account yet.
Getting fed up of having to scroll through the same posts each visit? When you register for an account, you'll always come back to exactly where you were before, and choose to be notified of new replies (either via email, or push notification). You'll also be able to save bookmarks and upvote posts to show your appreciation to other community members.
With your input, this post could be even better 💗
Register Login


Advertisement